What is a mounting belt
This is a tool storage bag. Anyone who is often forced to make something will definitely appreciate this invention. Thanks to him, it became safe to hang a shelf or take measurements at height. It takes quite a bit of time to pull out the necessary thing - a screwdriver, pliers, measuring tape, etc. - from the pockets of the belt. You don't have to keep going downhill to find the right tool.
As can be seen from the photo of the tool belt, the materials for it are:
- nylon fabric;
- leather;
- tarpaulin;
- any dense matter of rough texture.
The vest for carrying tools is equipped with a large number of pockets and pockets, as well as a system of tightening straps. It is this that allows you to adjust the construction tool belt individually to your figure.
Some products are equipped with special Velcro in the shoulder area - with their help, using the vest becomes much more convenient.
Tips for use
When using such items, it is recommended to take into account several important nuances:
- You cannot fill such a product with tools to capacity. This will damage not only the belt itself, but also the instruments themselves.
- The number of pockets and their functionality play an important role. The best option is to fasten some of the pockets, while others remain open. In this case, everything you need can be kept at hand at all times.
- It is better to choose (or make) a product of the appropriate color, on which dirt will not be particularly noticeable. This is especially important for those items that are planned to be used in repair work.
- This item can be cleaned with ordinary soap and water. It is better not to dry it on the radiator. This can reduce the wear life of the product.
Important! The hammer compartment should be located on the side of the working hand.
To make your own tool belt, you don’t need any special knowledge or skills. Such a product, which provides convenient carrying and transportation of the required number of tools, small parts and consumables, will come in handy more than once at home, in the country and in the garage.
Thursday salt - healing and magical properties
How to clean a comb with natural bristles?
Types of mounting bags
Mounting bags for tools can be of three types:
Shoulder. Such models are quite popular because they have a low cost. However, they soon lose their impeccable appearance. Such products are characterized by soft, easily deformable walls, which is why they are not always comfortable to use.
Belted. The tool mounting belt looks like a small tablet, equipped with pockets, loops and hooks.
In the form of a vest. This is the most ergonomic type of construction organizer. Most often they are made from a denim vest, equipped with a spacious storage system.
Professional models are sewn from nylon fabric. They are equipped with a huge number of fasteners and pockets. Such a large number of compartments can also be a disadvantage - when fully filled, they make the vest very heavy.
One of the most popular models of mounting bags is the Dewalt tool belt. This company has an excellent reputation for creating reliable instrument storage systems.
Trying to make a tool belt bag with your own hands
Each pocket has its own purpose. A standard belt typically has two large pockets that are located on the front (you can rotate the belt if you prefer these pockets to be on the side or back), and several additional pockets for small items (like nails, screws and staples). We will also need loops for attaching a hammer, pliers or other tools. They can be cut from the waistband of the jeans or remade from fabric.
Well, all the components of our future tool belt are assembled and we can start sewing. To make all seams of high quality, beautiful and reliable, you need to use a sewing machine. Replace regular threads with heavy-duty ones.
STEP 1: Large pockets. To begin, we place large pockets on the belt and securely sew them onto the fabric. It is better to make a double seam so that at some inopportune moment all the contents do not fall out of the pocket.
STEP 2: small pockets. We sew small pockets onto the mounting belt with our own hands for small details. For maximum safety of self-tapping screws, bolts, nuts and other things, you can sew a small piece of a flat magnet into your pocket. Then all the contents will be securely fixed in your pocket.
STEP 3: loops. Sew on loops for the tool. The hinges will conveniently store various screwdrivers, pliers, hammers, and tape measures. The loops are convenient for hanging the tool that is most often used.
Making a belt for installation work is a breeze! The main thing is to have the desire to create!
A well-equipped, convenient, organized tool belt ensures that work gets done more efficiently and safely. Assemble your own personal DIY tool belt as soon as possible. You won't regret it!
Source: rabotai-sam.ru
We make a tool organizer with our own hands
How to make a tool belt? This question worries many masters. Let's try to answer it.
You will need an old leather belt, preferably a military one. We will attach all kinds of fastenings and pockets to it. Straps from an old backpack or bag can be used as compartments for storing pliers and screwdrivers. To be able to attach a bunch of wrenches to the belt, it is appropriate to attach several carabiners to the product.
It would also be a good idea to equip a couple of pockets - you can put all sorts of small things in them, such as nails, screws, fasteners, etc. That's all - your DIY tool belt is ready!
Sewing Master Class: Tool Bag
Author: Lyudmila Kleus (Lvovna.)
Author's blog
Today I want to show you how to sew a tool bag. I drive my car a lot, but I never pay attention to the various knocking and rattling noises that are sometimes heard in the cabin. My husband, on the contrary, all the time just listens to where something happened... So we are going, for example, to the dacha, I tell him something, I become like a nightingale, I describe everything so colorfully, in faces, with foam on my lips, and he suddenly, in the middle of my monologue, suddenly declares: “Something hit. Listen, where is this? In the first moments, I can’t even figure out what’s going on. It is very difficult to switch from your thoughts to his. Then I start turning my head in all directions, catching sounds. Sometimes I even crawl my head under the seat. So I turn in all directions until we reach our destination... And then what kind of monologue did I have on the way - I forgot what I was talking about... So that’s what I’m talking about... All men carry tools with them in the car, which may come in handy on the road. They, as a rule, are in original boxes, convenient packaging, etc.... In short, in sets. But there are all sorts of screwdriver keys, not in sets, but in bulk, which you can’t throw away and you have to carry them in different boxes or old buckets and boxes. Well, maybe I’m exaggerating a bit, but still. And these instruments begin to strum on every bump, preventing us women from chatting about this and that, because they distract the attention of our counterpart. So, my dears, today I will show you how to sew a bag for tools in which they will not rattle. I have already sewn 5-6 such bags, I don’t remember exactly, but they were all made of thin tarpaulin. Now I haven’t found a thin tarpaulin, so I’m showing you one on dermantine. This is the kind of bandoleer for tools we will sew today. So let's get started.
For this we need:
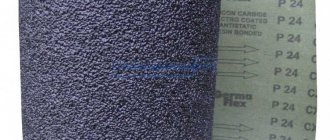
- dermantine or other dense fabric (you can also use an old tapestry);
- trouser braid;
- Velcro tape;
- tailor's pins (my pins are at the dacha, so I used decorative ones);
- chalk;
- pencil;
- rulers;
- threads, scissors.
Girls, I can’t give you a pattern for such a thing, because everything here is strictly individual. Whatever tools a man gives you, that’s how you should size them. So, take a piece of dermantine and bend the bottom to the size of the largest tool. In this case, I have the key. We lay out all the tools we need, deciding on the length of the bag and the number of cells in the pocket.
Use a tailor's pin to pin the cell to the required width.
We do the same with all other tools. Oh, where have our tools gone? Hush, girls, don't panic! The situation is under control!
Here they are, my dears! They simply fell headlong into these deep cells.
We take out all the tools and begin cutting and adjusting the bag to size. We draw a line with chalk along which we will cut off the excess. Don't forget the hem allowance!
Trimmed. 3-3.5 centimeters above the largest key, draw a line parallel to the top cut of the pocket.
This is what we got. Stepping back 2 cm from the top of the pocket, draw a line along which we will make a fold.
They turned it down. Stitched. I laid 2 parallel lines.
Now we remove the pins and draw seam lines using the marks with chalk.
Let's sew. To strengthen the seams, I stitched back and forth along one line. For ease of work and to prevent pins from pricking, I rolled the product into a roll.
So, we stitched. This is what we got. The pocket with cells is ready. Now we need to sew a valve that will cover our tools on top. We place the resulting part on a piece of newspaper, determine the height of the valve and cut off the excess around the perimeter.
We try on the part obtained from the newspaper to our pocket. This is what the bag flap will look like. We cut out the valve from dermantine.
We begin to process the bottom of the valve with braid. From the wrong side to the bottom of the flap, we overlap the braid and stitch it. The overlap width is 5-6 mm.
We turn it over to the front side, fold the braid over it and stitch it. Having processed the bottom of the valve, we begin to process its sides. On the sides we sew a braid 6-7 mm longer than the bottom edge.
Girls, we leave these tips only on the sides of the parts and only at the bottom! Look at photo 19. The top and bottom of the product are clearly visible there.
We tape the sides of the bottom of the bag.
This is what the ends should look like. This is necessary in order to carefully process the bottom of the resulting seam. We will fold this tip onto the back of our bag and attach it with a zig-zag stitch in one place. For those who don’t have such a stitch, you can simply attach it with a needle and thread.
This is how you get the corner of the valve.
So, we have two parts - the valve and the pocket itself. We place the flap on the pocket, align the top edge and trim it with braid.
This is what we ended up with. The bag is ready. Almost…
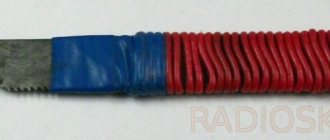
We begin to arrange the tools into cells. Small keys are clearly drowning in their cells! Here's what we do...
We place all the small keys on the cells on the same level as the large ones. Under the small keys we draw a line with chalk, along which we will sew a double line - these are the future bottoms of the cells. We draw a line under the smallest keys on each cell, not reaching the side seams. Look, see? We will make cuts along these lines with a stationery knife. Insert a ruler into these two cells one by one and cut along these lines with a knife or scissors. Just be careful not to cut through the seams! And watch your fingers!
That's it. Stitched, cut through. They put the tools in their places. This is what we got. What? Are you asking why the last cell is empty? And this is a surprise for our man! I'll show you a little lower.
So, we sewed the bag. We roll it up into a roll and measure the required length of the Velcro tape, which is hooked at the very tip. Don't cut it short! It's better to have a reserve.
We sew the interlocked ends like this - double stitching around the perimeter.
We apply it to the bag at the attachment point.
Girls, we sew the ribbon not along the square, but along the yellow stripe that I drew! Make no mistake! So, the braid was sewn on with a triple stitch (back and forth).
And now our bag is completely ready! Oh, you're asking what's in the last pocket? Here's what...
Stash! Every man should have a stash, so we made it! Let him spend certain sums there, let him! We'll have everything under control, right? Just shhh, don’t tell anyone about this! And the man himself will be so glad that he has a place for his stash!
Well, this is what we sewed for you today! Not bad, right? By the way, my husband spent the whole evening moving different instruments back and forth, hence the different variations of the sets. Another good thing about this bag is that you can immediately see if any tool is missing after repair. You can’t roll it up half empty, right? And sometimes men forget different screwdrivers and keys where they were repairing. Then they shake us poor people like a pear - where did you put the key to twelve???
And here is the handbag assembled. There won’t be anything rattling in the trunk now, so chat to your heart’s content—no rattling in the trunk will stop your man from listening to you attentively!
Stages of work
Sequence of operations for making a simple box for plumbing tools from plywood with your own hands. The bottom, walls and other parts are cut out using a pre-prepared template, the contours of which are transferred to a plywood sheet with a marker or a special pencil.
To remove burrs, the edges of the holes are ground with abrasive paper. Then the tray parts are glued together and fixed using tenon joints. This will give the structure strength.The manufactured tray is glued to the bottom between the parts that have holes for the handle, and is additionally secured with small nails.
Using glue, the bottom and sides are assembled in the shape of rectangles; the strength must be further increased with nails. Then you should insert the handle and secure it with nails or any other way.
A metal rod with threads at the ends is secured with nuts and washers. It should be taken into account that the hardening time of the glue directly depends on its brand and the temperature at which gluing occurs.
Internal connections are strengthened by gluing bars of rectangular or triangular cross-section at the joints between the walls, sides and bottom. The bars are additionally secured with screws or nails.
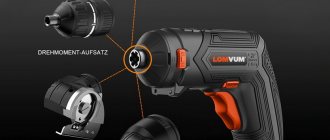
DIY screwdriver belt
A tool belt is an irreplaceable thing for any builder; a necessary tool and components should always be at hand during both routine repairs and professional builders. There are several types of tool belts, they differ from each other, let's try to understand their varieties, help you make a choice and how to make a tool belt yourself.
But you can find a photo of the tool belt for a visual representation in our gallery.
Brief contents of the article:
Trying to make a tool belt bag with your own hands
Each pocket has its own purpose. A standard belt typically has two large pockets that are located on the front (you can rotate the belt if you prefer these pockets to be on the side or back), and several additional pockets for small items (like nails, screws and staples). We will also need loops for attaching a hammer, pliers or other tools. They can be cut from the waistband of the jeans or remade from fabric.
Well, all the components of our future tool belt are assembled and we can start sewing. To make all seams of high quality, beautiful and reliable, you need to use a sewing machine. Replace regular threads with heavy-duty ones.
STEP 1: Large pockets. To begin, we place large pockets on the belt and securely sew them onto the fabric. It is better to make a double seam so that at some inopportune moment all the contents do not fall out of the pocket.
STEP 2: small pockets. We sew small pockets onto the mounting belt with our own hands for small details. For maximum safety of self-tapping screws, bolts, nuts and other things, you can sew a small piece of a flat magnet into your pocket. Then all the contents will be securely fixed in your pocket.
STEP 3: loops. Sew on loops for the tool. The hinges will conveniently store various screwdrivers, pliers, hammers, and tape measures. The loops are convenient for hanging the tool that is most often used.
Making a belt for installation work is a breeze! The main thing is to have the desire to create!
A well-equipped, convenient, organized tool belt ensures that work gets done more efficiently and safely. Assemble your own personal DIY tool belt as soon as possible. You won't regret it!
Construction tool belt
The requirements for a construction belt are high; it must be carefully thought out when creating it to prevent the builder from falling from a height in the event of a force majeure situation and allow him to take with him the necessary tool for work.
Oddly enough, there are strict regulations for sewing a construction belt, since this item is often subjected to heavy loads during work. It is imperative that only high-quality and durable elements are used to sew a belt, so there is no need to worry that the fastening is made of light alloy and will not be able to hold the load.
A construction belt without straps, on which a button is attached, prevents you from unfastening the belt while working. A construction belt with shoulder straps is additionally attached to the chest and back, does not limit movement during work and allows you to use a larger number of tools.
The mounting options for construction belts are different: on the side or on the back; choose a belt directly related to the type of work being performed, but the optimal one would be a belt with two fastenings.
The capacity of the tools will depend on the number and size of pockets on the belt; many different-sized pockets mean more capacity for the tools. For example, a dewalt tool belt will be a great help.
A tool bag on your belt or how to have the necessary tools with you
One of the most important factors in any repair is having the right tools on hand. Agree, it’s not the most pleasant experience to go down the stairs to get the necessary tool (if the work is being done at height) or to run around and look for a tool that you held in your hand 5 minutes ago, but now you can’t find. To avoid this extra time, you need to get a tool bag. But an ordinary bag is somehow not solid. The best option would be a mounting belt for the tool.