Hi all! Did you see how last time we made incredibly cool and realistic caterpillars on a chewed leaf? We liked the tried and tested ring technique and today we will be making a paper dragonfly. Dragonfly applique made of colored paper will embody a beautiful insect with expressive eyes. The work is not entirely simple; it is more suitable for students in the senior group of kindergarten or elementary school students.
Prepare for this lesson:
- multi-colored paper sheets;
- ruler;
- scissors;
- glue.
Master class for children “Dragonfly” made from waste material
Publications on the topic:
Children's master class “Ice cream on a Popsicle stick” made from waste material for preschool children Hello, dear colleagues and guests of my page. I bring to your attention a children's master class “Ice cream on a stick” (popsicle).
Children's master class on making crafts from waste material “Dragonfly” with children of senior preschool age on June 16. Dragonfly Day at MAAM I present to your attention a master class on making crafts from waste material “Dragonfly”. Master.
Master class of collective work of children from natural and waste materials “House for the pig Naf-Naf” The third of the pig brothers Naf-Naf built himself the most durable stone house - a real fortress. To make this house we needed.
Master class for parents and children on making crafts from waste material for Defender of the Fatherland Day Hello, dear colleagues! On February 23, the whole country congratulated our beloved men on Defender of the Fatherland Day. And in anticipation of this.
Master class “Panel “Grapes” from waste material” for children of senior preschool age Autumn is the time for grapes. Despite the fact that the summer was cold and rainy, the grape harvest pleased everyone. I'm not a big fan of grapes.
Master class on making a percussion instrument from waste material “Drum”, for preschool children on June 13. Percussion Instruments Day at MAAMU, dear colleagues and guests of my page, I present to your attention a master class on manufacturing.
Master class on crafts from waste material “Butterfly” for middle group children The teacher asks a riddle: I look like a flower and a bow too. I really love a meadow on a fine summer day. I flutter through the flowers and drink.
Master class “With love for nature”, panels made from waste material. For joint activities of children and parents In the life of every person there are moments when you want to run away, hide from worries, from the hustle and bustle of vanities. And then, a person comes to understand.
Christmas wreath made from waste material, natural material and Christmas tree decorations. Master class Christmas wreath made from waste material, natural material and Christmas tree decorations. Master class Necessary materials and tools:.
We're staying at home. Master class for children using waste material during self-isolation Hello dear parents. I bring to your attention a master class for children made from waste material during the period of self-isolation. I will show,.
DIY garden figurines made of copper wire
Nowadays the market offers a huge selection of garden figurines and other accessories for garden decoration. But you don’t have to buy decorations; you can make original garden figurines with your own hands. In this article we will tell you how to make figures of dragonflies and butterflies from copper wire that will decorate your garden.
Tip : It may be difficult to place beads on curved copper wire. Before starting work, make sure that the diameter of the holes in the beads allows you to put them on the wire, even if it is slightly bent.
Modular origami Dragonfly – Knitted fairy tale
Origami Dragonfly from modules is an excellent alternative for school labor and technology lessons, capable of instilling perseverance and patience in students, preparing them for more complex classes in high school, such as crocheting, sewing aprons, and cooking.
- Triangular module for dragonfly
- Assembling origami “Dragonfly” from modules
The finished composition consists of many identical parts - modules. First, the modules are rolled up from a small sheet of paper, and then they are combined, nested inside each other. Due to the roughness of the paper, it is possible to assemble models without using glue, but in some situations it is still necessary.
Triangular module for dragonfly
It is made up of a rectangle whose aspect ratio is approximately 1:1.5. To get rectangles, you need to divide both the long and short sides of an A4 sheet into 4 equal parts, mark the lines using a ruler and pencil and cut along the marked lines. The result will be 16 rectangles measuring 53 x 74 mm.
Assembling origami “Dragonfly” from modules
- Fold the rectangle in half.
- We bend the resulting part in half again.
- We bring the edges to the center line of the fold, so that an isosceles triangle is formed, and press new folds with our fingers.
- We turn the module over and lift the “tails” up, bending around the paper cut.
- We wrap the corners, bending them over the edges of the module, squeezing the corners with our fingers to form a fold.
- We bend the “tails” down, again fold the corners along the fold line, but do not bend them over the edge of the module, and again raise the “tails” up.
The triangular origami module is ready. It has sharp corners and two pockets. The modules are connected by inserting the corners into the pockets.
To start, you can try making a simple craft, such as a dragonfly. It will require 24 pink modules, 9 blue modules and 10 yellow modules.
We assemble four wings , connecting the modules one by one. We slightly bend the finished wings in an arc.
the tail in the same way and bend it.
We begin assembling the body , inserting two modules into the pockets of one.
Carefully add one corner on each side to the modules in the pockets - these will be blanks for attaching the wings , insert them tightly until they stop.
Ultimately it looks like this.
We lengthen the body: we put on another module, and on both sides we insert two more blanks into it for attaching the wings. The dragonfly's body is almost ready. We put on wings.
Lubricate the corners of the module with glue and fasten the tail; without glue it may fall off.
If desired, you can decorate the dragonfly's head . To do this, twist the two modules slightly with your fingers and insert them with their free, untwisted corners into the pockets of the body. Origami “Dragonfly from modules” is ready.
Do-it-yourself restoration of garden figures
If there were already figures in the garden, but they fell into disrepair, you can start restoring them.
To repair gypsum elements, you need to stock up on gypsum and cement mortar to mold missing or broken parts.
If stone figures become unusable, you can easily repaint them in other colors and give them new meaning.
You can plant flowers or creeping plants in old broken figures; they will look different and change functionality.
Weaving options
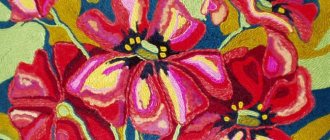
There are two main methods of weaving - parallel and volumetric. Beginners in beading mistakenly believe that volumetric weaving is more complex and refuse to use such patterns.
However, this is a misconception. In fact, both of these methods can be used, regardless of whether the artist already has experience or not.
Parallel weaving
This weaving serves as the basis for most decorative elements. And that's why it is often used. If we are talking specifically about such a craft as a dragonfly, then parallel weaving is ideal for making wings. Therefore, this weaving is usually used in combination with other techniques.
Volumetric weaving
The most popular type of weaving, which is widely used because it guarantees a very realistic-looking craft. A dragonfly made using this technique looks so realistic that it can be safely used for decoration. In addition, the beaded dragonfly brooch that was created using this technique will look more beautiful.
How to make garden figurines with your own hands
Cut a section of about 100 mm long from the copper tube. Approximately in the middle, where you need to drill holes in the tube, make small dents using an awl or self-tapping screw. This way the drill will not jump off during operation.
Using drills of the appropriate diameter in the tube, drill through holes for attaching the wings and antennae. Drill a hole at the bottom to fix the rod on which the dragonfly or butterfly will be held. Don't forget about the small holes for the eyes.
Cut medium-thick copper wire into pieces about 50 cm long. Sand the tube and wire using steel wool.
Insert two pieces of copper wire into the central hole to form wings.
Tip : to make the dragonfly wings the same, you can make a template from a wooden pole and board.
Bend the wire to form wings, insert the free ends into the holes and solder.
Make membranes on the wings from thin copper wire, onto which you first place multi-colored glass beads. The edges of the wire can be fixed using a soldering iron. To prevent the beads from dangling on the wire, they need to be glued. To make the membranes wavy, the wire must first be wound around the tube and then straightened.
Pull a thin wire into the pre-prepared holes, solder it and bend it to form antennae.
The dragonfly's eyes can be glued or fixed with thin wire.
To lengthen the dragonfly's tail, insert a spring into the tube. If you decide to make a butterfly, you won't need a spring.
Tip: you can make a spring yourself by winding copper wire around a bolt.
Insert the rod into the bottom hole in the tube and solder it.
Stick the rods that hold your garden figurines into the ground near the flower bed. Now bright copper butterflies and dragonflies will flutter over your flowers all summer long.
Source
Crafts for the garden from papier-mâché
Papier-mâché can be useful for decorating a gazebo or recreation area. It is advisable that this material should not be exposed to water, so it is best to place papier-mâché crafts under a roof.
Logs and boards can also become the starting material for the manufacture of garden elements.