Crafts made from fluffy wire: an idea for beginner craftsmen
We will tell you and show you how to make a fluffy cat with your own hands. Watch and try!
To work you will need:
- fluffy wire
- fishing line
- eyes
- plasticine
- pen or felt-tip pen
- glue
Have you prepared your workplace? Begin!
1. Place 3 fluffy wires together and twist them in the middle so that the length of the twisted part is 5 cm.
2. Make a blank for the kitten - bend one wire upward on each side, as shown in the figure.
3. Bend your paws as shown in the photo.
4. Twist the 2 resulting parts of the paws together, screw the ends of the wire to the tail and neck.
5. Make your cat well-fed - attach a felt-tip pen to its body, wrap it with 2 wires in a spiral, and then remove the felt-tip pen.
6. Let's start making the head. Twist the wire halfway into a spiral. Shape the other half into ears and press it to the head. The remaining tip of the wire is needed to attach the head to the body.
7. Connect the resulting parts. Wrap the remaining tip of the wire in a spiral around your neck. The final touch is to bend the tip of the tail to make your cat look mischievous and cheerful.
8. Glue eyes with moving pupils and turn a small piece of plasticine into a cold cat’s nose. Don't forget about the whiskers - they become ordinary fishing line.
He turned out to be a nice cat! Listen, maybe you will hear his grateful purring? What other crafts from fluffy wire would you like to make?
Source
LiveInternetLiveInternet
Quote from Rezhevlyanka
Read in full In your quotation book or community!
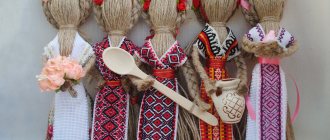
Cat Whore. Master class from irichka
SOURCE
Words from the author of the master class!!!1 I first saw this cat on Yulia Aleshkina’s blog, but since I was a beginner, and having read that masters were reluctant to share secrets and patterns, I was embarrassed to ask to share my experience. Then I found a pattern on the Internet, and when I was sewing the first cat, I decided to lengthen his legs, and inserted the wire as indicated on the pattern. The cat stood, but his legs dangled slightly. I thought for a long time about how to improve the frame and this is what I came up with..... What we need - 1. Wire (I call it knitting wire, it’s easy to work with and the doll stands stable) 2. Fleece or fur 3. Round nose pliers (I have a can opener) 4 Nose (fleece, fur of a different color) 5. Eyes (beads or ready-made eyes). Pattern We make such a frame from wire, measure the size of the rectangle according to the marks on the abdomen. Mine is 4 cm. by 7cm. We make a bend at the tip of the tail so that the fabric does not tear and screw it to the frame. We screw on the legs, each 25 cm long. Of this, 10 cm goes to the foot. The length of the leg will be 15 cm. We fasten the front legs with one piece of wire, then the back legs. Let's make a pattern. Cut out the details. Then we transfer the details to the fabric. We sew the tail, legs, make a groove on the back of the head. On the body we grind the front and back parts, leaving a hole for the tail on the back part. We turn the leg like this. The body looks like this, we make a basting with contrasting threads. We put the body on the wire frame We put on the legs Next we make the paws. To do this, we make such a loop at the end of the leg. Then we wind the wire onto the can opener. The size of the paw turns out to be perfect. We hook the loop to the leg. We do the same with the rest of the legs. It turns out such beauty! We sew the foot by hand. I fold the two parts of the foot right sides together and sew the front part. We turn it inside out, lay the filling around the frame of the foot and sew the back part with a hidden seam. We make claws with threads. The fleece stretches, stretch the leg and cut off the excess and sew it in a circle to the parts of the body., Sew the tail, inserting it into the back part of the body.. We stuff the body and sew it up with a hidden seam. sides On the muzzle we sew the mouth, then we grind the front and back of the head, leaving 2 cm in the neck area for turning. We stuff the head and sew it in a circle to the body. Glue or sew on the nose and eyes. And then - who is capable of what!!! Well, actually, it’s something like this. If you don't understand anything, please ask. I hope my MK is useful to you. Good luck, thanks for watching!!!
Crafts made from twisted yarn
When making the next product, the design space is filled with threads twisted into any shape. The process is very exciting , it will interest not only children, but also adults. To work you will need:
- Cardboard.
- PVA glue.
- Acrylic or wool threads of different colors.
- Pencil.
- Stencil.
- Scissors.
To give relief to the design, you can use threads of different thicknesses . First you need to transfer any image you like onto cardboard, then spread glue along the contour and glue the thread. Then you need to smear the inner area of the design with glue, stick the end of the yarn to it and twist the thread in the form of circles, ovals and droplets. This way fills the entire image space.
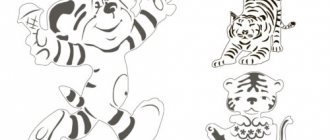
Origami cat bookmark step by step
In order to make an unusual bookmark, you will need a sheet of paper measuring 21 by 10.5 cm for a large bookmark or a sheet of paper measuring 18 by 9 cm for a small bookmark. You can take colored or white paper.
It is better to use special origami paper. It is sold in stationery stores, but plain paper will make an interesting craft.
Master class Pedagogical experience Application of MK cat-purr from threads Cardboard Threads Yarn
This is the cat my “FANTASERS” (children 4-5 years old) make from thread.
The technique is quite simple, but it develops fine motor skills very well. You will need: silhouette of a kitten, cut out of thin cardboard;
scraps of thread 1.5 - 2 cm long (it is best to take knitting, fluffy threads) of gray, black, brown, orange, white;
short ribbon for a loop;
a circle cut from fabric or velvet paper (the second part of the kitten’s head)
So, let's cut out the silhouette of a cat or any other animal from cardboard.
Start pasting over the silhouette of the kitten from the lower part of the body. Apply glue to a narrow strip at the bottom and glue one row of threads to the smeared part, applying them only with the ends so that the lower edge of the threads remains unglued and free of glue.
Apply glue to the upper part of the next strip, glue the second row of threads onto it so that only the upper ends of the threads lie on the glue, and the lower ends remain unglued and slightly cover the previously glued strip of threads.
Continue gluing threads on the remaining strips until the entire body of the kitten is covered. Choose the color of the threads on the strips yourself so that the kitten turns out beautiful.
Now let's start making the kitten's head: smear a narrow strip along the line of the head on the silhouette and glue the ends of the thread trimmings to it.
We glue the tail with threads starting from the top.
Apply glue to the pattern of the second part of the head and stick it onto the silhouette of the kitten’s head so that the glued ends of the threads are covered. (It can be made of velvet paper, cardboard or fabric).
The cat’s face can be drawn with a felt-tip pen or sculpted from salt dough, or from waste material (buttons, threads.)
Children-kittens lie on the carpet, in pairs, back to back.
P: They sleep quietly, back to back and purr in their sleep.
P: Everyone lay down on their backs. (children lie on their backs)
Paws up - and everything in a row
Children raise their legs up and begin to actively work with them. The teacher takes a toy dog and goes to the kittens.
P: Here comes the shaggy dog. Bow-wow.
And his name is Barbos. Bow-wow.
The teacher barks playfully, the children run to their places.
Source
Types of wire
A beginner in “wire” needlework will find a huge assortment of materials on store shelves. At this moment, it is important not to get confused and choose exactly what you need. It all depends on personal preferences and financial capabilities.
Copper wire has a strong, but at the same time flexible structure. Soft gloss and original shine of the surface are the distinctive features of this type.
Therefore, needlewomen often choose copper to create unique wire jewelry.
Copper wire, due to its pliability and softness, can withstand many bending and unbending, so it is better for a novice craftsman to choose this material for his first experiments.
Aluminum wire is similar in characteristics to copper wire, only it has a different color and is not solderable. Fine products are made from it. Outwardly, it looks like silver and gives the craft a noble look.
Chenille wire is actively used in needlework. It has a fluffy shell and is comfortable and easy to work with. It holds its shape perfectly and is available in various colors.
Due to the decorative properties of this material, craftsmen love to make crafts from chenille wire for children.
Soft stretchy French wire has a cylindrical shape. Products made from it look voluminous and convex.
This type of material is delicate; you must work with it extremely carefully so as not to leave scratches. French wire is used mainly to create original jewelry.
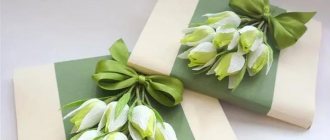
Applications
Paper is a material that is easy to cut, bend, and glue. A master class video will help you make an applique of an original paper cat.
Another option is appliqué using pieces of fabric.
For work you will need the following materials and tools:
- foam base 3 cm thick, size 50x80 cm;
- multi-colored pieces of fabric;
- marker;
- scissors, manicure file, stationery knife.
A cat is drawn on the base sheet; you can use a stencil. All details are cut with a stationery knife.
A piece of fabric is cut out a little larger in size than the applique piece, placed on top of the design and carefully tucked into the slots with a nail file. The edges are secured with glue.
Volumetric figures
It’s not difficult to make a three-dimensional cat craft with your own hands. There are options that will interest children of different ages.
Option 1
For this craft you need 2 cardboard tubes, paints and glue.
Progress:
- Fold the ends of one tube inward on one side and cut off the corners. This is the torso.
- The second tube is a cat's head. Diagonal cuts are made on the sides to create triangular ears.
- Both bushings are glued together.
- The background is tinted, eyes, nose, and mustache are drawn or pasted on.
- The tail is attached to the lower part of the body.
Option 2
A cat on springs is a toy that will interest older children. The work requires a little paper and patience.
Option 3
For the cat figurine you will need:
- white and orange paper;
- pencil, ruler, scissors;
- glue;
- markers.
Cut out the cat details:
- From orange paper:
- rectangles 6x13 cm and 7x14 cm are the torso and head;
- paws 4 parts 2x6 cm;
- oval tail 2x8 cm;
- 2 ear parts.
- From white paper:
- stripes on the body (3 elements 1x14 cm);
- stripes for the tail (6 parts 1x2 cm);
- oval muzzle 4x6 cm;
- ears (2 parts).
Glue the strips onto the body, roll them into a tube, and glue them together.
On the muzzle, draw or glue eyes, nose, mouth, glue the muzzle to the head, roll the part into a tube and fasten the ends with glue.
Glue white parts onto the orange parts of the ears and attach the ears to the head.
Connect the head and body.
Fold the paw parts, glue the edges, and glue them to the body.
Glue strips on both sides of the tail, the tail to the body.
Option 4
Their regular packaging cardboard is cut out with a cat's silhouette. Make 2 cuts at the bottom so that the figure can stand.
Glue on a muzzle made of colored paper and a mustache made from skewers.
The body is wrapped with colored woolen threads.
This cat will be warm even in the winter cold!
How to make garden figurines from wire
You will need: wire d 2 mm for forming the frame wire d 1.5 mm for the body and 0.9 mm for the outer layer thin wire d 0.5 mm for the mustache wire cutters acrylic paint in cans rubberized gloves.
We form a frame of the desired shape from thick wire (photo 1). It is better to make the paws longer - then they can be easily shortened, but it will be more difficult to lengthen them.
To give the workpiece volume. We randomly wind wire (1.5 mm) around the frame, threading it into the voids. Thus, we fill the cat’s body with wire: the area of the hips, heels, paws (photo 2)
Materials and tools for work
A comfortable and fully equipped place will be an advantage for the master. Depending on the technology used, the set of tools can vary dramatically:
- Felt and other types of textiles.
- Filler.
- Threads, needles, scissors.
- Plasticine, silicone sealant and vegetable oil to create anti-stress toys.
- Colored paper and cardboard.
- Pencils, paints, brushes.
Masters can find a ready-made set for modeling from polymer clay in craft supply stores. As a rule, the kit includes a bag of plastic mass, several stacks, and there may be molds to give a certain relief to the surface of the craft.
DIY thread kitten for children. Master class with step-by-step photos
Master class “Red cat” for children of primary preschool age.
Author: Valger Andrey 4 years old, student of the MKDOU kindergarten “Smile”, Chulym, Novosibirsk region. Head: Semenova Natalya Anatolyevna, teacher of the municipal educational institution kindergarten “Smile”, Chulym, Novosibirsk region. Description: this master class is useful for educators, additional education teachers, and creative parents for working with preschool children. Goal: making a pet - a cat. Objectives: - to interest and involve in the work of making a cat; - develop fine motor skills, imagination, fantasy; — present elements of technology with cut threads. Almost every one of us has a furry and beloved miracle. A cat is a proud, independent and graceful creature, but we love and cherish our furry pets. Children love little kittens very much. The children and I decided that we should have a cat in our group who would help us solve a problem situation in class, tell us the benefits of milk, play an outdoor game with the children, and sing a song before bedtime. Red kitten with a fluffy tail, pink nose and white spot. One day I went out into the yard for a walk and decided to play hide and seek with the mice. Tools and materials:
Scissors; Yarn (white, orange, peach); Colored cardboard (orange); Velvet paper (black, red); White felt; PVA glue; Markers; Hot glue gun. Note: As a safety precaution, the hot gun must be operated by an adult.
Progress:
1. We connect three different shades of thread.
2.Finely chop the colored threads.
3.Fold a sheet of orange cardboard in half and trace the template of the cat’s body.
4.Cut out the kitten’s body.
5.Cut out the remaining parts of the cat.
6. Apply glue to the head part and carefully apply the required amount of red yarn, pressing with your index finger. To create the tip of the tail we use white yarn.
7.In the same way, cover the body with yarn and let the parts dry.
8.Glue the parts of the cat together using a glue gun. 9. Let's start designing the face. We wrap a figure eight of white yarn on our fingers, carefully remove it and tie it in the middle.
10.Glue it to the kitten’s face using a glue gun.
11.Cut out the inner ears, chest and forehead of the kitten from white felt and glue it with a glue gun.
12.The eyes are made using appliqué technique, the antennae and nose are cut out of black velvet paper, and the tongue is made of red paper.
13. This is the kitten Ryzhik who settled with the guys and me.
Thank you for your attention!!!
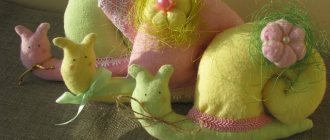
We recommend watching:
DIY egg crafts. Kittens DIY kitten magnet. Master class with step-by-step photos Crafts from waste material for children. DIY cat Soft toy DIY cat. Master class with photos
Similar articles:
Spring paper crafts in the middle group
DIY New Year's toy kitten. Master Class
Wood made of copper and beads
Most needlewomen prefer to make crafts from copper wire with their own hands, since this material is suitable for different types of work. To diversify a boring interior, you can add some interesting little things of your own design to it.
A tree made from wire may seem difficult to make at first glance, but in practice it is easy to make if you have basic skills in working with wire.
To work you will need:
- copper wire of different diameters
- beads
- pliers
- floral ribbon
A bright and beautiful tree will come out of simple beads. You need to prepare beads of red, yellow and orange colors. The work is difficult, but if you follow the instructions and be patient, you can complete it in 2-3 hours:
- First you need to put the beads on a 3-meter long wire, count 20 pieces and make loops on the legs. They must be on both sides.
- Pull out each loop and bend the branch a little. Also make several blanks of different colors.
- Then you need to fold three branches of the same color and twist them with pliers.
- The finished bundles must be wound one by one with an indentation to a thick wire and decorated with ribbon. You can follow a certain color sequence, or mix all the colors.
The result is a stylish autumn tree that will become a bright accent in any interior.
Copper wire butterfly
With the help of small tongs you can learn how to make curls from wire, on the basis of which you can easily make unusual products. For example, a miniature butterfly with cute wings.
The following will be useful for work:
- copper wire
- large oval bead
- forceps
- glue
Step-by-step instruction:
- From the blank you need to form the silhouette of a butterfly. Using pliers, starting from one edge, carefully twist the wire into a curl.
- Then the wing is formed. First the larger upper part of the wing, then the lower one.
- The wire must be bent and the formation of the second wing must be started in the reverse order.
- Then a second curl is created.
- The last step is gluing an oval-shaped bead to the center of the craft, imitating the body of a butterfly.
How to make toys for cats with your own hands
Making a cat toy yourself will take from one minute to several days. The main thing is that it should be made from natural (with rare exceptions) materials, be interesting and safe.
Toys from scrap materials
To make cat trinkets, scrap materials that are usually thrown into the trash are often used.
How much do the sculptures cost?
Such dandelions, three meters high, will cost 50 thousand rubles.
The price does not always depend on the size of the figures, what is more important is how much imagination and mental strength I put into this or that work.
For example, a hare was bought from me for 7 thousand rubles. Dandelions 3 meters high with a “hat” spanning a meter cost 50 thousand, an elf with a garden watering can (its height is 120 cm, and along the wings - 110 cm) - 70 thousand, and a fairy with a lantern of approximately the same size - 60 thousand rubles.
A fairy with a lantern was purchased from me for 60 thousand rubles
Funny Shih Tzu dogs made from yarn and paper cups: photo step by step with instructions
Creating these cute dogs with your own hands is not a difficult process at all, so you can safely involve your children in it. They will have new skills and toys, and if you want, you can decorate your interior with crafts.
What should a toy be like?
Cats are great at inventing their own entertainment - they hunt for a piece of bread or cheese (and then hide it or lose it). A special pleasure is chasing a fly that carelessly flew into the house. Ride on the parquet floor in the owner's slippers, and take a sweet doze there.
Scented toys
To make the cat immediately interested in the gift, you can make a “fragrant toy”.
- Two identical parts are cut out from dense fabric (felt, cotton, linen) according to patterns. Mark the beginning and end of the seam. Sew along the reverse side by hand or by machine. Turning the workpiece right side out, fill it with pieces of “crispy” polyethylene and dry “catnip” through the unsewn hole. After this, the hole is sewn up using a hand stitch. Such a cute trifle is complemented with laces, ribbons, and pompoms.
- It’s even easier - pour the filler into a mitten or baby’s sock that is left without a pair. Tie the open edge together with a strong thread and secure.
- A cat will also be interested in a simple “fragrant bundle” with catnip (this is the name of the herb) made of thick flax.
Teasing toys
It's not just animals who love teasing. People are also not averse to playing around with a kitten. It can be:
- Bow on a string.
- “Fishing rod” with pompoms or felt feathers.
- A hanging teaser made from a cardboard paper towel tube (or something else). It is enough to make 5-7 small holes into which to fasten multi-colored feathers. Thread a string or ribbon through the pipe. Tie a knot and hang the toy on the door handle or chair armrest. The movement of air will make the feathers flutter, and the animal will be busy for some time.
Fun rattles
To know where the kitten is, a sound rattle toy will come to the rescue.
- The simplest option is to pour beans, peas, small pebbles, and large beads into a plastic bottle. It won't take much - just cover the bottom. Lubricate the neck with glue. This must be done carefully so that the glue does not protrude from under the lid. Close tightly. Operating time is 10 minutes, 8 of which will be spent searching for the container and filler.
- This rattle looks more complicated, but much more impressive, if you tie it with yarn.
- Wrapped in sisal or twine, it is no longer just a rattle, but a mini scratching post.
- By connecting 3-5 Kinder Surprise boxes containing bells with a cord, you can get another sound trinket.
Important: screw the halves tightly and seal with tape.
Interactive games for kittens and cats
Interactive “developmental aids” for cats have become popular recently, but many examples and master classes on how to make them have already appeared.
They are made from wood, plastic, cardboard. A homemade toy made from plastic plumbing pipes (4 pieces) and “elbows” (also 4 pieces) is no worse than a store-bought one in terms of durability.
- From the prepared parts it is necessary to assemble a “ring” using special connectors.
- Drill holes along the top perimeter slightly larger than a cat's paw.
- Carefully sand the edges to remove any burrs.
- Place a couple of balls or a treat inside.
Cardboard toys
Cardboard is an accessible material, not expensive, and easy to work with. Craftsmen make houses and playgrounds for cats from it.
Building a full-fledged “residential complex” is difficult and will take a lot of time. Not everyone is ready for such a “feat”. Alternatively, a cardboard box will do.
How to make a box interesting
This is a favorite pastime not only for domestic cats, but also for serious big cats from the zoo. You just need to put the box in an accessible place. Usually the cat doesn't need anything else. But this option does not look very aesthetically pleasing, so you can make a more beautiful “house”.
- Labyrinth with “doors”. 3-4 boxes are glued together, “doorways” are cut out so that the animal can pass freely. A lid for the maze is not needed, so the cat can jump from one “room” to another.
- A shoebox is a good interactive simulator for developing the mind and intelligence. In a chaotic order, cut round holes of sufficient diameter on the lid and side edges. Secure the connection line between the box and the lid with tape. Inside - a ball, a mouse, a treat.
Stuffed Toys
It will not be difficult for needlewomen to sew or knit a soft toy for their favorite cat. It is better to use natural fur, felt, yarn. Artificial materials can cause allergies. Many animals do not like synthetics.
For a cat or cat in a soft toy, the size and presence of a tail are important. There are also ears that are convenient to tear off or carry in your teeth, holding the “mouse” by the ear.
To work you will need:
- fur (felt);
- filler - synthetic winterizer, holofiber, foam rubber;
- sewing tools;
- sewing bobbin threads; strong thread (dental thread is suitable) for sewing on decorations;
- patterns.
Shape - “mouse”, “fish”, “bird” or any other. Magazines and books have a large selection of patterns, sewing master classes and knitting patterns.
The eyes, nose, and buttons must be sewn on as securely as possible. It is better to make them from felt or embroider. From the same materials, only the consumption will be much greater, sunbeds, houses, hammocks, and comfortable soft labyrinths are sewn.
The simplest and most accessible games
A ball of paper (foil), a walnut, a fir cone. And also - a piece of felt, a natural cork from a wine bottle, caramel in a rustling “candy wrapper” - these are ready-made cat toys. They are additionally decorated with feathers, strung on a cord, and tied to a stick by a thread. Kittens love to play with newspapers and bags. It's important not to give them plastic ones!
How to make a dog out of threads: step-by-step description
Making a dog out of thread is quite simple. The technique involves wrapping a special template and tying the threads into bundles. No special preparation is required for this work; the level of complexity is low.
What threads are best to use?
For this technique, you can choose any thick threads. The color can be chosen as desired. However, to make the toy look more natural, it is recommended to choose gray, brown, white or black threads.
What else will you need for work?
To make a dog you will also need cardboard measuring 6*10 cm and scissors. To make a toy, you should also take small pieces of furniture fabric - you will need to make ears from it. However, if there is no material. You can use another one, the main thing is that it is tight.
Work process
The process of making a dog from threads is quite simple.
Note! It is important to follow the sequence of actions and take your time.
Step-by-step instructions for creating a toy:
- Take a cardboard blank and wind the selected threads on it. You need to make about 60 revolutions.
- You need to carefully remove the yarn from the workpiece and place the resulting skein on the table.
- Repeat the described procedure again, only this time make 70 turns of thread a little thinner. Also remove and place next to the first skein.
- From the fabric, cut out a small blank for the ears, 4 cm long and 1 cm wide.
- A ring of thick yarn must be tied with a thread in the central part.
- After this, you need to cut it on the opposite side.
- All the yarn must be straightened in one direction to form a bun.
- You need to make a muzzle. To do this, you need to step back about 1 cm from the tied edge and tie the bundle in a circle.
- In the resulting part you need to fold back a small amount of yarn and put a blank for the ears.
You might be interested in this. Crochet a toy dog - a selection of master classes.
Next, you need to proceed like this:
- After this, the strand needs to be returned to its place, backed off about a couple of centimeters and tied up again.
- After three centimeters, repeat the dressing again.
- In order to get paws, you need to disassemble the bundle into two parts, each of which needs to be tied in two places.
- Next, the body is made - at the first stage you need to cut the second ring (made of thin yarn). The resulting threads need to be wrapped around the workpiece.
- Near the base you need to make another strapping, try to keep it tight.
- Back off three centimeters and repeat tying.
- The remaining bundle needs to be divided into three parts - this will be the tail and two legs.
- The legs need to be tied in two places, and the same should be done with the tail (if desired, you can make any tail).
The work is finished, the thread dog is ready. The method is very simple, does not require skills or complex abilities.
Attention! Such toys can be made from any thread, but the thicker they are, the larger the dog will look.
Decorative cat
A simple craft that you can do even with your baby. To make it you need a cat figurine template. The figures of a sitting or lying cat are most suitable. The main thing is that there should be a lot of free space between the contours. You can find a template on the Internet or draw it yourself.
- First we trace the template on paper. Let's cut it out. We take thick cardboard; ordinary boxes that are used when moving will do. You need to cut out 2 figures from cardboard according to the template.
- We determine where the front side will be, paint the cardboard blanks in the color of the intended decor. For decoration you can use beans, white or colored beans, small pasta, beads, buttons. If you glue coffee beans, you get an environmentally friendly, natural air freshener with a pleasant aroma.
- Using PVA glue, we lay decorative elements on all the free space. The elements are laid out in random order. You can come up with any patterns: spirals, lines, triangles.
- We repeat the steps with the second template. Then we glue the two blanks with their right sides facing out.
- We close the joint with jute or linen twine in several rows. It is better to glue it with a glue gun.
- For the stand, take 2 rectangles of cardboard, paint them to match the color of the craft, and glue them together. We close the sections with the same twine.
- Glue the finished figurine to the stand. For stability, we carefully determine the mounting location.
- Additionally, we decorate the cat with a bow made of ribbon or braid, which we tie around the neck.
Fluffy kitty
Required materials: colored paper, a sheet of white cardboard, PVA glue and ordinary cotton wool.
On a colored sheet we draw the outlines of the cat. You can print it on a printer or draw it by hand. You don’t have to draw a classic cat; your craft can look like a cartoon character or a children’s book. Cut out along the contour and glue the figure onto a white sheet of cardboard.
Now we will make a fluffy fur coat. Lubricate the silhouette of the cat with glue, stepping back 1 cm from the edge. Tear off pieces of cotton wool and glue them, creating volume. Finally, we decorate the face: glue on the eyes and nose.
In order to make a beautiful cat craft, you do not need expensive materials or special skills. The time spent on making will not be wasted and will bring a lot of pleasure.