There are a large number of ways to make a mini bar with your own hands from scrap materials. Each of them requires proper preparation, as well as the availability of appropriate skills along with excellent aesthetic taste.
If you approach the process of creating a new piece of furniture correctly, you can end up with a truly high-quality and reliable cabinet for storing alcoholic beverages, which will serve for a long time without any problems.
Some tips
Most DIY bar designs don't require much skill to make. However, it is better for a novice master to start creating with the simplest samples.
Many completely unique and beautiful designs for placing alcoholic beverages can be made from the simplest materials with minimal labor.
And the clear geometric lines of simple creations will look elegant in both sophisticated classic styles and modern designs.
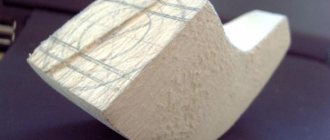
Drawer
To make a drawer you need 5 wood panels 21.5 cm wide and 4 cm deep.
- Making a kitchen table with your own hands - step-by-step instructions for building a beautiful and durable table (115 photos)
- How to make an ottoman with your own hands - manufacturing options and a master class for building an original ottoman (110 photos)
- How to make a cabinet with your own hands - ideas for original projects, their manufacture and assembly of various types of cabinets (85 photos)
You need to make a small hole in the front panel with a jigsaw. This will be a kind of handle for opening the drawer.
Minibar functions
Almost every man dreams of owning a home bar. By the way, if there is no such storage facility yet, then the woman you love may not think too much about the gift. A nice bar will be a wonderful gift for any occasion.
The bar cabinet is suitable for storing elite alcoholic drinks, as well as ordinary wines or even beer. As well as wine glasses, whiskey glasses, sparkling wine glasses, devices for opening, cooling, and aerating alcoholic beverages.
In addition to the main storage function, the bar will decorate the room in an unusual way. And if it is made with your own hands, it will become a legitimate source of pride for the owner.
Main varieties
Wine cabinets are considered the most expensive; they are equipped with special systems that maintain a certain temperature and level of illumination necessary for storing bottles of expensive wines. The bar plays the role of a cellar.
Companies that produce such furniture offer their customers a large selection of products that meet their requirements and wishes. This takes into account the area of the room where the cabinet will be located, the quantity and characteristics of drinks, and additional storage items.
There are special hangers built in for glasses and other utensils.
Furniture can be either an independent item or an addition to other structures. A home bar is classified according to several criteria:
Purpose and design
Amateur and professional cabinets are distinguished by purpose. The first option is furniture for home use, which is suitable for storing regular alcohol in small quantities. Bottles that require special storage conditions cannot be stored in such cabinets.
Professional bars are equipped with a refrigerator compartment, thick doors, and sections for the correct arrangement of bottles of wine and cognac. The cabinet has a built-in temperature control sensor and lighting.
The most popular design styles:
Types of bars
The bar can be large and stationary, or it can have very small shapes.
Most often, miniature bars are created in the form of vertical cabinets, shelves with a recess for glasses, and separate chests for each bottle.
Dimensions and dimensions
There are no strict rules in this regard. There are some recommendations that are violated in about half of the cases. The recommendations relate only to the height and width of the tabletop:
- The height of the bar counter is usually 1.1-1.2 meters. Then special high chairs are placed next to her.
- The width is at least 30 cm, optimally 50-60 cm. You shouldn’t go less than 30 cm: even a small plate on such a tabletop will be in danger. And it’s just inconvenient: you can’t put your elbows down, you can’t really lean on your elbows.
The length, shape, number and shape of the legs are all at your discretion. Speaking of legs. The traditional counters that were in drinking establishments are a table top on a cabinet. But for a kitchen, for some reason, a tabletop with one pipe from floor to ceiling is considered a “classic”.
Something like this counter is considered a classic in kitchen sets
By the way, in this form it is practically not used anymore. More functional analogues with cabinets and cabinets predominate.
Materials
The main materials used are fragrant and easy-to-process wood, cheap construction pallets, scrap boards, practical plastic, difficult-to-process metal, an old suitcase and chest, even scraps of water pipes. In general, everything that was found in the house.
Wood from pine, ash, and oak is used as wooden blanks.
All these materials are the easiest to process; they can be painted with plain paints, colored or clear varnishes, stains, or covered with decoupage or carvings.
If desired, you can use MDF or chipboard panels, plywood. At home, such a cabinet will last quite a long time, even without additional treatment.
Plastic and metal are even more durable, but require more skill and time.
Cold drinks
Not all alcohol is consumed at room temperature. In this case, we need a place where the alcohol will be kept cool.
In this case, you won’t be able to save much, but since we are not making a minibar with our own hands for dolls, we can make such sacrifices.
We are talking about a small refrigerator in which our drinks will be stored. Buying one is not a problem in terms of affordability, but if you are considering the option of a minibar, then it should not be difficult for you to pay for such a purchase.
- DIY bread box - step-by-step master class on making and tips on how to decorate a wooden model (105 photos + video)
- DIY high chair - interesting drawings and projects on how to make a comfortable and functional high chair (120 photo ideas)
- DIY built-in wardrobe: 115 photos of original ideas and video tips for building built-in wardrobe models
If the room is made in a classic design, using wood, then it is better to hide a refrigerator made of plastic and metal in a niche with a door - a cabinet.
You could see a similar example in different hotels and hotels - there usually a refrigerator with alcohol is always hidden in a cabinet that fits the shape.
However, do not forget that this refrigerator can store not only alcohol, but also other drinks that you prefer to drink cold.
It is best if this entire structure is presented in the form of one complete piece of furniture, such as a chest of drawers or part of a wall in the living room. The same story applies to the office and bedroom.
Globe shaped bar
This mini-storage for alcoholic beverages has already become a classic. Making it if you have a model of the Earth will not be difficult.
It would be nice to find an antique globe of quite large size. It can be coated with colorless varnish or gold and red stain can be used to give it a noble color of antiquity and prosperity.
The simplest option would be to install the globe on three or four legs and treat the surfaces with varnish that imitates the creations of deep antiquity.
Sometimes such an unusual miniature bar is placed on a stool or small coffee table.
And we must not forget to divide the ball in half and attach a mechanism that allows you to open and close the earth model. You can install a shelf inside the structure. When using this option, the bottles will stand straight and beautiful.
If a table is used under the globe, then glasses are placed on the lower shelf. They can also be hung on the top shelf with the bowls facing down, or mounted on the rim of a globe. But you will also have to make such a headband yourself.
Plasterboard cabinet
First of all, make a drawing of the wardrobe. For this:
- Decide on the place where your closet will be located.
- Make a sketch with a detailed diagram and dimensions of brackets, shelves and other parts.
Important! Make all calculations taking into account the thickness of the drywall.
Frame
To begin with, markings are made on the ceiling and floor. Use a rubber shock-absorbing band for comfort. Then attach metal profiles to it using dowel nails. Install stiffeners for strength. Their installation is carried out between rack profiles.
Sheathing
After preparing the frame, you need to start covering it:
- Screw the previously cut pieces into the designated places with self-tapping screws.
- Attach the sheets with self-tapping screws, the distance between them is 20 cm, recess the caps by 1 mm.
- Place the corners where the shelves will be attached.
Bar cabinet in the form of a case
We make a mini bar from wood. To make such an original storage, you will need boards. They must first be sanded and varnished to give light elegance or dark nobility.
From the planks we make an opening case into which a bottle or two will be installed. Here you can also provide shelves for low glasses.
The insides of the bar cabinet are lined with velvet or left in their original form. The bar door can be decorated with carvings and original handles.
This is the easiest option on how to make a mini bar at home.
Glass holder
The dimensions of the minibar are strictly limited, so the rack for glasses should have the smallest possible dimensions. You need to make sure that there are 2 glasses on the holder. First, you should choose the glasses themselves to determine the size of the holder.
- Beautiful DIY lampshade - simple ideas for making stylish design options for table lamps and floor lamps
- Do-it-yourself upholstery of a chair - methods of using upholstery and a review of the best materials (85 photo ideas)
- Beautiful corner shelf with your own hands - 95 photos of options for making and using shelves in interior design
It is necessary to make special grooves into which the stems of the glasses will be inserted. We make strips measuring 60.7x32 cm.
We drill holes in them with a diameter of approximately 1 cm and cut grooves. It is advisable to make the grooves a little wider than the stems of the glasses so that they fit freely.
Bar cabinet in the form of a shelf
Such storage will become an even simpler creation.
It is necessary to make a shelf for bottles, and on its lower edge cut openings for inverted glasses.
You can make this version of a miniature bar from old boards left over from renovations, or from construction pallets.
The openness of the shelf will help to unobtrusively demonstrate the wealth of the owners and their tastes in relation to alcoholic products.
Photo design ideas
Separate corner Desk - as a basis
Photo of a bar counter in a small kitchen
Zoning option Interesting lighting As a basis for a coffee table In a spacious kitchen)) Bar counter made of brick or stone - stylish Non-standard look and color
Bar counter in a studio apartment
You can also have lunch Two sketches for implementation Bar counter for a small kitchen
Video on the topic
If you want to place a bar counter in an open summer kitchen, you can borrow the idea from this video. The guy built an interesting stand using driftwood and a thick board found in the forest.
Most often questions arise about how to make a countertop for a bar counter. You can decorate it with mosaics. And how - look in the video. In general, the technology for laying mosaics is simple: use a special white glue, followed by grouting the seams between the tiles. It can be difficult to form an uneven edge. Here's how to do it - watch the video.
Tabletop glued from bars
Miniature bar in the form of a canister
This bar is not very different in manufacturing from previous options. The main problem of how to make a mini bar from a canister will be carefully cutting the canister and processing its edges. So it’s better to find a specialist with a good tool.
Otherwise, manufacturing such a design will not be difficult. Such storage is made in the form of a cabinet or shelf.
Why do you need a home bar for alcohol?
The design of this product can be both complex and simple. For example, sometimes the owner of the house cannot choose a suitable option to match the finished interior. Perhaps there are too many departments inside or, conversely, the compartments allow you to store something that is not at all what you need. Therefore, there is a desire to make a bar yourself. Let's decide why it is still needed:
- This design attracts attention wherever it is located. Sometimes not everyone can guess what's inside. Accordingly, such a specimen in the room plays an aesthetic role.
- The device is designed for storing expensive alcoholic drinks or refreshing invigorating cocktails. They are relevant at business meetings and holidays when guests gather in the house. It is irrational to store drinks in the refrigerator.
- Even homemade wine will not spoil if stored in a dark place. As a result, the taste of the drink from the correct content will only be better, more interesting and more refined.
Of course, a minibar in the house will be in great demand if at least one of the listed factors is present. It is important that the design has several shelves and compartments for placing bottles.
Spectacular minibar for strong drinks made of natural wood with a varnished surface PHOTO: rmnt.ru
A minibar can be made from an antique suitcase or a massive chest of drawers PHOTO: kreuzwortraetsel.me
Mini bar made from boards
A neat and unusual design for storing bottles in a lying position will be made from eight rather long planks. They can be installed vertically or at an angle of 45 degrees.
Small square holes can accommodate 9 to 12 bottles. If there is not so much alcohol in the house, you can use fewer boards.
Wine rack
The wine rack should accommodate 8 bottles. Accordingly, you need 16 boards about 2 cm thick and 30 cm long.
Sand the boards and make cuts at their ends at an angle of 45°. 4 boards are attached to the side wall, there should be a distance of 11 cm between them.
The first shelf is installed directly on the bottom panel. Next, 4 more boards are mounted inside the rack. Another 8 panels are installed on another wall.
Mini bar from an old suitcase
Even an old, completely unnecessary suitcase can be used to create an alcohol cabinet. To do this, it is painted or decorated with decoupage.
The internal part is divided into compartments, and the resulting cells are lined with expensive fabric or decorative sawdust. You can also use regular wood shavings.
Mini bar made from old furniture
If there has been a bookcase, a small wall cabinet, an unused shelf or a grandma’s chest of drawers on the balcony for a long time, they can also be adapted into a miniature bar.
Labor costs for such alterations will be determined only by the condition of the furniture.
Very old items will require sanding the surface, applying a new layer of paint or varnish, and decorative finishing.
New items can simply be decorated with decorative elements.
Drawers must be finished so that they slide out and slide in smoothly, without damaging the fragile glass with jerks
The inner surface is covered with original wallpaper, trimmed with glass panels, and illuminated with LED strips or spotlights.
The cells made should fit the size of bottles and glasses.
Such options are perfect for any style, since beautiful finishes can be matched to each design simply by using leftover building materials.
Selection rules
Among the wide range of bar cabinet models, it is difficult to choose the right design. Therefore, clients are advised to follow several rules when choosing:
- determine the future location of the furniture;
- take into account the interior of the room;
- clarify the functional features in advance.
A correctly chosen cabinet will not only decorate the interior of the room, but will also emphasize the style and taste of the owner of the room.
First, the store client determines what exactly he will use the cabinet for. If you don’t want to collect a large collection of expensive wines, then you will need a small, spacious bar that will be used for its intended purpose. The collector will have to order a design with additional functions and numerous compartments. When choosing, also take into account the space for the closet. Corner structures are suitable for small apartments. In large private houses you can place bulky furniture.
Be sure to pay attention to the color scheme of the room’s interior. The shade of the bar can be combined with curtains and other textiles, flooring or wallpaper, and other furniture. Options are determined in advance - heating, shading or lighting. The cost of the bar will depend on this.
Among the wide range of bar cabinet models, it is difficult to choose the right design.
Main selection criteria:
The structure should be located so that it is convenient to use. Pay attention to the style of the bar, its decor and accessories, because the furniture should look harmonious in the room.
Mobile bar
An adorable mini bar on wheels can be made from anything that is ready to move. They can be old bedside tables, construction pallets, desk drawers.
Small wicker baskets, ice buckets, and vases of flowers can beautifully decorate such mobile bars.
Creating a mini bar will be a lot of fun, and filling it can be left to family members who still need to buy something as gifts for the holidays.
Bar counter for the kitchen: stages, manufacturing methods, photo reports
The simplest option to implement is the classic one: a tabletop attached with one edge to a wall or furniture, and the other resting on a pipe. There are options with the tabletop:
- Make it from a wide board, preferably not coniferous - their wood is too soft.
- Order from the same company that made the kitchen set. If you bought a ready-made one, you will have to look for similar material from a photo or carry a small spare part with you to workshops to demonstrate what you need.
- Make it out of thick plywood, then decorate it with something - stick on plastic, tiles, mosaics.
Everything else is better to choose in a store that sells furniture fittings. The choice is very wide, and the range of prices is absolutely amazing. For example, a pipe of the same diameter can cost three times more. But this difference is not without reason. With cheap Chinese pipes/grids/baskets, the chrome plating begins to flake off after some time. German fittings have a very high price tag, but have a lifetime guarantee; Poles are in the middle in both price and quality. The choice is yours.
Homemade bar counter for the kitchen from a board
The photo above shows a homemade bar counter made from a thick board. It rests on one side on a shelf attached to the wall (also made of inch boards). The second support is a traditional pipe. A hole of suitable diameter is drilled in the body of the tabletop for the pipe. A “fastening ring” stop attachment is installed on the pipe under the table top, and the hole is closed on top with a decorative ring. There is also a “thrust bearing” or universal fastening of the pipe to the floor and ceiling, as well as various holders and shelves for it.
If the tabletop is attached directly to the wall, corners are usually used for these purposes. You can take reinforced ones, and choose the color based on the finish. But this type of fastener is installed so that it is not visible - stepping back a few centimeters from the edge. You can put several small corners, or one solid one.
Shelf holders can be placed under the tabletop
If you decide to make a bar counter in the kitchen along the wall, you can use decorative brackets for shelves. Their load-bearing capacity should be enough for a tabletop, especially since you can put several of them. An example of assembling a bar counter of a simple design with a pipe in the photo below.
Photo report No. 1: homemade stand made from tabletop and pipe
The tabletop was cut out from a window sill (solid wood), the edge was rounded, sanded, tinted and varnished. Spare parts - bar leg, brackets and a fixation to the floor - were purchased in the furniture fittings department.
This is the original data
We screw the stop to the tabletop and the corners to the edge. Everything sits on self-tapping screws with a flat head. The work takes about 7 minutes.
The main part is assembled
Having placed the assembled stand against the wall, mark on the wall the places where dowels need to be installed. We trace the pipe on the floor with a marker: we will set the thrust bearing according to this mark. Using the marks, we mount the support for the rack and install dowels in the wall.
Preparatory part
We put the stand in place and secure it with screws. All. Ready.
A simple bar counter assembled with your own hands
Bar counters with shelves
If you don’t like the design with the pipe, you can do without it, but you will have to remove the upper part, which is located under the ceiling. Instead of a leg, for example, you can make the same shelf as near the wall. The look will immediately become more dynamic and modern.
Sketches of easy-to-make bar counters
And in general, the entire structure can be assembled from wide boards, joining them at right angles. Looking at the photo below, you will understand what we are talking about.
Bar counter for a kitchen in a modern style (for minimalism and high-tech too)
Broken lines generally fit better into modern interiors. If the kitchen is in the style of minimalism or high-tech, then it is difficult to fit the classics there, but something consisting of broken lines will look very good (several sketches in the picture below).
Bar counters for kitchens in modern style
A slightly more traditional version is shown in the photo. This didn't make him any less interesting. A non-standard approach, even in small doses, significantly changes perception.
Bar drain-table option
Bar counter on base
We considered all these options without reason. But the tabletop can be attached to some kind of cabinet. If the tabletop is located exactly above the table surface, we take a pipe and standard fasteners to horizontal surfaces. If, as in this case, the surface of the bar counter is offset, there is a special inclined fastener.
Attaching the tabletop to the cabinet is easy and simple
You can make a cabinet yourself. Actually, the main thing is to assemble the frame. It can be covered with furniture plywood or some other finishing material - it depends on the style of your kitchen. The frame can be made from wooden (dry) slats, or you can weld a metal corner.
You can dance on this stand
An alternative is to assemble it from plasterboard profiles and sheathe it with it or with gypsum plasterboard. Another option is to build a brick base. But this is if the load-bearing capacity of the floor allows.
Loft style
With a plasterboard base: photo report No. 2
Often a plasterboard base is chosen. The material is inexpensive, the technology has been tested, the mechanics are familiar, and the result is at least good. There is no news regarding the order of work: we are assembling the frame. In this case, wooden blocks were used, but the same can be done using profiles.
Assembled frame
The main thing is to maintain vertical and horizontal planes, place the racks exactly at 90°. Everything is checked with a good building level; it is better to monitor verticality with a plumb line: it has no error. When the frame is assembled, it is sheathed on both sides with plasterboard or gypsum board.
Plasterboard sheets mounted
We fill the marks from the screws, corners and joints with putty. Then it depends on the chosen type of finish: some require putty (painting with water-based emulsion), others do not. In our case, textured paint was chosen; it is applied in a thick layer, and can be applied directly to drywall.
Covered with textured paint
All that remains is to install the tabletop on the bar counter. Choose which one matches the rest of the furniture in your kitchen.
Photo report No. 3: Bar counter with sink
This was the first experience in creating furniture (and anything worthwhile in general) with my own hands; as a result, some design flaws were made. The design was not the most successful, although there is no arguing about tastes.
Source materials:
- inexpensive countertops bought on sale;
- remnants of a laminated chipboard cabinet;
- bars;
- a couple of additional doors purchased;
- plumbing filling: sink, siphon, mixer and the required pipes, hoses, fittings.
The countertops are folded in an “L” shape, connected by steel plates, and the sides are attached.
Installing and replacing a faucet in the kitchen is described here.
Tabletops are laid out face down on the floor. They are connected in the shape of the letter “L” using glue, which coats the ends and a steel strip with perforations into which the screws are screwed. The strip, of course, is fixed at the bottom.
The sides were supposed to be refined (presumably with laminate), so the remains available on the farm were used - an old door and a piece of a cabinet. They are screwed using corners, aligned along the edge of the tabletops. And this is the first mistake. And visually such a cabinet looks heavy, and it’s uncomfortable to sit on. The sides must be moved from the edge by at least 10 cm.
After the sides were installed, the cabinet was turned over and placed in its permanent place. All other work was carried out on site. A hole for the sink was cut, the plumbing was installed and connected.
Front and back view
Slats are nailed along the floor - along the walls and slightly retreating from the outer edge (an indentation of 5 cm is made, 10 cm is more convenient), shelves are made. The cabinet on the sink side is closed with a door, the shelves on the left remain open. The space is partially finished with wooden slats.
At first they thought of putting several different “bells and whistles” on the pipe, but semicircular edges remained from the tabletops. It was decided to use them on the pipe. Panels for decorating balconies (purchased in Leroy) were used as the exterior decoration of the cabinet. They almost fit, and the remaining gaps were closed with a twisted cord. See the photo below for what a homemade bar counter with a sink cabinet looks like as a result.
Bar counter for the kitchen with a DIY sink
There are also some comments on finishing. First, the cord will soon be saturated with various liquids, will have a pale appearance and a strong “aroma”. To delay the appearance of the smell, you can cover it with something, even the same PVA glue. Secondly, the tabletops are simply joined together. Water will get into the gap and various small debris will accumulate. Even at the “joining” stage, the edges must be coated with sealant (transparent, silicone, not acrylic). You can and should also process the edges of the cutout for the sink. Then the tabletop will not swell. The joints of the countertops can be finished with furniture pads, and the same or similar ones can be used instead of a cord. Another budget option is plastic corners and the same T-shaped strips.
Bar counter for the kitchen on the remains of the wall
If the kitchen is combined with a balcony, a piece of the wall remains. The place where the window used to be. If you don’t want to destroy it, you can make a bar counter.
The rest of the wall when combining a kitchen and a balcony can be turned into a bar counter
There are two options:
- Place the tabletop at the existing height. This will be another work surface or shelf. Above it, on the pipes at a height of about 1.1-1.2 m, secure another plane, which will actually be the bar counter.
- Add/raise the wall to the required height and install a countertop.
How you can decorate a counter on the rest of the wall
Both options are not bad, but the one in the photo on the right is more practical: two surfaces in the kitchen are always better than one. Please note that the dimensions of the tabletop are larger than the width of the “leg”. This is no coincidence: this way you can sit more or less comfortably without turning sideways.
And if you’re not too lazy to remove this wall, you can make something more convenient - so that you can put your feet up. An example is in the photo.
It will be more comfortable to sit this way