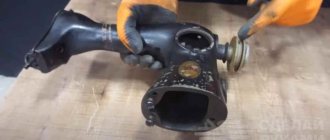
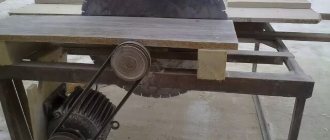
In this article we will figure out how to make a miter saw from a grinder, but at the same time you will have options where you can use your device as a circular saw or to trim metal profiles. As the story progresses, I will mention the parts that will be needed for cutting lumber and which ones will be needed for steel products. Essentially, you will get a universal unit that will be an excellent tool for your home workshop.
Why make a machine from an angle grinder
A cutting machine is a useful and necessary thing, not only in industrial conditions, but also in the household. With this useful tool you can make precise cuts of parts and workpieces. This is achieved by securely fixing the cutting disc, into the spindle of which you can install not only abrasive wheels for cutting metal. A stationary machine can be used for cutting tiles, bricks, marble, granite and other similar materials, using special diamond-coated wheels in the design of the tool. If necessary, such a machine can be used for sawing beams, boards and other wood workpieces.
Many people who have repeatedly faced the need to make an accurate cut of a workpiece want to know how to make their own cutting machine from an angle grinder and available materials. Holding the grinder in your hands, you can also make a precise cut, but it is more difficult to do this, since you have to hold the tool exclusively with both hands. Using a homemade cutting machine, you can not only perform, but also simplify the following work:
- Cut sheet material, such as galvanizing, used for chimney insulation and other purposes
- Cut ceramic tiles and tiles - keep in mind that the cut can only be made straight
- Cut materials at different angles
- Cut a metal profile, pipe, wooden beams, boards, etc.
The manufacture of a machine from a grinder requires an appropriate approach. After all, the tool itself is very dangerous, so the slightest miscalculation can lead to the master being seriously injured. The consequences of working with an angle grinder if safety regulations are not observed are known, so first, before building a homemade product, it is worth noting the following:
- Only with the correct manufacture of a stationary cutting machine can you be confident in its reliability and safety
- If you plan to do it, then you need to calculate every step so that no disaster happens during operation.
- Using a machine is in some ways safer than using a tool while holding it in your hands. However, you need to be aware that an angle grinder is a mobile tool, and making a homemade one is already a violation of safety regulations
- For manufacturing, it is necessary to use materials of appropriate reliability, corresponding to the power and size of the main power tool.
Having dealt with the need to manufacture the machine, you can get down to business.
This is interesting!
If you can’t decide whether it’s better to buy a new machine or make it yourself, then the second option is more preferable, since the cost of a factory device will cost at least 10,000 rubles. If you make it yourself, you won’t need any expenses, since the grinder is already on the household, and the components can be found in the garage.
DIY Miter Saw Guide
A crosscut is a device for cutting a product crosswise to length, and not only wooden materials, but also any other materials that can be cut by circular saws (for example, plastic). There are a sufficient number of hand-held circular saws (so-called parquet saws) on the market, with which you can:
- adjust molded products to size;
- remove excess material by cutting out blanks;
- or even make a long longitudinal cut.
But all these actions are carried out literally in weight, that is, without rigidly fixing the tool or workpiece.
In some situations, the achieved quality may be quite sufficient, but sometimes increased accuracy of the workpiece dimensions is required.
In this case, specialized cross-cutting machines, which are sold in any supermarket of construction and finishing goods, come to the rescue.
But such machines are very expensive. And besides, as a rule, the need for them never lasts long, unless you engage in carpentry professionally.
In this case, it makes sense to build a homemade miter machine using an existing hand-held circular saw.
But how to properly make a homemade miter saw from a circular saw? We will talk about this on the pages of this article.
Manufacturing details
We apply markings on the chipboard at different facing angles and screw in the hardware according to the marks.
The turning mechanism is placed on the rotational axis of the car wheel (king pin); it is supported by a bearing with a diameter of 0.15 m or more. We install a rotating semicircle with cuts.
We attach ears to the outer side of the bearing to hold them on the base with M6 screws. We put a latch with a wing on the side.
The broach is made from non-working shock absorbers. Oil is poured out of them, ventilation holes are drilled, which must be protected from small particles. So that there is no jerk at the start of the launch, it is necessary to install a soft start on the saw, which will slightly reduce the speed. We install a working bed with a cut slot for the saw.
The last stage of the activity is the installation of a protective mechanism for the disk. And we screw the guide rail to the bottom.
Our trimmer is ready to go.
Disadvantages of the unit:
- it is too noisy;
- To control cuts in wood, wood scraps are used, then the draft is set accurately, and then they cut clean.
You can make a tool from a circular saw in the same way.
A homemade workbench is the basis for convenient work
For ease of work, you should make a cross-cutting machine. It is advisable to have a mobile design if you have to move it to another place or directly to the construction site. Therefore, the frame is made collapsible, for which the tabletop is fastened to the legs using self-tapping screws.
To make a workbench, you must perform the following operations:
- Prepare the top frame. It is assembled from wooden beams measuring 40x40. Legs made of a similar material are screwed on with self-tapping screws and spacers are installed for greater stability. Or the joints are reinforced with metal corners.
- The tabletop is made from boards. Its width should be 10 cm greater than the length of the miter saw, and its length should be equal to the width multiplied by 3.
- Taking sheets of plywood (chipboard, MDF), prepare and secure improvised tables, trying to position their surface on the same level with the rotating mechanism.
- Install equipment for cutting ends.
Since it is difficult to make a high-quality rotating device at home, they take it ready-made.
Such wood trimming will be in demand in your workshop or when carrying out various construction works in which woodworking is indispensable.
If you need to make a machine with broaching, then for this you take the shock absorbers of the front struts of the car. It is preferable to a passenger car, because they are too massive for a truck. You can purchase them at any car dismantling point. Before installing shock absorbers, in order to facilitate the movement of the rod, the oil is drained and “air” holes are made in the body.
Circular cutting
When it is difficult to purchase such an instrument due to lack of finances, you can make it yourself.
For installation you will need:
- Thickened sheet of metal.
- Steel corners for pressing (use an old bed).
A welder is used to cut holes in a steel sheet, and its ends are processed with a file.
A particularly powerful electric motor is not required to use the tool; 0.9 kW is enough. It is mounted on the base with an additional spring, which performs a stabilizing task. To rotate the unit, you need to attach a handle, as a result you will achieve gradual movement of the saw. The characteristics are as follows:
- 0.2 m – diameter of the cutting disc;
- 1500 rpm – rotation speed.
This will allow you to easily process wood up to 0.07 m thick using a hand-made tool. Take care of adjustable racks and supports.
For pendulum risers, take a channel attached to a metal base. As a result, our tool will become stronger and heavier, but thanks to it, cross-cutting work will be done with ease.
You can take a three-phase electric motor (2.3 kW) and a swinging plate on hinges.
Place the belt on the motor pulley. The pendulum can be fixed to the base of the frame material. For convenient work with wood, the saw diameter must be 0.42 m, and the rotation speed must be from 2800 rpm. We cut a slot for the disk.
As you can see, it is possible not only to purchase a high-quality instrument, but also to make it yourself. Here's what we got:
Step by step guide
Let's look at the sequence of actions when converting a circular saw into a miter saw. A special feature of the “parquet” is its characteristic movement. You need to move it along the surface of the material being cut, but not vertically.
Therefore, the machine will represent itself as a base, which, firstly, will allow you to position and secure the workpiece, and secondly, it has a base with limiters along which the circular saw will move in the device (parquet).
Making a homemade machine from a grinder features
It’s not difficult to make your own machine from a grinder yourself. Moreover, there is a wide variety of manufacturing options, which depends on the available materials and imagination. There are two types of stationary cutting machines made from grinders:
- Simple - it received this name for one reason, which is not only the ease of manufacture, but also the minimalism of the device itself. The tool is attached to the workbench using additional materials, and it can be used
- Complex - it is rational to manufacture such machines if you plan to use it often for different actions. In most cases, a simple device is enough for a home garage, the manufacture of which requires little time, effort and consumables.
In order to make a cutting machine from a grinder with your own hands, you will need consumables, which are metal plates, as well as profiles and fasteners - bolts, nuts and washers. The only specialized tools you will need are an electric drill and a welding machine. Let's look at how to make the simplest version of a cutting machine from an angle grinder in more detail below.
How to make a mount for an angle grinder
We cut a piece of channel of suitable length and weld four threaded rods to it.
We place a grinder inside the channel. We put metal strips on the studs and secure them with nuts.
Option 1 - a simple way to make a cutting machine from an angle grinder
A simple way to make a homemade product involves making a base on which fixed connectors for a movable plate are attached. So, in more detail about how to make a machine from an angle grinder:
- Take a steel plate measuring 15x15 cm and at least 2 mm thick. Such a large size is needed in order to secure it to the workbench with bolted connectors. If the workbench (table) is iron, then the base can be welded to it, so in this case you can use a shorter plate 10x10 cm
- Weld two rectangular plates perpendicularly to the base, located at a distance of 5-8 cm from each other. The thickness of the plates should also be at least 2 mm. Their length depends on the size of the power tool, but usually small or medium grinders are used for stationary machines, so the length of the plates is 8-10 cm
- At the base of the plates, make a straight hole into which the connecting bolt is installed. The hole diameter is 6-8 mm, which is not so important
- At the next stage, you will need to make a movable base to which the grinder will be attached. To do this, you will need to take a steel plate at least 20-30 cm long, which depends on the size of the power tool. The width of this frame should be slightly less than the distance between the protrusions of the rectangular plates welded to the base
- On the back side of the movable plate, you need to weld a round oblong sleeve into which the connecting bolt will be placed
- It is necessary to secure the tool to the resulting movable plate using clamps, ties and other methods. The number of fasteners should be more than 2, and preferably at least three for greater safety
- Having secured the resulting structure to the workbench, you can test its operation
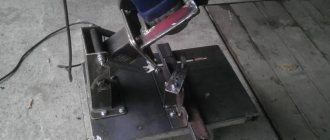
For ease of operation, you can weld a handle to the movable bar, and also install an auto-return spring, which will return the tool to its original position, that is, move it up. The photo below shows a ready-made installation for cutting from an angle grinder. As you can see from the example, its manufacture will require a minimum of effort and materials, and the result is a stationary device for cutting various materials.
This is interesting!
Finally, you will need to cut a strip of the appropriate size in the workbench, into which the rotating circle in the tool chuck will “go” when cutting materials.
When constructing the device, do not forget that safe operation depends on how to secure the angle grinder. It should be securely fixed in 2-3 points, which will prevent it from moving during work, as well as “flying off” from the movable frame. When installing the tool on a movable bed, it is necessary that the position of the grinder be strictly at a right angle, that is, the circle must be located strictly in a vertical position.
The resulting device is suitable for processing various materials from wood to durable stone. When working with a tool, do not forget to use safety glasses, gloves, and protective clothing. Instead of a workbench, you can use a wooden or steel frame on which to realize your idea.
This is interesting!
Similar simple frames for grinders are manufactured in the factory, so if you have an extra 2-3 thousand rubles, you can purchase a ready-made base and use it right today. However, there are no difficulties in making it yourself, so you need to decide on your own in each individual case which is better.
Making a miter saw from a grinder
When making the device, a grinder with a cutting disc is used. It's good enough for simple work, but when you have to make a cut at an angle of 45 or 90 degrees, it is almost impossible to cut the wood correctly at the exact angle by hand.
Therefore, in this project we will make a device like a miter saw, which cuts at a given angle without any problems.
Let's find a material that can be used for this device. We need rods on which part of the mechanism can slide - these could be chrome-plated steel bathtub curtain rods (those on which the curtain is hung). We also use a PVC pipe with a diameter of 3.75 cm, which can also be useful when assembling the device.
Materials
All materials were recycled materials - they were found or left over from past projects:
- 2 pieces of PVC pipe 15 cm
- 4 semicircular clamps for pipe w 1.25 cm
- 2 pieces of chrome-plated cornice 50 cm.
- 50 cm steel sheet 0.5 cm thick and 2.5 cm wide
- 2 pieces of square pipe w 2.5 cm and d 50 cm
- 2 pieces of corner w 2.5 cm and d 15 cm
- 2 pieces of steel plate 0.3 cm thick, length 10 cm and width 7 cm
- 1 steel plate L 25 cm and W 22.5 cm for the table
- 1 piece of aluminum ingot for stop
- Boot strap
- 20 cm nylon rope
- 1 bolt 8 cm and d 0.9 cm.
- Oak blank
Tools
- Right angle
- Roulette
- Spanners
- Grinder with cutting disc
- Welding machine
- Drilling machine with different bits
- Hand drill
- Punch
- Taps with a diameter of 0.5 cm and 0.7 cm
- Grinder
Safety
The tools used in this project can be dangerous if you do not use personal protection. When working with them, always wear:
- Protective glasses
- Headphones
- Welder mask
- Heavy, non-flammable clothing
- Gloves
Never neglect your safety!
Step 1: Making a holder for the grinder
We had a Dewalt D28402 grinder. It has two holes on opposite sides to screw a handle into. These holes will hold the grinder in the holder.
There are many ways to make such a holder. Its shape will depend on the shape and type of grinder you'll be working with - there's a lot of measuring involved to come up with a functional design that should also allow you to detach the grinder for hand work.
To develop the design of a holder for an angle grinder, the Sketchup program was used. Take a look at the photos.
When the design of the part was developed, several pieces of scrap metal were collected and sawn, which suited many parameters. We got five pieces of flat metal, 0.5 cm thick and 2.5 cm wide. They were welded and we got the fittings that you see in the photo.
A small piece of steel rod 0.9 cm thick was also welded to the reinforcement. A wooden handle will be placed on it. In this case, it was made of polished oak. A hole was drilled in the blank, put on a metal rod and the connection was strengthened with glue.
Step 2: Interesting uses for ski boot straps
Ski boots that were already old and torn also found use here. They had special straps that can be attached to the grinder so that they hold the handle of the grinder in the holder.
This way, you can easily attach and unfasten the angle grinder from the holder.
Step 3: Sliding Mechanism
So, let's move on to the most difficult stage. Will it be possible to make a sliding mechanism with rails from a chrome bathtub curtain rod and a sewer pipe?
We fix the PVC pipe in a clamp from a drill press and drill four holes with a diameter of 2.5 cm along the entire length of the pipe, after which we saw the pipe into two equal pieces 15 cm long. Bath curtain rods fit well into these holes, and with a little lubricant they will fit perfectly work. So far so good.
Now you need to attach a part to the front ends of the pipes, to which the fittings with an angle grinder can be screwed.
This part should turn slightly.
In the photo you can see in detail how it works.
It will be necessary to calibrate or change the trajectory of the cutting disk. Any deviation in the movement of the carriage with the angle grinder along the two rods will cause the cutting disc to also move out of the straight line.
To do this, we add a steel plate to the rear end of the rail, through which two bolts are threaded and in which a third hole is also cut. By rotating this plate as far as the diameter of the hole allows, you can more accurately guide the angle grinder.
The bolt will hold it in position once you have decided on the direction.
Now we will make the basis for the entire device.
Step 4: make the base
You need a base that holds the entire sliding mechanism and cutting tabletop. All that was needed to hold the PVC pipe was semi-circular pipe fasteners.
We build a simple frame for the device from PVC pipes 2.5 cm thick. We create a distance of 15 cm between them using iron corners 2.5 cm wide. Now we cut two iron corners 3 cm wide to a length of 22.5 cm and weld them to the sides of the frame. This creates a flat platform to which the sliding mechanism can be attached using PVC pipe fasteners.
Note that the platform is 0.5 cm away from the base, which leaves room for the carriage to move.
We weld nuts under the pipe fasteners to facilitate assembly.
We also cut a hole in the front of the device to allow the grinder to hang slightly from the table.
Step 5: Assembly
- Secure the grinder to the fittings. Push the bath curtain rods through the holes in both plastic pipes.
- Secure the PVC pipes using semi-circular fasteners (Check the location of the tub pipes first before securing the pipes.)
- Screw the plate that holds the angle grinder onto the steel pipes.
- Secure the angle grinder so that it cuts at the correct angle, then tighten all bolts.
- After assembly, examine the resulting device, check its functionality and disassemble it. Paint the metal parts. Let the paint dry for 24 hours. Let's continue the next morning.
- The next time you assemble the device, be sure to apply lubricant to the pipes to make the sliding mechanism easier to move.
Step 6: Add a Cutting Table
The cutting table is made of a steel plate that is held on by rivets. The plate is located in front of the grinder.
When all the parts are assembled and the cutting angle is determined, turn the vertical cutting disk perpendicular to the table. To make this easier, lower the cutting disc onto the table and place a right angle near it. When you notice that the blade is at a right angle, tighten the bolt and secure the grinder with a strap.
Since the cutting table is now screwed in, the angle is determined and the bolts are tightened, you can plug the angle grinder into the electrical outlet and cut a slot in the table, making sure that there is material left in both the front and back. Using this slit, you can now judge the trajectory of the grinder blade.
Now we make an aluminum stop (2.5 by 0.5 by 25 cm) and screw it to the table perpendicular to the slot. We create a second hole so that the stop can be screwed at an angle of 45 degrees.
Step 7: Test it
Since both the table and the mechanism are now ready, it’s time to test this device in action. There was no need to modify anything, since the device works without a hitch.
And this is how a pile of garbage turns into a useful thing!
Option 2 - how to quickly and easily make a pendulum saw
If you have a welding machine and consumables, you can make a stationary machine from an angle grinder in a matter of hours. Moreover, you don’t need to buy anything for this, since the necessary tubes, fittings and profiles can be found in a garage or a pile of scrap metal. To build a simple cutting machine using an angle grinder as the main tool, you will need to use the following parts:
- Metal profiles measuring 150-200 mm
- Sleeve 10-15 cm long
- Hairpin 20 cm long and 8-10 mm in diameter
- Washers
- Metal corner
- A sheet of metal 2-3 mm thick, which will act as a base
So, to make a simple homemade product you will need to perform the following steps:
- Cut the stud to the required length, then place the sleeve inside (it should move freely along the stud), and tighten the nuts onto the ends of the protruding stud. Tighten two nuts on both sides, since the second will act as a lock nut
- The nuts should not be screwed in completely; they should not come into contact with the sleeve
- The resulting structure should be welded to a steel sheet. In this case, it is important to grab the nuts, and the sleeve must remain mobile, that is, move freely
- At the next stage, it is necessary to make mounts for the grinder. To do this, you will need metal profiles, as well as washers that will act as brackets
- Cut to the required length (it all depends on the tool used, but for a low-power grinder, the profile length is 15-20 cm). Weld washers to the ends of the profiles. It is recommended to use at least 2 mounts for an angle grinder, but three is better
- The angle grinder has threaded holes for connecting the handle. We use these holes to attach the tool to the movable base using pre-prepared brackets
- First, the brackets are attached to the tool using bolted joints of the appropriate size, and then the reverse ends of the profiles are welded to the sleeve. As a result, we get a ready-made machine that can be produced literally within an hour
The photo below shows the design of a homemade machine made from a grinder with a detailed description of the necessary materials. Using the instructions, or for some, a diagram is enough to make a homemade cutting machine. It is important to take into account that a casing for an angle grinder must be provided, otherwise the risk of serious injury increases. Operating the tool without protective clothing, not only on a person, but also on the device itself, is strictly prohibited.
The simplest device is ready for use. The angle in the machine design is used as a guide for centering cutting materials. You also need to make a straight hole in the iron sheet, into which part of the disk will “go” when sawing workpieces.
How to Make a Miter Saw from a Grinder
How to make a homemade cross-cutting machine (trimming machine) for wood with your own hands
The design of the crosscut saw is identical to that of a circular saw mounted above the work table. Its main advantages: compactness and light weight. Taking advantage of this fact, saws are used not only in workshops, but also on construction sites.
How to make a hand-held electric saw from a grinder with your own hands? Algorithm for making a miter saw, stationary and tabletop circular saw. How to make a trimmer with your own hands from an angle grinder. Another time, made by hand
The tools are quite bulky and not heavy.
They are comfortable to use in stationary mode.
A miter saw is designed for a single task - cutting the ends of lumber at different angles. Due to the fact that the workpiece is motionless on the table during cutting, the cut comes out carefully and not unstained. Craftsmen who deal with wood processing trust this particular tool more. At the same time, saws made independently are successfully used for years.
The simplest convenient miter saw from a grinder. Pendulum saw made of shit and sticks
A very simple, convenient cutting machine for metal from an ordinary grinder
in an hour of time. It’s pendulum
Option 3 - an even easier way to make a cutting machine from an angle grinder
Many people do not have welding machines or do not know how to use them, so if you belong to the category of these people, then you should not despair. There is also no need to ask your friends and neighbors to make a machine. It is quite possible to do without welding, and bolts and nuts will be used as the main connectors. So, to construct a simple cutting machine from a grinder, you will need the following consumables:
- Corners - and a small number of them up to 1 meter. If there are pieces, that's even better. Corner thickness is standard 2-3 mm
- Steel tube 30 cm long - will be used as a handle on which the grinder will be attached
- Steel sheet 2-3 mm thick and of any size, but not less than 20x20 cm
- Bolts with nuts with a diameter of 8-10 mm
Let's start making a homemade instrument. The manufacturing process is as follows:
- First, you need to attach a 15 cm long corner to the steel sheet
- Attach another corner perpendicularly to the wall of the lying corner using bolts and nuts. If there is welding, you can make tack welds
- Attach the tube to the perpendicularly installed angle using the same bolted connections
- The tube should move freely, so there is no need to tighten the nut on the bolt. Instead, you need to tighten the fixing bolt with another nut.
- Connect two steel plates measuring 5x6 cm to the tube at a distance from the connection point. These plates will be used to attach the grinder to the handle
- Attach the angle grinder to the casing with pre-prepared steel plates
As a result, we get a simple cutting machine, a photo of which can be seen below.
There are many options for manufacturing similar structures, so it all depends on what you want to get in the end and what consumables are available. Working with the version of the cutting machine discussed above is not entirely convenient, as it is necessary to constantly hold the tool (due to the lack of a return mechanism), but this is easy to fix. A spring must be attached to the protruding part of the tube, which will return the tool to its original position, eliminating the need for the master to hold the operating unit.
Assembling a homemade cutting machine
A metal plate is welded to the ends of the shock absorber rods. A mount for an angle grinder is welded to the plate.
The base of the machine is welded from metal corners. A stand with a previously assembled assembly is welded to it.
Additionally, you will need to make a rotation limiter for the rack. We weld the fasteners to install the return spring.
At the last stage, all that remains is to make two working platforms with cuts at 45 and 90 degrees, and weld stops for the workpieces to them.
The step-by-step process of making a cutting machine is shown in the video below. This idea belongs to the author of the YouTube channel Mr Novruz.
Stand For Angle Grinder With Broach
Andrey Vasiliev
Ask a Question
How to make a start button for a pendulum machine from an angle grinder
The angle grinder works when you press a button. Moreover, the spindle rotation speed depends directly on the pressing force of the button. This means that an adjustment mechanism is built into the button, the operation of which facilitates the operation of the tool. When operating an angle grinder on a stationary machine, it is necessary to consider the starting system so that you do not have to hold the handle with one hand and press the button with the other.
If the tool is equipped with a regular button, which automatically locks when it is turned on, as for example in the first version of the machine, then no difficulties arise here. First, the tool is turned on, and then you can perform work. However, most angle grinders are equipped with self-off buttons that must be held by hand while operating. There are two ways out of this situation:
- Use ties (for example, plastic) or clamps of the appropriate diameter. They fix the button in the pressed position. In this case, it is also necessary to take into account the latch, which is responsible for turning the tool on automatically. Both the latch and the button must be tightened with a clamp, tie or other similar materials. In this case, the principle of operation of the device will be as follows - if you need to start the tool, you need to plug the plug into a socket or make a switch
- It is rational to remake the starting system if the tool is planned to be used more often as a cutting machine than as a stand-alone angle grinder. To do this, it is necessary to route the wires from the angle grinder to a separate switch, which will turn the tool on and off if necessary.
The power button, if it is displayed, is best located on the handle. A homemade machine does not require large expenses for its production, which, in fact, is its main advantage.
Do-it-yourself wood lathe with a copier
A copier is a device that allows you to make carvings on a workpiece according to a given template. Thanks to it, it becomes possible to produce similar parts at high speed. A wood copying machine allows you to avoid painstaking work and is most often used in home workshops.
To make a copy element yourself, you can use a manual router as a basis. It must be placed on a plywood board, the thickness of which should not be more than 1.2 cm. The standard dimensions for such a workpiece are 20x50 cm.
A lathe and copying machine allows you to make monotonous wooden parts with your own hands
Helpful information! The productivity of a wood milling and copying machine allows it to be used not only at home, but also in small industries.
Then you need to drill holes for the fastening elements, as well as install small bars that will serve as supports for the functional part. Next, the cutter must be placed between the clamps and secured using ordinary self-tapping screws. After this, all that remains is to place the block (7x3 cm) on the machine. It is used to attach the stencil.
This is how you make your own wood lathe with a copier. Videos that allow you to clearly understand this issue can be viewed on the Internet. Making this device is not that difficult. All work comes down to a simple modernization of a conventional unit.
Important points when constructing a pendulum machine
The type of tool under consideration belongs to the category of dangerous, therefore, when constructing the equipment, the following main points are taken into account:
- The manufacture of the frame is the basis responsible for the reliability of the installation. It is impossible to save on the manufacture of the frame, therefore only steel materials are used, the thickness of which is at least 2 mm
- Frame - the design of this part can be different, but the most important thing is to ensure the mobility of the cutting tool. This is achieved through the use of different materials, but in any case, you need to think carefully about the quality of the hinge joint, since your life depends on it. It’s better to spend more material, but make a high-quality and safe cutting machine
- Tool fastening - the angle grinder is fixed directly to the moving part. Moreover, the fixation must be as reliable and high-quality as possible. When working with an angle grinder, “reverse impacts” may occur, which are dangerous because the machine may simply be damaged, and the master who performs the manipulation will suffer as a result.
- Providing a counterweight is a small but important element that allows the tool to return to its original position when not needed. This will eliminate the possibility of damage to parts of the human body
- A protective casing - it must be present, no matter what design of the machine is invented, but using the device without a protective casing is strictly contraindicated
- The presence of a ruler - this will increase the accuracy of the work performed, which is important when cutting parts such as tiles, ceramics, and metal
- The starting device is also a kind of safety-affecting device. The control button should be located in close proximity to the master performing the work. This will allow you to quickly react at the right time by turning off the power supply to the tool.
In addition to options when the machine has a moving part, there are also methods for manufacturing cutting devices with the tool located in the lower part of the bed or workbench tabletop. However, this option is suitable only for cases when sawing wood is planned. Below is an example of how to make a home sawmill from a grinder quickly and easily. Details on making home sawmills can be found in this article.
This is interesting!
The tool can only be used in this form with disks or circles for processing wood. Cutting tiles and metal in this position of the grinder is extremely dangerous.
Do-it-yourself miter saw from a grinder
The design of the miter saw is similar to a circular saw mounted above the workbench.
Its main advantages: compactness and light weight. Thanks to this, saws are used not only in workshops, but also on construction sites. Unfortunately, homemade tools are quite bulky and heavy.
They are convenient to operate in stationary mode.
A miter saw is designed for the sole purpose of cutting the ends of lumber at various angles.
Due to the fact that the workpiece is stationary on the table during cutting, the cut is neat and clean.
Craftsmen who deal with wood processing prefer this particular tool. Moreover, self-made saws have been successfully used for years.
Trimming from a grinder
grinder miter saw
Technical characteristics of a cross-cutting machine with a broach, assembled by yourself:
- disk revolutions - 4500;
- cutting length - 350 mm (much higher than that of a middle-class factory tool).
The tool can be removed from the table and the grinder can be used for its normal purpose.
Manufacturing details:
- The turning device of the tool is installed on the turning axis of the car wheel (pin), it is held by a 150 mm ball bearing (if you can find more, it will do).
- We weld lugs onto the outside of the bearing to secure it to the base. It is fixed using M6 screws.
- To protect against chips, the clip is covered with a box.
- We make the broach from shock absorbers from a truck (broken ones will do). Oil is poured out of them, holes are drilled for ventilation, which should be covered with a mesh to remove dust and chips.
- To prevent a jerk from being felt when starting work, the saw is supplemented with a soft start module, which slightly reduces the speed.
- The last stage of work is the manufacture of protection for the disk.
Design disadvantages:
- very noisy;
- To adjust the accuracy of wood cuts, scraps of timber are used, after which the rod is fixed firmly and you can work cleanly.
Trimming from various scrap metals
The cutting frame is made of metal
This is a fairly heavy crosscut on a stationary metal table.
It will take some effort to control it.
But in the end, the saw mechanism moves smoothly, without jerking, and trimming with your own hands is easy.
Specifications:
- electric motor power - 2.2 kW;
- disk revolutions - 2800;
- cutting depth 80 mm.
Materials and tools required for assembly:
- 900 W electric motor;
- a metal sheet;
- metal corner;
- channel;
- hinge group;
- powerful spring;
- Bulgarian;
- welding machine;
- file.
The bed is made from adjustable supports, a metal corner and posts from an old bed. The working surface is a metal sheet like a table surface, in which we cut a hole, and process the edges with our own hands using a file.
- The pendulum stand for the saw is welded from a channel mounted on a sheet of metal; its height is about 80 cm.
- The stand for the electric motor is made in the form of a movable metal plate mounted on hinges. When installing an electric motor, a spring is used as a stabilizer. Then you can do without a pendulum and belts.
- The tension belts are adjusted with a conventional hinged bolt, and the pendulum for the mechanism is also made of metal.
- As an operating tool, a disk with a diameter of 420 mm is installed on the trimmer.
A miter saw is quite dangerous equipment; when assembling it with your own hands, you need to take care of protective boxes and covers. After all, the errors in the operation of homemade equipment are much greater than those of factory equipment.
Advantages and disadvantages of homemade trims
Advantages:
- Making your own tools saves money. For example, about 500 rubles were spent on modifying the grinder. The cost of a homemade table and saw mechanism is affordable for most craftsmen;
- main parameters: cutting depth, rotation speed, disk diameter, engine power, table dimensions, selected to suit your own needs;
- Having assembled the tool with your own hands, the master can easily find the cause of the problem and fix it.
Flaws:
- The service life of the tool depends on the quality of the source materials, and homemade products are usually assembled from all sorts of rubbish;
- Homemade trimmers are rarely powerful enough. After all, for high-quality operation of the equipment, careful selection of parts is necessary;
- sometimes the money saved on purchasing a factory tool is spent on repairing and modifying a homemade one;
- craftsmen often skimp on their safety by not equipping the table and saw with protective devices;
- Factory saws are equipped with a graduated scale that accurately indicates the angle of cutting the wood. It is difficult to build such a mechanism on a home device.
A few more convenient and interesting homemade products, including an excellent stationary one, a mobile one, and one made in a couple of minutes from several plywood and screws:
Review and comparison of factory models
| Model | RedVerg RD-MS210-1200 | Hitachi C10FCE2 | Makita LS1040 | DeWalt DW 711 |
| Power, W | 1200 | 1950 | 1650 | 1300 |
| Cutting height, mm | 55 | 59 | 93 | 55 |
| Cutting width, mm | 120 | 144 | 95 | 140 |
| Tilt angle, degrees | 45 | 52 | 52 | 50 |
| Rotation speed, rpm | 4500 | 5000 | 4600 | 2750 |
| Weight, kg | 6,8 | 11,9 | 11 | 20 |
| Dimensions, mm | 430*527*445 | 460*561*628 | 530*532*476 | 590*620*490 |
| Price, rub | 6290 | 13676 | 15826 | 30432 |
How to Make a Miter Saw from a Grinder
How to make a homemade cross-cutting machine (trimming machine) for wood with your own hands
The design of the crosscut saw is identical to that of a circular saw mounted above the work table. Its main advantages: compactness and light weight.
Taking advantage of this fact, saws are used not only in workshops, but also on construction sites.
How to make a hand-held electric saw from a grinder with your own hands? Algorithm for making a miter saw, stationary and tabletop circular saw. How to make a trimmer with your own hands from an angle grinder.
Other times,
hand-
tools are quite bulky and not heavy. They are comfortable to use in stationary mode.
A miter saw is designed for a single task - cutting the ends of lumber at different angles.
Due to the fact that the workpiece is motionless on the table during cutting, the cut comes out carefully and not unstained.
Craftsmen who deal with wood processing trust this particular tool more. At the same time, saws made independently are successfully used for years.
Trimming from a grinder
Technical properties of cross-cutting with broach, assembled in artisanal conditions:
- disk revolutions - 4500;
- cutting length - 350 mm (much higher than that of a middle-class industrial tool).
There is an option to remove the tool from the table and not use the grinder for its usual purpose.
- The turning device of the tool is installed on the turning axis of the car wheel (pin), it is held by a 150 mm ball bearing (if you can find something simple, it will do).
- We attach lugs to the outer side of the bearing by welding for fixation. How to make your own ice drill from a screwdriver. It is fixed with M6 screws.
- To protect against chips, the clip is covered with a box.
- We make a broach from shock absorbers from a truck (broken ones will do). Oil is poured out of them, holes are drilled for ventilation, which should be tightened with a net to remove dust and shavings.
- To prevent a jerk from being felt when starting work, the saw is supplemented with a soft start module, which slightly reduces the speed.
- The final step of the work is making protection for the disk.
- very noisy;
- To adjust the accuracy of wood cuts, trimmings of blocks are used, after which the thrust is fixed aggressively and you can work cleanly.
43 Mounting saw from a grinder
Email mail. Tel. 8-916-172. three eight four nine. Is it profitable to use biogas at home?
What are the advantages and disadvantages of homemade machines made from grinders?
The homemade products in question have some advantages and disadvantages, which everyone who has set out to make a cutting machine from an angle grinder also needs to know about. The advantages include:
- Having a stationary machine in the garage, you can quickly, and most importantly, efficiently cut different materials
- Obtaining a high-quality and even cut, which makes the device perfect
- Cheap - if you have an angle grinder, then the cost of manufacturing the machine will be minimal
Now let’s find out what disadvantages the homemade device in question has:
- Low reliability - even with the most competent approach, the possibility cannot be ruled out that a person may receive various injuries just because of working on such homemade equipment. To protect yourself, you need to work in protective clothing
- The difficulty of transporting the device depends on its size and weight. Only if the machine is called stationary, then it is intended for use in only one place
If you have already managed to manufacture the type of equipment in question, then understanding the correct operation of it will not be difficult. Already from the first test of the tool you can feel how effective its work is. Below is a selection of photos showing options for homemade cutting machines from grinders. In addition, a tool such as an angle grinder is fraught with many interesting ideas for expanding functionality, but that’s a completely different story.
Converting an angle grinder into a machine step by step: 10 assembly stages, electrical diagram for drawings
To create a machine yourself, you need to choose a design that matches your existing skills and capabilities. The easiest way is to assemble a machine from blanks created according to drawings in a specialized metalworking workshop. Otherwise, you will have to master welding technologies and purchase the necessary equipment.
Below is a step-by-step self-assembly algorithm with useful comments:
- After approval of the project parameters, the necessary materials, workpieces, tools and replacement attachments are purchased. The shopping list is determined based on the prepared set of design documentation. Compliance with current standards is not required in this case. However, all important details must be included, as in the examples above.
- Blanks for the power frame are cut. The table is made from sheet steel with a thickness of at least 5 mm.
- A transverse shaft is welded to the pendulum arm. When creating this unit, the perpendicularity of the parts is carefully controlled.
- A grip in the shape of the letter “P” is suitable for attaching an angle grinder. A hole for bolts is made in its side parts. With these fasteners, the hand tool is rigidly attached to the machine bed. Choose a fairly strong part of the grinder body.
- Additional fixation is provided using a metal clamp. All of the above mounts are made rigid to improve accuracy.
- The swivel bearings are pressed in. Instead of standard factory-made units, steel pipes with thick walls of suitable internal diameter are used.
- The assembled units are fixed on the axis of two sides.
- The pendulum is attached to the platform by welding. To avoid damaging the bearings, it is recommended to limit the temperature rise. To cool, use a cloth soaked in water.
- Weld a block with a mount for an angle grinder. Reinstall the angle grinder, protective devices, and return spring.
- They check the quality of the assembly, the reliability of the fastenings, and the functionality of the pendulum. Connect the machine, check the functionality first at idle and then in operating mode. The groove in the table is cut with a disk of appropriate width.
Picture No. 8. Connecting a magnetic starter with shutdown buttons and a protective thermal relay.
Look at Picture No. 8. Here is an electrical diagram for the drawings that improves the protection of equipment from overheating. It is also useful for quick emergency shutdown. One or more buttons for breaking the corresponding circuit are installed in a convenient place in the machine body. Foot operated switches are also used.
