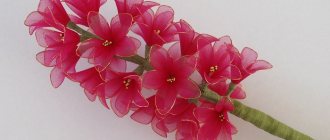
Hello friends! Last time I promised to write an article about roses in different techniques. I hasten to fulfill my promise. Today I have prepared for you as many as 5 master classes on making roses from satin ribbons.
Roses made from ribbons can be used for different purposes; they are suitable for interior decoration, for decorating hair or clothing. You can use them to create entire bouquets for a wedding or flower trees, as well as just individual buds, for example for brooches or hairpins, etc. In general, flower arrangements always look very beautiful and are suitable for different purposes.
Therefore, let's start making roses, and everyone will come up with a purpose for them for themselves!
Basic set of materials for making rosettes from ribbons:
Satin ribbons Lighter Glue Scissors Measuring tape Threads with a needle
Start immediately
Any fabric or ribbon is suitable to create a masterpiece, but veil flowers have a charming appearance and attractive abilities; it is quite difficult to pass by and not stop to admire them. This type of activity will not be too expensive; on the contrary, the accumulated scraps will be recycled and at the same time will bring great benefits to the owner; with the help of the resulting products you can decorate curtains or furniture.
Fashion for artificial flowers
The history of creating artificial flowers goes back thousands of years. Various available materials were used: clay, feathers, paper, fabrics, beads.
The first mention of flowers made from matter of varying densities dates back to the 3rd millennium BC. e. The fashion that originated in Egypt gradually migrated to the European continent. In the Middle Ages, the altars of Catholic churches were decorated with artificial flowers. Exquisitely executed flower bouquets have become an integral part of the fashionista's look.
Dresses were decorated with brooches, and hairstyles were decorated with hairpins with skillfully sewn and twisted pieces of fabric. In the 19th century, fabric roses migrated to ladies' hats, handbags and various accessories. The men's suit was decorated with boutonnieres.
Roses made of satin fabric
They are quite practical, and their production does not require much time and effort; depending on the desired dimensions, you can easily calculate the amount of base material. With the help of a step-by-step master class, all questions about the process will not make you think long, and the preparatory work will contribute to coordinated actions. The list is approximately like this:
- Shreds.
- Colored threads.
- Needle.
- Sharp scissors.
- Measuring device.
- Steam iron.
Everyone chooses the shade independently depending on the purposes for which the figurine is created; understanding the nuances of how to sew a rose for beginners will require attentiveness and determination. One thing is for sure, the end result will not leave even the most strict connoisseurs indifferent.
Embroidery with heart ribbons, simple work
Perhaps this is the simplest ribbon work that a beginning craftsman can do.
So, the execution technique is as follows:
- For beginners, it is recommended to use fabrics that are not very dense so that the needle with the material can be easily threaded. When all the necessary elements required for work have been collected, you can begin to work.
- A beautiful, neat heart is drawn on the fabric surface. To begin with, you can try embroidering a small heart to get a feel for the technique.
- For this embroidery it is worth preparing red material. For those who want to complicate their task, it is recommended to use one or more colors to embroider the middle of the figure.
- Embroidery begins along the contour. The material is laid in one direction using a needle. This is done with small stitches. If they are longer than 5 cm, the work will look sloppy. The optimal stitch size is 2-3 cm.
- When the outline of the figure has been embroidered, you can proceed to the next row. If the work uses two colors, then the second row can be made pink. And the third row will be red again. Thus, the heart turns out to be red-pink.
- In the middle of the figure, the last stitch is made with ribbon. At this stage the work ends.
This is perhaps the simplest tape job
Getting started is easy
Most materials tear easily, so with simple, careful movements you need to prepare strips of a certain length. The width of each workpiece is 8 centimeters; if the craft is planned to be large in size and the diameter is impressive, you will need fairly oblong pieces.
After cutting out the rose petals, you need to smooth them with an iron; thanks to such manipulations, you will be able to get rid of curls and smooth out the base well.
Divide the workpiece folded in half into even folds and grab it with threads; the output will be a square. A fairly simple method that even a beginner can handle; do not forget that the fastening element must be the same shade as the main one, otherwise all the seams will be noticeable.
Having walked the needle along the raw edge, you can move on to the next stage. If you have a sewing machine at home, it will speed up the process significantly; such actions will not affect the beauty of the rose made from the material.
How to embroider a simple rose with ribbons
Option 1
The easiest way to embroider a rose with ribbons, accessible to beginner embroiderers. This is a web rose. It's very easy to do.
- Using either sewing thread or your ribbons, make five straight stitches in a ray pattern (Figure a). Or it can be three crossed stitches, as in the photo.
- Bring the ribbon to the front side and begin to weave the threads of this warp with your ribbon in a checkerboard pattern. This means that you need to pass the tape once under and once over the warp stitch (Fig.b). Continue until your warp stitches are completely covered (Figure c).
Now your rose is ready.
Option 2
- Take the tape and fold its cut. Twist it three or four times to form the core of the flower. (Fig.1)
- Using threads matching the color of the ribbon, secure the core of your future rose. (Fig.2)
- Fold the edge of the ribbon at an angle to create a fold. This fold must be secured with regular stitches. (Fig.3)
- Continue making folds and sewing them to the base. (Fig.4)
- If you are using a wide ribbon, secure the folds with several stitches, moving from the base of the flower upward. (Fig.5)
- You have made the core of the rose, which will need to be sewn in the center of the outer petals. Don't make this core too big. Place a seam along the edge of the ribbon and pull it towards the base of the flower. Secure. (Fig.6)
- Now embroider the outer petals of the rose. (Fig.7)
- Using matching threads, sew the rose into the middle. (Fig. 8) Before sewing on the rose, twirl it in your hands and determine which side it looks better from. The flower looks more beautiful if the widest petal is located at the bottom.
- Now bring the needle and ribbon under the core of the rose. Insert the needle back into the fabric to form a loop. Don't tighten it too much, let it be wavy or twisted. This will create a beautiful petal. (Fig.9)
- Fill all the empty space at the center of your rose with these petals. (Fig. 10)
Option 3
If the task is how to embroider a small rose with ribbons, we suggest choosing the following simple technique:
1 Attach the ribbon to the needle. We draw the tape from the bottom up at the center of the future bud.
2 We retreat 7 cm, place the free edge of the tape on the needle, which is directed to the place where the tape and fabric are attached.
3. We assemble the tape into an accordion in increments of approximately 1 cm.
4 We pull the ribbon through the fabric from top to bottom as close to the center of the bud as possible. We get a small rose.
Such miniature flowers look beautiful when there are several of them at a short distance from each other.
Formation of the whole
By twisting the resulting tape into a roll, you can see how a nice appearance begins to emerge; the folds at this moment should be located on the outside. Each turn is carefully secured along the inner edge; if the production of a rose involves an open bud shape, this is corrected by the density of the roll.
By pulling the outer rows together, the structure will acquire the desired splendor. All edges must be bent inward so that the craft looks graceful and flawless. The lovely flower on a fabric dress is ready; it’s up to everyone to decide whether to use it in their new look or give it to a loved one.
Note!
- Wood burning for beginners: tips and secrets for burning pictures
Plasticineography - interesting options for creating pictures from plasticine on cardboard for children
DIY scrapbooking for beginners: what it is and how to do it. What you need to create a beautiful album or notebook (photo + video)
Floral ribbon embroidery for beginners
A simple lesson for beginners will be how to embroider a rosebud for a picture step by step:
- Using a thread matching the color of the strip, make 5 stitches to create rays from one center - the outline of the flower.
- Thread the ribbon into a needle, make a knot - insert the needle into the middle a short distance from the edge, holding the fabric, tie a flat knot.
- Bring the needle and ribbon onto the face, twist 5 rays in succession so that the fabric looks shiny side up. The ribbon should pass alternately under and above the beam. Wrap the base thread sequentially, in a spiral, so that the rose petals are in a checkerboard pattern.
A lesson in embroidering lilac flowers for a painting for beginning needlewomen step by step:
- You will need 2 needles - with ribbon and thread. Bring both to the front, make 2 stitches along the ribbon, 1 across, 2 along, 1 across.
- Pull the thread and pull off the ribbon to create a flower.
Spectacular rose on the head
Handmade, it will be an excellent addition to an outfit prepared for a performance on stage; such exclusive items have the ability to surprise and captivate the eye. The lightness and freshness of the stage image will give the audience unforgettable emotions and a positive attitude.
Having learned how to twist a flower from fabric, any connoisseur of such things will find proper use for them, wearing unique jewelry becomes fashionable, and production does not require large expenses.
Important! By applying the knowledge gained, you can improve an old bag and give it a second life, voluminous compositions will do their job, and when you go out into the street, passers-by will not even realize that just recently the current masterpiece was collecting dust in the closet.
Craft with curly edges
A bouquet of such floral arrangements will delight even the most selective handmade connoisseurs. Even a school-age child can make such a craft, since the technology does not require complex manipulations with fabric.
The creation process consists of the following steps:
- First you need to cut a strip of fabric with wavy edges on one side.
- Then the “waves” need to be sewn along the edge.
- Afterwards, grab the untreated side with small stitches and pull the thread together to form a bud.
Additional Information! To create such a flower, you can use a variety of fabrics, even thick ones. The main thing is to properly process the border so that the threads do not come out of it.
- When the bud is ready, it needs to be secured with a metal stick or a large wooden toothpick.
- The leaves are attached to the bottom using hot glue or thread.
The result is pretty flowers that can be combined into a bouquet and given as a holiday gift.
Fabric rose brooch
Perfect for those who like to add freshness to their look, a spring dress decorated with such a trifle will bring joy to others and delight the eyes of men passing by. Having taken advantage of your imagination of ideas, maybe as many as you like, you shouldn’t be ashamed of your deepest desires, you want to attach large plants to your favorite hat, you need to immediately take decisive action.
Other ideas
Silk flowers with the addition of beads look interesting; different sizes of the product fit perfectly into wedding or evening dresses. Stylish compositions with many details will make formal clothes even more attractive, and beads will add uniqueness to the overall look. By embroidering an item with your own hands, you can choose the optimal location of each element and emphasize its advantageous aspects.
Note!
- How to make a craft with your own hands: what you can do with your own hands at home
- DIY foam crafts: snowman, Christmas tree, sculptures, original figures with instructions (photo + video)
Papier mache from egg trays, boxes, cassettes: the best ideas on what can be made from egg packaging
Rose and basic postulates
On the canvas you need to create five loops that resemble a star. Through these loops we tighten the ribbon in the same color in a circle, but so that it passes either under the loop or above it. As a result, you get a rather beautiful bud, which can be complemented with elegant leaves, beads or beads, which will symbolize drops of dew.
Cobweb rose in 5 minutes in MK, instructions for making amazing roses
Examples of schemes supplemented with lilac branches.
Accessories and materials for embroidery
- Canvas, base fabric
- Hoop
- Ribbons
- Scissors
- Awl
- Multi-colored threads
- Two needles: one tapestry needle with a large eye and the second a regular sewing needle for thread
To begin with, you can use any fabric, color too. For beginners, it is better to take canvas as it is easier to learn. In the future, you can choose a base of better quality so that the composition can decorate your interior or a gift that could pleasantly surprise others. It is necessary to thread it into the stretch, into the hoop. They can be rectangular or round. We embroider a rose from satin ribbon.
This activity is quite simple, the main thing is to have patience. And things that, in your opinion, have outlived their usefulness can be decorated in the same way as in the picture.
You will find one example for beginners in our section. Schemes for creating a future painting can be found on the Internet. Photos of finished products amaze with their magnificence.
Fabric flower decoration
Hairstyles will also be a good option for a festive evening; a hair clip looks great on children. In the form of a small bracelet on the hand, it harmoniously combines with any clothing for relaxing in noisy companies. Thanks to the long-lasting perfume, it will be possible to give a beautiful accessory a pleasant smell; every movement will be accompanied by a sweet aroma.
For home
Flowers made from fabric for curtains will complement many ideas for improving rooms; long or short curtains will take on a truly charming appearance. When decorating a room, you can notice how it will become brighter and more comfortable, and relaxation will bring positive emotions. Gray winter days will be hidden behind the windows thanks to pretty plants spread across the entire wall.
To the nursery
It’s easy to diversify a child’s room and add a magical touch with a pattern for fabric flowers; it is not necessary to make the models close to reality. The combination of unusual colors will immerse children in a fairy tale and become a reason for various exciting trips without leaving the apartment.
To the kitchen
The room for eating also needs improvement; jars for storing cereals or cabinet doors can be transformed. Having a tea party with invited guests will bring more joy, thinking about how to make a rose from fabric should take into account the preferred shades of all family members and make a separate option for each. The care and attention will undoubtedly be noticed by loved ones, and words of gratitude will not take long to arrive.
Selection of ribbons and needles for embroidery
The needle should be:
- Tolstoy. Such a needle will make a hole in the fabric wide enough for the tape to pass freely without damage.
- With a big ear. The tape should pass straight through it: without bends or dents.
- Made of stainless material. Poor quality needles will corrode over time. “Islands” of rust appear, which make it difficult to pass through the canvas and stain the work.
Tapes should be:
- Thin. The tape should not create volume on the reverse side of the fabric. It is necessary that the tape itself easily passes through the canvas.
- Width from 7 mm to 2.5 cm.
- Permanent coloring. The embroidery will hang on the wall for years. Some colored ribbons and threads tend to fade.
Look for quality materials. You will pay a few rubles more, but the painting will retain its colors for many years.
It all depends on the idea. Feel free to imagine and don’t be afraid to experiment!
Selecting a canvas
What else is ribbon embroidery used for? On everything that is not taken by arrows from the touch of a needle. It can be not only fabric, but also leather, polymer material or even paper.
Most often, needlewomen prefer either canvas or dense natural material: burlap, linen or cotton.
What to choose: canvas or thick opaque material?
- The fabric looks like graph paper. The embroidery will be smooth and neat. It simply won't work any other way!
- No effort is required to make holes. Even the thickest ribbons pass through the wide holes of the canvas.
- Made a mistake? No problem. You can remove failed stitches and embroider them again. The quality of the canvas will not be affected
- There is no need to carefully get rid of the ends of the ribbons on the wrong side: they are still not visible.
- Appearance. A non-rough canvas without large holes looks much more elegant than canvas
- Transparency: you can see what's going on on the inside from behind.
- Aesthetics. The color and texture of the canvas are not appropriate everywhere
- There is no room for error. When bad stitches are removed, noticeable holes remain.
- Working with such a canvas is more difficult than with canvas
For a gift
Birthdays and celebrations of significant events have always provided an excellent opportunity for handicraft lovers to express themselves. From decorating rooms to souvenirs, all kinds of fabric flower patterns, templates and blanks are best used immediately to create designs.
Note!
- DIY vase: step-by-step photo instructions, master class for a beautiful and unusual craft
- Paintings from buttons, panels, appliques and compositions with your own hands: how to make flowers, a butterfly, a fish or a tree craft from buttons
Flowers made of wool (85 photos) - how to felt a flower from felt or a wool brooch. Step-by-step instructions for beginners
Various small shiny beads will also find their place on plants; thanks to specialized stores, they are easy to get, and the choice is so large that you can easily get confused at the counter.
Having small leftovers from sewing work, it is worth creating unusual plants and placing them throughout the hallway, then arriving guests will be in the mood for a good evening. If you plan a lot of designs, it is better to use stencils for flowers made of fabric; the production time will be significantly reduced.
Bud embroidery technique
Embroidering roses in two steps. First, the twisted middle is made, and then the outer petals are embroidered.
The core and outer petals of a flower
For the twisted middle you need a ribbon 2.5 cm wide, you will also need a needle and thread in the same color
We cut off a small amount, about 1 m, bend the tip - 3 centimeters with our right hand at a right angle (it doesn’t matter which side you start from - front or back), it will still spin. Then we bend it again, then put the fingers of the left hand - the index finger lies on the top edge, and the thumb under the bottom
We bend the top edge under the bottom, pull out the thumb, and a small triangle is formed. Now with our right hand we tightly twist it towards ourselves three times, aligning it along the top edge.
We stitch the center of the inflorescence with a needle and thread, all the turns. And so we twist it to the end of this geometric figure, which was formed on the left side when bending, that is, we turned it - we stitched it. The first one always twists tightly. As soon as you fixed the tape to the end with a needle, you again placed your fingers correctly - the index finger on the top edge, and the thumb under it. Bend the next triangle. And now you need to twist it more freely, the petals seem to deviate from each other. We repeat the same process of twisting and stitching with each turn. The new thread is fixed with a needle, turned again and stitched.
We lay the next one even more freely. A properly laid out ribbon is guaranteed to become an elegant creation. When many layers are wound, you can no longer pierce this bud with a needle, but only pick up a new turn to the bottom one. We twist the bud so that the diameter of the rose becomes 25 millimeters.
Detailed video lesson for needlewomen. Just five minutes and the rose is ready.
There was a small tip left where the first bend was. This is where the process needs to begin. We use an awl to pierce a hole in the middle of the fabric base. We insert the tail of our flower and send the needle and thread there to the wrong side.
From the wrong side, you need to pull the tip so that the rose fits tightly to the canvas. We secure it with thread and then cut off the excess along with the thread.
Now we thread our ribbon into a large needle with a wide eye. If you look at the bud from above, which is embroidered and inserted into the canvas, it will become clear in what order the petals need to be twisted and stitched, that is, twisted in a circle.
We twist the ribbon into a soft fold and pierce it under the petals. From the wrong side we retreat 2 millimeters, bring the needle to the front side of the fabric, and again create a soft fold. We repeat the puncture under the coils of the flower and make sure that everything is tightly and neatly laid out. There should be no gaps visible between those already stitched. When embroidering, you need to be careful when laying them out. Try to make them look nice, turn the twists as you like, the tape should fit as it should.
Tips from a craftswoman for handcrafting flowers
Next, after two petals, the third turn needs to be sewn differently
We advise you to pay attention to the jumpers that were created when piercing the main working material (there is a distance of 2 mm between them). They need to be covered with a third petal
This means that we move 1.5 cm to the right from the jumper. We twist the ribbon into a soft fold and pierce it. We sew the fourth petal further, retreating from it by 2 mm. Thus we lay them in a circle. We form the fifth turn of the rose, not forgetting to overlap the jumpers. Correct, tighten and lay them right away, then it will be difficult to do this. And we make sure that the level is the same. In this sequence, step by step, we sew eight blanks.
Joint activities
I always want to share the experience gained; young family members will be happy to do crafts of this kind; in order to interest the child, it is worth choosing a huge number of shades and allowing him to choose those that he really likes.
Some work will require the help of an adult, so it is better to be patient and be sure to prepare an additional tool. Large roses made of fabric will be much more convenient than small ones; on such models it is easier for children to understand all the stages of production.
For kindergarten
Arrangements for kindergarten can also be decorated using decorative buds; the parent’s task will be to assemble the blanks, and the child will design and attach all the parts with glue. By taking a little time to prepare, you can create a truly exciting evening together with fruitful communication on various topics.
Preparation for the process
Beginning needlewomen will need to purchase basic materials and equipment for their work.
When mastering embroidery techniques, it is best to start with canvas - it will be easier for beginners. The video presents the first lessons of ribbon embroidery for beginners.
For embroidery, clean fabric or with a printed pattern, tapestry or canvas are suitable, onto which patterns are applied snugly. In order to create patterns, you need to have at least two markers, one whose trace disappears after two days and the second, which can be erased with water.
Bag with ribbon embroidery
You can also embroider on finished products (gloves, handbags, dresses). Silk, satin, nylon and corrugated ribbons are suitable for this technique. Satin ribbons are most often used; they have a special weave of threads, the front side is clearly different from the back.
Working with thin, soft and elastic silk ribbons is quite easy even for beginners. From them you can create simple small flowers, more luxurious roses and complex shapes, the space can be used in any size. The most suitable material is the width of which is from 7 to 25 mm. The video demonstrates a master class “Ribbon embroidery for beginners” using satin ribbons.
For accurate and high-quality work, you need to purchase a wooden or plastic hoop on which the canvas or fabric is held.
To ensure that the process of mastering the technique of ribbon embroidery does not end quickly, for beginners it is necessary to use needles with blunt ends. A sharp needle can tear the fabric, but a dull needle gently pushes the threads apart and does not damage the base.
Embroidery materials
Before you start learning the technique of ribbon embroidery, you need to acquire some additional materials. You can't do without scissors and a lighter. To prevent the material from unraveling, it can be “stopped” with a lighter. There is no need to burn anything near the needle, otherwise the embroidery will be ruined.
When choosing a thicker fabric for work, you will need pliers and an awl. With their help it is much more convenient to pull the needle through the fabric.
Embroidery will become more beautiful and sophisticated if it is supplemented with beads, floss threads, decorative laces or yarn. The master class “Ribbon Embroidery for Beginners” demonstrates the use of additional decorations. It tells in detail how to correctly apply patterns, and then embroider them line by line. In the video, the master gives lessons in which he clearly teaches how, with the help of simple threads, ribbon embroidery becomes complete.
Simple and tasteful
The popularity of using such masterpieces in everyday life is growing, and the skills can be useful in all areas of life; it’s nice to hear compliments about things decorated with your own hands. Quite simple manipulations are sometimes impossible to distinguish from factory sewing; a lot depends on imagination and determination; armed with a minimum amount of tools, you can begin grandiose plans and achieve them.
Master class for beginners, getting ready to embroider
Before you start embroidering, you should prepare all the necessary materials and tools for the work. In order to embroider roses you will need:
- The fabric on which the embroidery will take place. It can be anything, but it is better for beginning craftswomen to take a canvas.
- A needle with a sharp end and a large eye. If the embroidery will be done on canvas, then you will need a needle with a blunt end. It is more convenient for her to work on such fabric.
- Any ribbon is suitable: size, material, color - choose to your taste. But please note that the most suitable size is considered to be ribbons about two centimeters wide.
- Threads, in some types of embroidery, thread is used to secure ribbons. Choose colors that are as similar as possible to the ribbons. Otherwise, the embroidery will look sloppy and tacky.
Embroidery Basics
- Before you start embroidering, make a small knot in the ribbon. It is needed to secure it to the fabric so that it does not fall off at the wrong time. To make a knot, bend a little ribbon and stitch this area with a needle. Be careful as the needle may damage the satin material.
- To make a rose, take a satin ribbon and twist it into a small bud. It will be the center of the flower. To prevent the bud from falling apart, sew its base with thread and attach it to the fabric. After fixing the bud, start working on the flower.
- Take a tape about two meters long. This amount of material will make a lush rose. If you need a small rose, use a smaller piece.
- Thread the needle and thread into the ribbon and start wrapping it around the bud, making small stitches. The shiny side of the material should be on top, then the picture will turn out bright.
- Make a stem and leaves for the flowers. To embroider a stem, take a narrow ribbon and twist it like a stem. Sew to fabric.
- To make leaves from ribbon, you need to cut out pieces in the shape of leaves and burn them with a lighter. Or sew a piece with a few stitches, giving it a leaf shape.
You will most likely have difficulty forming flowers at first. Video master classes will help you understand everything.
Embroidery according to patterns
Experienced needlewomen use special patterns when working on paintings. They are transferred to fabric and used as an outline for embroidery. For many beginning needlewomen, this approach seems too dreary and unnecessary.
Try using this method when embroidering a small picture. Transfer the design onto the fabric using a piece of chalk or soap. You will immediately notice how much easier it has become to work. You will know exactly where a certain flower should be, as well as what size the elements should be.
We bring to your attention simple patterns for embroidering roses with ribbons. Perhaps you will like one of the paintings and bring it to life.
Do not belittle the role of video tutorials when learning rose embroidery techniques. In this master class, the author embroiders a design on fabric. See how much easier this makes your work, and draw conclusions whether you should spend time transferring the pattern of the painting onto the fabric or not.
Beautiful roses made from fabric with your own hands
They will not only delight you with their spectacular execution, but they can also add new colors, spring mood and lightness to your life. Professional seamstresses have been using similar decorative elements in their work for a long time, and the end result reaches certain heights.
By experimenting with various components, it is necessary to highlight several of the most successful options and continue to improve your skills; perhaps the works that took first place at school exhibitions will in the future become an adornment for a handbag from a stylish brand. It’s definitely not worth stopping in your endeavors; perseverance and determination will definitely bear fruit.
Embroidery by thread
This version of the rose is also suitable for beginners and is completely embroidered on fabric, that is, there is no need to twist the middle first. Fasten the thread to the canvas and from this point make five stitches of equal length in different directions, like a star. The length of the stitch will determine the splendor of your flower. Now pull the ribbon to the right side near the middle of your “star” and begin to move it around the circle, alternately under and over the stitches. Don't over tighten or the flower will be very compressed. Instead of thread, you can immediately use ribbon, the main thing is to do everything carefully so that embroidery does not turn into a process of damaging the ribbons. A rose created in this way will be more voluminous and interesting than the flower described in the previous version. For clarity, view photos and videos.
Photo examples of fabric rose crafts
Please repost
0
