What boy doesn't dream of a toy car? And even better, made with your own hands. Let's consider what is needed to make a DIY car make your child happy.
What materials can be used for this, and what is the advantage of such a toy.
Volumetric figures of cars
Many people use paper. It forms volume perfectly. As a result, jewelry is made from pliable material.
- The product can be used as a toy in the future.
- An important aspect of inventory is density.
- A fake car is made from paper and cardboard. Stock up on glue to fit the pieces together.
- Using scissors, according to the template that needs to be placed on the canvas in advance, cut out the figure.
Cardboard vehicle fleet
A car made from cardboard is more durable, it can be played many times, and even the choice of manufacturing techniques is great.
- How to sew a decorative mini bag with your own hands
- Crafts from cotton pads - beautiful ideas and tips on how to make decorations and toys with your own hands (70 photos)
- DIY New Year's crafts: 70 photo ideas and a master class on making crafts for the holiday
Techniques for making models from cardboard
- By bending cardboard according to the diagram
- By gluing a large number of parts to obtain volume (for example, to make one wheel, you will need 4 round blanks that need to be glued together)
- By cutting out complex shapes and attaching without glue.
Find blank diagrams online or come up with them yourself, selecting part by part. Cut out the pieces using a utility knife.
Glue several almost identical parts into one. This will give you a streamlined model of the truck body/cab/tractor compartment and wheels.
Use a glue gun with silicone adhesive to securely attach the parts. Decorate the work with stickers or color it with felt-tip pens.
Working with this technique, you can make a whole fleet of cardboard cars.
- Crafts for Mother's Day - how to make simple and beautiful original decorations and toys with your own hands (130 photos + video)
- Craft flag - how to make it with your own hands correctly? Master class on making for holidays and parades (105 photos)
- Eyes for crafts: how to make templates and a master class on making eyes from various materials (100 photos)
Don’t forget to make a parking lot, garage or obstacle course from the same cardboard, because cardboard can be used to make not only cars, but also road signs, houses, bridges and much more.
Step-by-step implementation of a paper machine
- The first step is printing the parts. There are a lot of diagrams and templates on the Internet and other sources. Finding a photo of a fake car diagram is not difficult;
- If you don’t have a printer, you can draw the drawing by hand. Then use a pencil, ruler and eraser. A fake car turns out to be made entirely with your own hands. Refer to plans and drawings.
We make VAZ 2101
This domestic car was designed to help disabled people. When creating the drawings, the engineers wanted to introduce a separate seat for the stroller. After its release, the car spread throughout the world. Everyone dreamed of a penny. Over the entire period of production, more than 5 million copies rolled off the assembly line, some of which today can be found even in Europe.
Making a car with your own hands is done on the basis of a diagram that can be found on the Internet. This is the simplest option that can be made using a minimum amount of material and time. Brief instructions:
- the template is printed on a color or regular printer;
- cut along the contour;
- then bends are made;
- The sides are carefully glued together using PVA.
The piece takes several hours to dry. The craft can then be used as a competition entry.
Correct addition
For successful results in counterfeiting a car for a kindergarten or home, you must adhere to clear rules.
- Perform all actions according to the given steps.
- First, cut out the parts and glue the ends.
- Pay attention to the large elements first, then the small ones.
Master class “Colored car”
Cut out car parts in advance from paper of different textures. Old wallpaper, foil, wrapping paper, as well as velvet and foam paper are suitable for these purposes. Let there be several identical parts so that the child has a choice.
Pour the glue into a flat plate so that it is convenient to dip the brush into the glue and spread the parts.
Show your child how to glue the pieces and let him finish the job.
Complete the application with drawings of a traffic light, road, etc.
At 2 years old, the baby goes to kindergarten, and the teachers demand crafts. Devote just an hour to this activity and the child will be happy that he was praised.
Exercising with parents strengthens the family, strengthens trusting relationships and is also a lot of fun.
Paper fire truck
The sale of this vehicle will teach the child knowledge about company cars.
A fake fire truck requires the following materials:
- Glue,
- Two miniature boxes
- Colored paper
- And cardboard.
Use scissors as a tool. The cabin is created from a narrow box.
- It must first be divided into two parts.
- After this stage, you need to cover the parts with red cardboard. It is necessary to connect the body to the cabin.
- What's a car without wheels? Make them and add them to the fire truck.
- The staircase can be made of silver-colored paper. Foil will also work.
- A simple pen cap will serve as a flasher.
- The result is a toy that is educational in nature and suitable for many games.
Crafts cars from boxes
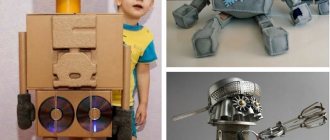
Excellent and easy-to-make machines are made from different boxes: shoe boxes, packaging for household appliances, cosmetics, and other available materials.
Fire truck made from boxes
A bright and loud fire truck always attracts a child's attention. Therefore, there are a lot of schemes for creating a fire truck with your own hands at home.
The model of a fire truck made from boxes can be arbitrary depending on the size and shape of the available material. The main thing is that you can design the cabin and body (or tank).
- Two boxes need to be fastened together and covered with bright red paper.
- Make wheels out of cardboard and attach to the car.
- Decorate glass, doors, headlights. They can be highlighted using white paint or narrow strips of white paper.
- A ladder can be made from two paper tubes and cotton swabs.
- The role of the hose will be successfully performed by a white cord.
- If desired, you can add flashing lights to the roof. And be sure to mark “01” on the side of the car.
If you want to make the fire truck more durable and original, you can cover the boxes with red fabric and sew on the necessary elements. The ladder can be wrapped in foil. You will get a very impressive model of a fire truck.
You can make a convertible from a sturdy shoebox. Simply cut the lid in half and decorate the box accordingly. The strength of the box allows you to use this craft for a long time in various children's games.
You can come up with a lot of ideas for craft cars made from boxes, depending on the size and shape of the existing boxes, the child’s needs and imagination.
From a large box you can make a play car, with a steering wheel, a seat for a young driver and wheels. The driver's seat can be made from a piece of thick foam rubber; the wheels and steering wheel can completely replace disposable plates or old vinyl records. If you glue strips of fabric to the places where the doors are attached to the body, they will open well and stay securely on the body.
Racing car
A racing car is the dream of many children. With due diligence in work, you will turn out to be a real participant in high-speed traffic.
- Use diagrams and drawings. There are a huge number of them on the Internet.
- Models vary in complexity.
- The car requires cutting parts and patience in assembling the structure.
- First, create a color version of the drawing. Cut out the necessary elements.
- The joints themselves must be glued.
- The car looks better using cardboard rather than paper.
Master class “A small car for a little girl”
The basis is two children's chairs and a refrigerator box. We cut out the parts according to the height of the child and the size of the furniture.
We connect the parts using clean sheets of A 4, completely covered with PVA glue. We also cover the uncovered parts with paper. For one wheel, we connect 3-4 circles, paint them with black paint and attach them to the car. Leave to dry.
Next is the process of painting and decorating, to the taste of the owner.
Military vehicle
As children, boys want to become soldiers. Delight your child by creating a car together.
There are two variations of a military car:
- According to the finished scheme,
- Fire truck method.
The materials are still the same - boxes of various sizes and cardboard or paper for pasting the frame. Please refer to actual images for realism.
If you don't have a color printer
Should you give up cutting and gluing a paper machine if you don’t have a color printer at home? Any difficulty should be used to your advantage. Is it a problem to get colored pencils or paints and a brush? No, that means the work should be in full swing, and the child will receive an additional task - carefully examine the picture on the computer monitor, and then color the printed template in the desired colors.
If your child worked with paints, you just need to wait for them to dry completely, and then cut out the parts and glue them together.
Interesting Facts
The highways and city streets of modern post-Soviet countries are overcrowded with foreign-made cars. You see a “compatriot” on the roads less often than a car made in Germany or Japan.
You can set a task for the boy - to find on the World Wide Web models of cars that were produced in the recent past, i.e. in the Soviet Union, and produce a fleet of vintage cars.
Parents can remember what cars they dreamed of as children, and what model they drove for the first time. It would be useful to tell a story about what advantages and disadvantages cars of the Soviet period had, and to recall the history of the creation of this or that model.
Collection "Zhiguli"
In the early 70s of the last century, cars called Zhiguli began to be produced in the USSR, which became popular. Tell the boy how many models were produced, why the first car was called a “penny”, and offer to collect a complete set of legendary cars. This will keep the boy interested in the idea busy for a long time.
Foreign collections
Having completed the work of creating a “garage” of Soviet cars, you can captivate your child with the work of making miniature models of modern domestic cars, and then move on to the “Americans”, “French”, “Germans” and “Japanese”. Here it all depends on the boy’s preferences, which brands he wants to have in his collection.
As you can see, there are many options to interest a child in making paper cars - the main thing is to have the time and desire for this.
Paper buses
Paper construction is a great hobby for a child. There are many free plans available online. For children, there are options that are easy to glue and cut out. People prefer Soviet models of this type of car.
- Print the drawing on thick paper or whatman paper.
- When printing in black and white, you should add color to the details yourself.
- Carefully cut out the elements.
- Then, using a ruler and a pen that does not write, you need to create the curves.
- They will serve for easy gluing.
- It is carried out with any type of glue, be it a stick or PVA, which must be applied carefully and slowly.
- Check that all parts of the future bus are thoroughly dry.
Master class “Fun Truck”
Give your child paper or napkins of different colors and let them tear them into small pieces.
Print out the outline of the “Fun Truck” car on cardboard and cover it thickly with PVA glue. Together with your child, randomly scribble pieces of paper onto the outline.
Brush off excess parts. The work is ready
Sequencing
- Prepare cardboard, glue, diagrams and scissors in advance;
- According to the drawing, cut out the elements and glue them onto a cardboard template;
- To complete the picture, you need decorations in the form of the sun, grass or bushes...
As a result, a unique fake appears that will delight parents and their baby. You can fit several machines into work at once, creating entire storylines. To detail the wheels, improvised means are used: buttons, bottle caps.
Crafts cars from waste material
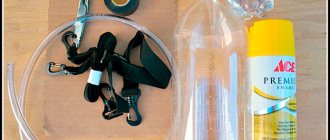
If desired, you can use various plastic bottles, trays, and various original packaging to make craft cars.
In a transparent body made from a plastic bottle, you can install seats and place figures of passengers on them. However, the design does not have to be complex. A bottle of body and wheels is enough.
You can make an interesting racing car out of a can of chips by attaching cardboard wheels and attachments to it using toothpicks. The bright jar does not require additional coloring. You will get an unusual machine.
Paper cars
They will not require a lot of money to implement. The nerves during creation will also be preserved. Children train their imagination and can constantly create new copies. There is nothing better than a car made by yourself.
It is also important that there are no absolutely identical models. Each car is filled with special features and style.
Translating means of transport into reality with paper is a great way to organize leisure time. As the child gets older, he will be able to make more complex models without any help.
For the kids, realizing their dreams with the help of paper, cardboard and other equipment will be remembered for a long time. Parents will also enjoy participating in machine engineering. According to the plan, interesting figures are obtained. Ready-made stencils make the process much easier.
Combine several types of activities at once. When working with your hands, conduct an oral conversation about the specialization of different types of machines. Explain to your child the basic rules for crossing pedestrian markings. It is necessary to discuss the correct use of scissors in fakes, so that the baby does not get hurt when doing it on his own.
There are a huge number of positive aspects to creating fake cars. Of course, fine motor skills and perseverance develop.
It is not for nothing that such activities are carried out by kindergarten workers in groups to train children’s memory. In the future, children will show interest in studying the structure and operation of machines.
Moving model
Using the origami technique, you can make a paper car that can drive. To do this you will need a sheet of A4 size paper.
Stages of work
The production of a working car model will take seven stages.
- Stage No. 1. The sheet is folded in half.
- Stage No. 2. By bending the upper right and lower left corners of the paper, we outline the fold lines.
- Stage No. 3. In the upper part of the workpiece we form bends in the form of triangles.
- Stage No. 4. The triangles are bent again in the central direction.
- Stage No. 5. The sides of the “race” car are formed by bending the outer sides of the workpiece towards the center line.
- Stage No. 6. The lower part of the craft is folded so that the triangles are at the top.
- Stage No. 7. The workpiece is bent in two, and the corners are tucked into the resulting “pockets”.
The racing car is ready to start. All that remains is to place the car on a smooth surface and blow. Under the influence of air flow, the car will move, thus simulating the movement of a real car.
Photo crafts machine
Craft Transport of the future
Natalya Suraeva
Craft Transport of the future
I propose to make a craft with your own hands from waste material: from the pages of old magazines and advertising leaflets, dedicated to Cosmonautics Day. Purpose: to develop an idea of space, develop imagination, thinking, hand motor skills, design abilities, the ability to highlight the features of a vehicle . Materials: magazine sheets, PVA glue, acrylic paint, disposable cups, cocktail straws, various decor. We make tubes from sheets of paper diagonally, connect them and twist them like a snail's house, coating them with glue. Select the desired size. Until it’s dry, bend the bottom into a plate shape, dry it and paint it with acrylic paint. We took the color blue. Let's dry it. Then we glue the cabin from a disposable cup and make a propeller from tubes. Insert support legs from skewers.
We decorate with decor, gluing it with glue and drawing elements in a different color. All is ready. You can use these paper blanks in class and the kids will be happy to color them. The young designers will come up with the rest themselves. Just help them glue the necessary parts and go to the exhibition.
Analysis of the future first-grader's copybook Analysis of the future first-grader's copybook. Bookstores offer a very large selection of copybooks for both mathematics and literacy.
Layout competition “Children's playground of the future” In our kindergarten “Teremok” a competition was held to design a playground for the future. My students, together with their parents, made a model.
Consultation for parents “Raising a future man” Do you want to be surrounded by worthy, determined, strong, truly courageous men in the future? Let your little sons.
Psychological portrait of a future first-grader Portrait of a future first-grader 1. Social development 1. The child calmly makes contact with adults and peers. 2. Communicates with peers.
Project “Kindergarten of the Future. I am a happy child” Project Kindergarten of the Future! “I am a happy child” Blagoveshchensk 2018 Type of project: creative design. Relevance:.
Project “Cafe of the Future” Municipal autonomous preschool educational institution “Kindergarten No. 201 “Island of Childhood” in the city of Cheboksary, Chuvash Republic.
Project “Science and profession of the future” Project “Science + profession of the future” Project participants: Children of older groups, teachers, parents. Project duration: short-term. Project “Professions of the Future” As part of the project “Professions of the Future”, pupils of the 2nd junior group mastered the profession of environmental engineer offered by Atlas.
Project in the middle group “City of the Future” Construction is one of the modern areas of development that we use in teaching children. The constructor allows children to learn.
Source
3 cars made from scrap materials with your own hands
Handmade products have already begun to appear in the automotive industry.
And there are many examples of machines assembled from materials that are at hand.
" Ferrari" by Joshua Redding. The appearance of this car happened not so long ago, in the American state of Indiana. Despite the fact that it does not have parts from a real Ferrari, it managed to cause an unprecedented stir. Each parking spot became the scene of a spontaneous photo shoot.
A car with a similar proud name was assembled by Joshua Redding, who was engaged in farming, at the same time as this former amateur auto mechanic. His household collected a large amount of a wide variety of garbage: old buckets of different sizes, an old steam boiler, a large wooden box, and even wheels from a wheelbarrow for construction work. It is unknown for what reason, but he did not dare to take all these things to the landfill. Suddenly, in the collected pile of various rubbish, he was able to see the outlines that the future car would take.
Redding chose Ferrari as the name for his homemade car. Despite the fact that the appearance of the car left much to be desired, the car turned out to be completely unique. Assembling a replica of a real Ferrari would be much easier, but copying a car created by Joshua would be almost impossible. It is unlikely that anyone else will have the same metal bucket with peeling paint. There’s no point even talking about decorative cows under the windshield.
Modified "Beetle". A car made from garbage can very well become a work of art if an artist gets to work. A resident of India named Hari bought an old Volkswagen Beetle for quite little money. The car was in a state of impossibility of movement, it was missing more than half of the parts required for successful operation, and the paintwork was almost peeling off. Definitely, a place for this vehicle was prepared at a junkyard, or in the workshop where Hari delivered it.
Artists, especially Indian ones, are not very rich people, but they have a considerable amount of free time. In order to carry out the “junk tuning”, a lot of different items were required: parts from broken cars, an old heater, a huge number of bottle caps, broken microcircuits.
The most interesting fact was that representatives in this country considered this type of tuning to be the best advertising. Now its author travels all over the country and demonstrates his creation at various exhibitions.
A racing car made from pots and garbage. People in China can create a copy of anything. This may include both technical solutions and design discoveries, as well as movie scripts and electronic devices. Cars were no exception.
Bottom line. All these creations of amateur designers once again confirm that, if desired, a car can be made independently, from the materials that are at hand.
Source
The most common ideas
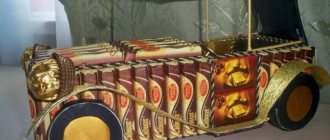
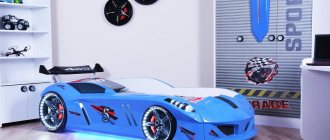
As you can see in the photo of children's cars made by hand, the material for them can be any available means: paper, cardboard, plywood, wood, metal, etc. There are no restrictions. The main thing is that the material is safe from an environmental point of view.
What to make a toy car from? It depends on who will do it. If it is a child, then his parents should carefully review the models from the “DIY Cars for Kindergarten” series to suggest a suitable option.
If dad plans to create a vehicle for his child, then it is preferable to focus on more complex designs, for example, making a car for a playground.
Do-it-yourself children's car: step-by-step description of making a homemade car (95 photos)
Any parent likes to please their child. However, not every family can afford to buy a toy once a week. The way out of the situation is crafts, and the most popular theme for them is cars.
How to make a children's car with your own hands? This will be discussed in this article.
Brief contents of the review:
