Almost every home has an old, unnecessary camera. It can be very ancient, film, or digital, from the very first model range. Many owners of such equipment are wondering: what to do with it? After all, it would be a pity to throw it away, since at one time the technology cost a lot of money, and, at first glance, it does not seem possible to find application for it in the modern world. But craftsmen have long found a solution to this problem and are making various crafts from and for the camera.
Manufacturing Features
Let's consider several features of such devices.
- Such a camera consists of two main parts: a wall with a hole and a screen. Others serve to render or photograph an image.
- In a pinhole camera, the hole is analogous to the diaphragm of a camera. The distance from the aperture to the screen plays the role of focus.
- In large-sized devices, the dimensions of which range from tens of centimeters to meters, the quality of hole processing does not play a special role. But on a centimeter scale this is no longer the case.
- The most suitable material is aluminum sheet.
- It is best to pierce the diaphragm with a steel needle on a hard cardboard backing, then sand both surfaces with sandpaper.
- The optimal diameter depends on the focal length of the camera. The relationship between these two parameters is approximately as follows: the aperture diameter is several hundred times smaller than the focus. You can take 100-500 times depending on the desired quality and technological capabilities.
Thinking progressively means living in the 21st century
In fact, several years ago the technology for creating dummies of CCTV cameras took a giant step forward. Now only a professional can notice the replacement of equipment, because a dummy is an invention where everything is recreated with incredible precision: an infrared motion sensor that does not go out even in harsh weather conditions, the presence of wires. Parents whose children are in the care of a hired nanny should take a closer look at this type of fictitious observation of the situation. Too many cases of child abuse have been shown in the media lately.
What is a camera obscura
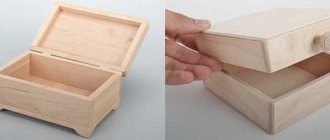
A camera obscura (lat. camera – “room”, obscura – “darkened, dark”) is the simplest optical device, a prototype of a camera. It can be either a box or chest, on one of the walls of which a small peephole is cut out, and instead of the other there is a screen made of translucent material, or a dark room with the same small peephole and screen.
Another name for this device is a pinhole camera.
Zenit-AM-stereo
| Unfortunately, KMZ did not produce stereo cameras, but there was always a need for such equipment, which forced amateur photographers to independently convert serial cameras for stereo photography, combining two cameras into one. Camera from Dnepropetrovsk “Stereophoto Club”, Ukraine. It consists of two ZENIT-AMs converted into one stereo camera - quite an admirable work. |
|
Operating principle of a camera obscura
Before you make a camera obscura with your own hands, you need to understand how it works. Her work is based on the law of rectilinear propagation of light rays, known from school. Many narrow beams of light pass through the camera's peephole. Each of them leaves a light spot on the screen of the opposite wall, equal in size to a peephole.
Such spots from many rays overlap each other on the surface of the pinhole camera screen, thereby creating on it an optical reflection - a copy of the object or panorama located in front of this unique device.
Human eye and pinhole camera
A camera obscura, by the way, resembles the principle of its operation of the human eye - the image also appears on its screen through a small hole and upside down. This happens because the light enters both the eye and the apparatus at an angle - the rays reflected from the top of objects are directed downward, and the rays reflecting objects close to the ground are directed upward. They intersect inside the camera, so the image on the camera screen is upside down. In our body, the image is returned to the correct position by the brain, and in the camera - by a mirror.
How to make an origami craft: camera
- Cut a sheet of colored paper into 4 equal parts. You can use a regular sheet of A4 office paper; my daughter and I took a silver sheet from a set of colored paper for children's creativity.
- Fold one of the quarters in half both lengthwise and crosswise. Expand again.
- Fold all 4 corners towards the middle.
- Fold in half along the fold, corner to corner.
- Fold in half along the second fold. The result is one module.
- Make the same modules from the remaining quarters.
- Place one module into another (you can carefully glue it so that the craft does not fall apart during the game).
- Place the resulting figures inside each other. Glue a small circle for a button and a small rectangle of shiny silver foil for a flash. Make a hole in one of the upper corners, thread and tie a string.
- Make the drawings small, otherwise they won’t fit, put them in the “pocket” on the back of the toy.
It works like this: holding it at the edges, not fully pushing it apart and moving it again.
History of the pinhole camera
Our distant ancestors also wondered how to make a camera obscura with their own hands - this phenomenon was first noticed by Aristotle back in the 4th century. BC.
The legendary Leonardo da Vinci was the first to describe the algorithm and mechanism of its operation. His invention was used by artists in the Middle Ages - a camera obscura helped them make paintings-copies of certain objects.
Scientists also thought about how to make a camera obscura with their own hands in a more “advanced” version later.
In 1568, the principle of operation of the pinhole camera was improved - the Venetian inventor De Barbaro replaced the screen with a plano-convex lens. This innovation significantly improved the clarity and saturation of the image. The device was called a steno-camera. It became a stepping stone to the modern camera.
DIY miniature retro camera made from paper. Say "cheese!"
Another master class on creating miniatures for paper dolls.
And again I was drawn to retro things. This time the object of imitation was an elegant antique camera made of wood with an accordion and brass finishing elements. With the arrival of spring, more and more people want to take pictures. In the city you can often see smiling passers-by posing for the camera. And by coincidence, I just read “The Apothecary’s House” by Matthews (those who have read it will understand). Apparently that’s why the idea came to me to make a miniature camera.
As usual, I don’t look for easy ways, so my choice fell not on a modern camera, but on a folding wooden retro camera.
Immediately about the result. Traditionally, to compare photos of the prototype and the finished miniature.
Having assessed the scale of the work, I decided that to make a miniature I would mainly need paper, thin cardboard, wire, a piece of aluminum can, paper glue and super glue.
Camera obscura made of cardboard
Obscura camera means dark room! In this instructable, we'll create a small dark room using cardboard, a cereal box, masking tape, and a cheap plastic hand lens. You can use this little gizmo to look at the world upside down, turn it into a camera obscura, or use it as a cell phone projector!
This is a great tool for teaching children about how the eye works, how we perceive light, and transparent and opaque materials.
Step 1: Gather Materials
You will need …
- Cardboard
- Box, chipboard, or file folder (something stiffer than paper but softer than cardboard)
- White paper or parchment
- Plastic hand lens
- Masking tape
- Scissors
- Box cutter or blade in precise form Cutting
- checkmate (not shown)
Step 2: Cut out the cardboard pieces
Using the template provided, cut out all of your cardboard pieces. You can do this with a box cutter, blade, or laser cutter if you have access to one. Try to keep the edges as straight as possible, this will make joining the pieces much easier.
Step 3: Glue the Cardboard Pieces
Lay out the pieces of cardboard as shown in the picture. Place one piece of tape on each side at the front, overlapping each side.
Step 4: Pinhole Camera Lens
Stick the lens onto the front hole. If you tilt the handle, the lens should fit without having to cut anything.
Step 5: Finish Assembly
Arrange all the pieces so that your box looks like a box. Tape all the outer edges, trying to cover any light gaps. The darker the inside of your box, the sharper your image will be. You can also cover the outside with dark paper if you like.
Step 6: Cut out the screen holder
Using the template provided, cut out the screen holder. If you use a file folder like I do, cutting two pieces and gluing them together will make it a little more durable. Make sure you add your ratings. This will be where you fold the holder into the frame.
Step 7: Fold the Frame and Glue It Together
This is the only difficult part of a pinhole camera. Fold the frame along the score line so that the corners are tucked into a small V. See the picture for details. Wrap the V and secure all four corners. When you're done, your frame should look like a photograph!
Step 8: Ribbon on Your Screen
Cut a piece of paper or parchment slightly larger than the hole in the frame. Tape along the inside of the chamber structure.
Step 9: Insert the frame and check it out!
Insert the frame into the back of the camera obscura. You can use the knobs to adjust the distance between the screen and the lens. Experiment with different distances, different light sources, and a darker window. Try turning your project into a pinhole camera or cell phone projector!
Toy cameras made from paper and cardboard boxes for children
Making such a camera with your own hands from a cardboard box will not take much time, and in just half an hour the child will have his own cardboard camera, with which he will immediately rush to “click” everything around. All that remains is to choose the appropriate camera model and get out the unnecessary old boxes.
Toy camera out of the box
Making a camera from an old box is easier than it seems. You will need an empty box the size of a real DSLR, colored paper, caps from plastic bottles of different diameters, 2 buttons to tie a string, a cardboard toilet paper roll, a printed photograph and a piece of sponge.
These toy cameras made from cardboard boxes turn out to be large and bright. The child will definitely enjoy pressing the sponge button to take an imaginary photo and checking on the “screen” what happened - and there will be a pre-pasted photo there.
Camera made from a cardboard box and a lens cup
You can make a “retractable” lens for a child’s camera from a cardboard box using a cardboard cup that is glued to the front. Make additional parts for the camera from available materials (deodorant caps, beads, spools of thread) or draw with a marker. Don't forget the ribbon so your child can wear the camera around his neck!
Camera made from a box, cardboard and a plastic cap from a hair conditioner
Using caps from shampoos or hair conditioners, you can easily make a flash and a lens on a toy camera from an old box, which you need to open and then close when taking photographs. Everything is like in a real camera!
Toy camera made of cardboard
This cardboard camera is the easiest way to make a toy camera for a child. All you need is: pieces of cardboard from a box, a cardboard toilet paper roll, glue and a marker. Draw, cut, glue and paint - and the camera is ready!
Making such a camera from a box or cardboard with your child with your own hands will amuse both you and the child. And the family photo sessions that your young photographer will start organizing with his camera will distract him from his tablet or TV for a long time. Most importantly, don’t forget to pose!
Source
Camera obscura or screen in a cup
See what a masterpiece you can create with a camera obscura.
An upside-down image of New York's Central Park in autumn was displayed on the walls and ceiling. The photograph was taken by Abelardo Morell using a camera obscura. Darken the room, he says, make a small hole for light, and the pictures of the world on the other side of the window will take up residence in your home.
Hm... - I don’t know... But the idea is tempting
Today we will make a simpler device than the one Morell used. But no less interesting.
We will need:
- Disposable plastic cup (preferably dark)
- Push pin or sewing pin
- Black acrylic paint (can be purchased in bookstores or mix gouache with PVA glue 1 to 1)
- Brush
- A sheet of parchment paper 12x12cm (you can try replacing it with tracing paper or a thin white napkin)
- Stationery eraser
- Candle + matches, flashlight
- Small figures or silhouettes for viewing
What to do:
- Carefully coat the cup with black paint on both sides, let the paint dry
- Make a very small hole in the center of the bottom of the cup using a pin or thumbtack. This will be the lens of a pinhole camera.
- Secure the paper to the cup with a rubber band. It will serve as a screen for a camera obscura.
- Light a candle or flashlight, darken the room and observe the light while holding the glass at arm's length with the screen facing you.
- Look closely and you will see a small crescent-shaped light spot on the dark background of the paper - this is an image of a flame, and it “stands on its head”!
- You can put different silhouettes in front of the flashlight, experiment with distances and shapes, you can turn the silhouettes upside down and get normal images.
How a camera obscura works can be easily understood from this figure:
High quality audio playback via Bluetooth
Stream music
A high-quality hi-fi system with high-quality speakers and a powerful amplifier still provides excellent sound over the years. But the equipment of modern models is undoubtedly better.
However, you can provide at least Bluetooth music streaming quickly and inexpensively. For this, the market offers audio-Bluetooth adapters at prices starting from 1,400 rubles. The compact devices have their own power supply and can be connected to the analog input of any stereo system using a 3.5 mm Mini-Jack plug or RSA cable.
Pair in the Bluetooth menu of your devices (smartphone, tablet, PC), after which streaming can begin. A particularly large number of interfaces are offered, for example, by the Philips AEA2700/12 (about 5,000 rubles on eBay), which can be connected via MiniJack and a digital connection (optical and coaxial). In addition, it supports NFC technology.
Labor intensity: average, costs: 1400 rubles.
Recommendations
The device in question is based on the laws of geometric optics. Displaying a picture on the screen does not require the use of optical elements, which by their nature distort light rays. This is due to the relative simplicity and low costs.
When building a pinhole photographing camera, shutter speed is measured in seconds and even hours, depending on the illumination of the objects. Therefore, it is very important to eliminate at home any possibility of exposure of photographic material in the camera: carefully isolate it from the penetration of the weakest ray with electrical tape or another method.
For the same reason, all internal surfaces of the camera must be coated with black paint to prevent glare. Another mandatory condition when photographing is to keep the camera still during exposure. Use a reliable, solid support or tripod.
Make thieves avoid other people's private property
For the purposes of self-defense and protection, dummies of CCTV cameras are also used. This method is one of the best and most popular among the community of summer residents or owners of private houses and other buildings who want to protect their property from thieves.
The owners quickly realized what a dummy was and what feats it was capable of. This is especially true for country houses, which remain unattended by their owners throughout the winter. According to the laws of the Russian Federation, the presence of ongoing video surveillance must be notified by a special sign on which this is written. If this mandatory condition is not met, the owner of the real CCTV camera will face an administrative fine. The law says nothing about “artificial”, fictitious substitutes for professional equipment. This circumstance allows private owners to install dummies on their territory absolutely fearlessly and legally. What will this application give? Excellent results in the fight for property protection.
Rating of the TOP 8 best instant cameras of 2022
The best inexpensive instant cameras
- Canon Zoemini C
- Fujifilm Instax Mini 11
The best instant cameras in terms of price/quality ratio
- Fujifilm Instax SQ 20
- Canon Zoemini S2
- Polaroid Now I-Type Instant Camera
- Fujifilm Instax Wide 300
The best mini instant cameras
- Fujifilm Instax Mini 40
The best children's instant camera
- Lumicube DK04
Which instant camera manufacturer should you choose?
The best manufacturers of instant cameras are considered to be:
Polaroid is a cult American company among fans of snapshots. The first camera that immediately produced a ready-made card was released in 1948. The peak popularity of the devices occurred in the 1980s-1990s. At this time, the concept of instant photography became so closely associated with the Polaroid brand that this type of technology was long called Polaroid. The company now offers users analog and digital versions of instant cameras with expanded functionality;
Fujifilm is a Japanese company widely known in the world as a manufacturer of cameras, photographic and film films. The brand's philosophy is based on continuous improvement and innovation, which allows us to offer users a wide range of the best instant cameras. The gadgets have a modern, stylish design and simple controls;
Canon has been a leader in the imaging industry for over half a century. Uses unique ink-free printing technology in its portable instant cameras. Excellent ergonomics, a selfie mirror and 360-degree illumination make Canon devices the best option for travelers.
It is also worth noting the company Lumicube , which specializes in the production of safe gadgets for children.
