Order starts from the workplace - if there is chaos on the table, then it will be the same in the head, with all the consequences for the efficiency of work or study.
The stores offer many ready-made solutions for every taste and at very affordable prices.
But if you make your own office organizer from scrap materials, in addition to order, you will receive moral pleasure from the handmade product.
Stationery organizer made from glass jars - mk
You can make such a cute DIY office stationery organizer from glass jars.
It is advisable to select identical jars for this work. For work you will need: white acrylic paint (in a can, for artistic work, or industrial facade paint), pencil, brush, felt-tip pens, tape. You can paint the jars with anything: nail polish, acrylic, or you can make your own decorative paint.
What do you need to make glass paint?
You need any paints and PVA glue. Making this kind of paint is not difficult. To do this, pour a little PVA glue 2-3 ml. into a separate jar and drop some paint of the desired color into it. Mix and make several colors like this. To store such paint, the jars are covered with lids to prevent them from drying out.
Such organizers are especially convenient for kids: they will definitely love such fun jars. And you can keep here not only brushes, pens, and felt-tip pens, but also any stationery items you like.
For books
Storing books is a science. It is important to properly maintain printed materials. Readable copies and textbooks do not have to be put away in the closet every time. For them, we recommend making a simple accessory with your own hands. It is convenient to use and will be useful for students for school supplies.
The technique is similar to making a document organizer. It is not necessary to make many compartments. Sometimes it is enough to simply cut off a Leroy Merlin box or similar box.
How to decorate:
- adhesive tape, film;
- textile;
- beads;
- braid.
The only point is to use strong boxes. Books are quite heavy. Thin cardboard is easily deformed.
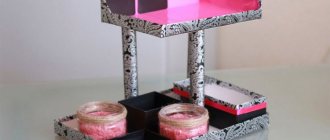
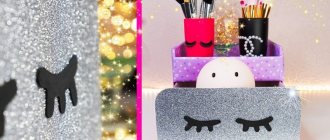
Stationery organizer made of cardboard - master class
For this master class you will need: a cardboard box, a stationery knife or regular scissors, a ruler, a pencil, universal Moment glue, PVA glue, acrylic paints or colored paper, a glue cap (the handle is next to the drawer), a sponge and a brush.
The organizer has a large box glued together from cardboard parts; the box opens with a handle (adhesive lid). The storage section is decorated with acrylic paints, or colored paper, a piece of wallpaper - the choice is yours
We will need a cardboard box made of thick cardboard (preferably corrugated). We transfer all the details onto cardboard using a pencil and ruler.
Each letter corresponds to the order of work: that is, first take part A, then 2 parts B, then part C, and so on. Please note: there must be 2 parts G, and 2 parts. H. (box walls).
- Take Moment glue and apply it to the sections of the children. A (back) and one of the side parts det. B. Hold B perpendicular to A for 5 minutes so that the glue dries. Then on the other side we glue the second part in the same way. IN
- Next we work, looking at the sequence of letters: C, D. As a result, we get the main part of the organizer
- Glue the bottom drawer in the same way. We do everything slowly and carefully. Now all that remains is to decorate our work
- But before painting or pasting, you need to cut ordinary napkins or paper towels into narrow strips. We coat the cuts and glue all the sharp edges of the product with pieces of napkin and PVA glue. Waiting for the glue to dry
- We begin to paint the product with a sponge and white acrylic paint. First we go over the entire surface for the first time, after drying - for the second time. We paint both the main part and the drawer. Then we take colored acrylic paints and apply them to the product 1-2 times.
- Take any suitable lid and glue it in the center of the box. Just like that, we made a box out of a cardboard box for any small items, as well as for manicure tools, nail polishes, and so on.
Organizer made of sleeves
A very simple and uncomplicated organizer. You can store tools, pens and pencils, scissors in it. It’s easy to make, you can even involve children in the work.
You will need:
- cardboard tubes (for example, toilet paper);
- decorative paper;
- glue;
- scissors.
How to do:
- Cut the sleeves to create different heights - this will make the organizer more interesting.
- Carefully cover the parts with decorative paper.
- When the bushings are dry, glue them together.
- Secure to thick cardboard.
- You can decorate the organizer with beads, ribbons, lace, and buttons. In general, what is enough for your imagination?
Wall
You can make a hanging or wall organizer for threads and other accessories with your own hands in half an hour. For the base you will need plywood. We allow you to replace it with a sheet of fiberboard or thick cardboard, whatever is available.
What you will need:
- plywood;
- fabric, paper;
- rubber;
- glue.
Manufacturing instructions:
- Cover the plywood with fabric. Or glue paper.
- Pull the elastic bands. The direction and quantity are arbitrary. Arrange diagonally, rhombuses, squares, make weaving. At your own discretion.
- Secure the edges of the elastic bands with glue.
- Let it dry.
- Time to hang it on the wall!
Wall accessories are convenient to use for notes, calendars, and photographs. They become an original decorative element; it is only important to choose the right color scheme.
Organizer made of cardboard and paper
The organizer is made of cardboard. The option is also simple, but you need to be careful and attentive.
You will need:
- cardboard;
- paper;
- scissors;
- glue;
- dye.
How to do:
- Cut all parts according to the drawings.
- Cover with white paper.
- Connect all the elements.
- Paint the finished item in your favorite color.
- You can not just color it in one color, but also make cool inscriptions and drawings.
Stationery organizer out of the box
There is always a box of cereals, equipment, and shoes lying around the house. This material can be used to create a convenient organizer.
You will need:
- small cardboard box;
- toilet paper rolls;
- scissors;
- decorative paper;
- glue.
How to do:
- Make a partition from the lid of the box and secure it with glue.
- Decorate the box itself with paper.
- Cut the bushings in half and also decorate.
- Place the parts inside the box.
Now you can put things away. The organizer is perfect for a children's desk to organize all the writing utensils.
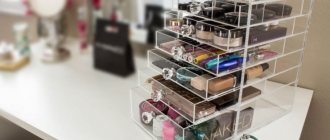
Unusual office organizer
You can make your own organizer for storing office supplies. For work you will need the following materials:
- sheets of thick cardboard;
- tin cans (6 pcs.);
- pencil;
- scissors;
- tourniquets;
- paper;
- glue;
- spray paint;
- ruler.
The work is performed in the following sequence:
- You need to clean the jars, cover them with glue and wrap them in paper.
- Then a handle is made and wrapped with a tourniquet.
- The jars are painted and dried.
- Then the cans are placed in pairs, connected in the middle with a handle and wrapped in ropes.
For the next version of the organizer for pencils, pens, paper clips and scissors you will need:
- cardboard tubes;
- acrylic paints;
- brushes;
- plastic paints;
- clear varnish;
- bias tape or braid;
- sackcloth;
- coffee beans, dried flowers.
The work is performed in the following sequence:
- It is necessary to cut the tubes to the required length; the number of elements is determined arbitrarily.
- The inside of the tubes is painted gold using acrylic dye.
- A stand is made from a plastic cover. You can also use old records. The elements are coated with acrylic paint and clear varnish.
- The upper edges of the tubes are treated with bias tape, which is fixed to an adhesive base.
- The tubes are wrapped in burlap and decorated with braid.
- The elements are placed randomly on the stand and fixed with Moment glue.
- The work is completed by decorating the organizer with ribbons, coffee beans, and dried flowers. The elements are attached with superglue.
You can prepare several compact organizers for pens and pencils in the required style:
- The stands can be made from wood cuts. You will need a low frame, the material is cleared of the core, processed with sheets of sandpaper, and coated with transparent or translucent varnish.
- To make a stand in a vintage style, you need to cover a tin can with pink fabric. Then lace inserts are passed along the top and bottom edges. Flower-shaped fittings are attached to the end.
- The organizer made from tin cans looks original. The containers are covered with colored paper, and decorative stones and shells are applied to the material using an adhesive base. Objects are coated with transparent varnish and fixed on a base made of a sheet of plywood.
- The nautical style pencil holder requires paper towel tubes. A cardboard base is being prepared. Each tube is covered with lace napkins, PVA glue is used, and folds are formed. The tubes are fixed to the base and painted with water-based paint (blue, orange, yellow). You can glue starfish, plastic fish, artificial algae, and shells to the stand.
- Pencil holders can be made from tin cans decorated with burlap. Along the perimeter of the upper part you need to glue flowers sewn from linen fabric in light shades.
- A stand made of a plastic or tin container can be covered with craft paper or leftover vinyl wallpaper. The materials are glued to the jars; the decor can be supplemented with braid, beads, and lace.
- Stationery organizer stands can be made from plastic shampoo bottles. The container is cut into 2 parts, the cut line should be smooth or curly. Handles are cut out at the top and glued to the bottom. Velcro is glued to the back of the containers, with the help of which the containers are fixed to the canvas and hung from the wall.
- Art Nouveau style pencils are made of satin fabric and lace. Satin is glued onto a cardboard circle and bordered with lace. Plastic tubes are installed and glued in the center of the circle. Products are decorated with lace, ribbons, sequins, and beads. The composition can be supplemented with a photo frame painted in a suitable color.
DIY stationery organizer made from iron cans
To find a pen, some people need to search the entire house and turn everything upside down. But if you have a stationery organizer, you won't have to go far to find pencils and pens.
You will need:
- cardboard;
- pencil;
- tourniquet;
- 6 cans;
- paper;
- scissors;
- glue;
- spray paint;
- ruler.
Progress:
- Coat the jars with glue and cover them with paper.
- Make a handle as in the photo and wrap it with a tourniquet.
- Then paint the jars and set them to dry.
- Arrange the jars in pairs, insert a handle in the middle, and wrap everything with a tourniquet.
Organizer made of disk and felt
Waste materials such as old CDs do not have to be thrown away. You can make many original and useful things from them. And today I will show you the process of making one of them. We will make an organizer.
The process of creating it will not take much time, and as a result you will get a very cute and useful thing that will be useful both in the home office and in the children's room.
Materials for making crafts:
- felt of different colors (I have yellow, green, orange);
- CD;
- satin ribbon;
- self-adhesive rhinestones;
- hot glue gun;
- scissors;
- pencil.
First, make some preparations. To do this, take the disk and place it on a sheet of felt. Trace around the edge with a pencil. Cut out the circle. Now place the disk again on the felt of a different color and trace with a pencil to the middle line of the circle. You will get a semicircle. Cut it out.
- Glue the circle onto the disk using a heat gun.
- Now glue the semicircle to the disk.
- Cut out a flower from orange felt.
- Glue the flower using a heat gun.
- Decorate with rhinestones. Our organizer - a DIY craft made from felt and a disk is ready!
This organizer is very convenient for storing various office supplies, for example, pens, markers, notepads, etc.
Such an organizer will be useful for both children and adults. It will decorate the room and help conveniently arrange many stationery items.
And some more useful tips:
- Instead of felt, you can use craft paper or just colored cardboard. Also try replacing it with regular cloth. But in this case it is better to hem the edges to make the product more neat.
- Instead of a hot glue gun, you can use Moment or PVA glue.
- Experiment with options for decorating your craft. You can decorate it with rhinestones or embroider it with beads. Use in your work those decorative elements that you have at hand.
- You can make several similar products and place them close to each other. It will also be interesting to look at a panel made of disks fastened to each other using braid or thread at some distance from each other. This way you can conveniently store pencils, markers, pens, and notepads. Everything will be at your fingertips and will not get lost.
FAQ. Questions and answers
Why is a pencil better than a pen? A pencil is much more practical. Firstly, text written with a pen may fade over time, but this will not happen with a pencil. Secondly, if you need to write on a vertical surface, the ink may drain and the pen will begin to write poorly, but the pencil will still write just as well. Thirdly, a broken pencil will produce two smaller pencils, but one pen will not produce two.
What are pencil holders for? A pencil is an indispensable thing on your desk. Agree, some office supplies constantly accumulate that can come in handy at any moment: you need a paperclip, a paper stapler, or an eraser. And about pencils and felt-tip pens it’s a completely different story!
What is foamiran? Foamiran is a soft rubber with pores, which is often used to create dolls, toys and jewelry.
What can replace fleece? To create a pencil holder, it is not necessary to use fleece; all parts can be cut out of felt. Felt is good because it is very pliable, easy to work with, and the variety of colors allows you to embody the most original ideas.
What were the very first pencils? The history of the pencil begins in the 11th century. Artists then drew mainly with sticks made from a mixture of lead and zinc, sometimes called “silver pencils.”
A pencil is a must-have attribute of any desk. Of course, you can buy it at any stationery store, but anything made with your own hands always has more advantages. This way you can make an exclusive pencil holder for every taste!
WE MAKE A MULTI-LEVEL PENCIL ORGANIZER FROM THICK CARDBOARD
You can make a unique pencil holder from simple thick cardboard. It will allow you to sort your pens and pencils the way you want.
We will need:
- base of the product: plastic, glass or board of the desired shape;
- cardboard boxes for cereals or baby food;
- paper towel and toilet paper reels;
- craft paper;
- stationery: scissors, glue, ruler, pencil, acrylic paints;
- braid and various decorations.
Work order:
- Take the base and paint it with acrylic paint of your choice.
- Cut all the cardboard blanks so that you get stands on several levels at once.
- Paint the inside of the boxes and sleeves white, and also apply paint to the edges and cuts of the blanks.
- Decorate the blanks with colored paper.
- Try on how the blanks will look on the base: mark their location with a pencil on the board.
- Spread the bottom of the drawers with glue and fix them one by one to the base.
- After drying, mask the joints of the cardboard boxes with tape and cover the product with decorations.
Exquisite pencil holder
You will need: a tin can, two-strand braid, braid with roses, satin ribbons, stationery pins, a glue gun, scissors.
Master Class
- Wrap the surface of the jar with double-strand braid and secure with glue.
- Glue the rose ribbon to the top of the jar.
- Tie a bow from a satin ribbon.
- Twist a rosette from a satin ribbon and attach it to the bow with stationery pins.
- Glue the bow with a rose to the pencil holder.
The exquisite pencil holder is ready! I recommend watching this video!
DIY pencil holder / Pencil holder / Penguin / DIY Pencil holder – My Paper Quest
I recommend viewing a photo gallery of ideas for creating exclusive pencil holders with your own hands!
AN EASY WAY TO MAKE AN ORGANIZER FOR JOURNALS AND NOTEBOOKS
To get a voluminous organizer that can accommodate magazines or notepads, you need to use a cardboard box as a basis.
Materials:
- cardboard shoe box;
- paper reels;
- colored paper;
- stationery.
We do the work:
- Cut off the lid from the box if it is non-removable.
- Draw a line in the middle of the box to the base and cut out a triangle.
- We bend the box along the drawn line and glue the two parts together.
- We deliver the missing parts on the sides from cardboard and secure them with tape.
- Line the bottom of the pencil holder with paper or white cardboard.
- We cover all the blanks with colored paper, install the bushings, and glue the tape. The organizer is ready. The organizer is ready.
You can give a second life not only to food boxes, but also to used tin cans. As a result, you will get a durable and very stylish organizer.
Materials:
- cans of different heights and diameters;
- board or plastic for the base;
- fabric of different colors;
- fleece, ribbons, ribbon;
- screws, screwdriver, glue;
- sewing supplies.
Making an organizer:
- Trim any irregularities around the rim and wrap the jar in fleece. Make a neat joint.
- Line the bottom with thick cardboard. This will make it easier to screw the workpiece to the base.
- Cut out strips of fabric with allowances. Glue the remaining material on the top and bottom of the can inside.
- Place a piece of white cardboard inside the jar. There should be a small gap between its edges
- Give the cardboard a bend by stretching it along the edge of the table. Glue a piece of fabric onto it, making allowances along the edges. It is necessary to stretch the material to avoid wrinkles.
- Attach the cans to the base using self-tapping screws; they are more reliable than glue. Cover the bottom with fabric.
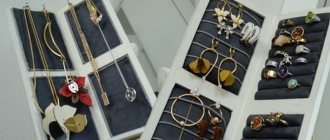
How to sew from fabric
Jewelry, combs, hairpins, keys, and other small items are stored in such organizers. The purpose depends on the place of use. It is convenient to hang wall accessories from children's cribs. We suggest sewing it yourself.
What you will need:
- a piece of fabric;
- buttons, loops;
- scissors;
- thread, needle;
- braid, beads, ribbons for decoration.
DIY instructions:
- Make a piece of fabric. To obtain a dense base, it is possible to sew several layers together and use a spacer. Fold over and trim edges.
- Cut out pocket blanks. Any quantity, size at your discretion.
- Sew to the base.
- We make loops for mounting on the wall. Rings will do.
- We decorate the pockets. We decorate at our discretion with buttons, ribbons, perhaps buy something from a craft store.
For fabric models it is convenient to use a sewing machine. It saves time and produces perfect stitches.
Simple stand
Ordinary things can be turned into beautiful and practical interior items. To make an office organizer with your own hands, you will need:
- Tin can.
- Colored tape.
- Acrylic paints.
Manufacturing process:
- First, prepare the jar. Sharp edges, if any, need to be sanded or sealed.
- Then we cover it with white paint. Let it dry thoroughly.
- We cover the jar alternately with two types of tape.
- You can paint the surface or sprinkle it with glitter using glue.
This stand looks very stylish. You can put pencils, pens, scissors in it. Instead of tape, they use various threads, strands, and paint with stained glass paints.
Another simple option would be to use drawers designed for utensils. They are already equipped with dividers, so they are ideal for pens and pencils. After use, the drawer can be stored away in a desk drawer, making it even more versatile.
Tags
with your own hands with your own hands with your own hands with your own hands with your own hands with your own hands in your hands Notebook with your own hands pens with your own hands bookmarks with your own hands Notebook with your own hands pens with your own hands bookmarks with your own hands useful properties and or make supplies
handsdiycraftsmakechildrendeskworkdecorationhandleswillschoolcoloredstationerywillboxbackviewsbesteatjarsphotocreationeverycanribbonotheracrylicpencilcaseitemboxessheetstandcontentfor
How to make an office organizer
Every home periodically accumulates a huge amount of office supplies: pens, pencils, markers, notepads and other items.
Necessary materials:
- shoe box;
- decorative paper;
- scissors, glue, ruler;
- cardboard and cylindrical bushings.
Manufacturing process:
- Take a shoebox and mark it as shown in the picture.
- After this, use scissors to make cuts along the indicated lines. Next, carefully bend the box exactly in the center and secure it with glue.
- Next, take decorative paper and cover the resulting organizer on the outside and inside. You can use a variety of decoration options.
The organizer can be left in this form to store notepads, notebooks and papers. And, as an option, you can make small compartments for storing pens, pencils and other stationery. To do this, inside large compartments, make partitions from thick cardboard, which are previously covered with paper. On the other hand, cardboard sleeves can be glued into the large compartment for storing pens and pencils.
Original pencil holder
You will need: a tin can, white and green fleece fabric, green felt, scissors, padding polyester, glue gun, thread, needle, centimeter, pencil, plastic eyes for toys.
Master Class
- Measure the height, bottom diameter and circumference of the jar.
- Cut out 2 pieces each from white and green fleece according to the dimensions (can height + 0.5 cm allowance and circumference + allowance).
- Sew the parts together with a back seam using a needle, or use a machine. You should get 2 blanks, as shown in the picture - one green, the other white.
- Turn the white part inside out and set the cylinders aside.
- Make 18 paired pieces (faces with ears) and sew them together, leaving a hole for stuffing. You should get 9 faces.
- Mark the location for attaching the eyes.
- Stuff the faces with padding polyester and sew up the hole.
- Glue the plastic eyes to the designated locations.
- Wrap the jar with padding polyester and sew the edges, then sew on the bottom of padding polyester.
- Place the green fleece piece on the can.
- Glue the padding polyester to the bottom of the jar.
- Apply glue to the bottom of the jar and glue the white fleece piece, and sew the edges of the white and green fleece together with a blind stitch.
- Glue on the animal faces.
- Cut out the leaves from felt and glue them too.
The original pencil holder is ready! I recommend watching this video!
Desk organization - 5 DIY pencil holders
How to make a pen and pencil organizer
Necessary materials:
- spacious box, you can use a shoe box;
- beautiful decorative paper;
- glue;
- scissors and ruler.
Manufacturing process:
- Take a shoe box, we only need the bottom part. Measure the required length of paper and decorate the resulting box with it. You can use glue or a stapler.
- Next, cut the required number of cardboard sleeves. At the same time, decide on the height of the bushings. You can make it the same height as the box, or you can cut the bushings a little higher than the main box.
- Select bushings of the required diameter so that the internal volume of the box is completely filled. Alternatively, you can take tubes of different diameters, for example, from toilet paper, from foil, from baking paper.
- The resulting blanks can be covered with decorative paper, or they can be left in their usual form if they are not visible in the box.
- Carefully insert the bushings into the box and secure them with double-sided tape or glue so that the structure does not become loose.
How to make a desk organizer - step-by-step instructions
A work desk or desk is an integral part of the interior of any apartment or house. Usually it is in this place that a huge amount of things accumulate, especially in the drawer of the table.
With the help of an organizer, you can quickly and easily put your desk in order and put every item in its place. For this you will need different boxes.
Necessary materials:
- boxes of different sizes;
- colored decorative paper or fabric;
- glue;
- varnish;
- scissors and ruler.
Manufacturing process:
- Pull the drawer out of the table and place the boxes you find in it. They must be positioned in such a way that there is no free space left and so that they do not move during operation.
- Next, cut the top of all the boxes to the same length.
- After this, you can immediately connect all the boxes using glue or paper clips and place them in a box, or you can first glue each box separately using paper.
- Apply varnish to the inside of each box so that the glue does not bleed through onto the fabric or paper in the future. Next, glue the fabric or paper of your choice using glue. To make the organizer look more elegant, you can use fabric of different colors.
How to make an organizer from boxes for a desk - option 2
An easy desk organizer can be made with just a few boxes. Thanks to this, you can get a beautiful and convenient organizer for storing all the necessary office supplies, papers and other small items needed for work.
Necessary materials:
- Prepare several boxes of different sizes. For the base of such an organizer, you can use the lid from a large box. When choosing boxes, take into account their location, as well as the fact that tall boxes should be placed on the far line.
- Small or tall boxes can be made from thick cardboard to perfectly fill the available space in the box.
- Take beautiful decorative paper or speckled paper and use it to cover all the prepared boxes. You can use one color of paper, or you can choose several options to get a more elegant organizer.
- Use glue or a stapler to secure the paper.
- After this, place the boxes in the base lid in an order convenient for you.
- Fill the boxes with all the necessary items. That's it, the beautiful and stylish desk organizer is ready.
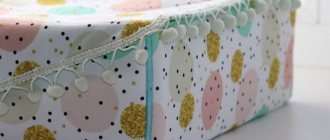
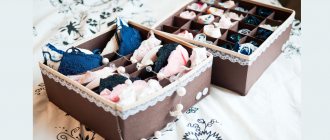
For clothes
The easiest way is to make organizers with your own hands using ready-made boxes and baskets. The only important thing is to find the right size. For reliability, the bottom is additionally reinforced with cardboard.
What you will need:
- box;
- textile;
- glue;
- needle;
- thread.
Instructions for making an accessory with your own hands:
- Trim the box to the desired height.
- Cover the outside with fabric, tucking some inside. If desired, we sew a lining.
- We fold two strips of fabric and sew handles.
- We sew handles to the sides of the homemade organizer.
To store socks and underwear, we recommend inserting cardboard dividers inside.