Crafts on the theme of traffic rules are part of the developmental program for pupils of preschool institutions and primary school students. Knowing the rules of the road is the key to safety and health throughout a person’s life, and that is why the training program devotes a large amount of time to this issue. The crafts offered by the program during training are very different. These are traffic lights, zebra crossings and, of course, Uncle Styopa! Therefore, we decided to consider simple and understandable crafts “Uncle Styopa is a real policeman.”
Application of crafts
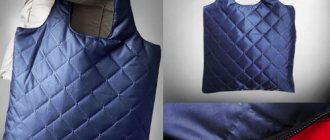
Sometimes for holidays or to act out scenes, a beautiful headdress in the form of a cap with a visor is required. With sewing skills, dressmakers using black and blue fabric will be able to sew a headdress of the desired shape according to the pattern. Knitting enthusiasts will knit a cap in no time according to the pattern of a beret with a visor.
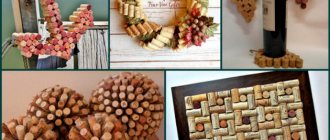
But in the absence of these needlework skills, you can make a wonderful headdress from paper or cardboard. In this article we will look in detail at how to make a policeman’s cap for a child or a small craft for a toy. On February 23, it is interesting to give men a bottle of a good drink, decorating its lid with a headdress with a felt visor.
Step-by-step photo lesson:
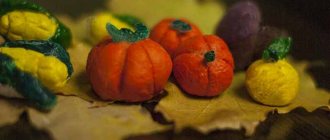
Roll into a beige ball.
Turn the ball into an oval blank, similar in shape and size to a quail egg. This will be the head of a person. Use the head of a match to mark the indentations for the eyes and attach a wide nose.
Insert small bead eyes.
Add a mouth, eyebrows, ears. The human head is ready. Next, you can either fasten your hair or leave the man bald.
Make a police cap from a drop of red plasticine, a blue cake and a blue crescent-shaped part (for the visor).
Attach the headdress.
To sculpt the uniform, prepare a soft blue mass.
Form a bar, slightly widening towards the bottom. This can be done by pressing the ball on all sides to the board.
Make blue cylinders for the legs, attach black booties.
Attach the trouser legs to the jacket. If the plasticine is dense, then it is better to use a match at this stage.
Add a blue shirt collar and a black tie.
Attach the turn-down collar of the uniform, as well as sleeves made in the form of cylinders.
Use a match to secure the head to the form. Add shoulder straps to the shoulders and attach the hands.
The brave plasticine policeman is ready. Such a figurine should definitely add to your plasticine collection of plasticine people, because creating your own unique masterpieces is always so interesting.
Source
Cap on the rim
The simplest headdress option for a little policeman would be a cap made of thick paper or cardboard. First you need to measure the circumference of the child's head at forehead level. Then, on a large sheet of A-3 format, draw a strip, the length of which is equal to the result obtained. The width is taken by eye, but do not make the strip too thin, as it may tear with sudden movement. The optimal size is 5 cm. Add an extra couple of centimeters in length to attach the ends of the headband to each other after trying it on your head.
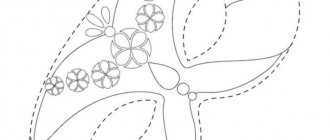
Next you need to draw the outlines of a policeman’s cap in the center of the sheet. How to make it yourself can be clearly seen in the pattern drawing above. To find out the length of the visor, measure the distance from one end of your forehead to the opposite. Connect the edges of the measurements together with a thin arc.
Next, a narrow rectangle is drawn under the ruler, from the ends of which an extension is made in both directions at the same distance. The dots are then connected together. You will get a cap with a flat top. You can make a triangular elevation in the center, then it will be more convenient to attach the police emblem.
All that remains is to cut out everything along the contours, paint it with paints or appliqué from colored paper, measure the correct length of the headband on the child’s head and attach its ends with a stapler or PVA glue.
Master class on making an applique from foamiran “Uncle Styopa is a policeman”
Marina Aleksandrovna Babchenko
Master class on making an applique from foamiran “Uncle Styopa is a policeman”
The police profession is one of the most important, responsible, respected and dangerous today! Thanks to their work, we feel safe on the road, in kindergartens, schools, and in crowded places. We can always turn to them if we need their help in solving difficult issues. A police officer is able to provide medical assistance if a person has been in an accident or has received any injuries and needs it until the ambulance arrives.
“ Uncle Styopa is a policeman ” is currently taking place.
. I, with my student Margarita Brushkovskaya, decided to take part in this competition at the municipal stage.
For our craft we needed: foamiran (both I and the children really like working with this material)
, man templates, sheet of colored paper, scissors, glue
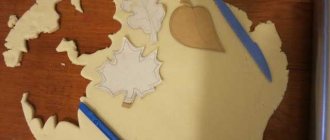
First we cut out the details of the man
Then we transfer the details to foamiran . Cut along the contour
Glue the parts onto a sheet of colored paper
We got such a wonderful
Our Uncle Styopa went to the competition at the Police Department. Wish him luck!
Children's master class “Collage “Uncle Styopa and everything, everything, everything!” to the 105th anniversary of S.V. Mikhalkov" You won’t find this anywhere, Only in Mikhalkov’s books! As part of the thematic week “Uncle Styopa and all-all-all” became one of the creative works. Photo report on the work of the book workshop within the framework of the thematic week “Uncle Styopa and all-all-all” As part of thematic weeks dedicated to the work of a particular writer, as well as within the framework of the Children’s Book Week, which is taking place. Photo report on the thematic week “Uncle Styopa and all-all-all” dedicated to the 105th anniversary of the birth of S. Mikhalkov Video Dear colleagues! I present to your attention a photo report of the events held in the senior group as part of a thematic week dedicated to. Photo report “Creative works of children within the framework of the thematic week “Uncle Styopa and all-all-all” Dear colleagues! As part of the thematic week “Uncle Styopa and all-all-all”, dedicated to the 105th anniversary of the birth of S. V. Mikhalkov, the children and I. Master class on making a flower from foamiran I bring to your attention a master class on a flower from foamiran. Foamiran (otherwise plastic suede or foam rubber) is used. Master class on making flowers from foamiran “Carnation” Master class on making flowers from foamiran “Carnation” Good afternoon, dear colleagues! Each of us has some hobbies. Master class on making a finger theater from foamiran The finger theater is a fairy tale on the palm of a child. Finger theater instills the ability to listen, develops fine motor skills, and allows you to open up. Master class on making crafts from foamiran “Airplane” for February 23 Master class on making crafts from foamiran “Airplane” for Defender of the Fatherland Day. Topic: “Airplane” Goal: to develop the ability to recognize. Master class on making crafts from foamiran “Umbrella” Master class on making crafts from foamiran “Umbrella”. Topic: “Umbrella”. Goal: to develop the ability to recognize colors; develop the aesthetic.
Source
Cardboard craft for games
You already know how to make a policeman’s cap with a rim with your own hands. Let's take a closer look at another similar example of a craft. This option can be used not only for playing police. As you can see, the cap is made a little differently from the previous example in the article. The main steps are performed in the same way, namely, first draw a strip of the headband according to the measurements of the baby’s head circumference, then add a visor at the bottom.
Next you need to act a little differently. The main part of the cap is drawn on top of the rim. The visor bends forward exactly along the fold line.
A thin strip with two circles of buttons is also drawn above the strip. The cap can be shaped into any shape you wish. The difference in operation is the additional headband, which is removable and is put on in the center of the headdress. Thus, you can depict any icon on it. This will allow you to play not only as a policeman, but also as a pilot, driver, train driver, postman or sailor. It is enough to make several interchangeable headbands for one common headdress.
As you can see, it’s not difficult to make a police cap out of paper with your own hands. In addition, she can quickly transform into the headdress of another employee.
Taking measurements from the head
To draw the pattern for a future craft correctly, measure the circumference of the child’s head with a flexible meter. To do this, pull it from the frontal part of the head above the eyebrows to the convex occipital region.
The tension must be good so that the meter does not sag. To this size you need to cut a narrow strip of the band. Its width depends on the cut of the headdress. In the main photo in the article, the band is cut high, since the crown of the headdress is flat and is simply represented by a circle cut out of cardboard. This is the easiest option for making a military cap with your own hands, which we will consider in more detail later.
Sample badge for a Russian police officer's cap
If you made a policeman’s cap with your own hands, then you must place a badge on the front. It does not have to exactly match the real cockade. You can simply write the word “police” on the rim. The country's flag in a square frame will look interesting. Before making a policeman's cap, think about the shape of the cockade in order to aesthetically place it on the rim.
If you want to make an exact copy of the Russian Ministry of Internal Affairs badge, as in the photo in the article, first draw a vertical oval with jagged edges. Then in the middle of it draw another one, only smaller. The cockade must have the same rim around its entire perimeter. You can paint it with yellow paint instead of gold. The inner oval is used for the flag of the state. Stripes of three colors look beautiful, located not evenly, but diagonally.
Cap with a star
Let's look at how to make a policeman's cap out of cardboard that will look like the real thing. It is placed on the child's head, covering the crown. To make it you will need:
- thick cardboard;
- colored paper for gluing the base;
- PVA glue;
- stationery stapler with paper clips;
- ruler;
- a simple pencil;
- compass.
The first step is to take measurements from the circumference of the child's head to draw the headband. As in previous versions, it is a strip of paper 5 cm wide. You need to leave an additional 2 cm on the top side to attach the top part of the craft. In total, the width is 5+2=7 (cm). The length of the headband corresponds to the circumference of the head plus a few centimeters to connect the ends of the part together. First, cover the strip with blue colored paper, and then connect the edges after trying it on with a stapler. This is done only from the back of the head so that the paper clips are not visible.
Simple option
Transfer the head circumference measurements onto thick cardboard, adding 1-2 cm to join the ends. They can be glued with hot glue or stapled with 2 paper clips. To prevent a child from being scratched by them, the metal ends should be on the outside of the part. Be sure to try it on to check that the ring is made correctly and only then finally connect the ends of the strip to each other.
Top fastening
You need to attach the top of a round cap to the prepared headband. To do this, place the blank on a sheet of cardboard and measure the distance between the opposite sides of the rim. This will be the diameter of the circle. Add another 2 cm to the radius so that the top protrudes beyond the rim, and draw an even circle with a compass. Immediately cover it with green colored paper so as not to do this later, when the craft has a three-dimensional shape.
To attach the rim to the top, you need to cut the 2 cm width left for this purpose into corners. They are bent at an angle of 90 degrees and smeared with PVA glue. Then they carefully glue the top of the cap, pressing the triangles with their fingers from the inside. All that remains is to cut out a star from red colored paper using a stencil and glue it in the center of the strip.
How to make a visor
The cap has a black visor. In order for the craft to keep its shape, it needs to be made arched. To do this, measure the distance from one side of your forehead to the other and transfer the measurements to a strip of cardboard. Then use a compass to draw a smooth curved line, connecting these two points with an arc. The part of the visor that should be attached to the rim is also drawn with an arc, only of a larger diameter.
To attach these two pieces, add a thin strip to the smaller arc. Then cut it into corners, coat them with PVA glue and attach them to the rim from the back. Don’t forget to cover the surface with black colored paper before assembly.
DIY police cap: pattern, sewing tips
Boys love to solve the most incredible mysteries. They often see themselves in the role of firefighters, rescuers and, of course, police officers. A police carnival costume necessarily includes one of the main attributes - a police cap. You can do it yourself at home. But this requires a little work. If a matinee is expected soon, you can make a cap out of paper; it will not last long. A cap made from fabric can come in handy more than once; at dress-up parties it can be used repeatedly.
LiveInternetLiveInternet
—Tags
—Categories
- Knitting (432)
- Crochet (82)
- Knitting (160)
- Knitted toys (21)
- Children's clothing (58)
- Women's clothing (212)
- Lace (4)
- Machine knitting (8)
- Men's clothing (32)
- Knitting techniques, patterns (94)
- Business ideas (1)
- Dacha (303)
- Pest Control (7)
- Water supply (3)
- Growing vegetables (71)
- Business ideas (9)
- Ideas for a summer house (33)
- Houseplants (1)
- Heating (10)
- Fruit trees and shrubs (39)
- Poultry farming, livestock farming (6)
- Beekeeping (1)
- Seedlings (22)
- Vegetable garden (70)
- Homemade products for the garden (58)
- Construction (18)
- Floriculture (16)
- Electrical (4)
- Child development (77)
- 0-2 years (30)
- 2-3 years (36)
- 3-4 years (13)
- 4-5 years (8)
- 5-6 years (9)
- 6-7 years (11)
- Children's books (1)
- For teachers and educators (14)
- Preschool education (5)
- Toys (5)
- Speech therapy (11)
- Newborns (11)
- Tips for moms (5)
- Diary on Lyra (3)
- Diary design (2)
- Health (66)
- Gymnastics (9)
- Diet, proper nutrition (11)
- Healthy lifestyle (16)
- Treatment of skin diseases (5)
- Obesity treatment (8)
- Cleansing the body (6)
- Foot care (10)
- Body care (4)
- Foreign languages (22)
- English language (18)
- Chinese (3)
- German language (1)
- French (2)
- Cooking recipes (629)
- Asian cuisine (18)
- Chicken dishes (33)
- Meat dishes (47)
- Vegetable dishes (24)
- Fish dishes (9)
- Winemaking (12)
- Main courses (124)
- Baking (107)
- Dessert, cake, ice cream (49)
- Homemade cheese (15)
- Breakfast (10)
- Preparations, preservation (68)
- Snacks (72)
- Sausages (7)
- Cooking Tricks (11)
- Cuisine of the world (9)
- In a hurry (15)
- Salads (20)
- Tips for housewives (7)
- Sauces (10)
- Soups (19)
- Dough (18)
- Decorating dishes (3)
- Bread (19)
- Obviously incredible (3)
- Useful information (20)
- Useful sites (5)
- Useful tips (38)
- Poetry (4)
- Poems (4)
- Holidays (51)
- Video editing (2)
- Competitions (1)
- Holiday decoration (18)
- Gifts (3)
- Congratulations (7)
- Entertainment (3)
- Scenarios (3)
- Everyone dances (7)
- Photoshop (11)
- Hairstyles (7)
- Hairstyles for daughter (7)
- Hairstyles for every day (1)
- Religion (47)
- Fortune telling (14)
- Conspiracies (6)
- Prayers (18)
- Orthodoxy (5)
- Rituals (19)
- Drawing (10)
- Handicrafts (136)
- Embroidery (4)
- Decoupage (12)
- Toys (7)
- Carnival costumes (3)
- World of little dolls (15)
- Soap making (4)
- Homemade products (31)
- Country of Masters (21)
- Jewelry (3)
- Sewing (19)
- DIY (208)
- Furniture (23)
- Molds (1)
- Book binding (4)
- Repair (41)
- Homemade products (92)
- Welding (3)
- Construction (17)
- TV, films, music (20)
- Cinema (1)
- Music (12)
- Performances online (4)
- Exactly (1)
- Tourism and recreation (18)
- Travel (3)
- Fishing (3)
- Students (17)
- Ready homework assignments (1)
- Literature (1)
- Mathematics (2)
- Textbooks (5)
- Sewing (108)
- Children's clothing (21)
- Women's clothing (37)
- Simulation (2)
- Men's clothing (13)
- Sewing (60)
- Extrasensory Perception (15)
- Clairvoyance (3)
- Humor (41)
- New Russian money (8)
- from 2 to 5 (3)
-Music
—Search by diary
—Subscription by e-mail
-Friends
— Regular readers
-Statistics
Cap parts
Any cap is not just a hat. It has a special structure, and each part in it has its own name. A police cap has the following components:
- Donyshko. This part of the cap is located on top and occupies the largest part of the entire product. The bottom covers the head and is, perhaps, one of the main elements of the headdress.
- Band. Otherwise, this part can be called a cap rim. The band supports the bottom by means of the crown, which is located between the bottom and the band. Cockades are placed on the band. Historically, the cockade is a symbol of power; it is located in the middle of the band, where a person’s frontal part is located.
- Tulya. As already noted above, this is the part of the “hat” that covers the head; the crown is located between the bottom and the band. On the crown above the cockade there are also distinctive signs, most often a coat of arms.
- Quarter. The crown itself consists of quarters.
- Visor. Each cap has a visor, which has both a protective and aesthetic function. Without a visor, a cap will no longer be a cap.
- Chin strap. In modern caps, the strap is made in the form of chains or braided cords and does not serve as a holder, as was the case on real Cossack headdresses.
Cutting out a cap
In order to sew the product with your own hands, you will need a pattern of a police cap. First you need to determine the size of your head. The circumference can be determined using a measuring tape.
To draw a circle on a sheet of paper or cardboard, divide the circumference by 3.14, then add 4. Get the radius of the circle. A circle and four more semicircular pieces for the quarters are cut out. The inner radius is found by subtracting eight from the outer radius. When cutting out a band, keep in mind that its volume should also be equal to this volume. It is necessary to leave 2 centimeters for allowances. You will also need a part for the visor. Make it in a semicircular shape, 3 cm wide.
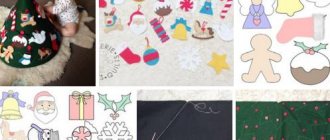
Doll "Traffic cop" made of nylon | podelki-doma.ru
Work for the competition “Dolls and Toys” from Natalia Vladimirovna Kudinova (GBU “Center “Good Light” in the Nadymsky district, Nadym). For a detailed master class on a doll made from tights , see here: “Santa Claus.”
The arms are made of a wire frame covered with padding polyester, with stockings on top, stitched on a sewing machine using a hand stencil.
The head is made of padding polyester covered with stocking. The nose, lips, and eyes are stitched using strings. The doll's hair is made of sock yarn. The details of the face are drawn using makeup.
The cap is made of felt and leather (visor). The base is cardboard. Decorative cord, buttons, and cockade were used for decoration.
The body is made of a wire frame. The inside is filled with foam rubber and padding polyester. The shirt and tie are made according to the sketch of the traffic police officer's uniform.
The trousers are sewn from uniform fabric according to the sketch of a traffic police officer's uniform.
The base of the boots is made of foil.
The boots are covered in leather. The sole is made of thick black felt.
The jacket is sewn according to the sketch of a traffic police officer's uniform. On the sleeve and the letters DPS are made of reflective tape. The shoulder straps are made of felt, the base is cardboard.
The doll is about 50 cm tall. It is stable at full height, the legs can be bent thanks to the wire frame.
And another work by Natalia Vladimirovna:
My grandmother. The base of the bottle is plastic. The face is made using sculptural textile technique.
Did you like the product and want to order the same from the author?
Write to us here. In order not to forget the page address and share with friends, add it to your social network:
More interesting:
See also:
Kuvadka dolls
Kuvadka’s dolls were hung from a newborn’s cradle (necessarily in odd numbers), driven away...
Tula lady
Good, isn't it? Housewives' dream: elegant, white-faced, hands on hips, holiday woman :). It is quite possible...
Today is International Puppeteer Day!
Congratulations to all lovers of puppets and puppet theater! This holiday is celebrated on March 21, starting from 2…
Furniture for dolls. A cradle for a tiny baby. Master Class
Nowadays there are a lot of dolls in the form of teenagers and adults, but remember, earlier, in our time, there were...
Rag doll Vanyusha
The rag doll Vanyusha Irina Kalinina after the talisman doll Northern Coast made another game...
White peacock
Competition entry from Svetlana Kononenko “White Peacock”. “I decided to participate in the very last mo...
DIY soft toy Owl
Soft toy “Owl” - master class by Lyudmila Pugacheva. Who said what you can buy today in a magician...
Knitted sheep
Technology for knitting the “Sheep” toy Author: Tatyana Mikheeva. We will need: • Remnants of yarn...
Monkey made of jute twine
The master class “New Year's Monkey Doll” was sent to our competition by Elena Adilbekova. Doll Both...
Monkey Lara
Master class on felting “Monkey Lara”. Author Semova Julia. Hello! For your attention...
Cockerel made of nylon
Another master class for the New Year’s competition in the “Golden Hands” category. Master class “Symbol of 2022...
Toys: crocheted unicorns
Unicorns are fairy-tale creatures that are very popular among children and adults, because at any age...
Share the news on social networks Tags: DIY toys, DIY dolls
podelki-doma.ru
How to sew a policeman's cap for a child
Next, we begin the sewing itself. The pattern must be attached to the prepared fabric. The police cap is usually black. Transfer all the details onto the fabric. For drawing on dark material, it is convenient to use tailor's chalk. Cut out all the elements. It is necessary to sew all four prepared parts with a circle. The band is sewn into a ring and reinforced inside with an insert made of plastic, cardboard, elastic band or elastic band. Decorative elements are sewn onto the middle of the band. The policeman's cap, made by hand, is almost ready.
DIY police cap made from paper
Making a paper cap with your own hands is not difficult. To work you will need white thick paper or colored thin cardboard, glue, pencil and scissors. As a pattern, you can use the pattern already presented above as a basis. First glue the band. It should be tight and fit well around the circumference of the head. After this, attach the crown to the base. It should be slightly different in height, higher in front, lower in back. It is necessary to leave 1 cm at the top of the crown in order to then bend this allowance and glue the bottom of the cap to it. For convenience, the folded edges can be cut with teeth. The bottom is carefully glued. When cutting out a visor from paper, you can also cut out teeth along the inner semicircle on the workpiece. They will allow you to accurately glue the part without crushing it and place it more accurately. Before gluing, make markings on the band. Don't forget about decorative elements. A police cap made of paper is quick and easy to prepare, but will not last long. It will be enough for one event, because in a cheerful round dance many funny incidents happen among the children.