Using the scrapbooking technique, you can make any gifts - these are albums, boxes or postcards
Do you think your life is boring and monotonous? It's time to plunge into the world of creativity, find something you like that will help you take your mind off the daily hustle and bustle. Some people engage in a hobby from time to time, but many devote themselves to their favorite pastime with genuine passion, turning it into a successful business, creating exclusive handmade items.
Creativity is a separate universe, full of mysteries and secrets. By immersing ourselves in the magic of handicrafts, we become kinder, discover talents and even find new friends. Scrapbooking is a special art form. Having mastered the technique with the help of detailed master classes (MK) on scrapbooking, you can make, design, decorate photo frames, postcards, albums and even books in ethno and boho style.
History and basics
Interestingly, the fashion for exclusive design of albums or postcards appeared long before the invention of the art of photography. The Greeks in ancient times used books for writing, they were called “hypomnema”. Interesting statements and personal thoughts that I wanted to remember or think about in my spare time were recorded in such notebooks.
In the 15th century, in good old England, philology students always had memory books at hand for sayings, essays and poems, recipes and even prayers. Later, “books of friends” gained popularity. During school years, who among us did not keep questionnaires? In simple notebooks, friends wrote down wishes, drawings or postcards. In the 18th century, notebooks were supplemented with clippings from newspapers, magazines, and bright labels.
An example of a surviving album with notes
It is known that US President Thomas Jefferson was an ardent fan of scrapbooking. His albums with thoughts and reflections on his future presidency are still kept in the museum.
In 1825, the first manual appeared on sale, which described not only scrapbooking, but also gave a master class on creating an album. A little later, Mr. Mark Twain himself created the first self-adhesive album. What is scrapbooking? The name is derived from the English words Scrap - scrapping, and book - book. If taken literally, the meaning consists of filling albums with clippings, notes, and postcards. At its core, this is not only a way to store photographs, but also an opportunity to beautifully tell the story of a significant event using tactile techniques and visualization. Of all the possible hobbies, scrapbooking is a unique opportunity to surprise, interest and demonstrate good taste. Today, unique products will become an invaluable gift for colleagues, friends or loved ones. A detailed master class will help even beginners in unusual art cope with the work with dignity.
A little history
Select a template
To get a beautiful chocolate bowl, it is important to think through the design of the product in advance.
You can draw a simple diagram yourself - as in the photo above. This template can be printed to scale, cut out and outlined on prepared scrap paper. To make it easier, you should print directly on decorative paper, you just need to make sure that the printing is done on the wrong side. It is desirable that the lines are slightly noticeable.
On a note! When choosing a ready-made template, it is important to ensure that it matches the purchased sweets.
Beginners are advised to choose simple patterns; craftswomen can make a chocolate bowl like this in the shape of a box.
If you decide to make a card, there should be a pocket, and the envelope should have a ribbon or clasp so that the gift does not fall out.
What might you need for work?
When starting any new activity, you will need not only a description of master classes on scrapbooking. You will definitely need a set of necessary tools.
Tips for beginners
A novice master should have in his arsenal:
- Several types of scissors. Separately, you will need scissors with large long blades for cutting paper, standard ones with sharp blades for cutting ribbons, fabric and tulle, as well as manicure scissors for miniature parts.
- During scrapbooking lessons you will need a trimmer - a special tool for working with paper. Essentially this is a large cutter with centimeter markings and a blade. Such equipment at some stages can replace the use of scissors and a stationery knife.
- Scotch tape, self-adhesive tapes. It is better to use adhesive tape with a double-sided adhesive base. Using tape, you can not only paste photographs, but also individual elements of the composition.
- Shaped hole punches. For beginners, master classes involve the use of special composters, which allow you to create patterns or a figured border in one moment.
- Stamps. You can decorate a product in various ways; the simplest is rubber stamps with ready-made embossing for designs.
After working with rubber stamps, they should be cleaned immediately. The easiest way to do this is with simple wet wipes, but without alcohol. Stamps can also be washed with a solution of water and soap.
- Sewing supplies. Since many cards and albums are decorated with fabric elements, you may need sewing supplies. Beginners do not need to use a sewing machine, just a simple needle and thread.
- Accessories. The main thing that scrapbooking lessons teach is the generous use of all kinds of decor. Albums and cards can be decorated with sequins, beads or beads, felt details, rhinestones, buttons and much more. The effect of grace, elegance and tenderness can be achieved using lace. In your work you need to follow the idea of the design project and remember about harmony.
- Sketches. A real lifesaver in your work will be sketches - templates for scrapbooking that will help you “catch an idea” for creating a postcard, box or photo album. Any master class on scrapbooking will tell you in detail which sketches are best to use for this work.
Scrap kit for designing works
In mastering the technique of scrapbooking and master classes, you will need a ruler and a centimeter, a mat for cutting cardboard with markings, the cardboard itself and glossy magazines, stickers. Experienced needlewomen use crocodile - special equipment for installing eyelets.
Preparing tools
To make chocolate bowls you will need to prepare a set of tools and buy the necessary materials:
- heat gun;
- figured hole punch;
- scissors;
- ruler;
- pencil.
A hole punch with shaped slits will replace scissors - you won’t have to figure out how to make the edges neat and lacy. With such a device, you can easily design slot-windows in the form of stars or hearts.
Works using scrapbooking technique
Anyone who wants to learn an original form of creativity will be helped by a detailed description of scrapbooking lessons. The first thing you need for work is a boundless flight of imagination and the desire to create.
How much does scrapbooking work cost?
Method of implementing scrap work
greeting card
A card is the best way to express your love, respect or respect without words. To get acquainted with the art of scrapbooking, we offer a simple master class on making an original postcard with movable decor.
The card can be made in any style and designed to your liking.
The work is as follows:
- To begin with, we will select scrap paper with a suitable pattern.
- Let's mark the base and backing of the front and back sides. The size must match the selected sheet of scrap paper.
- After finishing the substrates, we place the back part on double-sided adhesive tape, and completely glue the front part. Next, select the knife and the shape of the movable part of the postcard. You can use ready-made devices, but if they are not at hand, this is not a problem. Using a stencil or compass, we will draw any blank, and using a stationery knife we will cut it out. The shape can be any, square, round, oval or more complex geometry.
- Using a ruler, measure the middle of the front side. Place the cutting plate on the knife and cut out part of the part. Carefully bend the cut half.
- Separately for the main motif, we will cut out anything to your taste. This could be an image of animals or birds, flowers or abstract motifs. For a three-dimensional effect, the edges of the motif can be processed with a special creasing stick and then glued with double-sided tape. The picture should be 3D.
- Both parts are glued together. Apply glue to the left side of the workpiece and glue it to the bent side. In this case, the first part will remain movable.
We complete the decoration of the card according to your taste and desire. You can complement the composition with your own decoration ideas, decorate it with shiny stickers, beads or rhinestones.
An elegant box for secrets
The box is an object with an ancient history. A small, elegant accessory with great potential. It is to boxes that we entrust our secrets and keep things dear to our hearts. Therefore, the external design of a home treasury is of great importance. A scrapbooking box can be an excellent gift, and a master class with a detailed description of the stages of work will help even beginners handle it with dignity.
Box of Mom's treasures
Let's try to make a box with a secret:
- First you need to make several blank boxes. We mark the boxes on a thick sheet of cardboard. All drawers must be the same size.
- We cut out the blanks; the corners can be rounded using a regular coin. There should be 6 blanks.
- We crease, bend along the lines, and glue the boxes with double-sided tape.
- Let's start creating the frame of a large box, which will be the basis of the box. Its size depends on the size of the small boxes. The standard sizes are: two parts 19.2*12, two more parts 12.6*12. We draw the base on a sheet of thick cardboard, carefully cut it out and glue it end-to-end with masking tape.
- To make the box have a voluminous and cozy look, we wrap the top with thin synthetic padding and cover it with fabric on top. We hide the joint of the flaps on the back wall of the box.
- We cover the middle of the box with scrap paper. You can choose a motif to match the fabric, or you can create an original contrast.
- For the secret bottom, we cut out two pieces of cardboard measuring 19*5.5 and one 19*12.6. We fasten the parts end-to-end with masking tape and cover the top with fabric. From scrap paper we cut out two parts measuring 18.3*5 and one 18.3*12.1. We glue tape to the top for easy opening. Parts can be sewn by machine or by hand.
- We decorate small boxes to our liking, putting a sticker on each with an inscription saying what the box contains.
Technology tends toward subtlety, purity, and aesthetic refinement. When using tint ink or stamps, be especially careful not to smear the design. Carelessness is unacceptable in scrapbooking!
- Separately on cardboard we mark the lid for the box, cut out and fasten the parts. We cover the top with fabric and the inside with scrap paper.
- Putting the whole structure together. The lower part of the secret bottom is attached to the back wall of the box frame.
Boxes using scrapbooking technique
[Show slideshow]
The color scheme, pattern and decor are chosen by the craftswoman according to her taste. If the box contains what is most dear to a mother’s heart: the baby’s first curl, an ultrasound, a tooth and a tag from the maternity hospital, the color scheme and decor should be gentle, giving rise to a wave of warm memories. For wedding “secrets” it is better to choose pastel colors that will remind you of the tenderness and solemnity of the memorable day.
Family album
Creating an interesting and memorable photo story is the main direction of the ancient scrapbooking technique. Master classes on creating books filled with illustrated family stories and stories will help you make a memorable gift with your own hands. Such a gift is especially relevant when dedicated to the main event in the life of every person - the birth of a baby.
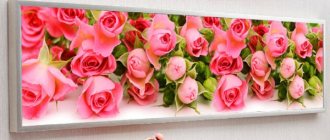
Everyone has a family album and it can correspond to a certain topic, accompanied by explanatory text
The description of the scrapbooking technique and master class consists of the following steps:
- Let's draw a blank on a sheet of thick cardboard. You will need two 15*15 squares for the cover and six 12.5*12.5 sheets for the inner sheets of the album.
- Glue the paper, cut off the sharp corners, and carefully cover it with cloth.
- Take a ribbon no more than 50 centimeters long. Glue it to the inside of the cardboard square.
- Let's lay out all the cardboard sheets sequentially, glue tape to each on both sides, connecting all the elements of the album together.
- We cover the pages of the album with scrap paper; you can decorate the border, giving the sheets an openwork appearance, using shaped hole punches.
You can insert the first photos of the baby into the middle of the sheets, and decorate the cover to your taste with original fittings.
To give the family album a special charm and elegance, you can use several artistic techniques:
- embossing - adding volume, creating convex patterns;
What is embossing and everything you need for it
- stamping - decorating sheets with patterns using templates, applicators and stamps;
- distressing - artificially aging pages in various ways.
Two ways to age pages
There are many styles of designing products using the scrapbooking technique, and master classes will help even beginners in the unusual decorating technique create an artistic masterpiece.
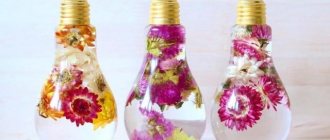
The production of gold paper adds a special chic to the creation of albums. For a luxurious effect you will need acrylic paints, plain white paper and a brush. The sheet is pre-soaked, then the “paper pulp” is evenly laid out on the newspaper. Dried flowers, threads and various small items can be randomly placed on top. To dry the top of the sheet, it is covered with polyethylene and pressed down with a press. After drying, we process the edges and cover the surface with gold paint.
Manufacturing technology
Each individual case will have its own actions, but there is still a general algorithm for making a chocolate maker.
- A template is drawn on a prepared sheet of paper.
- Then it is cut out.
- To create beautiful curves, draw along the lines with the back of scissors or a knife, being careful not to damage the base. Such actions will make it easier to fold the chocolate bowl and give it a beautiful shape.
- After the product is folded, they try it on - insert a chocolate bar inside.
- The only thing left to do is to decorate it in such a way that the decorations do not interfere with opening the chocolate bowl and extracting the sweetness.
other methods
A jewelry box can be made from many materials. Some of them are in every home and are even thrown away as unnecessary. However, in the hands of skilled needlewomen, any item can get a second life. For example, you can create a creative jewelry box from tape reels.
To work you will need:
- 2 reels of adhesive tape, the sizes of both products must be the same;
- glue;
- cardboard;
- regular pencil;
- scissors or stationery knife.
The following are manufacturing instructions.
- The reel is placed on a cardboard sheet and outlined with a pencil. Alternatively, you can use a felt-tip pen or marker.
- Then two identical circles are cut out: the first will act as the bottom, and the second as the lid.
- One of the reels is cut into two parts. This blank will be used as a lid. It should have slightly smaller parameters compared to the box itself.
- Cardboard circles are glued to the reels.
- Polymer clay is often used as decoration. The material is first softened and rolled out to the desired size.
- After this, the inside of the box is covered with clay. All joints with seams and irregularities must be carefully hidden.
- Seats with passes are not permitted. If you ignore this rule, bubbles will appear.
- When the inner part is ready, you can start working with the outer layer. Squares of different colors with patterns will look stylish. Before laying the outer row, you should stick a ribbon, which will act as a curtain to secure the cover.
- Then each part that is processed with polymer clay should be placed in the oven. When the material has cooled, the item can be used.
Marbling - drawing on water
youtube.com
Have you ever looked for weird cloud shapes in the sky? Then this hobby is for you: using insoluble paints, a pattern is created on the surface of the water, and then transferred to paper, fabric or any surface. It turns out very unusual and beautiful, and the process is truly mesmerizing.
There are two main marbling techniques: Persian ebru and Japanese suminagashi. The first is dominated by abstract patterns, while the second is dominated by circular patterns.
Improve yourself in the art of marbling:
- Marbling.org is an international marbling community with a library, gallery and forum.
- Suminagashi.com is a site dedicated to suminagashi and other types of marbling.
Frequently asked questions for beginners
What can replace cardboard?
If you are just learning, you can take cardboard mailing boxes. In order to fill your hand, such cardboard is suitable, but then you need to buy normal one - beer or bookbinding.
Binding cardboard (also called cover cardboard) is used for the manufacture of covers, binders, bindings, and packaging. It is very durable.
Beer cardboard is so called because it is also used in the production of stands for beer mugs. Inflexible, multi-layered. Suitable for landscape pages.
Where to get ideas for composition?
Look on the Internet for interesting albums and postcards. Save all the elements and details that you like. Then you will assemble a model of your product from them.
And don’t worry that at first nothing comes to your mind. Then you will have so many ideas that you will not have time to implement them!
I wish you creative inspiration, new ideas, successful implementation. And may your works be the most beautiful and give people joy and memories of joyful moments
A piece of cake
You can use the same technique to create crafts of a different shape. Scrapbooking in the form of a cake looks very interesting.
Very original box in the form of a cake
The template shape is two rectangles with triangles between them. In this case, the dimensions of the triangles correspond to the piece of cake, and the rectangles correspond to its side walls. Plus additions for assembly and fastening.
The sequence of work will be as follows:
- We cut out a product blank (template) from a sheet of cardboard.
- We draw along all fold lines with the blunt side of the knife.
- Fold according to the template.
- Glue a piece of cardboard cake in the required places.
- Let's decorate. The layers of cakes are beautifully obtained if two satin ribbons of different widths are glued on top of each other (first the wider one, then the narrower one).
A box in the shape of a piece of cake!
If you make several pieces and put them together, you get a whole cake. In this case, it is better to decorate the completely folded one so that you get the whole picture of a delicious delicacy. And if, for example, such an unusual treat is served at a children's party, the children will be delighted (and adults too). You can put a small gift or wish for everyone.
An original souvenir for February 23
It is not always possible to prepare an expensive gift. And instead of unnecessary souvenirs, you can present a chocolate bowl with sweetness hidden inside! The best gift would be a postcard.
Such beautiful things can be bought, ordered or made with your own hands. The best gift is the one you put your soul into.
At the initial stage, a pattern is made and transferred to thick paper - it can be colored, or it can be special for scrapbooking.
The photo shows a simple pattern that can be used to make a chocolate card. It is also simple in shape – rectangular. The pattern is suitable for making a souvenir with ties.
Below is a more complex implementation.
Plain paper will make regular packaging. But it can be decorated and turned into a work of art.
You can decorate with applique or pattern. The main thing is not to forget about the holiday and use specific attributes.
Here are a couple more ideas on how to make unusual and original scrapbooking chocolate boxes for Defender of the Fatherland Day.
Such a delicious gift can be given not only for a man on February 23, but also on Valentine's Day, Mother's Day, New Year, March 8 and on September 1 for a first-grader.
What could be the decor?
The craftswoman, for whom scrapbooking has become a serious hobby, keeps in her treasured drawers a huge number of things that are of no interest to people who are not passionate about it. It can be:
- small cute stones;
- small shells;
- rope cuttings;
- dried flowers;
- unusual candy wrappers;
- pictures from magazines;
- old newspapers.
Every trip to the craft store increases your inventory. In the crafts department you can purchase ready-made decorative elements:
- special paper;
- stickers;
- eyelets;
- rivets;
- beads and beads.
“Professional” decor is easy to work with, beautiful, and allows you to create a variety of thematic blocks. “Homemade” is original and makes every scrapbooking item special and soulful. For example, an album with photos from a honeymoon can be decorated with shells collected by lovers in the evening by the sea.
Experienced craftswomen know: to create real art objects using the scrapbooking technique, you need to use your imagination to the fullest, and not be afraid to combine incompatible things, using both store-bought decor and those that appeared spontaneously.
Box with a surprise
Remember the movie "The Diamond Arm"? The house manager opens the box, and there is a little devil on a spring. Surprise. If you add something to the craft described above, you will get a similar box with a surprise, but scrapbooking is a craft.
A box with a surprise popping out from inside will be more interesting.
The main thing in this idea is the springs. Let's make them from wire for weaving beads (medium thickness).
The actions are:
- We wind it on a knitting needle (you can use a toothpick).
- We stretch the finished spring a little.
- We glue our jumping or flying object (it could be a butterfly, a heart or something else) to the spring (with a glue gun).
- Glue its other end to the bottom of our box.
Ready. If you need more fluttering objects, repeat the operations.
Magic box with butterflies
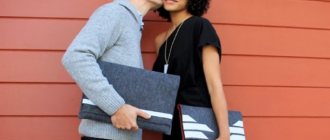
Customization - from jeans to bikes
bikeexif.com
Customizing is the alteration of clothing. Customizers transform jeans into skirts, shirts into dresses, and run-of-the-mill T-shirts into designer ones. A hobby for those who always want to be in style, but are not ready to spend a lot of money on clothes.
For men, customization is often expressed in the transformation of motorcycles and cars. Custom bikes are real works of art, and their creators are usually literally passionate about their passion.
Get better at customizing:
- “Second Street” is a website and community of the same name, where thousands of craftsmen post their work on remaking things and are inspired by each other’s ideas.
- Customoto.com is a site that has everything about creating custom motorcycles.
Master class on making from wood
This option is more complex than the previous ones, but this product has a long service life.
First you need to prepare the necessary tools and materials.
- Pencil.
- Ruler.
- A long board 10 mm thick and 10 cm wide. Wooden products made from soft wood are suitable: pine, alder, linden.
- Board for creating the bottom and lid. Its width should be equal to the dimensions of the finished base.
- Hand saw with fine teeth. Alternatively, you can use a jigsaw.
- Knife.
- Sandpaper.
- PVA construction adhesive. The use of carpentry “Moment” is allowed.
Once the dimensions of the future box have been determined, you will need to cut two blanks from the boards, which will be equal to the length and width. At the end of each workpiece, a bevel is equipped with a knife, the angle of which is 45 degrees.
This angle provides a beautiful joint between the side parts of the box. The depth of the bevel is identical to the width of the board.
How to make a box from a box?
The easiest way to make it is to use a cardboard box as a base. There is a similar item in almost every home. You can use shoe boxes, packaging boxes and any other options that fit the size.
Such a DIY jewelry box will not require creation from scratch, so the main actions will be aimed at decorating and combining the box itself with the lid.
Several steps will be required.
- Cleaning packaging from film. This step makes the decorating process easier: the varnish or paint is easier to apply.
- Then you need to create a couple of cuts in each corner of the lid and line up the folded edge of the sides.
- Using glue (it is best to use PVA for this purpose), glue the folded edge to the side of the box (outside or inside as you wish). All connections should appear smooth. Additional use of adhesive tape is allowed.
All further steps involve decorating the jewelry item using fabric. It is best to place foam rubber of small thickness under the textiles. Most often, needlewomen resort to decorating the outer part with velvet. As an alternative, you can use non-woven wallpaper.
You can equip the internal filling for jewelry using a towel. This is the best option for storing rings. To do this, you will need to cut the towel into pieces, the width of which is equal to the width of the box. Then the material is twisted into a tube, securing it with thread.
The formed tubes can be placed in a box and covered with corrugated paper or cloth. You can use wire or wooden skewers as separators.
This compartment is very convenient for arranging rings, but some girls also use it for earrings.
Freezelight - frozen light
popmech.ru
You may have already met strange young people who perform magic with flashlights in front of cameras. These are freezelighters. From the English freeze - “freeze” and light - “light”. The light really seems to freeze in the frosty air when it is shot at a long shutter speed. Using this technique, both beautiful abstractions and integral figurative compositions are created. The main thing is no computer processing.
Level up in freezelight:
- Lpwa.pro is a global alliance of light painters.
- Freezelight.ru is an original Russian-language art project dedicated to painting with light. On the site you will find video tutorials and a gallery with cool works.