If you are in the country where there is no access to a gas main, you have probably encountered the need to use an appliance similar to an electric stove. Quite often, people use stoves or stoves that are powered by liquefied gas cylinders. An alternative solution could be a homemade device that runs on liquid fuel. If you are the owner of a suburban area, and periodically try to solve the problem of heating rooms and cooking, then, quite possibly, an alcohol burner is suitable for you. It can also become an indispensable attribute if you prefer to go on overnight hikes in your free time.
How to make an alcohol turbo burner up to plus 1500 degrees, with your own hands
A burner is not the most necessary thing in everyday life, but sometimes it is impossible to construct a single thing without it. Buying it and then putting it in a closet for many years is pointless, but making it yourself in 5 minutes is possible.
If you want to make a homemade turbo burner, where the flame temperature will reach 1500 thousand degrees, then follow the step-by-step further explanations.
Before starting the burner manufacturing process, let's watch the video:
In order to make a burner we need:
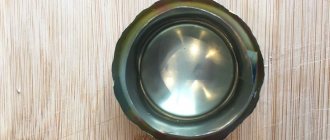
— a stand taken from a homemade fandyushnitsa; - candle; - an aluminum can of drink, always unopened. We only need the jar itself, and we will drain the drink in a slightly different way; — 98% medical syringe; - matches; - syringe.
First of all, we need to drain the drink from the jar into some container. To do this, we pierce the side of the jar with a syringe and pour the contents of all the jars into the mug. If you are unable to drain the liquid this way, then you can help yourself by draining it with a syringe.
Next, we must turn the key-opener on the jar, since pressure will be created there. The most vulnerable part of the jar, it turns out, will be the closed window through which we drink lemonade. To give the window a little support, you just need to turn the key 180 degrees.
For a 0.33 liter jar, 10 cubes of alcohol will be enough for us. Under no circumstances should you add more alcohol. No, the jar will not explode, because the weakest point of the jar is the lid, which can fly out. When working correctly, the lid will open slightly and all the pressure will escape through a small gap into the lid.
Through the previously made hole in the jar, we pour 10 cubes of medical alcohol into it.
Let's move on to testing: light a candle.
We put it inside on the stand of a homemade fandy maker, and put our jar on top, and wait until the alcohol starts to boil.
All that remains is to present a match to the hole so that the burner begins to function.
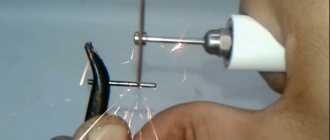
The burner works great, and you can test your experience on a needle, just by seeing how quickly it heats up. In a couple of seconds, the burner needle turns red.
Source
Making a dry fuel burner
DIY enthusiasts often have to abandon certain ideas due to the lack of necessary tools or equipment. Among such tools, we can note the burner, the absence of which we will try to compensate for by presenting in this material a review of a video on the manufacture of a burner using dry fuel.
Let's start, as always, by watching the author's video
So, we need: - a bottle; - dry fuel; - syringe; - hacksaw for metal; - dropper; - a tube; - an air injection nipple, which can be bought at any bike shop.
After these simple steps, our burner is half ready. Now if you light dry fuel, it will burn with a blue flame. However, in order for the homemade product to turn into a real burner, it needs air to get into it. In this case, the air must be under pressure.
We will supply it through a compressed air cylinder, which we will make from a bottle. To do this, make a hole in the bottle.
Now we take the bottle cap, since we need to attach a syringe to it.
We cut off the ears of the syringe, make a hole in the lid and insert the syringe into it. You can ensure a tight seal with a glue gun.
Homemade alcohol burner similar to a blowtorch
The good thing about homemade products is that they are very cheap and practical, and they are quite easy to assemble. It all works very simply; when the alcohol vapor is set on fire, it creates pressure in the container, and the fuel independently comes out through the nozzle and burns. That is, everything works approximately the same as in a blowtorch, only simpler, since you do not need to pre-pump the air.
Materials and tools for assembling the burner: - copper tube with a diameter of 8-10 mm; - a small aerosol can or another cylinder with a diameter of 30-40 mm; - a small glass jar with a metal lid (must close tightly); - a bunch of thread or cotton fabric; - alcohol; - sand.
The following tools will be needed: a drill, a hacksaw, an awl, a hammer, a soldering iron or torch, solder, and a vice will not be superfluous.
How to assemble an alcohol burner:
Step one. Making the base for the burner
The basis for the burner is an element in the form of a spiral, which is made of a copper tube. The length of the tube should be slightly less than 40 cm, and its diameter should be 8-10 mm. The sharp edges of the tube must be carefully processed with a file.
You need to make a spiral from the tube yourself. To prevent the tube from bending, it must be filled with sand. To do this, you need to plug one end with a stick, pour sand into the tube, and then plug the other end in the same way. To make a spiral you will need a cylinder with a diameter of 30-40 mm. An aerosol can is perfect for these purposes; almost everyone can find one at home. The copper tube needs to be looped around the cylinder one and a half turns. There is no need to rush.
There should be a distance of a couple of millimeters between the turns of the tube. This directly determines the size of the flame when the burner is operating. Ideally, the flame should pass through the gap between the two tubes and touch them at the same time.
Step two. Burner wick
To operate the burner you need a wick, it is done very simply, you need any cotton fabric, knitting threads are also suitable. The length of the wick should be such that it touches the beginning of the bend of the tube. On the other hand, the wick should stick out a couple of centimeters. As for the thickness of the wick, it is selected experimentally.
If the burner spits fire when starting up, the wick needs to be made smaller or the size of the nozzle increased.
To install the spiral, you need to drill two holes in the lid along the diameter of the tube. It should fit into the lid with minimal clearance. Next you can start soldering. The cover must first be cleaned of paint, otherwise the solder will not stick. You can solder from the bottom and top to ensure maximum tightness and strength.
Step five. Burner tests
To test the burner, you need to pour alcohol into it; gasoline will also work; you need to experiment with other types of fuel. Next, the lid must be screwed on tightly so that no fuel vapors escape from the can, otherwise the device will not work.
Starting the burner is very simple; you just need to use matches or a lighter to heat the tube in the area of the hole. Heat will begin to spread through the tube, while the fuel on the wick will evaporate and create pressure, which in turn will force the fuel out of the can towards the nozzle. As a result, a closed cycle is formed; the burner will burn as long as there is fuel in the can.
If you want to assemble something much more powerful, then the video below shows a flamethrower, which you can also assemble with your own hands. Enjoy watching.
Source
Alcohol burnersDesign and characteristics
Introduction
The presented material is intended primarily for personnel of organizations that use laboratory burners. Earlier in the article published on our website “Laboratory gas burners. Design and characteristics" technical aspects of the practical use of laboratory gas burners were considered.
This work examines similar technical aspects, but in relation to alcohol burners (hereinafter referred to as alcohol burners), which use liquid fuel (ethyl alcohol) to heat materials.
For ease of use, the article is divided into separate sections, which can be accessed directly from the table of contents below by clicking on the name of a particular section. Throughout the text of the article there are vertical arrows on the right side, clicking on which will return you to the table of contents section.
Content
- 1. Purpose and areas of application of alcohol lamps
- 2. Advantages of alcohol lamps
- 3. Arrangement of alcohol lamps
- 4. Distinctive characteristics of alcohol lamps
- 5. Properties of fuel for alcohol lamps
- 6. Fuel combustion parameters
- 7. Safety precautions when working with alcohol lamps
- 8. Technical characteristics of alcohol lamps
- 9. Operating conditions
- 9. Advantages and disadvantages
What is an alcohol burner (alcohol lamp)
First of all, let’s establish what an alcohol burner (hereinafter referred to as an alcohol lamp) is. The following definition is proposed:
Alcohol lamp
This is a liquid fuel burner with a tank for alcohol, through the lid of which a wick is passed with one end located in the tank and the other outside it.
Purpose and areas of application of alcohol lamps
Alcohol lamps are used to heat materials and products in an open flame with a temperature of no more than 900°C and a thermal power of no more than 170 W.
It is used in chemical and school laboratories, microbiological, cytological, biotechnical laboratories, medical institutions and also wherever the use of an open flame of low thermal power is required.
They are used for heating and melting materials, sterilizing instruments in an open flame, for flambéing in medicine, for heating small laboratory vessels (test tubes, flasks, crucibles, etc.) and other similar thermal processes.
Advantages of alcohol lamps
The alcohol lamps represented by our company meet the highest requirements for devices for professional work.
The most modern and advanced materials are used to make alcohol lamps.
All metal parts of alcohol lamps are made of high quality bronze or brass with galvanic nickel or chrome plating. All glass elements are made of durable thick glass, sufficiently resistant to destruction under mechanical stress.
Alcohol lamps are equipped with mechanical devices for adjusting the length of the protruding part of the wick, while the wicks themselves are made of high-quality cotton, which guarantees stable operation of the alcohol lamp during operation.
The protective elements of the alcohol lamps, namely the metal caps, are connected to the body of the alcohol lamp with a strong metal chain, which allows the caps to always be “at hand” and be used urgently if necessary.
You can be convinced of the high quality of workmanship and modern design of these alcohol lamps if you compare them with some analogues on the domestic market.
Alcohol lamp device
An alcohol lamp is a burner containing a reservoir for alcohol having a lid through which a wick is passed, with the lower end of the wick placed in the reservoir and the upper end outside it. The alcohol from the reservoir rises up the wick due to capillary pressure and evaporates when it reaches the upper part of the wick protruding from the reservoir. The alcohol vapor is ignited and the alcohol lamp burns with a flame temperature of no higher than 900°C.
Thus, each alcohol lamp has two main parts. This is a reservoir for alcohol and a device for its combustion (i.e., the wick itself and the structural elements associated with it).
The alcohol reservoir is the main load-bearing part of the alcohol lamp, and the most important and main part of it is the wick, which transfers liquid fuel (alcohol) from the reservoir to the end of the wick, where this fuel burns, creating a flame that is used for heating. In this case, the concept of “wick” refers to a body made of capillary-porous material, wetted by alcohol and capable of transferring this alcohol along the wick from the reservoir to the place on the wick from which the alcohol is removed by evaporation or combustion.
The ability of the wick to transfer alcohol is due to the permeable porosity of the material from which the wick is made, which ensures the transfer of liquid fuel from the reservoir to the combustion zone under the action of capillary forces, which, in turn, are caused by the effects of wettability and surface tension in the capillary channels of the wick material. If the wick is positioned vertically, the alcohol rises to the combustion zone, overcoming gravity. The required balance of forces is determined by the size of the capillary channels of the wick material.
There is a neck at the top of the tank. A wick is passed through the neck, which ensures the operation of the alcohol lamp. The alcohol lamp is also filled with liquid fuel through the neck.
Since the alcohol lamp has two working zones in one of which the alcohol enters the wick and in the second this alcohol burns, in order to separate the above working zones the neck of the tank is equipped with a lid through which the wick is passed. The wick is passed through a wick tube, which is a necessary element of the tank lid, while the latter can be installed both inside the neck and outside it, covering the latter from the outside.
The wick must be placed in the wick tube of the lid in such a way that, on the one hand, it can move smoothly and easily in the tube, and on the other hand, the contact of the tube with the wick must be sufficiently tight (i.e., the wick must be installed in the wick tube with some compression).
Installing the wick into the wick tube with some compression allows, on the one hand, to practically eliminate the leakage of alcohol through the wick tube in emergency situations, because the hydrodynamic resistance of the wick tube, densely filled with the fibrous mass of the wick, is very high; on the other hand, compressing the wick does not allow the wick to spontaneously slide down the wick tube when the spirit lamp is operating. However, the latter circumstance is not important for alcohol lamps that have mechanisms for holding the wick in the wick tube and moving it relative to the latter.
In almost all of the above cases, it is necessary to strive to ensure that the compression of the wick in the wick tube is minimal, since with increasing compression, the diameter of the capillary channels decreases and the rate of rise of alcohol along the wick drops sharply.
change picture Fig.1 Alcohol lamp SL-1 1 - reservoir 2 - alcohol 3 - wick 4 - sleeve 5 - cap
Figure 1 schematically shows the device of a standard SL-1 alcohol lamp.
The reservoir (item 1) is filled with alcohol (item 2). The wick (item 3) is placed in the alcohol lamp so that its lower end is in the tank, immersed in alcohol, and the upper end should be outside the tank in the open air. The tank cover is made in the form of a sleeve (item 4), which is installed inside the neck of the tank, and through the axial hole through which a wick is passed with some compression. The alcohol lamp has a cap (item 5), which is used both to extinguish the flame of the alcohol lamp and to prevent evaporation of fuel from the top of the wick.
The appearance of this spirit lamp can be seen in the same figure if you move the cursor to it.
The alcohol lamp tank can be made of glass or metal. Laboratory glass with a thickness of 2 mm and bottle glass with a thickness of 3 mm are used. Alcohol lamps made from bottle glass are more preferable for use, as they have high mechanical strength. Brass or bronze is used as a metal for the manufacture of the alcohol lamp tank, since these metals, upon accidental impact, do not form sparks that could ignite the alcohol in the tank. For the same reason, all other structural elements of alcohol lamps are made from materials that do not create a spark upon impact.
The tanks of alcohol lamps differ from each other in their shape. Round spirit lamps (cylindrical, cone-shaped and spherical) and spirit lamps in which the reservoir has a faceted shape are used. The faceted body (reservoir) allows you to install the alcohol lamp in various inclined positions, which, for example, is convenient when working with waxes, so that drops of wax do not fall on the wick.
change picture Fig. 2 Alcohol lamp 306 1 - reservoir 2 - cover 3 - tube 4 - wick 5 - sleeve 6 - cap
Figure 2 shows the appearance of a spirit lamp mod.306. The faceted glass tank (item 1) has a metal lid (item 2), which is attached to the neck of the reservoir using a screw thread. A metal wick tube (pos. 3) is fixed in the hole of the lid, through which the wick (pos. 4) is passed. The tube has a movable bushing (item 5), the purpose of which will be explained later.
The alcohol lamp has a cap (6), which is installed on top of the sleeve. Any of the five edges of the tank can be used as a supporting surface on the work table, which allows you to use the alcohol lamp both in a vertical and in an inclined position.
One of the inclined positions of this spirit lamp can be seen if you move the cursor to the picture.
The flame of an alcohol lamp having a faceted reservoir, when installed on various faces, is shown in Fig. 3
Fig.3 Flame of a faceted spirit lamp°
In laboratory alcohol lamps, the most common are wicks made from cotton fabric consisting of straight threads. However, wicks made from asbestos cord are also used.
Most of the latest models of alcohol lamps have devices for adjusting the protruding upper part of the wick, the recommended value of which is at least 3 mm and no more than 15 mm. Adjustment of the protruding upper part of the wick can be done either by moving the wick tube relative to the wick, or by moving the wick relative to the wick tube.
In the first version, the wick tube is made in the form of a sliding system consisting of two tubular elements, the upper of which is made in the form of a movable sleeve and is mounted on a sliding fit on the other lower fixed tubular element. By moving the upper tubular element (down or up), the total length of the two-tube system decreases or increases. Therefore, the dimensions of the protruding part of the wick either increase or decrease accordingly.
In the second version, the device for adjusting the length of the upper part of the wick is made in the form of a mechanism that converts rotational motion into translational motion.
The main element of this device is a gear with pointed teeth. The wick tube has a longitudinal through groove into which a small gear segment fits. The height of this segment is selected so that the teeth of the wheel enter the body of the wick to a depth of no more than 1-2 mm.
The specified gear wheel is fixed motionless on a shaft at one end of which a handle is installed. From the handle, the rotational movement is transmitted to a gear, which, through teeth that have close contact with the body of the wick, moves the wick up or down relative to the wick tube.
change picture Fig.4 Alcohol lamp with wick adjustment 1 - handle 2 - shaft 3 - wick 4 - tube; 5 — flame stabilizer tube 6 — hole 7 — cap
Figure 4 shows the appearance of a spirit lamp, which has a device for adjusting the size of the upper part of the wick made according to the second option.
The alcohol lamp has a handle (item 1), through which rotation is transmitted through the shaft (item 2) to a gear (not shown in the figure). The sharp teeth of this wheel interact with the wick (position 3), moving it relative to the tube (position 4) up or down depending on the direction of rotation of the handle.
The flame stabilizer tube (pos. 5) is fixed coaxially relative to the tube in which the wick is located. Alcohol vapor enters the gap between the tubes through a hole with a diameter of 1.5 mm (pos. 6).
At the outlet of the flame stabilizer tube, the vapors are ignited and, as a result, an additional circular flame is created around the protruding part of the wick. The above hole also has another purpose. By means of it, the pressure inside and outside the tank is equalized.
The appearance of this spirit lamp can be seen in the same figure if you move the cursor to it.
Typically, fuel for a spirit lamp is poured through the top hole of the tank after removing the lid. However, there are alcohol lamps whose tank has a side filler neck with a ground-in cap.
Distinctive characteristics of alcohol lamps
In laboratory practice, alcohol lamps of numerous designs are used. However, all the differences between alcohol lamps can be reduced to some basic features. The main technical characteristics by which alcohol lamps differ from each other are:
- tank material (glass or metal)
- tank shape (round or faceted)
- internal volume of the tank
- material, wick thickness and shape
- the presence or absence of devices for adjusting the length of the protruding part of the wick
Tank material
should be selected based on the operating conditions of the alcohol lamp. If the alcohol lamp is used in conditions where it is possible that the alcohol lamp may accidentally fall onto a stone or metal floor, then from a safety point of view it is preferable to use a spirit lamp with a metal reservoir.
Alcohol lamps with a glass body are much cheaper than metal ones. In addition, when operating a spirit lamp, you can always monitor the level of alcohol in the tank. However, glass is a fragile material that has little resistance to impact, and therefore there is always the possibility of destruction of the spirit lamp tank if it falls on a hard floor, which can cause a spill of burning alcohol.
Therefore, in rooms with increased fire safety requirements, the use of glass spirit lamps made from thin laboratory glass is not recommended.
Tank shape
round is the most widely used. Faceted spirit lamps are more expensive than round ones and should be used only when performing a number of specific jobs, for example, those associated with heating low-melting materials such as waxes, in order to prevent drops of heated material from getting onto the wick of the spirit lamp.
Tank internal volume
is not critical for the operation of the alcohol lamp. Rather, this issue should be linked to fire safety requirements. The internal volume of the alcohol lamp tank must be chosen such that during its operation, at a minimum, there would be no need to refill the alcohol lamp within one hour of its operation.
Material, wick thickness and shape
important elements for the operation of a spirit lamp. Wicks made of cotton fabric and asbestos cord are used. The most widespread are wicks made of cotton fabric, as they give a more stable and even flame compared to asbestos wicks, the other disadvantages of which are the relatively low flame temperature and the short service life of the wick.
In addition, and very importantly, inhalation of asbestos fibers contained in an asbestos wick can lead to a serious illness (mesothelioma). Therefore, if possible, avoid using asbestos wicks for alcohol lamps.
In Fig. Figure 5 shows a cotton wick for alcohol lamps.
enlarge Fig.5 Cotton wick
As for the thickness of the wicks, we must proceed from the fact that the thicker the wick, the more fuel it supplies to the combustion zone. Thicker wicks also produce a larger flame with a higher flame height. As a result, the thermal power of alcohol lamps with a thicker wick is slightly higher, but the alcohol consumption is also higher.
For most laboratory work performed using alcohol lamps, a wick thickness of at least 4.8 mm and no more than 6.4 mm is sufficient.
click Fig.6 Wicks Banner
Thicker wicks are necessary for some professional jobs that require a high, voluminous flame. It is advisable to have alcohol lamps with different wick thicknesses in the set and use them depending on the technological requirements for the work being performed.
Two forms of wicks are used in alcohol lamps: round (in cross-section) wicks and flat ones made from woven tape. Alcohol lamps with flat wicks are used to heat long objects, such as glass tubes.
Device for adjusting the size of the protruding part of the wick
provides great convenience when working with alcohol lamps, since it is not necessary to extinguish the flame of the alcohol lamp each time in order to adjust the flame parameters (height and volume) by changing the size of the protruding part of the wick. Alcohol lamps with devices for adjusting the protruding part of the wick are more expensive than alcohol lamps without these devices. However, the slightly higher price is more than offset by the professional work amenities this device provides.
The weight of alcohol lamps usually does not exceed 0.25 kg, and the height does not exceed 120 mm.
A summary classification of alcohol lamps, taking into account the above characteristics, is given on the website “Practical recommendations for choosing alcohol lamps for laboratory work”.
Properties of fuel for alcohol lamps
All alcohol lamps primarily use ethyl alcohol as fuel. Ethyl alcohol (ethanol) is a colorless, odorless liquid that is flammable and burns with a bluish, faintly luminous flame. Density 0.794 g/cm3. The boiling point of pure ethyl alcohol at normal pressure is +73.9°C. Specific heat of combustion 7100 kcal/kg. Ethyl alcohol is hygroscopic and mixes well with diethyl ether, glycerin, benzene, etc. Store ethyl alcohol in containers with a tightly sealed stopper.
To assess the fire hazard of ethyl alcohol when using alcohol lamps, it is necessary to take into account the flash point and auto-ignition temperature.
The flash point of ethyl alcohol is the lowest temperature at which vapors are formed above its surface that can ignite in the air from an ignition source. In this case, no stable combustion is observed. Approximately, the flash point characterizes the temperature conditions under which a flammable substance becomes flammable when stored in an open container or in the event of an accidental spill. The flash point of ethyl alcohol is +13°C.
The auto-ignition temperature is the lowest temperature at which combustion of a substance begins when in contact with air in the absence of an ignition source. For ethyl alcohol, the auto-ignition temperature is +365°C.
There are three types of ethyl alcohol on the market: rectified ethyl alcohol from food raw materials; technical hydrolytic ethyl alcohol and synthetic technical ethyl alcohol.
Technical synthetic ethyl alcohol is sometimes colored blue-violet by adding methyl violet dye C24H28N3Cl. Along with the dye, substances with a pungent odor are also added, for which pyridine C5H5N is usually used. This alcohol is called denatured alcohol.
According to the latest regulatory documents (GOST R 52574-2006), denatured alcohol can also be produced in the form of a colorless liquid, but with a pungent odor, for which crotonaldehyde CH3-CH=CH-CHO is added to the alcohol in a volume fraction of about 0.2%.
All these types of alcohols can be used as liquid fuel for alcohol lamps.
The average consumption of alcohol when burning alcohol lamps, approved by regulatory documents, is per 1 minute. burning 1.7 ml. Accordingly, for 15 minutes of burning it is 25 ml. and in 1 hour - 100 ml. These standards can be used when rationing alcohol consumption when performing certain technological operations.
However, it should be borne in mind that the regulatory standards for alcohol consumption exceed the actual consumption, which averages 25-30 ml/hour.
Rectified ethyl alcohol from food raw materials and ethyl drinking alcohol, according to the degree of impact on the human body, are classified as hazard class 4. The maximum permissible concentration (MPC) of ethyl alcohol vapor in the air of the working area of industrial premises should be no more than 1000 mg/m³.
In alcohol lamps, alcohol burns through a chemical reaction
CH3OH + 3O2 = 2CO2 + 3H2O
Oxygen (O2) is taken from the surrounding air and, as can be seen from the equation for the combustion of ethyl alcohol, only water (H2O) and carbon dioxide (CO2) are formed during combustion. Both are present around us in huge quantities, so we can assume that the use of alcohol lamps for laboratory work is absolutely harmless to the surrounding personnel.
Fig.7 Flame temperature of an alcohol lamp
Fuel combustion parameters
The main parameters characterizing the process of fuel combustion in alcohol lamps are: combustion temperature, thermal power of the alcohol lamp and fuel (alcohol) consumption. These three parameters should be taken into account when working with alcohol lamps.
Combustion temperature
is the maximum temperature that can be reached during complete combustion of alcohol. For alcohol lamps, this temperature does not exceed 900°C.
Figure 6 shows the temperature distribution along the wick flame. In the lower part of the flame of an alcohol lamp, the temperature does not exceed 350° Celsius, and the maximum temperature of 900° Celsius is reached in the upper part of the flame.
More detailed information about the flame of an alcohol lamp is presented in Appendix 01.
Click! Click and application 01 will open!
All about the flame of a spirit lamp
When an alcohol lamp burns, a diffusion flame occurs, in which the alcohol burns at the boundary of the flame, where mutual diffusion of air and fuel occurs.
In this case, the processes of combustion and mixing of alcohol vapor with air develop in parallel. Since mixing processes proceed much slower than combustion processes, the speed and completeness of combustion are determined by the speed and completeness of mixing of alcohol vapor and air. Mixing of fuel with air occurs through slow molecular diffusion.
The structure of the flame of a spirit lamp 1 is a conical core; 2 - zone of formation of a mixture of alcohol vapor and combustion products; 3 - zone of formation of a mixture of combustion products and air; 4 - border between zones.
The figure shows a simplified diagram of the torch of an alcohol lamp, which arises due to the mutual molecular diffusion of alcohol vapor and air. Inside the conical core 1 there is pure alcohol vapor that evaporates from the surface of the wick. In zone 2, a mixture of alcohol vapor and combustion products is formed, and in zone 3, a mixture of combustion products and ambient air is formed.
Boundary 4 between zones 2 and 3 is a smooth conical flame front, to which air molecules diffuse from the outside and alcohol molecules from the inside. The combustion products formed in the flame front diffuse towards the alcohol vapor, intensely heating them in the pre-flame zone, and are partially displaced into the air surrounding the torch.
The advantages of the diffusion flame of an alcohol lamp are the comparative constancy of temperature over the entire height (flame length), the compactness of alcohol lamps and the ease of their manufacture.
Figure 8 shows a close-up image of an alcohol lamp flame.
enlarge Fig. 8 Alcohol lamp flame
An important characteristic of a spirit lamp is its thermal power.
alcohol lamps, i.e. the amount of heat generated as a result of the combustion of liquid fuel (ethyl alcohol) per unit time.
The thermal power of alcohol lamps is measured in watts.
The thermal power of an alcohol lamp is directly proportional to the consumption and heat of combustion of ethyl alcohol and for alcohol lamps ranges from 150...220 watts, depending on the design of the alcohol lamp.
Ethyl alcohol consumption also matters for alcohol lamps
, the maximum actual value of which is usually no more than 30...35 ml/hour.
A typical calculation of the power of a spirit lamp is given in Appendix 02.
Click! Click and application 02 will open!
About the thermal power of the alcohol lamp
The thermal power of an alcohol lamp is calculated as the product of the hourly consumption of alcohol and its heat of combustion.
The calculation is made using the formula:
Nkw = (0.278) x Vn x Q
where NkW is the power of the alcohol lamp in kW; Vn is the nominal mass flow rate of alcohol in kg/hour; Q is the heat of combustion of ethyl alcohol in mJ/kg (equal to 27 mJ/kg).
Let's consider an example: 27 ml (or taking into account the density of 21.3 g) of ethyl alcohol burned in an alcohol lamp in 1 hour. Let's find the power of the alcohol lamp.
Solution: NkW = (0.278) x 21.3x10-3 x 27 = 0.160 kW
Safety precautions when working with alcohol lamps
When working with alcohol lamps, you must follow safety rules. It is necessary to use the alcohol lamp only for the intended purpose specified in its technical data sheet. Do not refuel the alcohol lamp near open flame devices. Do not fill the alcohol lamp with fuel more than half the capacity of the tank. Do not move or carry a spirit lamp with a burning wick.
It is strictly forbidden to light the wick of a spirit lamp using another spirit lamp. Fill the alcohol lamp only with ethyl alcohol. Extinguish the flame of the alcohol lamp only with the cap. Do not keep flammable substances and materials that can ignite from short-term exposure to an ignition source with low thermal energy (match flame, alcohol lamp) on the workbench where an alcohol lamp is used.
When working, do not tilt the spirit lamp, and if such a need arises, use spirit lamps that operate in an inclined position (faceted spirit lamps). If a spirit lamp tips over and burning alcohol spills on the table, immediately cover the spirit lamp with a thick cloth, and if necessary, use a fire extinguisher to extinguish the flame. The room in which work with alcohol lamp(s) is carried out must be equipped with primary fire extinguishing means, for example, an OP-1 or OP-2 powder fire extinguisher.
The attached video shows in detail how to work with an alcohol lamp.
Safety precautions when working with an alcohol lamp
Technical characteristics of alcohol lamps
The table shows the technical characteristics of alcohol lamps supplied to the domestic market by FIRMA BST-3 LLC. All alcohol lamps have a maximum combustion temperature of 900° Celsius, a service life of at least 5 years, are equipped with a device for adjusting the size of the protruding part of the wick, and cotton fabric is used as the wick material. All parts made of brass are chrome plated. Thick-walled bottle glass 3 mm thick or high-strength cut glass of the same thickness is used as glass for the manufacture of an alcohol tank.
If you move the cursor to the model number (304, etc.) and after changing the color of the selected number, click on it, you can go to a detailed technical description of the alcohol lamp of this model.
Alcohol lamps. Specifications
| Options | Model | |||
| 304 | 305 | 306 | ||
| Tank material | glass | cut glass | cut glass | |
| Internal volume of the tank, ml | 85 | 115 | 115 | |
| Wick thickness, mm | 6,4 | 6,4 | 12,7 | |
| Alcohol consumption, ml/hour | 28 | 29 | 30 | |
| Thermal power, watt | 183 | 190 | 197 | |
| Height, mm | 100 | 110 | 117 | |
| Width, mm | 65 | 85 | 83 | |
| Weight (net), g | 153 | 220 | 200 | |
terms of Use
Alcohol lamps should be used in a well-ventilated, closed, heated room at temperatures from +10° to +35°C and relative humidity up to 80% at a temperature of +25°C. The room must be equipped with primary fire extinguishing means.
Advantages and disadvantages
In conclusion, we present the advantages and disadvantages of laboratory alcohol lamps (alcohol burners) compared to other types of laboratory burners.
ADVANTAGES
- ● Light weight
- no more than 220 g. - ● Easy to use
- you only need to add alcohol to the fuel container, and then the alcohol is automatically supplied to the combustion area. - ● Reliability
- all design elements are practically trouble-free in operation. - ● Quiet operation
- during operation, the alcohol lamp does not create any extraneous noise. - ● No pungent odors
- the smell of alcohol before it is ignited is negligible compared to the smell of gaseous fuel in similar cases. - ● No maintenance required
- there is no need for routine or repair work to adjust and clean structural elements. - ● Safety in operation
- the fuel used in small quantities is not explosive, spilled burning alcohol can be easily extinguished using standard fire extinguishing agents (powder fire extinguishers). - ● Easy to store fuel
- it is possible to store small volumes of fuel (about 1 liter) in a regular plastic bottle. - ● Low price
- the cost of alcohol lamps is significantly lower than laboratory gas burners or other types of burners that use liquid fuel (kerosene, gasoline). - ● Environmentally friendly fuel
- does not pollute the environment (it is safe when released into water and soil and does not form toxic substances during combustion).
FLAWS
- ○ Low thermal power
- the calorific value of ethyl alcohol is lower than that of other types of both liquid fuel (kerosene, gasoline) and gaseous fuel (methane, propane). - ○ Unreliable operation at low temperatures
- poor fuel evaporation at sub-zero temperatures. - ○ Low mechanical strength
- glass elements of alcohol lamps have low resistance upon impact and are easily destroyed under mechanical stress.
We hope that the presented material will help specialists decide on the variety of laboratory alcohol lamps presented on the domestic market and make the right choice when purchasing them.
Material for this article provided
Author ktn F.A. Bronin All rights reserved.
When using materials from this site partially or fully, a link to or to the author of the publication is required.
DIY alcohol burner from an aluminum can
The idea of an alcohol burner made from a tin or aluminum can is not new. Such a device has long been used by hunters and fishermen in the wild to warm up a mug of tea or cook food without starting a fire, and at home, an alcohol lamp for the same purposes often comes in handy during a power outage. An alcohol burner from a can is very simple to make, and if you experiment with its modification, you can adjust the height of the flames, the duration of combustion, and the amount of heat released during fuel combustion. You can learn more about how to make a burner with your own hands.
Recommendations
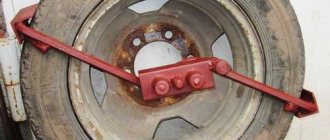
The principle of operation of the device is what you should understand before making the device. You can consider it using the example of a burner for roofing work. How does the burner work?
- The device is connected to the reducers of oxygen and propane cylinders by a system of supply hoses.
- Reducers are placed on the cylinders to create working welding pressure.
- A diagram for gas and oxygen is assembled, the tightness of the connections is checked, the nodes are secured, after which the gas can be opened with valves.
- The gas pressure is set to the operating value and the valve opens.
- The fuel is supplied through hoses to the propane appliance.
- The injector carries out the mixing process to form a gas-air environment.
- A working flame with a temperature reading above 2000 degrees comes out of the device.
Making a burner is one thing, using it correctly is another. A simple burner can cause an explosion or fire.
When performing any welding work, you must wear personal protective equipment: gloves and goggles, special shoes. You can work with propane cylinders only in a well-ventilated area, and at sub-zero temperatures, any actions with the burner are excluded.
What you should absolutely not do:
- work near open fire;
- keep the cylinder tilted;
- place vessels under the sun;
- carry out work without a gearbox;
- Warm up the gearbox over an open fire.
If you can clearly smell the gas, work with the burner should be stopped by closing the valve on the cylinder. Homemade burners, depending on the purpose of use, can be different: burners with a VK-74 valve, devices converted from an acetylene gas cutter and mini gas burners. It is realistic, profitable, and useful to build every homemade device. Only initially you need to decide on the type of structure and its parameters. The gas burner is also used in private households and for commercial purposes. In plumbing, a metal workpiece is heated with a torch, which ultimately comes out quite hardened.
DIY beer can burner
The two identical parts of the cans thus obtained must be connected by inserting one into the other. Since they have the same diameter, the connection can be difficult because you need to insert one into the other so that there is no gap between them. Since aluminum is easily deformed, before cutting off the second blank, you can stretch the cut, finished part of the future alcohol lamp onto the bottom of the whole jar, thus expanding its edges to the desired diameter.
After both parts are connected, you need to make holes around the perimeter of the upper part of the alcohol lamp with an awl or a 1-2 mm drill. There can be 18-20 of them with the same distance between them. In order for the flames to rise upward, the edges of the holes need to be slightly bent upward. At the top of the burner you need to make several holes 3 mm in diameter to pour alcohol and adjust the internal pressure of the container.
You can simply pour alcohol inside the burner, or you can place a cotton pad there so that it is saturated with it.
A DIY beer can burner works very simply: 30 ml of alcohol is poured inside, the inlet holes in the center of the top are closed with a coin. The bottom of the alcohol lamp is heated with a match, the alcohol vapor ignites, forming flames emerging from holes made around the perimeter.
Beer can burner
To make it convenient to heat water or food on the burner, you need to make a stand for dishes. To do this, you need to use a slightly larger jar, for example, a canned jar. You need to mark two lines on it: one at the height of the burner, the second at a height twice the length of the burner. The top of the jar is cut off, and its walls are divided into 12 vertical cuts. Of this number, you need to leave six pieces, cutting off the extra ones after one. In the center of the bottom you need to make a hole for heating, and bend the remaining strips inward towards the bottom. The stand is ready, all that remains is to place the alcohol burner inside it.
Can burner
A small fishing report, where Esbit tiles were very helpful
The season for catching white fish on the Seversky Donets is slowly ending. The weather had deteriorated greatly, it was raining and it was getting colder. And the more I want to catch bream a little more. At such times I switch to morning and afternoon fishing, but this time I fell for the tasty barometer readings. From Friday to Saturday the weather was predicted to be without precipitation, and most importantly, a sharp increase in the mercury column against the background of low pressure before and after. Therefore, I adjusted the departure so as to get to the peak - I started fishing the night before. I have never regretted it.
The big fish started taking as soon as it got dark. I was very pleased with the results of the trip. During the night I caught seven good bream weighing from 1.2 to 1.8 kg, several good crucian carp slipped through. I caught a qualifying chub weighing 2 kg less 30 grams - a real fighter, he bent the feeder-medium into a donut.
However, it was really not hot at night and in the morning. At 3 am the thermometer read +2 degrees.
I made tea a couple of times at night and indulged in coffee in the morning. He treated the no less fishing comrades who stood in the next place to drinks.
Homemade alcohol burner: features
There are two types of DIY alcohol burner: open and closed. The manufacturing methods of the second type are described above. The open one differs from the closed one in that it does not have a top cover, and the fuel is ignited without preheating. Disadvantage of an open alcohol stove: high fuel consumption. Disadvantages of a closed burner: slow heating, side flames can be blown away by the wind, care is required when handling to avoid tipping over.
To use it for its intended purpose, you will need to make a stand for dishes. This can be easily done using ordinary wire. A stand for the boiler and other utensils is necessary in the winter, when cold dishes can extinguish the burner. If the burner without a stand is made of aluminum, it will only effectively heat aluminum cookware.
Now we’ll talk about how to make an alcohol burner at home. Used materials are enough for this. there is nothing to buy. The alcohol burner is very environmentally friendly and safe. And besides, a very indispensable thing in hunting and fishing. It can also be used in a tent. So, let's start simple. You need to empty the first jar of its contents, rinse and dry thoroughly, and then cut off the bottom. You can immediately empty the second jar, but you can do this later.
Next step: Cut off the bottom of the can. The cut off part will serve as the bottom of the future burner. We will further insert the top into this part. Based on this, we insert our second jar on top (still whole). In order for the upper part to fit easily, it needs to be stretched a little. We insert it very carefully so that in the future we can easily disassemble our structure. A sufficient depth of about seven millimeters.
After this, we begin to manufacture the future upper part. After emptying, drill holes around the entire perimeter. For greater effect, use a thinner drill bit.
After these steps, we proceed to the next ones. Remove the entire middle of the bottom and cut off the entire top of the can. This is what the design should look like.
From the remaining parts of the jars we make the inner side. We will need to cut out a strip. To do this we need a special formula for us. The length we need must correspond to the height of half the jar plus the height of the narrow part of the second half of the jar. Simply put, our resulting length should be much greater than the width of the board we use.
In the lower part we make several cutouts in the shape of triangles, the height of which should be approximately three millimeters. These cutouts are necessary so that our fuel flows into the inside of the burner.
To complete our equipment we will need several steps. To make the folding process even easier, we use the remains of the jar. We cut out a small mount from them. And on the top of the jar we make a small cut, about six millimeters.
Our alcohol lamp turned out great. The alcohol itself is poured into the largest hole at the top. To boil 500 milliliters of water, we only need twenty-five grams of alcohol. Next, through the same larger hole, we ignite the alcohol. The combustion process begins, after a couple of minutes the alcohol begins to boil and alcohol vapor seeps through small holes and it is ignited from the central flame.
Alcohol burners are often found in equipment stores. A homemade alcohol burner will be no worse, and the main thing is that everyone has the material to make it. It (the material) is also available in any landfill. Such a burner can be made from pasture material in the field and used where it is not desirable to burn a fire, for example, in a shelter or so as not to attract undue attention. After all, the fire can be seen from several kilometers away. On such a homemade burner you can easily boil water for tea or bum packet (instant noodles).
Burners can, in principle, be made from any cans of stewed meat, coffee, condensed milk, etc. We will consider the option of making them from cans of carbonated drinks (beer), which are very common in any landfill:) cans. Cut a hole in the bottom of the jar as in the picture below.
It turns out something like this. Drill holes as shown in the picture. To ensure that the holes are located symmetrically, we use a lined stencil. In field conditions, of course, you can do without a stencil and pierce holes, for example, with a small nail or whatever comes to hand. It is advisable to make the holes small. We cut off the cans. One at 30mm and the other at 20mm. The result was the following parts of the future burner. From one of the remaining cans we cut out a blank like the one in the picture below. We make holes in this blank. After cutting the workpiece, the next part of the burner is obtained. Next, we insert the final part obtained into the previously prepared part. Let's look at the picture, everything is basically clear there.
We put the remaining part on the resulting structure and get the finished product. Before doing this, it is advisable to coat the inside of the blue part with some kind of adhesive-sealing solution. It is best to refuel the burner with alcohol. In extreme field conditions, it can be filled with other flammable liquids. Before ignition, a burner filled with alcohol must be slightly warmed up so that the alcohol begins to evaporate, because in our burner it is not alcohol that burns, but alcohol vapor. Further, vapors will appear on their own as a result of heating the burner during its combustion.
If you are in the country where there is no access to a gas main, then you have probably encountered the need to use a device of this type. Quite often, people use stoves or stoves that are powered by cylinders. An alternative solution can be a homemade device that operates on liquid fuel. If you are the owner of a suburban area, and periodically try to solve the problem of heating rooms and cooking, then, quite possibly, an alcohol burner is suitable for you. It can also become an indispensable attribute if you prefer to go on overnight hikes in your free time.
Burner Esbit Pocket stove MadeToSurvive + British stove + my version for 3 kopecks
I note that at first I saw pictures on the Internet and made a stove from scrap materials. Then I decided to buy an original factory product - mainly out of sporting interest. The pocket folding burner Esbit is sold in Ukraine, but, however, it costs quite a lot: about 12-13 bucks on average (including packaging of fuel).
The cheapest thing I googled was in the store fiskars-tools.com.ua/vmchk/Posuda-i-kuxni-ESBIT.html (where, by the way, I bought the Hultafors knife from a recent review). And I also came across used offers. In the military-sm.com/ store, which specializes in all sorts of army things, I saw used Esbit stoves for 50 hryvnia (less than 2 dollars). There, for comparison, I also ordered similar-spirited British Army tiles, which are sold new, but at a price of about 5.5 bucks.
The tiles were sent by Nova Poshta, in a cardboard box, a day after payment. Shipping from Kharkov to Slavyansk cost me 37 hryvnia. The burners were generously wrapped in stretch film. The English stove had a separate package.
Esbit stove
The baby has very modest dimensions: 98 x 77 x 20 mm. Weighs only 86 grams.
The German burner is made of galvanized steel about half a millimeter thick. Everything was implemented very reliably and with high quality. Stamped perfectly, where necessary - small stiffening ribs are created.
Although this is a second-hand item, the petals fit quite tightly, the rivets and stoppers hold the movable joint perfectly.
There are 3 fixed positions in total: completely closed, fully open, intermediate, thanks to which you can place not only a frying pan, kettle or pot, but also a small mug or cezve. There is absolutely no feeling that the product will fold/unfold somewhere.
The teeth on the petals allow the fire to pass to the installed dishes from all sides.
On the main platform there is a recess for a rectangular fuel pellet. The company name is embossed on it and it says that the product was made in Germany. Also on the inside of the pallet there is the inscription DRPuAusl.Patente which means Deutsches Reichs-Patent und Auslndische Patente or “German Office of Patents and Foreign Patents”. I mean, everything here is kind of very serious.
On the front side, both petals are endowed with a very beautiful logo relief. It is also shown here that the sashes can be placed in both extreme and intermediate positions.
I don’t know how old this stove is, but there is not an ounce of rust anywhere. It’s just smoky in places (partly it was, partly I added it during use).
English military stove
British tiles are sold new in the store, that is, they are “warehoused”, either written off or demolished by the glorious NATO ensigns. This device is larger than the German one, although the design is similar.
Product dimensions: 120 x 95 x 30 mm, weight – 139 grams.
Thanks to this size, apart from a tablet of dry fuel, there is nothing stopping you from throwing some wood chips, cones and other husks under the dishes. By the way, Esbit has a model of more massive tiles - with dimensions of 132 X 96 X 39 mm, and even large installations for an Air Force grill, with exactly the same design + grate.
Can burner
In addition to using aluminum beer cans, a spirit lamp can be made from an ordinary tin can. A burner made from a tin of coffee or brewed tea with a tight-fitting lid would also work great.
The principle of making a burner from a can is similar to that described above:
In principle, you can make an open alcohol burner; a lid is not needed for this. To do this, you need to insert a tin plate into it, rolled into a circle with a diameter smaller than the walls of the tin can. Alcohol is poured into the resulting circle in the center and set on fire.
As with any flammable substance, handling alcohol requires caution. You cannot fill the jar to the top with it, otherwise it may explode. Apart from alcohol, it is not recommended to use other types of fuel. The burner cannot be placed on a table at home, as it may catch fire, and in general, when using an alcohol lamp at home, it is necessary to use a stand both for the burner itself and for the dishes. To put out an alcohol lamp, it is necessary to stop the access of oxygen to the burning alcohol vapor; to do this, you can cover it on top with a tin lid. The burner should not be used to heat small synthetic tents.
Homemade dry fuel burner
If you are planning to make a similar trip along the Oka River, then it would be a good idea to have a gas or other burner with you, since the banks of the Oka are mostly treeless, not counting the willows growing along the water. Finding wood for a fire can be a time-consuming task. In turn, a gas burner is not cheap, but you can make a dry fuel burner yourself.
We used a 1.3-liter pot as the basis for the burner. You can take any small metal container (pan, jar, kettle). A sufficient number of holes are drilled on the side wall near the bottom. They will play the role of a blower. A curved metal plate is placed inside the container, and a lid is placed on it.
This is necessary so that the dry fuel is slightly above the bottom. This way it will be less likely to be blown around by the wind. The metal plate and lid that are placed inside should be smaller in diameter than the diameter of the container, which will ensure free passage of air inside the burner.
Air outlet should be provided at the top. To do this, we simply bent several short copper tubes and placed them tightly on top of the side surface of the pot. The burner is ready.
Dry fuel should be inserted through the top hole. You can place a pot or pan of any size on top, which is quite convenient. You can also heat a tin can along with its contents.
Source
Preparatory work
In order to make a device with your own hands, you should prepare a compressor; it is best to use a car tube, which you can borrow from a truck. It will need to be pumped up from time to time. An alternative solution is a compressor from an old refrigerator. You should prepare a receiver; a plastic canister with a volume of 10 liters or less is perfect for this. The cork should be solid, it is advisable to choose a translucent one. Such useful homemade products are made from several elements, among them the fuel tank should be highlighted; for this you need to use a two-liter steel container, into the lid of which two tubes are soldered. One of them should be long, the other short. The first one sinks to the bottom of the tank.
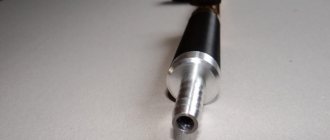
Nozzle and handle - manufacturing options
If you look from the outside, the handle and nozzle are, in fact, the entire unit .
The rest is pipes and valves supplying gas. For the nozzle, you can purchase a brass nozzle from gas appliances. They sell without problems and cost pennies.
If you need a special design, you can proceed as follows.
We clamp a suitable workpiece with a vice.
To avoid crushing the thread when clamping the part in a vice, first use a regular wooden clothespin.
Carefully drill a hole with a drill of a suitable diameter, not reaching the end about a millimeter. We grind down the remaining metal until the point left by the very tip of the drill appears.
After this, using a thin drill or a hardened awl, we punch a hole of the required diameter from the inside.
Any suitable object can be used as a handle. A handle from an old soldering iron, a piece of thick-walled hose, or a drilled piece of wood will do.
To fix parts and hoses, we use clamp clamps and hot glue gun.
The burner flame is adjusted and adjusted in the following ways:
- gas control valve - current;
- moving the nozzle (nozzle) along the axis of the injection chamber, changing its opening.
- changing the size and shape of the supply window through which atmospheric air enters.
The last two methods are used when setting up . They do not need to be changed during operation. However, if you are not sure of the accuracy of the design calculations, you should take care of the possibility of adjusting them.
experimental part
The capacity of the tank can be equal to 70 milliliters, the nozzles need to be made in the amount of 16 pieces, the distance between them should be one centimeter. The estimated burning time can be 25 minutes per refill. As practice shows, the duration and intensity of combustion of such devices depends on the type of fuel. The best combustion occurs from medical alcohol vapor. If we are talking about situations where salicylic acid is used, then it does not burn as intensely. If the burner is filled with edible alcohol, it will show the shortest burning time.
The temperature of the alcohol burner is high enough to heat the tent and cook food. When using alcohol devices, solutions that contain about 50-70% ethanol should be used. This allows you to extend the operating period, although it reduces the intensity of the flame. The design has the ability to boil 0.5 liters of water in 7 minutes, which is enough to brew tea or steam instant noodles. During operation, do not overturn the device, as this may pose a fire hazard. As practice shows, if you throw cotton wool on top and then set it on fire, overheating can cause the alcohol to begin to evaporate greatly, causing the burner to simply break in half. The design of the burner is very simple, but before making it, many people wonder why use liquid alcohol when there is dry alcohol. The answer to this question will be higher heat transfer, which indicates the possibility of heating water faster.
Main types of alcohol burners
A homemade alcohol burner can be open or closed. Each of the above designs has its own advantages and disadvantages. If we are talking about an open type device, then you may encounter not so high efficiency; combustion will occur over a larger area. This will promote abundant evaporation of fuel. Among other things, closed-type burners do not provide the ability to control the amount of remaining fuel. Such burners require external ignition, which increases the fire hazard. However, each of the listed burners can be made independently. It is important to remember that the operation of burners is based on the combustion of fuel mixture vapors. Therefore, it is strictly forbidden to use substances that contain acetone or gasoline as fuel.
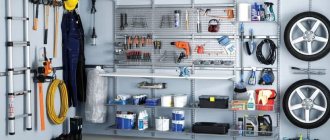
Main advantages of devices
The mentioned burner can easily be made by you yourself. You can take it with you to the garage, to the country house or on a hike, as well as to those places where there is no electricity, main gas or wood stoves. Using such a device, you can quickly heat water, cook food or heat a room. This invention is suitable for those places where it is impossible to make a fire, since the device produces a flame that is almost invisible, but it will be enough for cooking. An alcohol burner has many advantages, among them good performance in difficult weather conditions. And this is true even if the outside air temperature drops to -40 degrees. If you make such a device yourself, you will be able to feel how easy it is to use, compact, economical and affordable in terms of purchasing fuel. The last factor can be called one of the most important advantages of such burners, since alcohol can be purchased everywhere. Among other things, the cost of such fuel is low, especially when compared with kerosene or gas.
Work technology
Alcohol ones can be purchased at the store, but the design is so simple that you can make them yourself. The fuel tank should be filled with alcohol, but not more than 1/2 full. A simple filter is installed at the compressor inlet. You can do it yourself, using a funnel on which a segment is stretched. The principle of operation of the device is ensured by pumping air with a compressor, as well as its further entry into the receiver under some pressure. It smooths out pressure pulsations. The air is then sent into a container with fuel, where it is mixed with alcohol vapor. The resulting mixture goes to the burner. The combustion intensity can be adjusted using a special screw located on the burner.
Nuances and operating instructions
A propane burner is a dangerous device, and therefore, when working with it, you must follow the operating and fire safety rules
Roofing propane burner, instructions for use:
Carefully and tightly screw the nozzle onto the nozzle. Connect a hose to the cutter fitting, securing it with a special clamp. They are usually not included in the kit and will need to be purchased separately. Attach the second end of the hose to the gas vessel. Check the tightness and reliability of the connections with the flame regulator closed. Using soapy water, check the tightness of the connection and gas-air leaks, and with the gas valve on the cylinder open. Smoothly turn the gas regulator counterclockwise and light the burner.
It is prohibited to point the torch at flammable materials. After completing the work, close your gas valve on the vessel. When the burner flame goes out, close the torch torch regulator and allow it to cool.
Dangerous and harmful production factors when working on the roof with a propane torch:
- The occurrence of a fire hazard;
- explosion of a gas container;
- burns from open fire;
- thermal burn from heated cutter surfaces.
Fat lamp
A grease lamp or oil lamp can be improved by using some kind of wire wick holder.
To do this, take a container and fill it with butter or melted fat. Then they take a piece of wire and twist it to form a spiral (in this form, the wick stand is more convenient and reliable). After that, we lower the wick into the oily liquid, and fix its tip on the top of the spiral. It should stick out just slightly above the surface of the oil or fat.
Thank you for your attention, if you liked it, share this article with your friends on your social network . It’s not difficult for you, but I’m very pleased. And this will be a good motivation to write further for you.
Rules for safe operation of equipment
If used incorrectly, gas cylinder equipment can become a source of a strong explosion or fire.
When performing welding work, you should definitely use personal protective equipment: glasses, gloves, special shoes.
Before starting work, you need to thoroughly inspect the equipment for damage. If the equipment gets dirty, be sure to remove the dirt
You can work with propane cylinders only in well-ventilated areas, and the air temperature should not be below 0 °C.
Absolutely forbidden:
- Work near open flames.
- Keep the cylinder tilted when working.
- Place the vessels in the sun.
- Carry out work without a gearbox.
- Heat the gearbox over an open fire.
In addition, if you smell gas, you must immediately stop working and turn off the valve on the cylinder. We also recommend that you familiarize yourself with the main reasons for the explosion of gas cylinders.
When working without personal protective equipment, you can get burned, not only from an open flame, but also from accidentally touching hot parts.
If the considered homemade burners are not suitable for you, we recommend that you familiarize yourself with other options for making useful homemade products discussed in our articles - a burner made from a blowtorch and a burner for a sauna stove.
Alcohol lamp device
First, let's look at the device of the alcohol lamp. This design has only 3 parts: body, cover and glass wool filler . Well, the case is clear, this is a container into which we pour alcohol.
The lid is made from the top part of an aerosol can, so to speak, it prevents alcohol vapors from burning from above, they come out through the side holes and burn in the form of a burner, like on a gas stove.
Glass wool is needed so that the alcohol does not overheat, does not boil, and evaporates more evenly. Without glass wool, the alcohol inside the spirit lamp, when it is full, boils, begins to boil and splashes out through the side holes with strong fire.
To ensure the stability of the alcohol lamp and initial heating, you need a metal stand, such as a regular jar lid.
Final works
At the last stage, we have to make supports on which the cooking pot will be located. To do this, you should use two metal rods, which are driven in the shape of the letter P into the ground parallel to each other. During the cooking process, ensure that the device does not tip over. If you decide to make a product such as an alcohol burner with your own hands, then you should remember that such a device is disposable, since tin cans will no longer be useful for the next time.
Burner manufacturing technology
An alcohol burner can be made in one of several ways. If you are new to this business, then you should choose the simplest possible method that does not involve the use of technology involves the use of two empty tin cans; they must first be cleaned and rinsed with running water. After this, the products should dry well. In the central part of one of the cans, 4 punctures should be made using nails. The same holes should be made around the perimeter of the rim of the jar. This element will become a blank for the future burner, from which a flame will burst out when used.
This part must be cut off from the can so that the length of the side is equal to three centimeters. To do this, you can use household scissors, since the tin is quite thin and can be easily cut with any sharp object. When an alcohol burner is being made, at the next stage it is necessary to cut off the bottom of the second jar; this must be done as carefully as possible so that there are no nicks. Otherwise, you will need to use a file or sandpaper.
Which one should I do?
Before we begin manufacturing, we will select the appropriate type of burner from the following list:
- atmospheric injection;
- ejection;
- supercharged.
The second and third types are more difficult to manufacture. And to organize pressurization you will need compressed air or oxygen, which means a compressor or another cylinder.
The easiest way to do it yourself is the first type; it’s the one you should prefer..
The atmospheric burner process is controlled by a control valve. Therefore, the choice of type, as well as the model of the device itself, largely depends on which one turns up.
It must be remembered that the combustion of a particular gas depends on the diameter of the nozzle hole. The hydrogen jet has slightly less of it, the propane jet has more.
Designs, diagrams, drawings, assembly technology
First of all, you will need a drawing of the future device, a sketch or diagram of the burner, with dimensions.
It’s easy to find a ready-made one using the Internet . If you understand the general principles of the device’s operation and know how to calculate it, you can develop the project yourself.
An easy option is to use a valve from a propane or oxygen cylinder, known as model VK-74 (see diagram).
A fitting is machined into the side thread, which will also serve as a handle. You can use a pipe of suitable size. On one side, cut an internal thread, on the other, make a shank for putting on the gas hose.
We screw a plug onto the thread with which it is attached to the cylinder. We drill a hole in its end and cut a thread for the jet. We weld a nozzle to the plug on steel spokes, which will also serve as an injection chamber.
It's even easier if you come across an old acetylene cutter or gas cutter. Essentially, this is a finished burner . It is enough to remove the parts connected with the oxygen supply so that they do not interfere, replace the gas nozzle with a nozzle, and attach the injection chamber-nozzle above it.
What is this alcohol lamp for?
The main purpose of this small alcohol stove is to boil one mug of water for coffee or tea. You can brew coffee in a Turk or heat canned food.
Since the alcohol lamp is quite small, its power is only enough to boil water up to 0.5-0.6 liters. I tried boiling 1 liter of water on this alcohol lamp at room temperature. After some time, the water would, of course, boil, but fully filling the alcohol lamp is not enough for this. You can, of course, add more alcohol when it’s all burned out, but for such tasks it’s better to use a large alcohol stove with a large burner, just like on a gas stove.
Scheme
A homemade soldering torch is extremely simple. Its body is a tube with a nozzle at the end. At the other end there will be a tap with a pipe for connecting the gas supply hose.
To make it easier to adjust the power of the torch, we will equip the nozzle with a divider.
Gas burner diagram
Methodology of work
A piece of cotton wool is placed on the bottom of the burner, which should first be moistened in alcohol. Next, the structure is covered with the upper part so that it acts as a sealed lid. If you do not ensure tight contact of the parts, then in the cracks you can install strips of tin that remain from cutting the products. When you make an alcohol burner with your own hands, it must be used according to a certain principle. Alcohol should be poured onto the top of the structure where the holes are made. This must be done in such a way that the composition gets on the rim. The latter should also have holes. Next, the alcohol is set on fire, the tin is heated, and the heat is transferred to the cotton wool, which is soaked in alcohol. As a result, vapors begin to be released that will support the flame.
Third manufacturing method
If you are thinking about how to make an alcohol burner, then you will need to prepare a flat metal jar, which can be a container for canned food or cosmetic cream. You will need pumice, as well as alcohol. The mechanism of such a device is extremely simple and does not require any special effort during manufacture. To create the device, you need to pack pumice into the container as tightly as possible, and then pour a certain amount of fuel on top of everything. These manipulations must be performed as carefully as possible so that the liquid is absorbed and does not splash out. Thanks to the presence of pumice, the flame will burn for 15 minutes, since due to its porous structure it will act as a fuel distributor. Such an alcohol burner made from cans will allow you to cook food, as well as heat a fairly small room like a garage or change house. To heat food, you need to build a stand for dishes, which is made of stones, wire or other material. The main thing is to take into account the requirement that the dishes need to be stable.
Source
Making a dry fuel burner
DIY enthusiasts often have to abandon certain ideas due to the lack of necessary tools or equipment. Among such tools, we can note the burner, the absence of which we will try to compensate for by presenting in this material a review of a video on the manufacture of a burner using dry fuel.
Let's start, as always, by watching the author's video
So, we need: - a bottle; - dry fuel; - syringe; - hacksaw for metal; - dropper; - a tube; - an air injection nipple, which can be bought at any bike shop.
After these simple steps, our burner is half ready. Now if you light dry fuel, it will burn with a blue flame. However, in order for the homemade product to turn into a real burner, it needs air to get into it. In this case, the air must be under pressure.
We will supply it through a compressed air cylinder, which we will make from a bottle. To do this, make a hole in the bottle.
Now we take the bottle cap, since we need to attach a syringe to it.
We cut off the ears of the syringe, make a hole in the lid and insert the syringe into it. You can ensure a tight seal with a glue gun.
Source