Nowadays, we throw a very wide variety of packaging products into the trash every day, but some products can be a good source for doing various kinds of crafts with your own hands.
So, as an example, you can take an empty tin can of lemonade or beer. For the most part, crafts made from tin cans serve as decoration, but if you use your imagination and imagination, you can build something useful and usable for your home.
Materials, tools
- Several aluminum cans of the same diameter (one of them with a screw cap);
- Copper tube, diameter – 4-6 mm;
- Nut M6-M8;
- Bolt according to the size of the nut with a rubber sealing ring;
- Two-component epoxy-based adhesive;
- Twine (rope) according to the size of the inner diameter of the copper tube;
- Alcohol.
Tools we will need: Screwdriver or drill; Pliers; Regular scissors; Knife; Marker; A syringe for refilling the burner and a lighter.
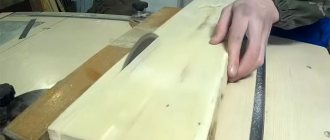
Finalizing the middle part
- I cut off the excess middle strip, collecting it with the bottom can (photo 1 - before, photo 2 - after).
- The purpose of the operation is to obtain the correct length of the middle strip.
- I cut out 3 triangles 2-3 mm high in the middle strip.
Safe alcohol burner made from aluminum can
Surely many have already seen an alcohol burner made from an aluminum can. One author suggested how it could be improved to make it safer and more convenient. Now the burner will never explode when heated, as it has a special safety valve. In addition, the flame became more beautiful and even, which increased the efficiency of the burner. As a result, the burner now looks like a regular kitchen burner.
Materials and tools for assembly: - aluminum can for beer and other drinks (the author uses narrow cans from Mio, as he makes a small Primus); - cotton pads, cotton cloth or sponge; - can of a larger diameter (used for olives); - a coin; - raw food and a frying pan (you can fry an egg to check).
To work you will need the following tools: scissors, a lighter, a needle with an awl (a sharp nail will do instead of an awl), pliers, a bolt with nuts or a self-tapping screw.
Popular articles Happy May Day
Let's start assembling the alcohol burner:
Step one. Cut out the first burner element
The first element of the burner needs to be cut out of the can; to do this, you need to move 17 mm away from the bottom. After this, a circular line is drawn with a marker. To keep the line even, the marker can be fixed at the desired height, and then rotate the can.
Step three. Burner testing
Through the large hole you need to pour alcohol or other liquid fuel, such as gasoline, into the burner. Next, the hole is closed at the top with a coin. The coin is needed to prevent the burner from exploding under excess pressure. If there is excess pressure in the burner, the coin will simply move and excess gases will escape from the burner without bursting it.
To start, you need to heat the bottom of the burner with a lighter or matches, and then ignite the vapors that will come out of it. Well, then the burner will heat itself and burn as long as there is fuel in it.
Then the jar needs to be divided into 12 parts with a marker, the excess is cut off along the circular line. Each line must be cut to the bottom ring. Then the resulting strips are cut off one at a time, resulting in a design like the one in the photo.
You need to cut a hole in the stand; it is needed to heat the burner when starting. The strips need to be bent so that they rest against the bottom, thereby increasing the rigidity of the stand. That's all, then the burner is inserted into the stand and you can start cooking.
Calcination of the forge
To completely remove moisture from a newly manufactured device, experts recommend calcining the forge. A simple gas burner is used as a fire source; it can be easily found in any hardware store. The nozzle of the switched-on burner is inserted into a tube placed on the side and heated until the device turns red from incandescence. This drying takes no more than 10-15 minutes. It is better to ignite a gas wick in the socket of a blowtorch; it is not so dangerous.
The productivity of such equipment is not very high, and without a brick plug, a homemade mechanism is used wastefully. And with such a plug, the heating speed of the mini-forge increases significantly.
Do not forget that a homemade forge is a highly dangerous item. It should not be left unattended while it is burning.
This completes the process of creating a household mini-forge. Now it can be tested in action. A homemade forge is used for melting metal parts and subsequent casting, for forging in home workshops, and for melting small glass products. By carefully following the above recommendations, anyone can build such a structure. And having learned to work with such a device, you can begin to create more complex mechanisms.
Another similar video
Country interior decoration
A very interesting use for tin cans can also be found for country house use. So, for example, they can be used in the manufacture of garden furniture; a chair and table are a very good idea to use empty aluminum cans.
So, in order to make a chair, you need to connect all the cans together using very powerful and reliable glue. For a more stable position of the chair, and so that it does not deform from the weight of the person sitting on it, it is advisable to fill each jar with sand after gluing.
Manufacturing sequence:
- A hole is made in the side wall of the tin can for the prepared steel trim. This is done at a distance of approximately 4.5 mm. You need to drill two holes on the back of the can (they are needed for the mounting screws).
- A wooden board will serve as the base for the forge; the corners are attached to it with self-tapping screws. They are screwed in accordance with the holes made on the can. Next, taking screws and nuts, screw on the tin can.
- The next step is applying a layer of gypsum thermal insulation. This solution hardens instantly. Therefore, all the necessary tools should be prepared in advance (this is a tube, a spoon, water and the rest).
- A tube (approximately 4 cm in diameter) is rolled up from thick cardboard and placed in the center of the jar. A steel tube is inserted closely into it through the prepared hole. To make it easier to pull out in the future, it is recommended to wrap it in wax paper.
- Now you can start mixing the solution. Sand and gypsum are mixed in a one to one ratio. Sand must be taken clean and without impurities. By adding water, the mixture is brought to the consistency of thick sour cream.
If possible, you can add fireclay or asbestos. These fire-resistant materials are allowed to replace 1/2 of the sand used. But, if they are not there, then they can do without it.
- A gypsum-sand solution is tightly placed in the free space between the walls and the cardboard insert (you can use a plastic spoon for this). When doing this, you need to remember that this mixture sets in a matter of minutes. After the container is filled, you need to remove the solution from the hole on the side tube.
- After 30 minutes, you can remove the tube.
Making a burner from a beer (water) can with your own hands
Alas, the idea of making a burner from a can of cola (beer or other drink) is not mine, but still I decided to make a more detailed article on how to make a burner with your own hands.
Popular articles Creating a scented rose jewelry set
To make a mini burner you will need:
— Two cans of cola (you can use any can: beer, juice, kvass, in general any); — Pliers; - Scissors; - Glue; — Coin; - Alcohol.
Let's start implementing the idea!
First of all, you need to rinse the jars (updated).
Next we take an ordinary cork. Take a marker, apply the marker to the cork and trace the jar diagonally. Next, using ordinary scissors, we cut out the future burner.
Do the same with the second jar.
We make the burner directly.
Next, after we already have two parts, we need to connect the two parts as shown in the image. After this, you need to glue the two parts together using super glue, or better yet, cold welding. Next, you need to clean the can of paint (so that it does not catch fire during combustion).
Making holes in a circle
Now all that remains is to make holes in the jar, as shown in the picture (in a circle and in the middle). The holes in the middle are needed to pour fuel through them. We place the coin in the middle of the jar so that the flame does not escape through these holes.