I love beer, I love wood, I love being outdoors, so I decided to make myself a souvenir: a good old Viking style 'beer mug'. Completely by hand, just like in the old days.
The goal was to not use a single power tool. It took a lot longer than with the 'proper' tools, but it turned into one of the most fun projects I've ever done.
Put away your drawers of classic hand tools because you won't need them this time. All you need is a good ax and a good knife.
“Pendant” and “leg” parts
These parts have the same diameter - 10 mm and differ only in length, so one drawing can be made for them. We set the length of the legs a little longer than for pendants, so that the assembled product is more stable during operation and does not tip over (Fig. 55).
Rice. 55. Drawing of the “pendant” and “leg” parts
The pendants and legs are simple in design, so they are best processed with hand tools. The total length of the six pendants and three legs is 750 mm. But making all the parts from one long piece will not be very convenient. Therefore, taking allowances into account, we will take two blanks: one 450 mm long for five pendants and one 400 mm long for one pendant and three legs. The cross-section of the blanks is 15 x 15 mm. The manufacturing technology for these parts is outlined in the technological map (Table 8).
Table 8
Routing. Manufacturing of “suspension” and “leg” parts
Development of drawings of product parts
Initially, an assembly drawing should be developed. It will allow you to determine the overall dimensions of the selected product (Fig. 52).
Rice. 52. Assembly drawing of the product “cup stand”
For the stand, the overall dimensions are height 350 mm and leg circumference ∅ 220 mm. The diameter of the stand is 35 mm, the angle of inclination of the cup holders is 75° and the diameter of the balls is 25 mm are reference dimensions.
In the specification for the assembly drawing we write that the product consists of a stand 3, three legs 1 with balls 2 and six pendants 4 for cups. The material of all parts is wood. As the material for making these parts, I chose hardwood - birch.
After the assembly drawing has been developed, you can proceed to detailing - developing drawings and drawing up technological maps for all parts.
With a waterfall
An interesting version of a floating bowl is a bowl with a waterfall. A plastic bottle will help you imitate pouring water:
- cut off the neck and bottom of the bottle and cut it in half;
- Next, you need to slightly warm up the halves of the bottle over the candle and bend them so that they form two tongues, with the help of which you will attach it to the rest of the elements;
- pour hot glue over the surfaces of the bottles so that it looks like a stream of water;
- leave to dry;
- Connect the two halves of the bottles, then the water will be voluminous.
There are many options for decorating the resulting waterfall. You just have to turn on your imagination. By creating an imitation of the seabed, you will get a wonderful marine flavor.
Craft materials
A person who sees this product for the first time has a question: how does a floating cup with flowers without support maintain balance in the air? This happens thanks to a little trick carefully hidden behind the decorations. If you want to surprise your friends or add a touch of originality to your interior, you will need the following:
- Cup and saucer.
- Reliable adhesive (Second, super-moment, Mars), designed specifically for smooth materials such as glass or ceramics.
- Thick wire, plug or two-core cable.
- Thermal gun.
- Scissors, pliers.
- Decorations according to your idea - shells, roses, pine cones, small toys, sweets, beads, buttons, tinsel.
- Modeling compound or super plastic.
It is best to use dishes from a coffee set, as they are usually small in size. A glue gun is used to work with uneven and rough surfaces, and for the rest use regular Moment glue. A metal hanger or aluminum fork will do.
New Year's flying cup
DIY wooden stools
A floating cup in New Year's style will become an original decoration of the New Year's interior. Snow made of cotton wool or padding polyester, a Christmas tree made of a pine cone or a cypress branch, a small figurine - what could be easier to create a winter New Year's entourage!
Christmas trees can also be made from New Year's green tinsel. White paint or a simple note corrector can imitate snow on them. You can determine the characters yourself when creating your New Year's story in a floating bowl!
A candle will add warmth and light to your cup
Winter cup with snow sparks
Multi-colored garland
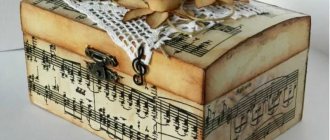
You can create decorative elements for a cup with your own hands from almost nothing; for example, making such small gift boxes will not be difficult. You can leave a note with your wishes in the form of a small envelope.
A flying cup decorated with Christmas-style candles, flowers and New Year's balls will give you a festive Christmas mood.
Reveals the secrets of creating a festive New Year's flying bowl in his master class by Nika Shvetsov:
What kind of wood are mugs made from?
Mainly made from coniferous and hardwood:
- made of oak - do not absorb moisture, do not crack. Over time, the shades change. Bog oak is the most seasoned;
- made of ash – natural color gives a beautiful aesthetic appearance. They have a distinct pattern;
- from tropical acacia – gives an extraordinary aroma. They stand out for their light-colored patterned structure;
- made of bamboo - light weight. The walls are quite thin, but durable.
A wooden mug is the most natural and healthy.
Beer mugs.
The thickness of the wood of kitchen utensils is large. The varnish coating is practical, resistant to moisture and temperature changes. The devices, painted in Khokhloma with gilding, look very elegant and rich.
The tree does not emit toxic substances. Much more practical than ceramic and glass. A layer of varnish closes the gaps between the fibers. The aroma is perfectly preserved.
For beer
A wooden beer mug has basically the shape of a barrel with a painted bottom. In Norway they are made in the form of a cylinder, with threads on the outside. The most common vessels are made of acacia and oak. Dried wood is used in production. It is turned, sanded and coated with varnish, which hardens when exposed to air. Such dishes are not prone to overheating.
For tea
Combined mugs.
The vessel has an unusual bowl shape. The fishing mug is missing a handle. Khokhloma painting is often applied. Thanks to their thermal properties, the cups retain heat for a long time.
Other options
The unique aroma and taste of wood made the devices very popular. Modern masters have created many original designs that have made tableware universal.
Preparing wood, dissolving boards into blanks
First of all, the board must be dissolved into slats from which the mug will be assembled. This can be done using a stationary circular saw or a hand saw with a ruler. The thickness of the slats must be at least 1.5 cm. Otherwise, there will subsequently be problems with fastening the handle.
The board unfolds into slats of the required thickness PHOTO: youtube.com
Each slatted piece is carefully processed using an electric planer. But here it is quite possible to use a regular manual one.
The slats should be as smooth as possible PHOTO: youtube.com
Next, each rail is aligned in width. By the way, when working with machines, do not forget about safety precautions. Violations can lead to serious injuries, sometimes even incompatible with life.
The slats need to be aligned not only in thickness, but also in width PHOTO: youtube.com
When long slats are processed, they must be cut into pieces of the required length. The result should be wooden blocks with dimensions of 15x30x180 mm. Further work will be done with them. In order for them to be tightly connected, you will have to use a milling machine, with the help of which one of the edges of each block will become convex, and the second sunken.
The blocks are ready, you can start working with a milling cutter PHOTO: youtube.com
What drinks can be poured?
Wooden mugs.
Suitable for both cold and hot drinks. Excellent heat retention. The vessel itself does not heat up. Green tea is often poured.
It is worth paying attention to kuksu. Unique packaging including a cup and plate. In nature, they are used for hot dishes, porridge, tea, and hot first courses. Considered to be food utensils.
Large cups were used for mead and kvass. Nowadays they mostly serve beer. Other alcoholic drinks are not poured into containers, as alcohol dries out the varnish. The wood is impregnated with food varnish. Colored drinks change color towards dark, as the dye gets into the cracks.
"Floating Cup"
This craft can also be called a flying or air cup. This craft will appeal to many lovers of beautiful decor.
What materials will be needed:
- Unnecessary cup;
- Saucer;
- Scissors;
- A small cable no more than 20 cm long;
- Any artificial flowers (paper can be used);
- Glue or glue gun.
Materials:
- unnecessary or specially purchased cup and saucer;
- special glue that glues glass, plastic, ceramics. These are such as Super-moment, Extra-strong moment, Secunda, Mars and others or a glue gun and adhesive rods in it, used for non-glossy surfaces;
- wire or wires that are strong;
- masking tape or electrical tape.
Cup assembly process
If you have patience and have a great desire to create such beauty, then after reading our guide you will easily cope with the task.
I recommend taking into account the following nuances:
- The cup and saucer must be the right size for a harmonious combination.
- Take them of small weight, otherwise the structure will be unstable. The frame may not support a heavy cup.
- The length of the wire or wire between the elements should be no more than two cup lengths.
- The cup should be at an angle of no more than 45 and its projection should not extend very far beyond the saucer. Otherwise, your topiary will be extremely unstable.
Let's start making the frame.
Cut the wire or wire.
We clean the edges of the wire at both ends with sandpaper and degrease it.
Glue one end to the cup, after the glue has set, glue the other end to the saucer. For final hardening of the glue, leave for 24 hours.
If you are making a frame from wire, then to fix it in the circle you can make a loop with a diameter of 2-4 cm. Secure it with a rod glue. To secure it to the saucer, make several zigzag twists to create a flat spiral. And also attach with a glue gun.
To increase the surface area of the base for decoration, the wire or wire can be wrapped with paper tape, felt, any other fabric, or covered with special plastic (polymorphus). Polymorphus, when lowered into warm water, becomes soft and pliable. You can give it any shape. He is easy to work with. If, when fixed, it freezes and becomes not flexible, then lower it into warm water. Finish the form. It is convenient to fashion an additional support step from polymorphus.
After you have completed making the frame, check its reliability. If the structure stands well, does not tip over, and nothing has come loose or fallen off, we proceed to the next stage.
This is a creative stage in which it is possible to show all the most unrealistic fantasies and ideas.
Flying mug of flowers
The mug is most often decorated with flowers.
The choice of colors is huge: dry, from colored and corrugated paper, from satin and other fabrics, made using the kanzashi technique, from polymer clay.
Then smaller flowers, leaves, petals. They cover all the gaps and imperfections.
Place the flowers at an angle to create the impression of smoothly flowing into the saucer. Also make the transition from the waterfall to the saucer smooth so that the topiary made by yourself looks more organic and natural.
If you wish, you can add small toys of moths, birds, and butterflies.
Flying mug of fruits and berries
Here, too, you can show your imagination. In addition to various vegetables, fruits, mushrooms, add moss, leaves, insect figures (dragonflies, butterflies, ladybugs).
Autumn fruits and flowers will look great.
And you can combine autumn vegetables with moss, leaves and small flowers.
Instead of a mug, you can make a homemade barrel or basket.
Floating money mug
A mug with smoothly flowing coins from a half-opened zipper looks very original and fascinating, almost magnetically.
The coins can be scattered in any order or neatly laid out with one side up. For coins, you can use foam plastic as a base for the wire. And the base of the frame itself can be straight or curved.
To make coins look brighter, they can be coated with gold paint; you can also coat a cup and saucer with this paint. If you do not want to paint over some elements, cover them with masking tape while painting.
This craft will look great in your home or you can give it as a gift with wishes for an endless cash flow.
Making hoops that hold the elements together
This product will be assembled without any glue at all. Therefore, everything must be perfectly adjusted. The only exception would be a handle mounted on tongues. But the liquid in the mug will not come into contact with it.
Next you need to make iron hoops that will fit around the outside of the mug, holding it in a compressed state. To do this, you need to measure the circumference, then make them from strips of narrow alloy. It is most convenient to place the ends of the circle on rivets. 2nd, the upper hoop should be a couple of mm smaller (around the circumference).
The ends of the strips are riveted, after which the hoop can be put on the mug PHOTO: youtube.com
Installing hoops: how to do it correctly
In order to install the lower hoop, it is necessary to remove the upper plastic tie, after which, carefully tapping it with a hammer through a wooden plank, lower it evenly until this happens. The fact is that the bottom will do little to hold back the wall elements from compression, as a result of which the larynx will turn out to be a little narrower, as befits a mug. Therefore, the lower hoop will stand tightly.
The hoop is pushed in with a hammer and a plank until it stops PHOTO: youtube.com
The upper ring is driven in a similar way.
How to care for wooden mugs
It is worth considering the recommendations for caring for devices in order to preserve it longer:
- It is necessary to wash in warm water with added soap. An exceptionally soft sponge. Do not use cleaning agent;
- after rinsing, allow the water to drain and wipe dry;
- Rinsing with vinegar or alcohol will help remove foreign odors;
- films from coffee and tea disappear in cold water;
- Onion juice effectively fights stains. Rub with the cut part and leave for up to 10 minutes. Then wash it off;
- containers with drawings are not stored in the sun;
- The devices are kept in a room with good ventilation.
In such mugs, tea retains its temperature longer.
How to make it yourself
It is quite possible to make such dishes yourself at home. Simple rules will help in production:
- From an ordinary wooden board you need to cut out a rectangular shape.
- Next, you need to thoroughly sand it to avoid any burrs.
- Calculate the angle at which the cut will be made. To do this, it is important to decide on the number of edges.
- The board is placed on a circular table at an angle. The angle is 22.5 degrees.
- Cut pieces with an average height of 18-19 cm.
- A slot is made on each piece. The depth should correspond to the thickness of the bottom.
- All parts are laid out and two strips of tape are glued, while connecting the sides into a ring. The ring is placed on paper and a contour is drawn along it from the inside.
- Trace another shape.
- The bottom is cut out.
- The sides are laid out on tape and glue is applied. Twist into a ring, tapping lightly with a hammer to ensure complete shrinkage into the slot. The remaining glue is wiped off.
- After drying, sand the edges.
- The beveled part is made with a cone for milling. Skinning.
- Trapezoid-shaped remains are suitable for mounting the handle. Drill a hole from the inside. Screw the handle and add glue. A small hole is drilled on the beveled sides, which is needed for nails.
- Cover the inner surface, bottom and two layers with polyurethane on the outer side.
- If desired, burn the image or apply a painting.
Start of activity
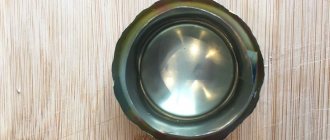
The stainless steel bowl listed in the list of required materials was chosen due to its relatively low height and convenient diameter, since it had to match the dimensions of the future mug and the blank for it.
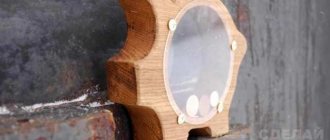
Once the bowl was selected, measurements of the height, top diameter and bottom diameter were taken using a caliper and drawn in Fusion 360. An offset of 10mm was used to create the timber sides. A somewhat freeform handle was added that looked ergonomic. A 19mm hole was added for the middle finger.
Cedar was chosen for the wood structure because of its resistance to rot and its relatively low density, which would make the cup lighter. Time will tell if the softwoods are strong enough for this application. The wall thickness and handle can be adjusted in the future. Once the design calculations are complete, you can begin loading the data into Fusion 360.
What is topiary
Topiary is a decorative figurine symbolizing wealth and abundance. Typically, topiary is a tree decorated with coins, coffee beans, shells, and, in general, various little things. The variety of elements that can be used to create a souvenir provides room for imagination. Using the same scheme, but using different materials, you can make completely different topiaries.
Previously, topiary was the name given to the special cutting of trees, which later developed into the creation of ornamental plants, where the crown was depicted in the form of various gizmos. At the same time, you can make such a small and beautiful tree from any materials; the simple scheme of work allows you to make something like this even for children.
Currently, in addition to trees, they create various compositions where the tree is not present at all. It's all about technique - gluing the elements onto the base tightly to each other. You can decorate the craft with various details, paint them, tie ribbons to create a unique gift and attract wealth to your home.