I've been wanting to get into wood carving for a long time, using both hand tools and power tools. This DIY wooden piggy bank is made from layers of chipboard that have been cut, glued, processed and shaped into the little pig you see in the photo.
Approximate final size: 280 x 150 x 150 mm, with a roomy belly so that all the money can fit in!
Photo frame
There is complete order here. Each folder contains all the files. The illustration with dimensions is named exactly as the file for cutting this product in cdr format is named:
We are constantly working on the collection, systematizing it even more, making the most interesting products, adding new layouts.
Within a year, we will make a unified file system for quick navigation, and then the price of the collection will at least double, but if you buy the catalog now, we will share with you all the updates to the collection and new layouts.
The price of this collection is only 2,000 rubles for a systematic collection of 10,000 layouts.
- Write to Alexey the phrase “ Buy 10,000 layouts ”:
- We will send you payment details (payment by Sberbank card is accepted).
- You pay.
- We will immediately send you all three links to download the collection
Contacts for purchasing a collection of layouts:
Free download of the Griffin laser cutting model.
Here is another 3D model for laser cutting, “Griffin”. Cool construction set for children and adults. Cool 3D plywood constructor from the category layouts for laser cutting
The use of laser machines is gaining more and more fans every year. The article presents a collection of various drawings, download for free.
Modern computer technologies, if not completely eliminated the need to use manual labor, have definitely reduced it to a minimum. The use of laser machines is also gaining more and more fans every year.
CNC laser machines refer to a whole range of devices designed for processing various surfaces. Management is carried out using computer programs.
Dear machine tool builders, we have selected a large number of models for you in dxf format, you can download them for free HERE.
A little history
People have long sought to protect their savings from thieves. For this purpose, wooden chests were used, lined with iron for strength. They were more like modern safes. The poor layers of the population put their savings in stockings or clay vessels, egg capsules, which could be sealed and buried for greater safety.
Historians do not have reliable data in which country piggy banks first appeared. Germany, China and Malaysia are mentioned as her homeland. Previously, piggy banks were made mainly in the form of pig figurines. This, in particular, is associated with the fact that in Chinese culture the pig symbolizes prosperity and prosperity.
What materials can be processed?
The device is used for processing and creating patterns on many types of surfaces:
And this is not a complete list of possibilities for using CNC cutting. The use of non-contact technologies will make it possible to process even materials of small thickness. Recently, automation of such work was considered impossible in principle. As well as simple creation of drawings for a CNC laser.
Original gift idea: piggy bank made of wood
Original handmade gifts are more valuable than ordinary purchased souvenirs. If you want to surprise a loved one, then take note of this simple idea.
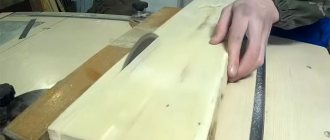
To make a piggy bank, you will need a piece of board (you can use oak, pine or hornbeam), as well as a piece of plexiglass a few millimeters thick. You will also need carnations with a wide head.
The first step is to take a piece of board of suitable size and use a compass to mark a circle with a diameter of 15 mm. But the diameter of the inside of the piggy bank can be made larger or smaller if necessary.
Main stages of work
Then you will need to draw the legs, tail, ears and penny. Then the author cuts out the pig from the board using an electric jigsaw. At the next stage, the resulting workpiece must be processed. A drum sander will do the job perfectly.
To give the piggy bank a neater look, you need to chamfer and round the edges. You will also need to make a slot for coins in the upper part of the structure. The author used a router bit, but you can use other tools you have on hand.
At the last stage of the work, all that remains is to cut out two circles from plexiglass and “sheath” the piggy bank on both sides. The craftsman uses decorative carnations with a wide head as fastening elements.
Cardboard box
If you want to save a lot of change, or save paper money, then a shoebox piggy bank is best suited for this. You just need to make a cutout for the money and decorate it.
If you set a goal not to open the bottle until a certain time, then the lid can be glued. If you simply tie a ribbon around the box or make a lock, it can be used more than once.
Cardboard
The simplest version of a cardboard piggy bank is a cube. A pattern is made from a single piece. To prevent the cardboard from breaking, it is better to run a nail or the blunt side of a knife along the folds.
A hole is cut in one of the planes. Then the cube is glued together with paper glue. The lid can be glued on. Or pierce holes in it and in the wall with a nail and make a “lock” from woolen thread or beautiful braid.
The cube can be painted or decorated in any other way that your imagination dictates. If you use corrugated cardboard, the piggy bank will be more durable.
Laser engraving: more about the technology
When using this technology, it is assumed that the material is removed from the surface of the workpieces by sublimation. The result is achieved by exposing the surface of the material to a focused laser beam. Maximum power is maintained when cutting. The main thing is to correctly manage the installation parameters to achieve the desired result. Laser engraving works on many of the same principles as a printer. The equipment is as convenient as possible due to the fact that almost no step is carried out manually. This is only required when preparing drawings. And in its finished form, the image will last as long as possible, without any damage.
Equipment with capabilities
This equipment has a laser base as its main working tool. It is distinguished by a high power rating. This makes it possible to process materials with different types of parameters. Thanks to such technologies, it is possible to obtain parts with different characteristics and dimensions.
The capabilities of laser installations are worth considering in more detail in order to correctly use patterns with templates.
- Cutting.
This is an affordable technology option, although not the most effective. A laser cutter uses less energy than a plasma cutter to do the same job. Even when using heat treatment. The advantage of this type of cutting is the accuracy of the edges and the ability to preserve optical properties.
Cutting is done through or through. The use of the second option is relevant in the case of making souvenirs. Laser processing helps to quickly remove the top layer of plastic. This allows you to form a pattern on the surface of the second layer. Such jewelry work can only be done by laser and CNC machines.
- Engraving.
This solution has its own operating principle. Thin through cuts are applied carefully, step by step. After this, a line is drawn up with the necessary dimensions. It doesn't matter how complex the image is, how thick the material is. The main advantage of laser engraving is maintaining high speed.
Rocket
To make a rocket, you need to make a cone out of red paper and glue it to the top of the bottle, after closing the lid. The “body” of the rocket can be wrapped in white paper.
Cut out six or eight triangles from red paper and glue them in pairs, with the colored part facing out, using paper glue. This is how you get stabilizers. Now, using a glue gun, you need to attach them to the base of the rocket.
Note!
How to make a house out of cardboard: 140 best photos of children's crafts with your own hands + step-by-step manufacturing instructions with simple diagrams
DIY rose lamp - step-by-step instructions for creating a lamp with your own hands + original design ideas with photo reviews
- Furniture decoupage: TOP-140 photos of non-standard decoupage options. Step-by-step instructions for decorating furniture with your own hands
Turtle
You will need: 1.5-2 liter green plastic bottle, moisture-absorbing wipes (urethane foam), scissors, thick needle, thick threads, button, black pen.
Master Class
- Cut off the bottom of the bottle, then trace it on a napkin (urethane foam).
- Draw the head, 4 legs and tail of the turtle.
- Cut out the workpiece.
- Sew the plastic shell to the turtle's body, as shown in the photo instructions.
- Decorate the center of the shell with a button.
- Draw the turtle's face and claws.
- Cut a hole for coins.
- It is worth noting that this turtle swims remarkably well!
The turtle piggy bank is ready!
Piglet
You will need: a half-liter plastic bottle, pink paper, self-adhesive eyes, wooden beads, soft wire, glue gun, scissors, black marker.
Master Class
- Remove the label from the bottle.
- Cut a hole for coins.
- Cover the bottle with pink paper and cut a hole for coins.
- Cut out the ears from another pink paper, then glue them on.
- Cut out a pink circle the size of the lid.
- Glue the circle onto the lid and draw 2 dots with a black marker to make a patch.
- Attach self-adhesive eyes.
- Glue 4 wooden beads for pig legs.
- Wrap the soft wire around your finger to create a spiral shape, then glue it on as a tail.
- Fill your piggy bank with coins.
The accumulative pig is ready! In the same way you can make completely different piglets)