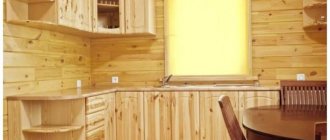
Without a kitchen corner - a corner sofa in addition to a kitchen table and stools, chairs or bench - modern life is already unthinkable. Making a kitchen corner with your own hands makes sense not only for the sake of saving money: not every commercial model will definitely fit into a free corner of the kitchen, and the one that is suitable in size may not be suitable in design or price. A kitchen corner piece of furniture is not a complex piece of furniture, but a novice craftsman who is not properly equipped with rather expensive equipment will come across many pitfalls on the way to transform it into a product. This article is about how to bypass them and still make a corner in the kitchen at home that is not inferior to the factory one.
Note: the secret of the comfort that a kitchen corner creates is its aesthetic self-sufficiency. A corner sofa with a table and stools/bench is a self-zoning piece of furniture; it will create an area of calm and well-being, a kind of virtual bay window or alcove, even in an open field or barn.
Which one to do
It is possible to make a kitchen corner in different types of designs. The main requirements for a kitchen corner are compactness, convenience (ergonomics) and hygiene in the kitchen. We still need to achieve maximum savings in money, materials and labor by working as a public tool. Based on this, we will choose which one can be made simpler and better.
The main types of kitchen corners are shown in the photo. Pos. 1 – bay window corner, round or faceted. Each rider is allocated an optimal seat width of approx. at knee level. 400-450 mm. The bay window corner is extremely convenient and cozy, but, alas, it is complicated, expensive and requires an extensive kitchen.
Types of kitchen corners
A semi-bay window corner will fit into the kitchen of a modern apartment above the middle class: the side sections are straight, and the width of the corner at knee level is 200-300 mm, pos. 2. For a person of average build, sitting in the corner of a half-bay window is almost as comfortable as in a bay window. In a kitchen of normal dimensions, corners with a beveled corner are most often installed instead of half-bay windows; in them, the rider’s knees have 150-200 mm, pos. 3. You can’t move much anymore, but sitting quietly, no thoughts arise about where to put your knees.
Kitchenette with sleeping area
Lovers of small-sized kitchens most often make straight corners, pos. 4, with backrest wedge in the corner, pos. 5, and with a beveled back, pos. 5. Their convenience, technological complexity and cost are increasing in this series, but straight kitchen corners have a common positive property: if instead of a pair of stools on the long side of the kitchen table, the height of the bench is the same as the seats of the corner, then by moving the table and moving the bench, you can get a bed with a width of 600-850 mm. Very expensive and equipped with complex mechanisms, branded kitchen corners with a sleeping place are no more convenient, see fig. left. A corner with a beveled corner also has the property of transforming into a sleeping place without additional devices, if the corners of the seat of the complete bench are appropriate. beveled way.
Uncomfortable kitchen cornerNote: in fig. on the right is a perverse product of modern marketing - an expensive straight kitchen corner. In fact, the straight angle is the most uncomfortable of all. Much more inconvenient than its closest relative - a corner with a wedge in the back. A straight kitchen corner is only good for placing an unwanted guest in the corner. But he won’t be able to leave in English; he will have to push the owners away.
Corners with a beveled corner and a back are often complemented by a table and/or bar in the corner, pos. 7-9. The first two are not an option: getting something out from behind your back is inconvenient, but pushing it or accidentally knocking it over is easy. If the owners are firmly subject to prejudices and do not want to put anyone in a corner, then it is better to equip a mini-sideboard with a chest and a bar in the corner, as in pos. 9.
At pos. 6, 7 and 8 show corners with the so-called. hanging angle, i.e. without a separate support. Kitchen corners with hanging corners, made of laminated chipboard, are no less strong and durable than those with supporting corners, but they are cheaper and more technologically advanced to produce. However, they cannot be modular (see below), because initially performed only by the right or left. For the consumer, their cheapness is apparent, because... The hanging corner angle cannot be transported assembled and requires assembly on site.
Modular corners
Kitchen corners made from pieces of furniture that are not connected to each other (modular, see fig.) are good to produce and sell: there is no need to make right and left versions. They are also appreciated by those who often rearrange furniture; modular kitchen corners look good in studio apartments of laconic styles, such as loft, high-tech, minimalism. But the functionality and ergonomics of modular kitchen corners, simply put, are non-existent - you can’t put anything in them, and it’s uncomfortable to sit in the corner.
Modular kitchen corners
Note: traditional kitchen corners are also made modular, consisting of 3 separate items - a pair of sofas and a corner. They are placed right or left, turning the corner by 90 degrees, and one of the sofas by 180. However, such corners are more expensive, because Extra material is required for the corner and its design becomes more complicated. It is very difficult to make a modular kitchen corner at home, because... To the required accuracy of pairing of parts within 1 item (see below), the accuracy of pairing of objects with each other is added.
Manufacturing process
Before you begin manufacturing, you need to determine what its design will be and where you plan to place it.
To make even the simplest option for a room or kitchen, the drawings must be as accurate and detailed as possible.
The creation process consists of several stages, which include:
- production of armrests;
- assembly of the left and right parts;
- filling frames with foam rubber;
- fabric upholstery.
What to do and what not to do
The first mistake when designing a kitchen corner is a table with legs and straight front seats, pos. 1 in Fig. The secret of the comfort and self-zoning of a kitchen corner is its compactness and convenience, but here the table cannot be really moved, and its legs get tangled in the knees of 3 people sitting. The corner for the kitchen should be made under the table of a beam-and-panel structure, pos. 2 and 3, and the facades of the seats are either sloping (pos. 2) or with raised bottoms of the chests under the seats, pos. 3.
Tables and drawers for kitchen corners
The second mistake is not to make drawers under the seats, pos. 4 and 5. They interfere with each other and spoil the floor. To get to the contents of the drawers, you need to move the table far away and kneel down. If the house is run by a maid and a housekeeper, and the owner does not care about their worries, then a kitchen corner with drawers is a matter of taste. And we need to make a corner for ourselves in the kitchen with chests under folding or removable seats.
Homemade kitchen corner. Corner sofa
Our kitchen corner is designed in two versions - identical in design, but differing in the materials used and color design. Which one to choose is a matter of taste.
In the first option, considered in detail, the load-bearing parts of the sofa and table are made of wood board, which can be coated with black varnish, azure, or treated with stain and varnished. The table top and seats of the sofas are made of chipboard with white cladding. The edge trims (pine) are also painted white. The foam pillows are covered in durable decorative fabric in a rich green color that contrasts nicely with the black and white trim.
| A “calm” option for finishing the kitchen corner: brown wooden parts, beige pillows. |
Fans of calmer tones can make a corner sofa and table in a different version. The difference between them and the first option is only in the materials used and color (here - a combination of brown and beige). All parts of the kitchen corner are made from wood slabs lined with light veneer. After assembly, the corner elements are moistened, sanded, treated with a walnut-colored stain, and then several layers of transparent matte varnish are applied. The soft elements are covered with beige fabric.
When making a sofa and table according to your own design, their dimensions can be chosen arbitrarily, with the exception of the height and depth of the seat. It is advisable to change the latter only if the seat of another, very comfortable piece of furniture is copied. The dimensions of the table can be easily adjusted to any length of the bench.
Get to work!
Which corner of your kitchen is best suited is up to you. And here we will see what difficulties you will encounter when making it at home without experience, and how to cope with them. The analysis will be based on the example of a design known in RuNet, the drawings of which are given below; The main materials are laminated and simple sanded chipboard with a thickness of 16 mm.
Drawings of a kitchen corner made of laminated chipboard
Specification for kitchen corner drawings
On the one hand, this corner requires minimal materials and labor and can be made much more convenient, see below. On the other hand, the prototype is oriented towards industrial technology, its design is rational and well-developed, but we need to get a product no worse than that, assembling it at home on the knee and in weight. This particular sample was also chosen because it is capable of acquiring all the best qualities of a corner with a beveled corner, plus the ability to serve as a sleeping place, but technologically it is not much more complicated than a right corner. In addition, there is a generally correct specification for it with statements of material and fittings, see fig. on right.
Note: if you check/refer to other sources with descriptions of this sample, keep in mind that in some of them, and quite a few, in the drawings of the parts the dimensions are given mixed for sofas with a length of 100 and 60 cm. Assemble the blanks cut out from them into the product, of course, impossible.
For example, in the top row of Fig. Assembly diagrams are provided with the drawings, clear as day to a factory technologist. But what to do with them if you don’t have production equipment? The sample under consideration is a panel box-shaped structure, similar to the power circuit with load-bearing skin in the aircraft industry. Box-panel structures save material and labor as much as possible, resulting in very durable products, but their manufacturing technology is subject to a number of specific requirements. There are a lot of invisible tricks here, but we can deal with them, and we will do it. First for the sofas, in this order:
- Selection of fasteners;
- Adjusting dimensions for a specific room;
- Cutting laminated chipboard and chipboard into blanks, marking and drilling holes;
- Trimming the edges of beveled parts and edging;
- Covering the parts for which it is required with soft covering;
- Assembly.
Next, let's see how we can simplify the manufacture of a corner section (corner) and make it more convenient. The original design is modular, but in our apartment the corners of the walls do not change places by themselves. Knowing exactly where the corner will go, whether it will be right or left, the corner can be made hanging (see below), and this will make the work much easier and cheaper.
Fasteners
The main fastening elements of this kitchen corner that absorb operational loads are confirmed furniture screws and steel corner connectors; dowels play a supporting role, keeping the parts from moving. The specification above contains a list of accessories for assembly in an industrial environment, but for home use, some things will have to be changed in it.
Note: in products made from laminated chipboard and chipboard, it is possible to replace confirmats with wood screws to connect parts through the face into the edge occasionally. In this product - under no circumstances is it possible, because... the boards are very thin, 16 mm. The connecting corners are attached to the parts using wood screws, see below.
Confirmations
The standard size of confirmats 7x50 specified in the specification is the maximum permissible for a given chipboard/laminated chipboard thickness. This makes it possible to transport the corner modules in assembled form and reduce its cost somewhat, because there is no need for on-site assembly, and any of the modules is carried into the apartment by hand by a person with the physical development of an office type. But marking and drilling for the thickest possible fasteners also requires production precision (see below), which cannot be achieved by working at home with your hands. For example, can you, when working with a hand-held electric drill, feed the drill perpendicularly or parallel to the face of the board with a deviation to the side of no more than 0.1 mm? The question is rhetorical. Therefore, for manual work, provided that the product will not be transported over long distances with shaking and jolts, the size of the confirmats should be reduced to 6x50 or even 5x60. Otherwise, i.e. If you take fasteners according to industrial specifications, some of the parts may delaminate during drilling or assembly. If the chipboard/chipboard is taken from eco-friendly brands E0 or E1, then it will definitely delaminate, so the chipboard/chipboard should be taken from the household brand E2, and if you want E0/E1, then the thickness of the boards needs to be increased to 24/20 mm, adjusting accordingly. dimensions, see below.
Fasteners and connecting elements for the kitchen corner
The height of the screw neck H is important for the strength of the confirmed connection, see pos. 1 in Fig. H must be exactly equal to the thickness of the overlay board, on the right in pos. 1. Sometimes H is indicated by the 3rd digit in the name of the screw size, i.e. you will need confirmations 6x50x16 or 5x60x16 for the original structure or 6x50x24/6x50x20 or 5x60x24/5x60x20 in the case of using boards of greater thickness.
The confirmation drill must be taken exactly for the given screw size. The height of its skirt should be equal to H (in the center in position 1), the diameter should be equal to the diameter of the screw body without thread, and the length of the spiral part of the drill L (without cutting tip) should be equal to the full length of the threaded part of the screw. If the heel of the screw rests on the residual conical hole in the hole, then hidden delamination in thin boards is guaranteed, and it is only a matter of time before it spreads outward. Small.
Dowels
In all sources on the topic of the kitchen corner in question, photos of wooden dowels are given as illustrations with enviable consistency, but without proper understanding. This is a gross mistake in this case. Wooden dowels are designed for connecting wooden parts: they dry out along with the base material, and the connection remains strong for many years. Or centuries, if the furniture was made by an outstanding master.
Chipboard/chipboard do not dry out and are therefore connected with plastic dowels. If you take slightly more expensive propylene ones, then there is no need for rather labor-intensive and careful gluing of joints. For the reasons stated above, the diameter of dowels for manual production must be reduced to 6 mm, leaving their length the same. In the edges of the boards, holes for dowels are drilled only along the jig (item 4 in the figure); diameter - 5.3 mm, drilling depth 22 mm in the edges and 12 mm in the faces.
The seats (see below) can be made not folding, but removable, by placing them on dowels with round heads for detachable connections (above, position 2). This will allow you to avoid the rather complex installation of piano hinges, the costs of them and fasteners for them. And if they decide to rearrange the corner in a hurry, then the likelihood of damage to it is reduced: they grabbed the seat without thinking, it remained in their hands, and the sofa did not jump or hit anything. Getting something out of the chest under the seat on piano hinges is no more convenient, because... The seat cover reclines less than 90 degrees. It’s easier to remove it and lean it against the back than to rummage through the chest while holding the lid with your hand. But in the design under consideration this, unfortunately, is impossible, see below.
It is better to take other dowels for our kitchen corner with faceplates, at the bottom at pos. 2. Washer thickness 0.5-0.7 mm; At first such gaps will not be visible. After some time, the washers will be pressed into the chipboard (the parts are tightly tightened with confirmats), the gaps will converge, and the entire product will acquire additional strength. Another advantage of dowels of this type is different corrugations on the long and short parts, which provides even higher strength of the connection without the danger of delamination of the boards. You just need to select dowels of the required size: with a 20 mm long part and a 10 mm short part (for 16 mm boards). For boards 20/24 mm, the long part needs 30 mm, and the short part 12/16 mm.
Corners
For the design in question, you will need steel isosceles corner connectors 30x20x2 (for fastening obliquely) or 30x15x2 for fastening in a row. The first number indicates the length of the corner shelves, the second their width, the third – the thickness of the material. During assembly, the corners will have to be partially bent to install inclined parts, so you need to take them white or gray from viscous “raw” or moderately annealed steel. The presence of stiffness stamping on the bend for bent corners is unacceptable, pos. 4 in Fig. The internal and external folds of the corners should be smooth, without tears or wrinkles. The corners of burnt steel, yellowish with spots of tarnish, even if they bend, will then crack. Black phosphated corners from the so-called. Overdried steel is very strong, but when bent, it breaks immediately.
Note: just so you know, plastic furniture corners can be bent by thoroughly heating them with a household hairdryer at full power. But plastic corners last no more than 3-5 years, and then they dry out and crack.
Dimensions
Let's look again at Fig. with drawings (duplicated on the right). The dimensions have been corrected: the length of a sofa 1 m long is shown in black; red and blue next to the “black” ones for a small sofa 60 cm long. The green marks will come in handy later when we get to the corner seat.
The “red” dimensions are basic: you need to add to them the missing amount of 600 mm for longer sofas. For example, for a sofa 1.3 m long, you need to add 700 mm to the “red” dimensions. The longest possible length of a sofa of this design is 1.5 m. “Blue” dimensions are relevant for sofas up to 750 mm long. If the sofa is longer, you need to take “black” sizes instead of “blue” ones.
6th position
There is no 6th part in the drawings. This is a seat blank, a simple board without any holes. Its length is equal to the length of the lengths of the sofa (968/568 mm in the drawings) minus the double thickness of the upholstery fabric, it is kept within 1-3 mm. The thickness of the optimal flock and microfiber in the kitchen is approx. 1.5 mm taking into account folds, so in this version the seat length will be 965 mm for a large sofa and 565 mm for a small one. Minimum seat width 297 mm, including fabric upholstery and installation on piano hinges, see below. If the dimensions of the kitchen allow, the width of the seat can be increased, then an overhang will form in front. With the corner seat option discussed below, the maximum width of the sofa seats is 444 mm; then the seat bevel of the corner section is reduced. In this case, the width of the bed can be up to 900 mm.
Cutting and Sawing
Sawing chipboard/laminated chipboard sheets into parts is done using a jigsaw along the contour. The contour is drawn according to the template, so the jigsaw file must be guided along the inner edge of its line. The upper and lower edges of parts 2 (chest front) and 8 (back base) in Fig. with the drawings you need to cut it obliquely, for which you need a jigsaw with a tilting shoe or you will need to buy a shoe for the existing one. The angle of inclination of the front of the chest is 10 degrees, and the back is 5 degrees. Some shoe scales are graduated in units of relative inclination; for an angle of 5 degrees it is 0.085, and for 10 degrees it is 0.177. Not 0.175, as it might seem, since the relative slope is nothing more than the tangent resp. corner.
The jigsaw file for trimming is beveled inward from the edge to be trimmed. For children 2 (facade), the upper edge is cut from the face so that the upper outer corner remains intact, and the lower edge, on the contrary, from the underside (wrong side), so as not to cut off the inner lower corner. The edges of the backrest, because it is tilted back to the facade, cut in the reverse order: the top one from the back, and the bottom one from the front.
Edging
The free edges of the kitchen corner parts need to be covered with something that matches the overall tone. Edging PVC kitchen furniture with a T-shaped edge is undesirable, not because the groove for the edge needs to be selected with a milling machine, but because dirt will accumulate in the gaps of the edge. By the way, for the same reason, it is advisable to make a kitchen table under a ready-made postforming tabletop: it does not require edging at all and is equipped with a drip tray.
The visible and touchable edges of kitchen furniture are covered with a tape made of complex ABS plastic (ABS, acrylonitrite butadiene styrene) up to 2 mm thick, and the back ones and those above the floor are covered with crepe paper tape. ABS is absolutely safe, hygienic and environmentally friendly; medical equipment is also made from it. ABS and paper edges are produced dry and self-adhesive. The first ones are intended for industrial use with a separate supply of glue, so you need to get self-adhesive ones. Edging a kitchen corner with self-adhesive edges is done as follows:
- The edge strip is cut from the roll to the required length plus 2-3 cm. It is convenient to measure the lengths of curved edges with a tailor's meter.
- Peel off 2-4 cm of protective film from the end of the segment without touching the adhesive layer with your fingers.
- Place the end of the tape on the edge exactly lengthwise and press.
- Holding the tape with your hand, with the other hand you pull out the protective film from under it by the original “tail”. The tape should lie on the edge itself.
- When the tape is all on the edge, it is rolled with a rubber roller.
In general, the procedure is the same as for high-quality self-adhesive gluing. By the way, this is a good finishing option if you decide to make the entire kitchen corner from inexpensive sanded chipboard: there are few visible parts in it, and the textured self-adhesive under acrylic varnish from natural wood will not be immediately distinguishable even by an experienced carpenter. Self-adhesive gluing is done after sawing and trimming the edges before edging. In this case, the inside of the chest can simply be varnished.
Marking and drilling
The accuracy of marking parts of box-panel structures made of chipboard/laminated chipboard is required to be no worse than +/-0.5 mm, but how can it be maintained on edges and sanded chipboard if the size of the material fibers is of the same order? There are no problems with this at the factory; there are no markings as such - they cut and drill using automatic machines. In handicraft production, they use templates, but in order to check each one, you have to ruin up to 2-3 blanks. For piece production at home, this is unacceptable, if only because you need a lot of templates and so much time is required to make them that it is easier to buy a ready-made corner. Moreover, the quality of the product made from parts marked according to templates turns out to be 3+ at best.
Marking calipers
Firstly, the marking of holes on the parts of the kitchen corner made of chipboard/laminated chipboard should be done so-called. a marking caliper with sharp jaws for measuring external dimensions and a vernier for precise installation of the carriage (on the left in the figure). Experienced mechanics sometimes make a marking caliper from a regular one, sharply and very carefully sharpening the tightly knit outer jaws on fine sandpaper, but manually align the tool carriage exactly according to Vernier is difficult.
Note: electronic booms, incl. The marking ones (on the right in the figure) are actually not so convenient to use, and the marking accuracy is worse. Here electronics have not yet caught up with good old mechanics.
Next, marking the holes on all parts is done from the bottom. When marking asymmetrical sidewalls, keep this in mind so that it does not turn out to be a mirror image. The right and left sidewalls are, of course, mirror marked.
Then, between the centers of the outer holes for fastening the mating part, axial lines are drawn into the edge with confirmations and beaten from them to the sides along half the width of the attached board. The extension of the attached part is marked along the center line and is also marked to form the contour of its edge. On the bottom of each board, you need to mark the contours of all attached edges in this way, this is necessary for accurate assembly. The accuracy of beating edges is required +/-0.5 mm, which in this case is ensured by a fitter's angle with millimeter divisions and a steel fitter's ruler.
Sverlovka
Drilling of blind holes for dowels is carried out immediately along the required diameter to the required depth, as described above. But for now we drill holes for confirmations only through the faces of the boards and only with the spiral part of the drill, i.e. not to full diameter. We will drill it completely later, in the order of assembly, so the entire kitchen corner will turn out without distortions and cracks.
Selection of materials
Before starting work, determine the materials. They take into account not only the color and design of the future product, but also its practicality. After all, the kitchen is a room in which furniture is exposed to soot, grease, temperature changes and high humidity.
Frame
The sofa frame is the foundation. The service life of the product depends on its quality. The following materials are used to make the frame:
Tree. One of the most popular options. This material is relatively expensive, but it is easy to work with and looks noble. In addition, wooden frames are durable and reliable.
It is easy to work with, and with proper processing its moisture resistance increases. It swells when exposed to moisture for a long time. Has less strength than wood.
Chipboard. The characteristics are similar to products made from MDF. This material is also made from wood waste, but by gluing with synthetic resins. Releases harmful substances and is not recommended for the kitchen. The main advantage is low cost.
Metal. Strong, durable and fireproof material. It is relatively expensive. To work with it you will need welding skills and appropriate equipment.
In most cases, in addition to the main frame material, plywood is used.
Textile
The appearance of the product and its practicality depend on the fabric.
The following options are used for upholstering sofas:
- Skin. The strongest and most durable material that is not afraid of grease and has high fire safety. It has a high cost. To work with it you will need a special machine or hand tools. It looks expensive and noble.
- Leatherette. It looks like leather, but is less resistant to wear, costs less and has low combustion resistance. Expensive options last a long time, cheap eco-leather cracks quickly, leaving greasy stains on it that are difficult to clean.
- Tapestry. Natural, durable material. Embossing is often used to decorate such fabric.
- Folk and velor. Soft fleecy materials made from synthetic threads. They become electrified, attract dust and dirt, and quickly lose their appearance as they wear out and wear out.
- Linen and cotton. Natural materials, easy to use. With frequent washing they fade and shrink.
- Microfiber. Soft synthetic fleece material. Thanks to Teflon impregnation, it repels dirt and dust, does not fade when washed, and does not wear out over time.
- Jacquard. Outwardly it resembles a tapestry, but is made of synthetic threads. Dense and durable. It is resistant to fading in sunlight, easy to clean, and has a long service life.
- Chenille. It feels like velor to the touch. It is characterized by high wear resistance and resistance to fading.
Filler
When creating upholstered furniture and pillows, filler must be used. The following materials play its role:
- Sintepon. This is a thin material that is wrapped around thick filler to increase its durability.
- Foam rubber. Cheap but short-lived material. Sofa seats with such filling quickly lose their shape.
- Batting. Another inexpensive but short-lived option.
- Holofiber. This is a more wear-resistant material that does not lose its shape with prolonged use.
- Felt. Another filler option with a long service life. Has a relatively high price. Has low softness.
- Coconut fiber. Expensive, but durable filler. Used for the production of orthopedic furniture.
The level of furniture softness depends on the material used and the thickness of the filler. For sofas with an average level of hardness, take a 5 cm layer of filler.
Upholstery and upholstery
Before assembly, the sofas need to have their backrests and seats completely covered, and the corner seat parts also require backrest segments separately. We will talk about covering and assembling the corner of the kitchen corner later, but for now we will limit ourselves to sofas.
Holofiber, which is excellent for interior furniture, does not fit well in the kitchen; in the local microclimate it is not particularly hygienic. The soft padding of kitchen furniture is made from low-permeability foam rubber of the EL2240, EL2540, EL2842, EL3050, EL3245, EL3550 and EL4050 brands. The first 2 digits characterize the hardness, and the last 2 indicate the density in kg/cubic meter. m. The load-bearing capacity within this range increases from 60 to 120 kg per square meter. m, this means that this material is able to withstand such weight indefinitely, completely straightening when the load is removed. Foam rubber EL2842 is universal; lower brands go to the backrest, EL3050 and EL3245 to the seat, and EL3550 and EL4050 are intended for furniture in public buildings or for particularly heavy riders.
The thickness of the foam layer is 20-40 mm. It is recommended to cut this evenly with a heated nichrome thread. It’s also not difficult to make a machine for cutting polystyrene and foam rubber with your own hands, but it’s still extra work. In addition, for the machine to be safe, the thread must be powered from a 12V 5A power source, and this is more serious work or a significant waste of money. However, cutting pieces of foam rubber with fairly even edges can be simpler:
- A steel bench ruler is taped along the cutting line;
- The cut is carried out with a new, absolutely sharp mounting knife in several steps along a ruler;
- For the first cut, the blade is extended 5-7 mm, and the knife clip rests on the ruler. Take a closer look at your knife - the end of its clip is at an angle, this is just for such cases;
- For subsequent cuts, the blade is advanced further by the same amount until the entire layer is cut.
Covering the kitchen corner seat with foam
The seats of the kitchen corner are covered with foam rubber with a fold along the front edge. For the hem you need to give an allowance of 2-3 times the thickness of the board. Sheets of foam rubber for the backs are cut exactly to the size of the base. The foam rubber is glued with 88-grade glue, the folds are glued last. If the seat has a stem, then before gluing it is better to round its front edge, and give the foam allowance equal to 4-5 times the thickness of the board, see fig. on right. It will be much more comfortable to sit on such a seat.
tight fitting
Conventional upholstery fabrics are rarely used in high-quality kitchen furniture, because... quickly become saturated with fumes and get dirty. Leatherette is more hygienic, but sitting on it in the heat is unpleasant, and installing air conditioning in the kitchen is not advisable for many reasons. It is best to cover the kitchen corner with flock or microfiber.
Flock is available in plain and colored, smooth and embossed, on the left and in the center in Fig. Dirt becomes entangled in its fibers without migrating back, and is removed during mandatory regular cleaning at least once every 2-3 months. Flock upholstery of kitchen furniture lasts up to 10 years or more.
Covering the kitchen corner with flock and microfiber
Microfiber works on the same principle, but its fibers are regular plexuses of the finest fibers. Microfiber seems to draw dirt into itself and hold it firmly; This material was originally developed for cleaning optical glasses. Microfiber is available only in single-color, modest colors (on the right in the figure); does not require maintenance at all times of use. Unfortunately, this material is expensive and lasts no more than 3-5 years, and then you need to completely change the upholstery: microfiber cannot be cleaned, because... in this case, its structure is disrupted.
Fasten the flock and microfiber upholstery as usual, using a furniture stapler to the underside of the base. The folds at the corners are glued with 88-grade glue: the fold is turned away, glue is dripped onto the fabric adjacent to the base, left until tack-free, and the folded fold is pressed. There is no need to glue PVA, it can cause stains visible from the outside.
Assembly
Assembling furniture using corner clamps
Before final assembly, thrust bearings are placed on the legs of the sidewalls. Any board as wide as thick will do, but it’s still better to use round ones with threaded or dowel heads instead of those recommended by the authors of the original design: there will be fewer nooks and crannies for dirt to accumulate. Dowel bearings are cheaper than threaded ones, and they are easier to install: holes are drilled in the edge of the leg for dowels (6 mm in this case), and the bearings are simply pushed into place.
How to assemble homemade box-panel furniture without distortions, cracks and without using complex production equipment, this is, as they say, another question. In this case, you cannot do without a pair of corner furniture clamps, see fig. on right. Welding corner clamps with a common clamp are not suitable, they cannot accurately bring together the parts to be connected, but with the help of furniture clamps this is not so difficult:
- They put dowels in the children. 4 in the drawing, lightly tapping with a rubber hammer or mallet;
- One of the sidewalls (part 1 in the drawing) and the back wall of the chest (part 4) are tightened with clamps so that the edge of the part. 4 entered the contour marked for her on the underside of the child. 1;
- Drill holes for confirmations and screw them in;
- Without removing the clamps, they place the children on the dowels. 3 – bottom of the chest;
- The upper clamp is removed and moved to the far corner of parts 3 and 4;
- Connect parts 3 and 4 (with additional drilling of holes for confirmations). The clamp from their corner is immediately removed, otherwise it will remain in the sofa;
- Remove the remaining clamp (don’t forget!), put the child. 5 (lower backrest brace) and attach to det. 4;
- They put children. 2 – façade of the stall;
- Attach the second side panel without screwing the confirms all the way. You just need to bait so that the dowel heads fit slightly into the holes;
- Assemble the backrest (inset at the bottom right in the figure with drawings) and put it in place, then pushing the sides of the backrest apart. The confirmations on the 2nd side are holding up;
- The seat is hung on piano hinges, see below.
Here a possible question may arise: why use clamps if there are already dowels? The dowels are not guides, they do not hold the angle and can break during hanging. Taking into account the fact that marking and sawing were done by hand, it was impossible to do without clamps. Conscientious professional furniture assemblers use clamps with all their might, but why do we need to hack around for ourselves?
Seats
In our case, it will not be possible to place the seats on dowels with rounded heads, because The façade of the stall is slanted. If you limit yourself to dowels on the edge of its rear wall, they will quickly break out even if you carefully remove the seat cover. The seats of the sofas in the kitchen corner are hung on piano hinges, but it’s not worth taking 1-2 long ones (item 1 in the figure): it’s difficult to hang the lid of the chest on these so that it lies in place evenly and does not warp when folded back, without special equipment. You need to take 3-4 short loops for fastening in a row, pos. 2. Loops for fastening with a zigzag (item 3) are not suitable - how to attach them to a 16 mm board? The same applies to card loops, pos. 4, strongly recommended by a number of authors.
Hinges for hanging kitchen corner seats
The wings of the seat hinges should be as wide as the thickness of the board. First, the hinges are placed on the seat, aligning the edges of the wings along the bottom edge of the board along with the upholstery. Then an assistant is needed: he will hold the seat, and the master will align the edge of the wing of one of the outer hinges with the lower edge of the board of the lower backrest screed (detail 5 in the drawings) and attach a pair of screws, not reaching them all the way. Then the other outermost loop is attached in the same way, and after that the rest are fastened to full tension and the outermost ones are pulled out. The assistant keeps the seat reclined all this time.
A variety of ideas for home crafts
There are a large number of technological techniques for home crafts that can make the interior not only more decorative, but also functional.
By connecting the ends of thick branches together, you get a hot stand. Such a product can even be made from paper folded in several layers. The resulting strips are glued together in a spiral or formed into products in the shape of a square, rhombus, or rectangle.
Even photocopying techniques are available for home crafts, allowing you to transfer designs onto fabric. The design is attached to the fabric requiring renewal with the front side. On the reverse side it is pressed with an ironing press or iron until the image is completely transferred. All that remains is to dry and iron the product.
- Unusual vases are made from an ordinary beautifully shaped glass bottle. To do this, the outer surface of the bottle, in a spiral, needs to be tightly wrapped with decorative rope, fixing it with glue.
If you don’t want to bother with rope and glue, you can paint the bottles in bright colors, decorate them using the decoupage technique, or make an interesting painting on them.
- Concrete, plaster and clay certainly provide room for creativity. These materials are used to make unique stucco elements for interior decoration. They are also used to create beautiful garden lamps, original vases, fancy candlesticks, exclusive figurines and other decor.
- Such handicrafts can not only become an excellent decoration for your home interior, but also be useful in everyday life. For example, for safe movement around the local area at night, garden lights can be placed along paths and paths.
Homemade crafts are a fun activity. From the variety of ideas, it is easy to choose an option suitable for a specific interior in order to add a touch of individuality to it in the form of an original home-made product.
Try, experiment and you will definitely succeed.
Coziness and comfort in an apartment largely depends on the quality of the furniture. Exclusive furniture made independently has undeniable advantages. Therefore, the question of how to make a beautiful, high-quality and reliable corner sofa with your own hands is relevant for many.
Corner
The corner module of the original design is quite complicated (item 1 in the figure), not entirely convenient and not very hygienic: along the gap between the back and the seat, dust and crumbs will fall just where it is difficult to remove them. Since in our case the entire corner is made at the place of constant use, it would be more expedient to build a hanging corner for it, tightly fastened to the sofas. Drawings of its 5 parts - seat, support bar and 3 back segments - are given in Fig. The bevel of the corner seat with sofa seats 400 mm wide is 210 mm, and this is considered a half-window window that fits in a small-sized kitchen. The bevel can be straight, convex or concave. The most convenient thing is a slightly convex bevel, but then it will not be possible to attach a bench to arrange a sleeping place. The backrest has an upward camber, which further improves ergonomics.
Drawings of details of the corner section of the kitchen corner
The dimensions of the back segments must be verified according to the location. reasons. First, small parts are greatly affected by the thickness of the skin. Since the sofas were covered earlier, this value will be known by the time the corner section is manufactured. Secondly, all the dimensional errors accumulated in the sofas will converge into one in the corner.
And yet, the seat and backrest segments need to be trimmed freely, without tension, so that the backrest does not overtighten the fabric when assembling. The lower edges of the segments need to be beveled inward by 2 mm (at an angle of 10 degrees, this is with a margin). The tops of the segments can be figured (options in positions 4 and 5 in Fig.), as long as the contours converge at the connecting points.
Note: rear support posts do not need to be installed if there are no suitable scraps and the rider weighs less than 100 kg. If they are installed, then they are attached in pairs of confirmations through the face into the edge. The heel of the lower support is sealed with a piece of ABS and just stands on the floor.
Corners in a corner
This corner also has 2 secrets. The first is a nook under the seat. From the point of view of a domestic animal, this is a reliable reserve den at a safe distance from the main house. And from the point of view of the owners, it does not cause them unnecessary trouble.
Second. The middle segment of the backrest does not bear operational loads. If you place it on friction pins instead of self-tapping screws, a hiding place will form in the cavity behind it. You will just need to sew an outward-facing tongue-strap made of durable fabric to the upholstery of the lower edge, and sew up the corner section from the rear with fiberboard. When closing the cache, the tongue is tucked inward so that it is not visible. To open the cache, the tongue needs to be pryed and pulled out with a fork or something like that. Remove the segment by pulling the tongue and the top of the back. This cache is unlikely to hide anything from an experienced burglar or a professional search, but it is quite reliable from an amateur thief or overly curious household members.
Required Tools
So that during the assembly process you do not have to be distracted by searching for the right item or material, you need to take care in advance of what may be needed for manufacturing. The master will need:
- hammer;
- jigsaw;
- drill or screwdriver;
- roulette;
- accessories;
- stapler;
- glue;
- sewing machine;
- stationery knife;
- anti-stapler.
Options for kitchens without upper cabinets, photos of possible designs
The last tool is optional. With its help, it will be easier to remove failed areas of the upholstery, if there are any, but you can also do without it, which cannot be said about everything else. When assembling a kitchen corner, this minimum of tools is required.
The old fashioned way
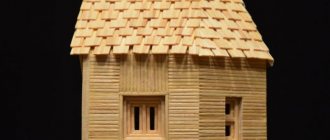
A kitchen corner made of wood looks chic in any setting, whether it is made from solid wood or boards from unusable construction pallets - pallets, see fig. And making a wooden kitchen corner with your own hands may not be more difficult or more expensive than the one described above.
Kitchen corners made of wood
To start carpentry on wood, and not on viscous and fragile chipboard, it is not necessary to immediately buy an expensive triad of a jointing machine - a manual milling machine - a sander. You can get by with traditional hand (and non-volatile!) hand tools. Processing small parts in piece production with it often turns out to be easier and faster than readjusting the machine for the next operation.
To begin with, in addition to a jigsaw (we are not pedants, this tool is not very expensive, is often needed and is better than a bow saw in all respects), you will need a regular carpenter's plane, a hand jointer and a set of wood rasps. At first, one so-called will be enough. cabinet rasp, flat-convex with a tapered end, on the right in the figure:
Woodworking tools
You will also need selected (emphasis on the “s”) straight and beveled chisel planes (on the left in the figure). Using a straight chisel, remove the folds and select grooves along the fibers, and with an oblique blade across and plan the ends.
For primary processing of knotty wood, you need a sherhebel plane in the center. The sherhebel is used with a slight sliding to the side, as if cutting off and trimming knots. You can turn an ordinary plane into a sherhebel by placing a “piece of iron” knife with a rounded blade in it.
Having gained a little skill, it will be possible to replenish the tool park with another 3-4 types of selected planes with replaceable pieces of iron for them, see next. rice. Take a closer look at antique furniture: it was made with just such a tool, and not with modern machines with shaped cutters.
Selected planers for figure planing
The last point is the assembly (pulling together) of furniture panels from boards, they are also an array of furniture. In theory, this requires special devices - clamps - 3 per tabletop, 4 per cabinet sides and 2 per smaller panels. Here, firstly, one clamp can be replaced with a pair of jaws with clips for mounting on a rod, and a piece of timber of suitable thickness for the clips will go onto the rod, see figure; usually 60 mm. Sets of jaws for clamps and long clamps are sold separately.
Tension clamp made from a pair of jaws with clips and a piece of timber
Finally, wide panels are not needed for the kitchen corner; Most often, a shield for 3-4 boards is required. In this case, a shield from boards can be assembled without any special equipment at all, see video:
Assembly
Exactly following the step-by-step instructions for assembling furniture will help a novice craftsman complete the job without unnecessary material and time costs. The process is divided into several stages, including:
- frame construction;
- cutting and sewing covers;
- upholstery of backs and seats;
- headset assembly.
Before you make a kitchen corner with your own hands, you need to clear the room of furniture and foreign objects.
Installation and fastening of the frame
The frame of the kitchen unit can be built from oriented strand board, chipboard or plywood. When assembled, the wood panels form a spacious and strong box. To make the frame, you need to choose laminated chipboards. The ends of the elements prepared for assembly must be sealed with edge tape. This will protect the chipboard from moisture, and the room from the release of harmful fumes from the chipboard.
Only the sides of the frame are often made from wood panels. These parts of the structure are connected to each other by bars. To securely tighten the sheets with each other and the crossbars, through connections should be used. It is better to use steel corners when making a set of boards. In these cases, its elements are assembled using bolts.
Before screwing fasteners into OSB, chipboard and plywood, it is necessary to drill holes slightly smaller than the cross-section of the confirms or self-tapping screws. Dowels will add additional strength to the structure. It is better to join the parts after treating the holes, fasteners, spikes and contacting surfaces with glue.
Installation of fronts and seat bases
The bars between the sides of the kitchen corner can be sheathed with plywood or fiberboard. The facade sheets are attached to the frame with self-tapping screws. For the base of the seat, plywood with a thickness of at least 10 mm and 16 mm chipboard is suitable. The lid is connected to the body using piano or furniture hinges. The non-removable seat can be secured with confirmations and self-tapping screws.
For decoration
A wooden corner is an original decorative element for finishing a house. It is made from high quality wood species. Mostly spruce, pine or linden are used.
It is made by planing specially selected wooden blanks. The entire manufacturing process includes several sequential steps related to the preparation and processing of the material.
Advice: if mistakes were made during the first stage, this may not appear immediately. Therefore, when choosing and purchasing wooden corners, it is important to adhere to some rules that will help you choose quality material.
Models measuring 100x100 mm are used on slopes
When choosing, you should take into account the fact that it must be manufactured strictly according to technology and meet all quality standards. If something has been broken, you will encounter not very pleasant consequences - the product will begin to deform and crack.
Therefore, when purchasing, you should pay attention not only to what type of wood was used in production, but also to the quality of workmanship. The material must be dry, the maximum permissible humidity is 10-12%.
Advice: if you cannot determine how raw the wood is, ask for a quality certificate from the seller.
It should be borne in mind that all errors made during the production of corners may manifest themselves in the future, as this is related to the properties of the material itself. Therefore, it is advisable to install wooden corners as decoration not immediately after purchase, but to let them lie in a dry room for 2-3 months.
How to choose
In this case, we recommend paying attention to the size and shape of the models. They are usually used for finishing corners:
| Domestic | The products have a smooth or additionally decorated surface on the inside. |
| Outdoor | For finishing the facade, door and window openings, the corners on the outside are smooth, polished or even with carved elements. |
Advice: they should not be confused, as they are not interchangeable.
- You should also pay attention to the size of the product. For example, to decorate the facade of a building, it is better to use wide corners that will reliably hide and protect the protruding parts of the finishing material (lining or siding).
In the photo - window decoration on the balcony
- Pay attention to the presence of irregularities, cracks or deep scratches on the surface of the products. They indicate the low quality of the material from which it is made. It is better to refuse the purchase.
Functional Features
It has two main functions - protective and decorative. It is used for finishing, both for internal and external corners.
It protects them from:
- moisture ingress;
- the appearance of chips and cracks along the edges, which can cause damage to the integrity of the entire finish.
The products are also an additional fastening building element for openings in wooden houses. The decorative function of corners is not only that it can be used to hide the edges of the trim protruding in the corners, but also to give the room or house a finished look.
Finishing the edge of the opening with your own hands
Installation methods
Installing a wooden corner is quite simple. It consists of several sequential steps, which are divided into stages.
- Take the necessary measurements of the room and calculate the number of products and their sizes.
- Treat the corners with a special impregnation. This is necessary to increase their service life, as well as to prevent possible rotting and fire.
- Fix it over the finish using self-tapping screws or attach it with special glue.
- Cover the surface of the wooden corners with paint or varnish.
Products come in various sizes, including those with shelves 70x70 mm
All additional materials can be purchased at almost any building materials store; this will not pose any difficulties. Sometimes manufacturers sell ready-made wooden corners coated with impregnation and a special coating. In this case, you can skip steps 2 and 4.
But decorative corners are made not only from wood.
Today in stores you can purchase models made from a wide variety of materials:
They can have an original design, shape and size. They, like wooden corners, are used to decorate the interior and exterior of the house.
Decorating a doorway
The price of such models is significantly lower than their wooden counterparts. But what is their quality? It should be borne in mind that wood is a natural and environmentally friendly material. The products not only have an original design, they are much stronger, more durable, and better protect against drafts.
In addition, they are easier to attach to the wall, and some varieties contain resins (pine, spruce), which, when evaporated, have antimicrobial and antifungal properties.
DIY corner sofa for the kitchen
The standard set of furniture for arranging a dining area includes a table, a corner sofa and stools.
According to the step-by-step instructions, to make a corner sofa for the kitchen, you will need:
- Board made of birch, beech or pine 2 by 4 cm - 100 cm.
- Beam with a section of 4 by 4 cm, about 135 cm.
- The beam is 2.5 by 2.4 cm, about 365 cm.
- Beam 1.5 by 1.5 cm thick - 300 cm. For covering the back wall, a sheet of fiberboard.
- Plywood 0.8 - 1 cm thick for the bottom and sides.
- You also need 5 cm thick foam rubber or padding polyester.
- Upholstery fabric (microfiber, tapestry, leather, nubuck and others).
To make a corner sofa for the kitchen with your own hands, prepare:
- jigsaw
- carpenter's corner
- plane
- furniture stapler
- screwdriver
- Sander
- drill
- bit
- hacksaw
- pliers
- roulette
- hammer
You will also need: confirmations, screws 0.4 by 2 cm, 0.4 by 6 cm and 0.4 by 8 cm, bolts and 0.8 cm washers, dowels, legs, hinges. If you plan to make a folding sofa with your own hands, then according to the instructions, you need a special mechanism. The drawing of the sofa for the kitchen should indicate the calculated dimensions and dimensions. In this case, your kitchen corner will fit perfectly into the dimensions of the room.
The workpieces are sanded and leveled, and only then can they be marked and sawed. The average length of a corner sofa is 120 by 90 cm, the corner insert is 45 by 45 cm, and the back height is 85.5 cm.
First, according to the drawings, the main parts of the sofa from the kitchen corner are made - these are the sides. They are made from a thick sheet of plywood. The markings are made with a pencil, and then the part of the kitchen corner sofa is cut out along the lines with a jigsaw.
The next step is to make two frames from 4 by 4 centimeter beams for both sides of the sofa. Both frames should be in the form of parallelepipeds, which are then fixed to the sidewalls. The connections at the corners should look like a mustache and a spike, which are subsequently glued. The T and L shape connections should be at a 90 degree angle.
At the corners, the connections can be with through holes or hidden, go into half of the beam, and also have one, two, or three tenons. They are secured with dowels or corners with self-tapping screws.
The frame of the corner sofa for the kitchen is connected to the back and secured on the sides. When the base is ready, you can assemble the hinged seat covers. Seats can be solid or sectional.
How to make a wooden shelf with your own hands read more
Rectangular frames for seats are made from a block 2.5 by 2.5 centimeters thick. Then they are sewn up with centimeter plywood. The seats are cleaned and covered with a layer of stain and varnish. Then foam rubber is glued and the fabric is stuffed.
A piano loop is attached to the long part of the corner sofa seats. Fastening the hinged covers is done at the end of the work. The corner module is assembled in the same way. A frame is made from a 4 by 4 centimeter block. The profile should be triangular in shape and have sides at angles of 45 and 90 degrees. The module is covered with plywood.
The assembled two parts of the sofas and the corner module are sanded. Exposed wooden elements are covered with stain and, accordingly, three layers of varnish on top. All parts are placed on the sofa legs and fastened together. The connection takes place using screws to the frame support. There must be at least 8 legs.
Structural details are adjusted when adjusting the height of the legs. Marks are made in the places of future fastening. Holes for bolts with a diameter of 0.8 centimeters are drilled. Bolts and washers for them should have wide margins. There should be twice as many washers as there are bolts, so that one goes under the bolt and the other goes under the nut.
The upholstery fabric depends on the proximity of the sofa to the stove and sink. The surface should be easy to clean and not exposed to chemicals.
For a small-sized sofa, 5 cm foam rubber is suitable. For a semi-soft corner of a larger size, padding is taken from padding polyester. Foam rubber or padding polyester is glued to the back with glue. The fabric is cut out according to patterns and stapled to the back of the back, as well as at the junction of the back with the seat. The material is stretched and securely fastened at the corners. Then it is fixed around the entire perimeter.
List of required parts
It is always necessary to draw up specifications for the drawings (a list of parts for each of the cabinets) indicating the quantity of all parts of the future kitchen. The main thing is not to forget to indicate the fittings. Parts list example:
- Rear wall (fibreboard).
- Side walls (chipboard).
- Facade (this is usually chosen before the list is compiled).
Then all that remains is to place the order. The question "Where?" You don't even have to lift it. In every small city there are enough furniture shops that will cut your materials into furniture elements for little money. Usually they only need an assembly drawing, as well as sketches of each element, broken down into parts.
We also recommend that you check all parts for defects immediately before payment, check the drawings, since defects during cutting are by no means uncommon and it is better to identify them at the stage of receiving parts.
Part No. 1 – long sofa
The first step is usually to install a long sofa in the kitchen with your own hands. You need to take the chipboard and cut out all the elements that are marked in the drawing:
- 2 sides;
- frame bottom;
- outer and side parts;
- seat;
- back;
- board for the seat and top of the product.
Take 2 sheets of chipboard or plywood for the sides and 1 for the bottom. Cut out the parts corresponding to the measurements and connect them with self-tapping screws. You should get a regular wooden box. To secure the lifting seat, use a special bar, which should be held on the dowels. Its standard size is 96 by 100 cm. Invent a backrest and attach it to the sides using dowels, and then attach the main and auxiliary strips.
The last step is to secure the corners. To make a sofa with your own hands, use metal bars that will ensure reliable fastening of the structure. After assembling the base of the product, he proceeds to covering the sofa. Cut 2 pieces of foam rubber so that they match the size of the seat and back, and 2 pieces of finishing material. It is recommended to use glue to fix the filling, and a stapler for upholstery materials.
Please note that when tucking the fabric at the corners, you first need to wrap it in the middle, and then hide it with the side pieces of upholstery. Let's start the installation with a long sofa
For example, let’s take a structure with the following indicators: the length will be 1 meter, the height will be 80, and the depth will be 40 centimeters. First, you need to cut out all the details of the future sofa from chipboard according to the drawing and measurements. You will see the following details:
Let's start the installation with a long sofa. For example, let’s take a structure with the following indicators: the length will be 1 meter, the height will be 80, and the depth will be 40 centimeters. First, you need to cut out all the details of the future sofa from chipboard according to the drawing and measurements. You will see the following details:
- Two sidewalls.
- Bottom of the niche (frame).
- The front part of the niche.
- Side part of the niche.
- Seat.
- Back.
- The thrust part for the bar.
- Seat bar.
- Plank for the top.
As an example, here are some measurements of the parts. Our seat will be 96X30 in size, the back will be 96X26, and the front part of the niche will be 96X31 centimeters. It is clear that the sidewalls will be 80x40 cm in size. They are also the main parts. Let's start assembling the sofa from the sides.
Assembling a long sofa
- The first thing we do is mark the milling marks, taking into account the main dimensions, width, height and depth of your sofa. Then we mark the holes for the screws and the joints with other parts. If you find it difficult to do this the first time, practice on plywood or a separate sheet of chipboard.
- Next, the sides need to be edged with glue, and furniture bearings must be screwed onto the lower ends. The latter are attached using self-tapping screws.
- Now you need to construct a niche, also known as a box, which will serve as a stiffener. You will need two sheets for the sides and one for the bottom. The bottom of the niche can also be made of plywood. According to the measurements, cut out the pieces and connect the parts together with self-tapping screws. Basically, you need to make a regular box.
- Next you will need a seat bar - this part is needed to secure the lifting seat using metal hinges. The bar is held in place by dowels. The dimensions of our plank will be 96X100 centimeters.
- You will also need a stop strip with dimensions of 96x60 cm. When you take measurements of the stop strip, subtract 2 centimeters, since it will be additionally covered with upholstery and filling.
- Next, make the back according to your measurements and attach it to the sides using dowels.
- Then attach the thrust and top strips to the backrest.
- Now you need to secure the corners. The most budget option is to use wooden blocks that are cut at an angle. But it is best to use metal ones - they will securely secure the structure and can be rotated at an angle of 5 degrees.
Coffee table made from pallets
A table made from pallets is the fastest way to make it. The pallet itself is already a prefabricated structure. You can make a simple table from one or more pallets stacked on top of each other and secured together.
The structure is painted in any color acceptable for the interior, and furniture wheels with a diameter of 100-150 mm are installed on the bottom. It turns out to be an original mobile table for the living room.
Simple DIY kitchen sofa made from furniture board
- Acrylic paint.
- Textile.
- Drill.
- Jigsaw.
- Self-tapping screws for wood.
- Furniture panel (18 mm).
- Foam rubber (80 mm and 20 mm).
Cutting the shield and fastening the parts
Before you start cutting the shield, you need to draw up drawings of a homemade kitchen corner with cuts. The project must be developed in such a way that at least 3 people can comfortably fit on the sofa.
It’s better to start cutting the shield with a jigsaw, but you can also get by with a hand saw. During the cutting process, the tool should be held strictly perpendicular, and the ends of the shield should be located strictly at an angle of 90° in relation to the main plane.
The parts are fastened with self-tapping screws, and to prevent cracks from forming, you must first make a hole for the screw. The diameter of the drill should be 0.5–1 mm less than the diameter of the screw.
Hull painting
Before painting, it is necessary to treat the surface of the body with a primer to increase the adhesion between the varnish and the wooden surface. We apply the coating in 2 layers, and for a more saturated color - in three.
Making soft pillows
To sew pillows we use foam rubber, which, unlike padding polyester and holofiber, has a better density and is more comfortable to sit on.
For the backrest, you can use thinner foam rubber, and for the seats you will need foam rubber at least 80 mm thick.