The proposed master class from Olga Pruss clearly shows how to make a miniature cheese from polymer clay.
You will need white and yellow plastic. It turns out more naturalistic if you take translucent white. The yellow will be used to make a wax crust, and the white will be mixed with the yellow to form the cheese mass itself.
Now take the salt and sift it through a sieve. We will only need its large crystals. Make a flat cake from the light yellow part and press it into the salt. Fold in half and press into the salt again. We perform these operations several times until the salt crystals begin to resemble uniform holes in the cheese.
Roll two balls from yellow plastic and light yellow plastic with salt. We form the salt mass in the likeness of a wheel of cheese.
Roll out the yellow one thinly, cut out two circles and form a cheese crust, carefully smoothing the joints.
A disposable plate works well for applying texture. We just press our head of cheese against it from all sides. Before cutting the cheese into pieces, it is recommended to keep the cheese in the freezer for a couple of minutes. Now everything is cut easily and neatly. Bake according to the instructions for the polymer clay you worked with.
The advantages of paper as a decorative material are endless. Varieties and ways to create miracles from it. For example, quilling.
Quilling
(quilling) is a fairly young technology for working with paper, based on twisting paper strips. Using various ornaments or natural motifs, artists create entire panels - not only flat, but also three-dimensional, as well as other decorative items of amazing grace and beauty.
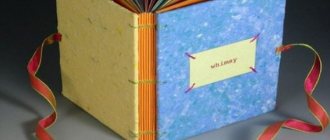
Master class on making a box in the shape of cheese
Tatyana Gurova
Master class on making a box in the shape of cheese
I work as a music director in a kindergarten. You always want the holiday to be fun and interesting and memorable for the children. And my favorite moment at the holiday is the surprise! Just for a surprise moment on one of the holidays, I needed a piece of cheese with gifts inside . You won’t find one ready-made, so I decided to make it myself.
I offer a master class on making “ cheese ”.
- cardboard box ;
- tape (stationery and paper)
;
- printed paper.
As a basis, I took a large cardboard box , from which I cut off the lid and the entire side short The bottom of the box was cut out to form a triangular shape. I connected the long sides and bottom with stationery tape on the inside, and paper tape on the outside. The “wrapper” will stick well to the paper tape, so I did just that. The result was a box , but triangular in shape. The top of the long side covers was also cut off in the form of triangles . The remaining lid on the short side was slightly adjusted so that it did not interfere with closing. I printed sheets of paper with a “cheese” print on a color printer, glued them together and covered the box using PVA glue. The box really turned out like cheese! I wish you all good luck and creative success!
Master class “Didactic manual “Smart Cat” from an ordinary box” The didactic manual is called “Smart Cat” (like a wonderful bag). To make this manual you will need the following materials:.Master class for teachers of preschool educational institutions “Use of a sensory box during the summer health period” Goal: Improving the professional skills of teachers - participants in the master class in the process of active pedagogical communication on mastering.
Master class for teachers and parents on decorating a box using the decoupage technique. In the modern concept, decoupage is a technique for decorating all kinds of surfaces with cut out pictures. So to speak, non-standard. Master class “New Year decoration in the form of a frame” Master class: “New Year decoration” Master class using scrap materials Author: Natalya Petrovna Biktasheva, teacher. Master class on making a photo frame Master class on making a photo frame. Goal: making a photo frame from Floamiran size A 4. Required material: - Sheet (A4) of Floamiran. Master class on making a “Forest” model Master class on making a “Forest” model Dear colleagues! Today I want to share with you my “Forest” layout. Layouts are about form. Master class on making snowflakes Prepare a snowflake for the Christmas tree from pasta. We will need: - rolled and straight pasta with an oblique cut, - glue gun, - acrylic paint. Master class on decorating a group in the form of wall painting MASTER CLASS on wall painting in a mixed-age group (senior-school preparatory preschool age) Prepared and designed by:.
Master class “Creating and using a sensory box” Slide1 Good afternoon, dear colleagues! Today we will talk to you about creating and using a sensory box." Purpose: to introduce teachers.
Master class “Decorating a box with pencils” Hello dear talented teachers! I want to share with you a pleasant and interesting activity, the result of which can decorate the interior.
Source
How to make a cone from a circle
Making a cone out of paper is quite simple. You just need to do everything correctly and carefully, foreshadowing a unique positive result. The step-by-step instructions are as follows:
- Determine why you are making a paper cone. Its size, paper density, color scheme, as well as the presence of any decorative elements will depend on this.
- Take paper of the required size and lay it out on a horizontal surface. A kitchen table, nightstand or coffee table is suitable for this. How convenient for anyone.
- Using a ruler, mark a point in the middle of the sheet.
- The tip of the compass is placed at this point and the contours of the circle are first outlined with a dotted line. At the same time, it is noted whether the stylus does not extend beyond the sheet of paper. If everything is in order, a clear line is drawn.
- A circle is cut out clearly along the line with scissors.
- Next, you need to connect the center of the circle with any point on the circle with a ruler and draw a line with a pencil.
- Using scissors, carefully cut the circle along this line exactly to class=”aligncenter” width=”1356″ height=”763″[/img]
- The cut circle is rolled into a cone to the size you need. The edges are trimmed and secured with a paper clip.
- Glue is applied to the edges of the cut edges on the inside and outside, and the walls are tightly fixed.
- Let's start making the base of the cone. To do this, take another sheet of paper and lay it out on the table.
- The manufactured cone is placed on a ruler. This is how its diameter is determined. 2 millimeters are subtracted from this result and the indicator is divided in half. This is the estimated radius of the cone.
- A circle is drawn with a pencil on a blank sheet of the established radius. It is considered internal.
- Then from the same center we draw a new circle, the diameter of which is 2-3 centimeters larger than the previous one.
- Cut out a circle along the outer contour.
- We connect the gap between the inner and outer circles with notches, which are made using scissors. It is advisable to do this procedure carefully so as not to go beyond the inner circle. The distance between the notches should be about a centimeter.
- The made notches are wrapped in one direction. There should be a slight overlap.
- We cover the outer part of the notches with glue and carefully insert them inside the cone itself.
- We leave the finished product on the table and allow it to dry thoroughly.
flowers, butterflies, birds and animals using the Kanzashi technique
–Tags
–Categories
- fom (27)
- fom (6)
- (6)
- humor (2)
- animal (0)
- ;bdjnyst (0)
- (7)
- clip art (1)
- batik (4)
- birch bark (21)
- Beads (47)
- Paper fantasies (169)
- video (27)
- embroidery (33)
- embroidery (8)
- embroidery (0)
- knitting (606)
- Lum, Tenerife (2)
- Newspaper tubes (38)
- cities (85)
- Discs (8)
- food (451)
- health (223)
- Interesting! (173)
- art (134)
- kanzashi (221)
- kanzashi (4)
- quilling (207)
- quilling decorations (1)
- volumetric quilling (47)
- carpet weaving (3)
- flap (4)
- music (71)
- music (7)
- wallpaper (9)
- clothes for plus size (32)
- postcards (19)
- Healthy! (103)
- nature (271)
- garden and vegetable garden (126)
- working on a computer (129)
- various photos (6)
- frames (6)
- handicrafts (474)
- modeling (23)
- floristry (6)
- Craft (160)
- statuses (2)
- poetry (13)
- diary diagrams (6)
- diary diagrams (0)
- stencils (95)
- flowers, decoration (33)
-Music
–Search by diary
Sunday, February 05, 2012 19:40 + in the quotation book cheese and paper mouse
The advantages of paper as a decorative material are endless. Varieties and ways to create miracles from it. For example, quilling.
Quilling is a fairly new technology for working with paper, based on twisting paper strips. Using various ornaments or natural motifs, artists create entire panels - not only flat, but also three-dimensional, as well as other decorative items of amazing grace and beauty.
DIY Philadelphia cheese
Philadelphia cheese is a cream cheese that does not require a ripening process. It is famous for its mild, moderately sweet taste. Its delicate consistency goes perfectly with both sweet and savory foods. Unfortunately, the price tag for Philadelphia cheese in supermarkets is very high and the average consumer cannot always afford to buy it. More affordable, and even better in taste, is Philadelphia cheese, made by yourself. Its recipe is very simple and quick.
- 300 grams of sour cream 25%
- 280 grams of classic yogurt
- one teaspoon lemon juice
- 1 teaspoon salt
Place sour cream, yogurt, lemon juice and a teaspoon of salt in a bowl and mix gently, but do not beat. Then take a colander and stir it into a saucepan or plate. Cover the bottom of the colander with gauze three to four times and pour out the mixture.
Caucasian brined cheeses
Caucasian brine cheeses (GOST 1907-55) were produced mainly in the Georgian SSR, Armenian SSR, Stavropol Territory and the republics of Central Asia. Made from sheep, buffalo, goat and cow milk. The technology for producing brine cheeses up to their molding is essentially no different from the technology for rennet cheeses. The difference begins in the next period, when the cheese arrives for ripening, which takes place in a salt solution (salt concentration 16-20%). Most cheeses are aged in brine before being released to consumers. Keeping cheeses in brine protects them from rapid fermentation of the cheese mass in mountain cheese-making conditions, where there are no well-equipped cheese factories. The ripening of cheeses in brine is slow. These cheeses differ sharply in taste from unpickled cheeses. Some cheeses, after ripening, are removed from the brine and finally ripened in cheese cellars on shelves. Keeping cheeses in brine does not allow the formation of crusts, which makes these cheeses rindless. These include Chanakh, Tushino, Kobi, Ossetian, Yerevan, Georgian, Suluguni, Motal. Cheese cheese belongs to the same group.
Baked eggplants with feta cheese
Chanakh, Tushino, Kobi and Ossetian cheeses differ very little from each other in terms of taste. All of them have a specific taste, spicy, salty, sometimes with a weakly expressed food taste. The cheese mass is homogeneous, somewhat brittle, but not crumbly. When cut, they have eyes of various shapes and sizes located throughout the mass. Cheeses made from sheep or goat milk acquire the taste and smell characteristic of these types of milk. The shape of the cheese is different - a double truncated cone, a block, a cylinder, which somewhat affects the properties of the cheese, since the penetration of salt into the cheese mass is not the same. In addition, Chanakh cheese in Armenia is produced mainly from cow's milk and therefore does not have any foreign flavors. Goat and sheep milk is also used to produce Cobi cheese, which affects the taste of the cheese. A characteristic feature of Cobi cheese is its uneven surface, as it is molded in wicker baskets. In addition to brine storage, vats are also prepared paraffinized. To do this, after keeping the cheese in brine for 1½ months, it is washed, dried and waxed, which makes it possible to store it for more than a year (at a temperature of 5-6°).
Mouse
– Gray and pink quilling paper
– Black stained glass paint
– Toothpick and paper glue
How to make a mouse out of paper. The body consists of a strip of pink paper: press one end of it to a toothpick and roll it into a tight roll. Lubricate the end of the strip with glue and glue it so that the part does not unfold.
Take a strip of gray paper. Glue its end to the pink blank and wrap it around a roll to enlarge the body. You can add one or two more stripes (this depends on the desired size of the part). Glue the end of the strip.
Make the head. Take a strip of gray paper and roll it into a tight roll - you can add another strip by wrapping it on top. Fix the strips - coat the ends with glue, press and hold them until the glue sets. Use paper glue.
To make a muzzle, roll up a roll from a partial strip of paper, secure the end, and then slightly stretch the middle of the roll so that it turns into a cone. Glue this cone to the head piece.
Glue the head to the body. Make small rolls of ears and paws from narrower strips of gray paper. Glue the parts to the head and body. Draw the eyes and mouth. You can make the eyes differently: drop a little stained glass paint for children's creativity onto a piece of plastic film. When it dries, you will have a pair of shiny, bulging eyes.
Making a thief mouse in a piece of cheese
- Let's cut out the base of the mouse from cardboard according to the pattern and glue a smooth wooden or cocktail tube to it with tape.
- We glue the ears and tail (made of serpentine ribbons), and secure the antennae (made of soft wire) with tape. Then we glue the muzzle and body. Eyes, nose and mouth can be glued or drawn.
- For the bangs, cut out a small strip, make small cuts, twist it onto a pencil and glue it on!
- We will make the cheese from yellow cardboard according to our pattern or from a box of any shape, pasting it with yellow paper and cutting out holes. All that remains is to insert the stick with the mouse into the cheese.
How to make cheese with your own hands: master class from a farmer
There are many types of cheese on the shelves of our stores. However, you can cook it at home. Then you will be completely confident in the quality of the product and will be able to cook what you like. Homemade cheese is both tasty and healthy.
Svetlana and Yuri Mardovich, Belarusian farmers, started making cheese quite recently. Before this, only milk, cottage cheese and butter were sold. They couldn’t decide on cheese for a long time, since its production requires a lot of milk and requires special equipment and starter cultures.
Svetlana Mardovich is a creative person. In his free time, he practices batik, paints with watercolors and pastels, paints pebbles with his daughter, loves to care for pets and spends a lot of time in nature. Svetlana believes that even when making cheese you need to be creative and not be afraid to experiment.
Svetlana, what inspired you to make cheese?
The experience of my farmer friends from social networks. There are many passionate people with whom it is interesting to communicate on various agricultural and food topics. We always share our findings, observations, and do “work on mistakes.” And recently we got together and held a seminar on making hard and soft cheese.
The technology of making cheese is very fascinating. When you cast magic over a pan, you feel like a wizard! With the correct temperature and time, you get a tasty and aromatic cheese made by yourself.
What kind of cheese do you mainly make?
For now I only make ricotta, cacotta and halloumi. For all types of cheese I use cow's milk, although halloumi, for example, is traditionally made from sheep's milk with the addition of goat's milk. But it also turns out great from cow's milk. I usually put dried mint in this cheese. But I like to experiment and add different spices, paprika, sun-dried tomatoes.
Riccotta is a traditional Italian cheese. It is made from the whey left over from making mozzarella or other cheeses. The word "ricotta" in Italian means "re-brewed." Caciotta is an Italian semi-soft table cheese with a closed texture (no eyes). According to tradition, cocotte is made from a mixture of cow and sheep milk. Halloumi, halloumi (English Halloumi or Greek haloumi) is a pickled semi-hard cheese of Cypriot origin. It is made from a mixture of goat's milk and sheep's milk, although it sometimes contains cow's milk.
Approximately how much milk is needed to make, for example, 1 kg of cheese?
To get 1 kg of cheese, you will need an average of 12-15 liters of whole milk, but ricotta is made from whey. From 10 liters of whey, no more than 500 g of ricotta is obtained.
What cheese do you order most often?
Halloumi is usually ordered with spices or mint. This cheese can be fried: it is heat and melt resistant. Fried slices of halloumi with a delicious golden crust have a delicate texture and a very pleasant taste.
Svetlana, please tell us how you can make halloumi cheese from cow's milk.
Take whole milk (I have 12 l) and heat to 32°C. It is very important to accurately determine the temperature, since we will be adding live bacteria to the milk, for which overheating is harmful. Even experienced cheese makers do not try to determine the temperature of milk “by touch.” Therefore, we need to use a food thermometer.
Add natural rennet. For 3 liters of milk – 6 drops.
Leave the milk for 40-50 minutes until a curd forms. When it thickens, cut into cubes.
Leave the cut cheese for 5 minutes.
Start stirring the cheese grain and slowly heat it to a temperature of 38-42°C for 20-30 minutes.
Take a colander or several (so that you can stack them on top of each other). Use a ladle to remove the cheese grain and place it in a colander.
Leave the cheese in a colander for 15-20 minutes to drain the whey.
Tamp down the cheese grain with a spoon.
Once the whey has drained, remove the cheese from the colander, turn it over and place it back in the colander. Turn the cheese three times every 15 minutes to drain the whey.
Heat the whey to a temperature of 85-91°C and lower the grill into the container.
Place the molds with cheese on the grill and simmer them for 20-30 minutes until the cheese floats to the surface.
Prepare coarse sea salt and your favorite spices. I used paprika and garlic spices. You can only add dried mint.
When the cheese floats, remove it and place it on a flat surface. Press down on top with a spoon to compact the cheese.
Sprinkle with salt and spices.
Fold in half and leave for a while to drain the whey. When the cheese has cooled, put it in the refrigerator for a few days to salt it.
Cheese made from polymer clay. Salt method.
Hello! Having fallen a little behind schedule during my vacation, and having returned with a couple of ideas, I would like to share them with you