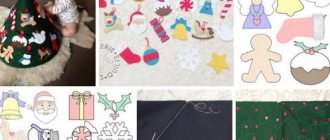
Don't have enough places at home to store all sorts of little things? Are you thinking about buying another chest of drawers and dividing its drawers into sections? This is unlikely to be a good solution, since new furniture requires additional space and is often overgrown with unnecessary things. What about neat felt baskets in which you can store small but very necessary things? Embroidery threads, needles, buttons and much more. Let's try to make them together.
Measuring work
- Take a ruler and carefully lay a piece of felt on the table.
- Place dots that will be located at a distance of 9 cm from the edges.
- Connect the 4 dots by drawing 4 straight pencil lines.
- Clearly indicate where the two lines intersect.
The success of all further work depends on the accuracy of the pattern. Therefore, it is better to check all the measurements again. Draw a line along the ruler so that anxiety does not interfere with making an even cut.
A virologist explained at what age people are more likely to get sick with COVID-19 again
“Hands froze”: Russian woman played in a landfill at -30 for the sake of clean ecology
Anna Khilkevich admitted to her subscribers that she believes in real men
Ideas for making a crochet basket for Easter
When I was preparing this collection, of course I couldn’t leave out the knitted toys. Indeed, in skillful hands, whole masterpieces can be made from yarn, knitting needles or crochet.
So, you can knit a case for an egg and the egg itself)) Or an excellent chicken.
But what a motley hen!!
Or an idea with interesting Easter bunnies. It looks very original.
How do you like these bunnies?? Well, just lovely!!
Or these delicate baskets with Easter characters.
But here is a similar job to rabbits made of fabric, only here you need to knit them.
And I also selected diagrams for you, it was very difficult to find them of good quality, but I tried, I hope you like it and find it useful.
This option is suitable for storing sweets or can be used as a box.
The yarn makes very cool works, and most importantly original ones; no one will definitely have such crafts.
Stapling corners with a paper clip
Now the shape of the future basket is already becoming obvious. The staple prevents the corners from moving when connecting the other two on the opposite side. This is the most convenient way that allows you to model the design at your own discretion. As long as the corners are held with staples and not sewn tightly together, it's a matter of a few seconds.
Correct geometry: classic dresses of the year that perfectly style your figure
BTS Named World's Best Selling Artists Of 2022 In The Music Industry
When a marriage on the verge of divorce can still be saved (10 signs)
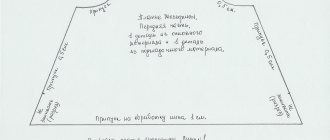
Making a pattern template
From cardboard we cut out the bottom of the basket - an oval 19x15 cm, the handle of the basket - a rectangle 24x2.5 cm (cut the ends of the handle with a corner), the stands for the wall of the basket - 14 rectangles 10x1cm.
Cut a rectangle out of cardboard for the Easter cake - length 30 cm, height - 15 cm, bottom - a circle with a diameter of 10 cm.
Cut out templates of the Easter Bunny and Easter Egg from cardboard;
Permanent seam
To prevent the basket from falling apart during use, you will need to make several stitches with a needle. For now we are making them with a hidden seam so that the product does not fall apart as a result. Now you can remove the staples and move on to stitch design.
To do this you will need to complete the following steps:
- Cut a piece of 30 cm of thread.
- Thread the thread through the eye of the needle.
- Tie a knot at the end of the thread.
Using a simple stitch, connect two opposite corners, starting from the outer corner.
- At a later stage, the two outer parts will cover the nodes.
- Cut the thread and repeat the step on the other side.
- Use a paper clip to secure the loose corners again.
At this stage, you can already think about what you will store in this basket. The higher the objects are supposed to be, the thicker and higher the walls need to be made. In this case, it is recommended to buy thick and hard felt and create an additional inner hoop. Then the basket will be able to withstand even men's tools, screwdrivers and pliers.
What color should you decorate your interior in 2022: the most fashionable options named
It is important that the eyelashes are well curled: how to prepare your face for a photo shoot
Funded by the city budget: restoration of the Gothic well at Orlov’s dacha
We weave a cozy basket from leftover felt
All thrifty hamsters who are engaged in creativity for at least any long time will definitely have a bag with scraps, pieces, leftovers and all sorts of similar treasures, from which they can no longer create a full-fledged work, but at the same time it would be a pity to throw them away.
Today I invite all felt craftswomen to look with me into such a bag and weave from the leftovers a cute and convenient basket into which you can put all sorts of little things, put things in order and decorate the interior of the room with it.
One more point that I would like to draw the readers’ attention to is that the work we will be doing today involves virtually no sewing! So the lesson may be interesting for those who do not like to sew or do not have a sewing machine.
To make a basket 14 cm by 14 cm by 10 cm, we will need 19 strips of felt 2 cm wide and 50-57 cm long. Trimmed edges can also work; you can sew strips of shorter scraps.
Take the first 7 strips and fold them evenly, next to each other. For ease of use, the ends can be secured with clips or pins.
Clips are more convenient to use. We clamp the ends as shown in the photo:
We take the 8th strip of felt and place it across the first seven, exactly in the middle, passing one by one above or below them.
We take the next strip and lay it next to the previous one, weaving it in the same way. If necessary, you can use clips to secure the strips.
We continue weaving:
... Until we weave the bottom of the basket from 7 strips.
Thus, the bottom of the basket is ready, it’s time to move on to weaving the walls. For this we need the remaining 5 stripes. They will need to be connected into a ring, end to end, without overlap. You can do this with a thread and a needle, glue or even a stapler.
We take the first ring and begin to weave it into the wall of the basket:
We continue, moving to the next wall:
Similarly, we form all four walls of the basket from the ring:
Take the second ring and weave it in the same way:
Then the following and all the remaining rings:
When all 5 rings are woven, it's time to finish the basket. If the ponytails remain too long, they will need to be trimmed.
To close the top of the basket, take the clips and use them to secure the ends, alternating between the inner and outer sides:
First we will secure the ends on the outside. To do this, we tuck each of them in turn inside, as shown in the photo:
This is what it should look like:
Now we turn the basket inside out and all the internal tails become external.
We fill them the same way as last time.
Turn the basket back inside out. The main work is over, all that remains is to come up with the decor. I decided to make this using cotton cord and sublimation transfer stickers.
We stretch the cord along the top edge of the basket. You can leave handles on the sides and tie the ends of the cord in a knot.
Now let's prepare the stickers. To make them, we will need sublimation pictures and adhesive white felt. We will transfer using an ordinary household iron.
Place the sublimation paper face down on the felt and heat the iron.
It is advisable to secure the sublimation on felt using special thermal tape or regular masking tape.
We iron the paper-felt structure and transfer the picture. You can periodically check how successful the translation is by lifting the edge of the paper.
When everything is ready, turn off the iron and peel off the tape, remove the paper layer. The picture has been translated.
Cut out felt stickers along the contour:
Now all that’s left to do is paste the picture and tag onto the basket. To do this, peel off the paper backing and simply, like a regular sticker, glue the stickers onto the basket:
The glue is quite strong, so if the product does not require washing, you can leave it like that without any additional fastening. If you want to make it stronger, you can hem the sticker additionally along the contour with a hidden seam or install rivets.
Place a sticker on the back:
All is ready! Can be used 
A little later, I finally found rivets in my bins and installed them:
Happy creativity!
Let's work on the corners
Usually these parts are the most problematic.
- Attach the remaining corners to the circle with a paper clip.
- Do this on both sides.
- Now you can adjust the opposite sides so that the edges line up nicely.
- Make sure there is no space between the inside and outside.
- When all the edges fit well together, push a pin through the outside and the already sewn corner from the inside.
- Do the same on the opposite side.
Video material
Thus, making a felt basket with your own hands is not at all difficult. We looked at only a couple of ideas, but using your imagination, you can make many more different options for similar products from a material so convenient for needlework.
Felt is one of the most popular materials today - it is a fleecy material made from felted wool. As a rule, this material is sold in layers of various sizes and thicknesses. Textured, dense, non-fraying material offers dozens of color solutions for our ideas.
Felt can be called a universal material for needlewomen of any age - making crafts from felt
loved by both adults and children. Crafts made from it are easy to make, very bright and pleasant to the touch.
So, as Valentine's Day is approaching, I propose to make a felt basket decorated with hearts
. Even school-aged children can easily cope with this craft.
To make a felt gift basket for Valentine's Day
You will need:
- felt 2-3 mm thick (1 A4 sheet - red, 2 pink colors),
- needle,
- threads (main or contrasting color),
- paper,
- ruler,
- pencil,
- scissors,
- hot glue gun (optional).
First, it’s better to draw a template on paper, since my felt sheets were A4 size, it was very convenient.
After the paper template is ready, cut it out.
We pin the template to a sheet of felt with tailor's pins or simple needles and cut it out.
We cut off the excess, but don’t throw it away: it will come in handy later.
It should look like on a paper blank. Four folding “ears” and a square in the middle.
Now let's start the “assembly”. Sew adjacent sides. I took threads of a contrasting color, I think it looks more interesting. Everything here, of course, depends on your desire.
We sew the handle with a similar seam - two equal long strips of felt of the same color.
Sew the handle to the basket.
Such a bright felt basket
doesn't even require decoration. But since Valentine's Day is approaching, let's decorate it with multi-colored felt hearts.
We cut out hearts of different sizes, glue them or sew them the way you want.
This is such a cute basket! And you can put anything in it.
Have fun creating!
The long-awaited holiday – Easter – is approaching, and it’s time to start preparing gifts for your loved ones and friends. And the best gift is a gift that we make ourselves, putting all our love into it. And I suggest you make an Easter basket from felt. It will be an excellent gift on Easter if it is filled with colored eggs and sweets.
Decorative embroidery
Now the basket is ready, all that remains is the decor. It is worth noting that you can design the product at your own discretion. Cover it with beads, decorate it with sequins, embroider it with beads or ribbons - in any case it will look beautiful and elegant. The proposed option is the simplest of all.
- Mark 4 dots on the felt.
- You can use crochet yarn.
- If you don't have crochet yarn, you can double thread and cross stitch twice.
- Push the needle through the back of the felt.
- Insert the needle now diagonally at the front of the other end.
- Insert the needle from the same side into the remaining point on the back of the felt.
- Insert the needle at the front of the remaining point.
- Pull the thread inside the basket.
- Then insert the needle at approximately the same height from the inside to the outside.
- Make sure you only go through one layer of felt with the needle.
- The thread should be located between two layers of felt.
Materials for the basket
Felt is sold in craft and children's art stores. For this master class, it is better to choose a denser one that holds its shape. Flowers can be made from thinner material.
To make a basket, prepare:
- felt in brown, blue, yellow, light blue, red and green;
- scissors;
- pen or pencil;
- glue "Moment" transparent;
- ruler;
- compass.
Buy materials with a reserve, because we still have many interesting felt crafts - accessories, toys, decorations, home decor.
We also have a beautiful candy bowl and a basket with a cockerel, it is more complicated, but also more interesting. And if you need to give a gift to your loved one, pay attention to the heart box.