The time of modern youth brings new hobbies and new pranks. Now, on the eve of school time, the issue of purchasing office supplies and other supplies necessary for study becomes relevant. But to surprise classmates and teachers, some are resorting to the option of using edible school supplies.
What it is?
These are analogues of ordinary stationery, most often capable of performing their original functions (drawing, gluing, washing), but they can be eaten. It sounds strange, but this is a great way for children to have fun and have fun.
There are stores that sell such goods in finished form, but most likely children will prefer to make edible school supplies with their own hands, because the process itself is a fun game where, in addition to accuracy and precision, you can show your imagination and individuality.
Unusual pencil-berry
- regular pencil;
- marmalade
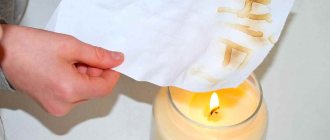
To turn an ordinary pencil into an original delicacy, you need to buy some wild berry marmalade. You need to make a small hole in the bottom of the marmalade and put the “cap” on the end of a pencil or pen. The result will be a very original delicacy that you can snack on during a break or right in class.
Every child loves to surprise their friends. In particular, many kids will love the idea of bringing edible supplies to school that they can eat in front of their classmates and teachers. These amazing items can be easily made with your own hands, and our step-by-step instructions will help you with this.
How to make edible school supplies?
It all depends on what kind of stationery item will be made. It’s worth immediately considering that the production of multi-colored pencils and markers will require more effort and financial costs, because it will be necessary to purchase or manufacture raw materials for them. And items such as an eraser, glue, a simple pencil, and plasticine are less expensive to manufacture.
What might you need? Any products that are at home or that you have enough imagination for: banana, cheese, crab sticks, straws, sausages, chocolate bars, chewing gum, marshmallows, marmalade, food coloring, food pencils, marzipan, sugar mastic. In addition, a variety of empty boxes and parts of ordinary stationery, ice or confectionery molds, a board, a ruler, and a knife will be useful.
Organizer for the kitchen: a useful idea that never occurred to me
Sometimes things are not so smooth in the kitchen. Especially if the area is small and there is little space for organizing full-fledged amenities. In this case, you can create convenient accessories for storing dishes, napkins, useful items and towels. Let's look at the detailed instructions for making such a design.
Kitchen organizers can be placed on a loggia or balcony if they are combined with it
List of materials for work
The quality of materials has a huge impact on the result of the work. What you will need to produce a compact device for hanging towels and kitchen rags:
- a board from an old chair or bench, you can choose an aged one;
- unnecessary forks (just don’t use aluminum ones, as they bend too much);
- self-tapping screws or strong double-sided tape;
- varnish and paint.
Decorated cutlery will perfectly complement the interior when used in different organizers
Manufacturing instructions
Cutlery on the organizer, if they are made using the same technique, will look much more interesting.
Original towel hooks will not only focus attention, but also perform their function perfectly.
- We sand the selected board and paint it, if possible varnish it.
- Then let the surface dry. Meanwhile, take three forks and turn the tines in an interesting way. Bend the handle to form a hook.
- We attach a strip of double-sided tape, divided into three parts, to the board, then remove the protective film.
- We attach the forks to it one by one. If necessary, they can be additionally secured with self-tapping screws.
The role of a towel hanger can be played by ordinary clothespins, which can be attached to the door or the side of the kitchen cabinet using a glue gun.
How to make edible school supplies with your own hands: simple recipes
Simple options for making school stationery:
- Eraser. It can be made by simply cutting it out of different products (cheese, crab stick, dense chocolate candy filling). The eraser can have any shape: from a regular rectangle or a beveled parallelogram to a voluminous fruit. It is much more interesting to prepare an eraser from mastic and marzipan. Here you can show your imagination and add different bright colors to the item. To do this, the finished mastic of two colors (usually blue and red) and marzipan (white) is rolled out (the thickness of the marzipan is 2 millimeters, and the thickness of the mastic is about 5-7 mm) and connected to each other in a “sandwich” so that the mastic is in the middle. An eraser is cut from this blank. The finished product will be exactly like the original. You can also make an eraser from gelatin, sugar and food coloring. To do this, you need to dissolve 2 teaspoons of gelatin in hot water, add 1 tsp. sugar and a few drops/grains of food coloring of any color, mix the mixture, pour it into ice molds or just into a deep plate and put it in the refrigerator. After hardening, the mass is taken out and the eraser of the desired shape is cut out.
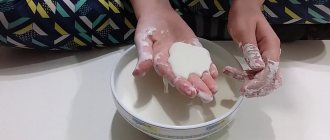
- Glue. How to make edible school supplies that will be absolutely similar to the original? Edible PVA glue is prepared very simply: you need to take marshmallows, a little milk, mix them in a deep saucepan or pot and heat over low heat, stirring. After the mass becomes homogeneous, it is left to cool. In the meantime, you need to prepare containers for edible glue. To do this, thoroughly wash the empty PVA bottle with running water, then rinse with a solution of soda and rinse well, and let the bottle dry. New glue can be poured into the bottle. Its appearance is a white and viscous mass, and if you pour it on bread or cookies and put it together, they will stick together. Another option for glue is to use chewing gum as a raw material. They also need to be heated so that they melt, and then poured into a bottle. This glue filling can be not only white, which will amuse others.
- Pens. There are several options to make them. The first is to attach a lollipop to a regular pen (if it is thin) or to its shaft, or attach sweets/jelly beans/lollipops/chewing gum to the back of the pen so that only the edge is edible. The second is to insert the pen shaft into any edible product. This could be a sausage, a chocolate bar, a pack of Frutella or Mentos sweets (to do this, you need to drill a hole in them using a drill and a thin drill), or a crab stick. You can wrap the handle shaft with multi-colored strips of mastic, and the result will be a big piece of candy.
School supplies decor: how to decorate school paper clips and paper clips
To decorate your school paper clips and clips, you can use bright, decorative adhesive tape. In addition, for such decoration of school supplies you will need very little material, and this school little thing will please the eye for a long time.
Decorative adhesive tape can be tied to a paper clip or attached to it in the form of a flag. Such beautiful paper clips can even be used as unusual bookmarks.
Fluffy pom poms will look cute as decoration for school supplies, especially paper clips. These DIY pom-pom crafts will lift your spirits with bright colors and decorate your school office in an original way.
Complex options
These options include making sets of markers and pencils. Since more ingredients are used here, the procedure is considered complex. How to make edible school supplies, and in particular colored pencils?
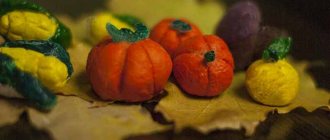
To create the base you need to prepare: marshmallows, seeds and puffed rice. For dyes (in dry form) the following products:
- yellow - corn, banana, bee pollen, pineapple, peanuts;
- orange - apricot, carrots, soybeans, peach;
- red - raspberry, strawberry, wolfberry;
- cream - apples, rice, sesame seeds, macadamia nuts, coconut flakes;
- green - kiwi, green beans, pistachios and pumpkin seeds;
- blue - blueberries, peas;
- purple - blueberries, wolfberry, prunes;
- black - almonds, prunes, wild sesame, Brazil nuts.
One product can be selected for each individual dye. The prepared ingredients are ground into powder (separately for each color). Heat the marshmallow ball until it melts, add seeds and puffed rice into this mass, and then colored powder made from previously processed products to give color to the pencil. Mix, place in a mold or shape the plastic mass with your hands into the shape of an object. Leave to dry. Perform this procedure for each color product. You can then use the pencils as is, or you can wrap them in a wrapping paper label to give them a store-bought appearance.
Edible paper glue
- a tube of glue;
- chewing gum.
To prepare this original delicacy, you will need to buy chewing gum and stock up on a small amount of powdered sugar, just in case. The tube of paper glue is completely freed of inedible contents. Chewing gum is melted in a water bath and the resulting mass is filled into an empty and thoroughly washed tube. To make it more convenient to push the chewing mass inside the tube, just sprinkle powdered sugar on top, and then the melted chewing gum will not stick to your hands. After this, all you have to do is wait for the “delicious glue” to completely harden – this usually takes no more than 15 minutes.
Useful tips
How to make edible school supplies was described above. The main thing is to follow safety rules when working and further consuming such items.
Even if a child makes “new items” for his school bag on his own, parents must control it. To prevent an edible item from causing harm to health (poisoning, intoxication, vomiting, diarrhea, allergies, etc.), when preparing inedible parts, they must be thoroughly washed and disinfected.
Such accessories should also be stored separately, preferably in a food container. The shelf life of edible items depends on the material from which they are made, but it is advisable to consume them no later than three days from the date of manufacture.
Pockets for small items or how to sew a children's organizer
This children's organizer is especially suitable for use in the garden. The cabinet doors there are very narrow and it is difficult to find a suitable holder in the store. In addition, you decide for yourself how many and what size pockets there will be. Here the top ones are for underwear, T-shirts and socks, the bottom ones are for sportswear and shoes.
Based on this master class, you can sew an organizer or, for example, pockets for small items on a crib. How to calculate fabric consumption if you want to sew according to your measurements is written at the end of the material.
How to sew a children's organizer
We cut the fabric into 3 pieces, each measuring 33x38 cm.
Interesting ideas for storing office supplies
An excellent organizer option for pencils and pens is pencil holders made from tin cans. If the jars are small, you can glue several jars together for stability. A pair of wide-diameter cans, beautifully decorated with colored paper, fabric, and acrylic paints, would also be suitable for the table.
As you can see, in order to make a beautiful organizer, you don’t need to spend a lot of money - you can use what you can find in every home. The only difficulty is that you need to remove (secure) the sharp edge of the jar. A piece of thick cable or wire works well for this (cut off a piece slightly larger than the diameter of the jar with a utility knife).
Such a wire has insulation on top (rubber, PVC, or vinyl) - this is what we will need. Next, we make a cut along the entire length of the wire and take out the “filling,” leaving only the insulation. Then we apply Moment glue along the inside of the insulation and apply it to the top edge of the can. Now it will be safe to use a pencil pencil.
- This is how you can design an organizer made from a box or cardboard:
- For kids, as well as for schoolchildren, you can buy some felt for the organizer. Look at what wonderful containers for pencils and pens you can sew from thick felt:
- In the video - a do-it-yourself paper organizer:
Stationery organizer made from glass jars - mk
You can make such a cute DIY office stationery organizer from glass jars. It is advisable to select identical jars for this work.
For work you will need: white acrylic paint (in a can, for artistic work, or industrial facade paint), pencil, brush, felt-tip pens, tape. You can paint the jars with anything: nail polish, acrylic, or you can make your own decorative paint.
What do you need to make glass paint? You need any paints and PVA glue. Making this kind of paint is not difficult. To do this, pour a little PVA glue 2-3 ml. into a separate jar and drop some paint of the desired color into it. Mix and make several colors like this. To store such paint, the jars are covered with lids to prevent them from drying out.
Such organizers are especially convenient for kids: they will definitely like such funny jars. And you can keep here not only brushes, pens, and felt-tip pens, but also any stationery items you like.
Stationery organizer – master class
For this master class you will need: a cardboard box, a stationery knife or regular scissors, a ruler, a pencil, universal Moment glue, PVA glue, acrylic paints or colored paper, a glue cap (the handle is next to the drawer), a sponge and a brush.
The organizer has a large box glued together from cardboard parts; the box opens with a handle (adhesive lid). The storage section is decorated with acrylic paints, or colored paper, a piece of wallpaper - the choice is yours.
We will need a cardboard box made of thick cardboard (preferably corrugated). We transfer all the details onto cardboard using a pencil and ruler. Each letter corresponds to the order of work: that is, first take part A, then 2 parts B, then part C, and so on. Please note: there must be 2 parts G, and 2 parts. H. (box walls).
Take Moment glue and apply it to the sections of the children. A (back) and one of the side parts det. B. Hold B perpendicular to A for 5 minutes so that the glue dries. Then on the other side we glue the second part in the same way. IN.
Next we work, looking at the sequence of letters: C, D. As a result, we get the main part of the organizer.
Glue the bottom drawer in the same way. We do everything slowly and carefully. Now all that remains is to decorate our work.
But before painting or pasting, you need to cut ordinary napkins or paper towels into narrow strips. We coat the cuts and glue all the sharp edges of the product with pieces of napkin and PVA glue. We are waiting for the glue to dry.
We begin to paint the product with a sponge and white acrylic paint. First we go over the entire surface for the first time, after drying - for the second time. We paint both the main part and the drawer. Then we take colored acrylic paints and apply them to the product 1-2 times.
Take any suitable lid and glue it in the center of the box. Just like that, we made a box out of a cardboard box for any small items, as well as for manicure tools, nail polishes, and so on.
- The video shows how to make a desktop organizer out of cardboard:
- How to make an organizer for your desktop, see the diagram and video:
Source: https://yutka.net/organajzer-dlja-kanceljarii-svoimi-rukami
Cardboard organizers - photo ideas
| To ensure that the things you need are always at hand and don’t get lost, get yourself an organizer. You can put stationery, jewelry and hair clips, cosmetics, sewing supplies, small children's toys and much more in the organizer. |
And you don’t have to go shopping in search of a convenient and beautiful organizer - you can simply make it yourself from unnecessary boxes, cover it and decorate it to your liking and make it fit perfectly into the interior.
The organizer can be of various shapes, any size and include many different compartments. Some organizers are made closed - in the form of boxes, houses or chests of drawers, and some are open to provide quick access to the necessary items.
- Organizers-inserts are a very convenient thing for drawers of closets and chests of drawers: you can put underwear, socks, belts, etc. in separate cells and you won’t have to look for the right item of clothing for a long time.
- Organizers for children are also convenient: firstly, you won’t have to constantly bump into pencils, hairpins or doll shoes, secondly, all these small things will not get lost, and thirdly, the child will get used to keeping his property in order from an early age.
- A selection of photos will allow you to figure out which organizer is most convenient for you and which one you can make.
Printable dollhouse boxes
What is always useful in doll making and will enliven the interior is a beautiful box.
Maybe someone will find it useful, so I’m posting it. Photo from the Internet. See more topics Do-it-yourself miniature dolls on Babyki
babiki.ru