Preserved flowers - preserve the beauty of flowers for many years
It’s so nice and joyful to receive a bouquet of beautiful flowers as a gift, but how sad it is to watch how this beauty withers and crumbles before your eyes.
Many people have wondered more than once about how to preserve the beauty of fresh flowers for a long time. A way has been found! Fresh flowers can be preserved, and you can choose one of two methods that suits you best. The most important thing is that you don’t need expensive materials for the work; all the necessary things can be bought at the nearest store or even found in your own kitchen.
Sample business plan for the project
To understand the profitability and prospects of the project, it is necessary to analyze competitors, if any, in the market of your city. If they are not there, then you will be a leader and will be able to conquer this niche. Preserving flowers involves solving the following issues to start production:
After answering these questions, you need to think about finding suppliers of quality raw materials. For work you will need fresh flowers that have an attractive appearance. You can start work without assistants, since production does not require special knowledge and skills. You can understand the technology after the first try. You can find the recipe on the Internet absolutely free.
Preserving flowers in glycerin
The easiest way to preserve the beauty of flowers is to preserve them in glycerin. The essence of the method is that glycerin gradually displaces water from plant tissues. Please note that the higher quality and fresher the flowers, the better they will be preserved in glycerin.
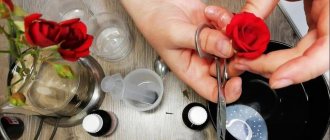
To preserve flowers, sterilize the glass container.
Shorten the flower stems and remove excess greenery. Strip the stem to 7 cm and split it as much as possible.
The preservation solution is prepared from two parts hot water and one part glycerin.
Place the flowers in the prepared solution and remove them from a dark place for 2-4 weeks.
After the plant is completely saturated with glycerin, it can be removed from a dark place and used as a decorative element.
Unfortunately, when preserved in glycerin, flowers lose their brightness. To avoid this, place a fresh bouquet in water tinted with the desired color dye, this will make the flowers more vibrant. And only then begin the conservation process.
Selection of flowers and plants
Plants and flowers with thick and long stems are best suited for stabilization: roses, peonies, lilies, branches of rowan, oak and other trees, reeds and many other plants and flowers. The only plants that are not very suitable for embalming are plants with dense young foliage and plants with thick sap, such as dandelion and fern. Of course, experienced florists know how to stabilize such “complex” plants, but it is best for a novice master to start with roses or other garden flowers.
During the conservation process, the stem needs to be trimmed, so the finished plant will be about 7 cm shorter - take this into account when choosing a flower or branch, especially if you are planning to make a composition or bouquet. The flowers will lose their scent, but they can be scented artificially using essential oils or perfumes.
Preserving flowers in gelatin and salt
If you want to start preserving your bouquet right away and are not ready to go shopping for glycerin, just go to the kitchen and prepare gelatin and salt.
For 100 g of hot water you will need 25 g of gelatin and 2 tbsp. table salt. Just add water to the gelatin, let it sit, and then add salt to it.
Fill the container with the prepared solution in which there are flowers and various decorations that help create a beautiful composition.
Place the container in a cool, dark place until the gelatin has completely hardened.
Flowers preserved in a beautiful container can even become a gift for a loved one. This is a great alternative to a bouquet that will wither in a few days.
Source
Benefits of using gelatin
Gypsum is considered one of the simplest and most popular materials for creativity, making decorative elements and interior elements. This mineral is sold in powder form, easily mixed with water, and quickly hardens after pouring into a mold. But often, when making crafts and casting various household items, a number of serious problems arise. Small details and thin outlines may appear blurry. When pulling out the workpiece, the plaster crumbles greatly, and as a result, part of the workpiece may break off completely.
Professionals have long replaced gypsum with liquid silicone, which, after being poured into a mold, forms a high-quality, rubber-like material that is pleasant to the touch and perfectly follows the contours of the sample. Silicone is also great for creating molds, into which molten plastic or epoxy resin is then placed to produce various decorations and souvenirs. Silicone has only one drawback - it is very expensive.
The price for 1 kg of material can reach 5000-7000 rubles and more. An excellent alternative to silicone is food gelatin, the price of 1 sachet does not exceed 20-50 rubles.
How to preserve a bouquet for years? Learning to preserve flowers
Every woman has sighed at least once over the transience of the life of cut flowers. It is quite possible to prolong their fragile beauty, and this can be done in several ways at once. So wait for the next gifted bouquet and feel free to experiment!
You can preserve flowers in three different ways at once, all of which are quite inexpensive. You will need a transparent container, fresh flowers, water and some supplies that can be purchased at any hardware store.
Preserving flowers in glycerin
Flowers preserved in glycerin can be stored both in open vessels (vases, glasses) and in closed ones. In the first case, the solution will need to be periodically added, but in the second - not. The flowers will retain their appearance and will only fade slightly during canning.
The fresher and better quality the flowers, the better they will be preserved, so after receiving the bouquet you should not delay, it is better to immediately select several flowers for storage.
The procedure for preserving flowers is simple and is based on the fact that a glycerin solution gradually displaces water in the plant tissues. True, this takes time, depending on the size of the flower, from 2 to 4 weeks.
In order to preserve a flower, you will need:
• Find and sterilize a transparent glass container;
• Trim excess greenery from the flowers, shorten the stem by cutting it diagonally, peeling it to 7 cm and splitting it as much as possible;
• Prepare a solution of 2 parts hot water and 1 part glycerin;
• Place the flowers in a container with the solution so that they are immersed in it;
• Place in a cool, dark place for 2-4 weeks, depending on the thickness of the stems.
After the plant is completely saturated with glycerin, you can take it out into the light and store it as a regular interior decoration.
Glycerin is responsible for the shape of the flower, but the brightness of its color should be taken care of separately. To do this, immediately after purchasing a bouquet, water-soluble dyes, sold in flower shops, are added to the water. They will saturate the flower petals with the color you want, and then the glycerin solution will fix it.
Soak the plant with the solution
Mix water with glycerin in a 1:1 ratio, pour into the vessel where you will keep the flowers. Cut the stem of the plant diagonally; remove the bark from its lower part if it is dense; It is better to split a thick stem so that soaking occurs faster. Place the flowers in glycerin so that the stem is immersed in glycerin by a few cm. During the first week, cut the stem by about 1 cm every day. Then simply leave the flower in the solution for another week. All these days, add glycerin solution, as the plant will absorb it.
Usually 14 days is enough to stabilize a rose or flower of similar size. However, if you notice that the solution level is still noticeably decreasing, continue conservation until active absorption stops. Now you can wipe the stem of the flower, place it in a beautiful vase or fix it on a stand, creating a beautiful composition. The exquisite interior decoration is ready. Sometimes it just needs to be cleaned of dust with a hairdryer or a dry brush, and not kept near water. By the way, you can protect a flower from dust and moisture, while making it more decorative, by covering it
Storing flowers in salt
There is another way to preserve flowers, but it is quite controversial. After all, firstly, only unblown roses can be stored this way, secondly, storage lasts no more than 2-3 weeks, and finally, no one sees the flowers at this time. Unless you want to take a bouquet with you by train to Vladivostok and are ready to take a risk.
So, cut off the roses that are ready to bloom. Then heat a couple of kilograms of table salt in a frying pan and cool. Pour salt into a tin or cardboard box and place the flowers on it so that they do not touch each other. Sprinkle another layer of salt on top, completely covering the roses. Close the box hermetically and put it in a cool place. When you need the flowers, take them out, shake off the salt, trim the stem and put them in water - the flower should come to life and open.
A flower preserved using one of these methods will give you joy not for 3-4 days, but for a long time and will turn into an unusual decoration for any interior or a wonderful gift.
Did you like the article? Subscribe to the channel to stay up to date with the most interesting materials
Source
Preserved flowers in glycerin
Choosing flowers
Flowers must be dense and not very young; young leaves are not suitable for this either. Please note that there should be no midges or any damage on them. The chosen flowers, blades of grass, leaves and petals will determine how your bouquet will turn out.
Young foliage cannot be preserved in glycerin! It does not lend itself to this method and the result will not please you.
When choosing twigs, for example, cherry, apple or lilac, peel them 7 cm from the bottom and split them, this way they will better absorb the solution and cook faster. We cut the stems of the selected flowers at an angle.
The embalming method itself involves replacing the moisture in flowers with glycerin. Thanks to this, the plants remain almost in their original form for a long time. You can buy it in pharmacies, after which we make a special solution for preserving flowers.
Preparing a solution for preserving flowers
It is necessary to dilute glycerin with hot water in a ratio of 1:2. Pour the solution into a previously prepared tall container and place the flowers selected for embalming. Immerse the stems by 3-5 cm. The solution should reach approximately 20 cm for everything to work out correctly. Afterwards we put it in a dark and cool place. If you place flowers in an open container, then monitor the level of the solution. It must be added as it is absorbed. In closed containers, the liquid level practically does not change at all.
If you want to give flowers a certain color or make it richer, add water-soluble dye to the solution!
Flower in jelly. Master class. Subtleties of cooking
This extraordinary dish appeared several years ago and immediately became a real hit. They admired it, presented it as a gift, and tried to find out all the subtleties of cooking from the craftswomen. Now every housewife can prepare a luxurious flower in jelly. You don’t need any special skills to do this, just follow the step-by-step master class.
Edible bouquets
Every self-respecting housewife always tries to surprise her guests. Delicious 3D flowers in jelly look completely natural and cause a lot of exclamations of admiration. Amazingly beautiful bouquets placed on a plate seem like a real work of art, difficult to execute. Let this remain a little secret of every craftswoman, but all their preparation actually takes no more than twenty minutes.
Let's prepare the “canvas”
By this we mean a base, transparent and quite dense, in the center of which the flower will subsequently form.
- It is advisable to cook it in a transparent container (glass, plastic), through which the flower in the jelly will be clearly visible.
- For the density of the consistency, it is necessary to observe the proportions - 10 grams of dry gelatin per 200 milliliters of water.
- A clean transparent “canvas” can be painted in different shades to suit your taste, but many prefer to leave it in its original form to facilitate subsequent work.
- In order for the base to be tasty, but not cloudy, sugar (40-50 grams) and a teaspoon of lemon juice are added to it.
- Pour the required amount of water into the gelatin and let it swell.
- Heat the mass, dissolve sugar in it, add lemon juice, no need to boil, just warm it up to eighty degrees.
- Let the “canvas” cool a little and put it in the refrigerator.
Base for petals
It is better to color the flower in jelly using natural juices (beetroot, carrot, spinach juice), and regular milk is added to make the consistency thicker. Without it, thin delicate petals will not be so graphic, but there are several important aspects to consider here:
- Milk does not like acid, and when interacting with it it quickly curdles, so it is better not to use orange, cherry, lemon and other strongly acidic juices in this situation.
- The consistency should be as concentrated as possible, so it is better to prepare the dyes (squeeze the juice) yourself. This way, 3D flowers in jelly will look especially rich, and the dessert will become extremely healthy.
- We continue to maintain the proportions (10 g/200 ml), pour gelatin with water, let it swell, and heat the milk separately; it is not recommended to boil it.
- Combine milk with swollen gelatin and juice; the total liquid ratio should be no more than two hundred milligrams; if too diluted, the petals may harden poorly and not hold their shape.
All necessary components are prepared. You can use your imagination and create luxurious, fresh flowers in jelly. We’ll start the master class by preparing the necessary equipment and all the ingredients. We will need:
- The base is a pre-prepared transparent sheet in a glass container.
- Tools - an ordinary medical syringe with a thin needle (a ten-cc one is convenient here), a medium-sized knife, several spoons with pointed ends for ease of insertion into the jelly.
- Glasses with a multi-colored base for petals. The flower itself in jelly is made in red, lilac, and orange. We use green shades to form the leaves, giving the finished composition even more naturalness.
Master Class
To create a flower in jelly in the form of a freshly blossomed living chrysanthemum, we will need yellow and red colors.
- We fill the syringe with a yellow tint and insert it into the base at a ninety-degree angle, gradually releasing the liquid as the needle is pulled out. Droplets that appear on the surface should be carefully removed with a paper napkin.
- We will need 10-15 of these yellow stamens (the middle part of the flower), here it is important not to move the needle inside the “canvas” so that the strip is perfectly even.
- You can start creating petals. Fill the syringe with red and inject it into the base at an angle of forty-five degrees. Gradually press the piston, making horizontal movements with the needle and forming a petal of the desired size.
- The transparency of the container allows you to monitor all the manipulations being carried out. To make the jelly with flowers inside really voluminous, maintain the distance between the petals, visually assessing the result obtained and, if necessary, filling in the remaining gaps.
- Now we’ll change the technology a little; we’ll need a spoon and a green tint. Let's start decorating the chrysanthemum with leaves. We insert the spoon at the same angle with the convex side up, along its upper edge, trying not to violate the integrity of the base, lower the needle and fill the entire resulting slot with green.
Basic subtleties
By changing technology and using additional devices, entire bouquets can be created in this way.
- A spoon is used to form round rose petals.
- To make the petals sharp, dip a thin flat knife blade into the base.
- The flower will look brighter if the upper part (its backing) is filled with white (milk jelly).
All that remains is to remove the resulting masterpiece from the container, hold it in warm water, and turn it over onto a plate. The almost living 3D flower is ready, you can surprise your guests.
fb.ru
Flowers preserved in a jar
If you want to embalm flowers in a jar, do not forget to rinse it thoroughly with boiled water and dry it.
Flowers selected for canning can be placed there in advance, having previously prepared, trimmed and split the stems. After you fill them with a solution in a concentration of 1:2 (add twice as much hot water as glycerin), straighten the flowers with a stick, giving them the desired appearance. Flowers preserved in a jar must be tightly closed to prevent air from entering. The jar can be decorated in different ways, giving it even more sophistication, for example, by adding shells, various stones, sparkles, figurines or figures, and whatever you want. You can also decorate the top of the jar by tying twine or ribbon, or gluing some pebbles or sparkles on top.
Flowers in jelly, 3D technology. You won't believe it, but these flowers are... edible!
To prepare such a masterpiece, as you probably already guessed, we will use a gelatin base, and for the flowers themselves - petals, pistils and leaves, we will need natural food colors - brightly colored juices and regular milk. Ingredients:For the base for 1 serving:
- A packet of gelatin, diluted as directed on the package,
- Lemon juice or acid - to taste,
Milk jelly for flowers:
- Milk - 2 cups
- Sugar - 3 tbsp. spoons
- Gelatin - 2 tbsp. spoons
- Vanilla sugar - 1 sachet
Preparation: Lemon jelly or colorless gelatin base, dilute in advance and place in the refrigerator overnight.
For milk jelly, add sugar to milk, stir and carefully bring to a boil over heat, finally add vanillin. Let the mixture cool a little and put the swollen gelatin into it (pre-soaked in water for 2 hours, drain off the excess water)
Heat the mixture again until the gelatin is completely dissolved (do not boil) and finally cool to room temperature. Now pour the milk jelly into different containers and paint each portion in the desired color using juices -
- beets,
- carrots,
- green juice,
- tomatoes,
- citrus fruits,
- food coloring (as for Easter eggs)
Leave a little white jelly if you plan to make a chamomile.Tools:
- teaspoons of different shapes and sizes,
- medical syringes (by number of colors),
- knives with blades of different widths,
- food colorings,
- gelatin,
- milk,
- water,
- napkins,
- jelly molds,
Technology: The technology for preparing such flowers in jelly is actually very simple and after a little training, you will probably be able to create masterpieces no worse than in the photo. In already frozen jelly (by the way, you can buy ready-made berry jelly price in Russia at which is very accessible, in this case the base will be of a variety of colors and shades), a colored solution is injected using a syringe, the excess from the surface is blotted with a napkin. Next, you can put the mold in the refrigerator for about 10 minutes, and then take it out and continue adding other elements. To make leaves of various configurations - sharp, rounded, etc.
, we use teaspoons and knives. In the video below, the author of this technology, Lisa Glinskaya, clearly shows the entire process and recipe for making such masterpieces. However, such jelly can also be made as an alcoholic dessert. It is also not difficult to remove the finished jelly from the mold - dip the bottom and walls of the mold in hot water for a few seconds , cover the mold with a flat plate, turn it over and our 3D jelly flowers are ready. source
Published 10/27/2015 at 12:49 pm
resept-shagi.ru
Preserving roses
Many, having watched the movie “Beauty and the Beast,” have repeatedly thought about how to preserve roses in glycerin so that they would also stand in such an original container, without water, and not fade.
To do this, you need to select the desired flower and place it in the solution, which we prepare according to the above recipe and adhere to the same rules. It should stand in it until it is completely saturated. After this, it can be placed in a special container, the fallen petals, like in the film, are also embalmed by placing them in the solution along with the rose. Then we lay it out as decoration. The decoration is ready.
The process of preserving flowers takes from two weeks to two months.
DIY silicone from Gelatin and Glycerin
Somewhere a couple of months ago, I came across this video on YouTube, where a man made a mold from gelatin and glycerin. I really liked the video, especially because all the components of this recipe are easily accessible and not very expensive, at least for small volumes of forms. The video itself, although in bourgeois language, is nothing special to delve into; it was enough to hear fifty-fifty, after which it became clear how much glycerin and gelatin should be mixed. Therefore, I decided to try to repeat this recipe for homemade silicone or rubber, whichever is closer.At the nearest pharmacy and grocery store, several vials of glycerin and the same number of packets of gelatin were purchased. Here everything will depend on the size of the mold; if you want to make a mold for something large, then accordingly you will have to purchase a little more of all these components.
Mix everything approximately 50/50, that is, by eye. Experimentally, I found out that if you pour more glycerin, the mixture turns out to be more liquid and fluid. But if there is not enough glycerin, then this gelatin paste will stretch like drying Moment glue and at the same time it is difficult to stir even in a water bath, let alone pour it into a mold with a part that has complex detailing. In general, 50/50 seems to be the best option. I have not tried adding glycerin more than twice (to find out the limit at which the mixture would remain strong and not sticky after hardening).
It’s ideal to heat the whole thing in a water bath, because you don’t have to control the temperature, but you don’t always have access to a gas stove, so for now I made do with an ordinary candle. The main thing is not to let the gelatin boil, otherwise it will start to burn and smell terrible, as if you were frying some kind of animal carcass. Heat and stir this substance for about 10 minutes so that the mixture is homogeneous and without any lumps. There in the video he heats the whole thing in the microwave, but in order not to look for dishes for it and not to conjure with the required heating time, for now he decided to make do with ordinary heating over an open fire.
I tore this glass crystal off the chandelier for the duration of the experiment. I also bent a mold from a strip of plastic to a size slightly larger than this stone.
I poured a little of this silicone into the bottom of the mold and left it to cool to make something like a base for a stone. I decided to do this so that the thickness of this rubber would be more or less uniform on all sides of the crystal. Otherwise, if the mold is thin, it will not hold the desired shape well, moreover, it may tear when the prototype is removed from it.
After that, partially dip the crystal into a bowl of gelatin to get rid of air bubbles from the bottom of the stone. Then we quickly transfer this pebble and place it on the bottom of the mold, along with the gelatin stuck to it, as if gluing it.
Now the simplest thing is to fill the form with gelatin to the edges of the formwork.
What's good about this homemade rubber is that it hardens literally before your eyes, as soon as it cools down you can cut it. There is no need to wait a week for this form to set completely, as is usually the case with acidic construction silicone. After the mass has cooled, unwind the plastic from this cube.
We make a cut at the top and carefully remove the glass crystal from our mold.
Then mix and pour epoxy resin into the mold.
The epoxy resin casting no longer came out of the mold as easily as the glass prototype. Therefore, I had to carefully cut the mold in a circle and tear it apart so as not to scratch the epoxy crystal with a knife. I don’t know yet what this is connected with, but the casting turned out cloudy and not transparent. Either the presence of water somewhere in the gelatin mass is affecting it, or something else. On the other hand, if you cast something colored in the mass, then it will no longer have much significance.
Also, purely for the sake of experiment, I tried to cast a fragment of this stone, but from plaster (alabaster). The results were disastrous. Gelatin begins to absorb water from the gypsum and as a result, at the end we get a sticky plaster stone and a form spoiled by water. Maybe something rough and without much detail can be cast from plaster in a gelatin mold, but then you will have to somehow clean the surface of the plaster cast from fragments of sticky gelatin.
In general, I liked the fact that this homemade silicone mold allows you to make castings from epoxy resin. While there is a lot of fuss with acid (assembly), and aspic is still expensive. Another positive feature of such gelatin forms is that they can be adjusted with a hot spatula, that is, if there is an unnecessary hole somewhere on the form, you can simply cover it up by melting a fragment of this gelatin mass in a spoon. You can also easily melt and refill old molds into new ones. I remember how much I tinkered with this radiator, although with the help of this gelatin mold, it could have been copied even faster and with better quality. Of course, there are also disadvantages: this mold is afraid of water and temperature (it melts), so if excessive heating occurs in a massive epoxy casting, the mold may simply float along with the resin.
Afterword 1
After some time, I tried to polish this epoxy crystal to find out exactly whether it was cloudy in bulk or only superficially. I also created a separate page about hand polishing epoxy, in case anyone is interested. The results of polishing, of course, were not particularly impressive, because I had never really polished the resin myself. But some shine still appeared on this pebble, this is especially noticeable in the video that I added at the end of that topic. In general, epoxy castings in gelatin molds turn out cloudy only on the outside, at least for me, so keep this in mind if you want to cast something in such a mold.
Write a message to the author Author: Nikolay Golovin — — — — — — — — 06/30/2015
Other site pages
When copying materials from the site, an active backlink to the site is required. Author: Nikolay Golovin / My hosting provider BeGet.ru 04/12/2012
Preserved flowers in gelatin
Preserving flowers in gelatin is a much easier and less time-consuming process.
It is necessary to trim the flowers and place them in a container, but they should not fit tightly to each other. Mix gelatin with sugar 1:1 and add hot water, dilute the concentrate and let it brew. Stir the solution, then add it to the jars of flowers. If you want to add color, add dye to the mixture.
For a better effect, you can add a little glycerin or a few spoons of salt. Let's brew.
In this case, we make a solution in the following ratio:
Let the solution brew, stir it and pour the flowers into the containers. You can also make a colored background; it can be either monochromatic or consist of several colors. However, to do this, you need to prepare the solution one by one, adding the desired color to it. Pour in layers and let sit. When the first layer is taken, fill in the next color.
The solution will not flow out, even if the finished container is turned upside down!
Bleaching flowers
It often happens that when flowers are infused in a glycerin solution, spots appear on the leaves. Do not be upset - this situation can be corrected by keeping them in a special solution for several days.
For this you will need:
- 500 ml water;
- 160 g of acetone;
- 120 g sodium bisulfate;
- 10 g 99% acetic acid;
- 160 g denatured alcohol;
- 50 g oxalic acid.
Mix all the ingredients and place the flowers with spots there. In a couple of days it will be possible to continue preserving them.
Making a flavoring
Making your own fragrance is quite simple, but it will look original and fill the house with an aroma that you choose yourself.
For this we need:
Mix gelatin with hot water and add salt. When this solution is ready, you need to add essential oil there at the rate of 10 drops per 2 cups of liquid. However, if you want to achieve a stronger aroma and you like such smells, then feel free to add more.
Preserved flowers can be not only a beautiful decoration, but also an excellent gift. Making them is not at all difficult, and they will delight you for many years.
Source
Selecting OKVED and completing documentation
This is the production of souvenirs, so when registering you should select OKVED “52.48”. As documentation, you must register as an individual entrepreneur. The capital investment is minimal, and the registration process will take no more than 1 week. You do not need to register a legal entity. The cost of registration is up to 1000 rubles. To do this, you need to visit the tax office of your area with documents and the corresponding state-issued application.
Source
PRESERVATION OF FLOWERS in glycerin, gelatin and salt
PRESERVATION OF FLOWERS in glycerin, gelatin and salt
There is a way, and more than one, to preserve flowers almost in their original form. We are talking about preserving flowers in glycerin, gelatin and, of course, salt. What kind of canning can do without salt! The latter method is only suitable for compositions in closed vessels and does not involve removing the flower from the solution.
It is better to take dense, not too young flowers. Oddly enough, too young foliage cannot be preserved with glycerin. It is better to remove excess leaves immediately. Carefully examine the flower you decided to preserve. If you see damaged petals and leaves on it, then it is better not to use such a flower. The stem must be cut diagonally, remove the skin or bark (if it is a twig of lilac or apple tree, for example) approximately 7 cm from the bottom and split it. This is necessary so that the solution penetrates better into the flower.
Glycerin is diluted with water in the ratio: 1 part glycerin to 2 parts hot water. The resulting liquid is poured into a jar, vase, or any other beautiful vessel to a height of approximately 20 cm and placed in a cool, dark place. Penetrating into the leaves, glycerin absorbs their liquid and replaces the moisture evaporating from the leaves and stems with glycerin. The liquid level must be maintained, therefore, as it dries, the solution must be topped up. This only applies to open containers.
In closed vessels, the level remains virtually unchanged. It takes from two weeks to two months to completely soak, depending on the size and thickness of the stems. But the result obtained is worthy of admiration! For this reason, it is worth being patient and waiting. Plants preserved in this way retain their elasticity and flexibility and do not require special care; they can be wiped with a damp cloth to remove dust.
It takes from two weeks to two months for complete saturation, but the result is certainly amazing!
You can also preserve individual leaves. It takes much less time from 2 to 3 weeks. But you also need to take into account some features. Fern leaves, for example, release milky sap after cutting, which can clog moisture-conducting channels in the stem. In this case, the end of the stem should be held over the flame until it darkens.
Glycerin only guarantees us the preservation of the flower’s shape. But you can “conjure” the color yourself.
In order to give plants the required color, you need to feed the plants with artificial water-soluble dyes, adding them to a glycerin solution. You can use brilliant green, acrylic, oil, silver, colored transparent varnishes, now craft stores provide us with a large assortment of similar products.
It happens that plants were unsuccessfully preserved and white oxidized spots formed on them, which spoil the appearance of our plants. You can correct the situation by bleaching the plants for a couple of days in the following solution:
Flowers in decorative bottles.
The beauty of these decorative bottles is difficult to put into words. And even a photograph cannot fully convey to you their brightness and tenderness.
To create a composition you need a beautifully shaped transparent bottle. It must be washed well and disinfected with boiling water. Plants can be planted immediately by splitting the stem and filled with a solution of glycerin and water in a 1:2 ratio. For the best effect, before putting the plants in the bottle, you can put them in a solution for several days so that they are saturated with it. Then you put the flowers in the bottle, carefully straighten them with chopsticks, carefully fill them with the solution and seal the neck hermetically. The neck can be additionally decorated with twine, ribbon or filled with sealing wax
Tips and tricks
It happens that making slime yourself does not give the expected result. During the work process, it is important to consider some factors:
- quality of materials used for slime;
- maintaining the correct proportions.
- Thanks to well-mixed ingredients, the slime will be homogeneous and can be easily removed from the container.
If the consistency falls apart and the toy does not acquire the required shape, you need to knead more thoroughly and actively until the slime acquires the required ductility. Sticky slime that sticks to the spoon does not contain enough water. If the slime stretches but does not stick, it means too much liquid has been added. Excess should be drained or more dry ingredients should be added. - Prepared slime must be stored properly. Gelatin and plasticine slimes are stored in the refrigerator, pre-packed in an airtight plastic container.
- During the game, the slime may begin to stick to your hands, then it is advisable to add more thickener or leave the slime in the refrigerator for a couple of days.
Slimes made from plasticine have a shelf life of 7-30 days, while gelatin slimes can be used for no more than a week. The reason for this is the natural origin of gelatin; it quickly deteriorates and the toy becomes unsuitable for play. After a while, the slime begins to smell unpleasant, loses its viscosity and may become moldy.
Unusual modern toys make games brighter and more active, and the manufacturing process helps to study the properties of certain materials and their compounds. Keep very young children away during the kneading process. Chemicals can be dangerous to inhale, and babies love to taste everything. It’s better to think through all the safety measures and make the game more educational and original.
How to preserve a bouquet for years? Learning to preserve flowers
Adding an article to a new collection
Every woman has sighed at least once over the transience of the life of cut flowers. It is quite possible to prolong their fragile beauty, and this can be done in several ways at once. So wait for the next gifted bouquet and feel free to experiment!
You can preserve flowers in three different ways at once, all of which are quite inexpensive. You will need a transparent container, fresh flowers, water and some supplies that can be purchased at any hardware store.
Preserving flowers in glycerin
Flowers preserved in glycerin can be stored both in open vessels (vases, glasses) and in closed ones. In the first case, the solution will need to be periodically added, but in the second - not. The flowers will retain their appearance and will only fade slightly during canning.
The fresher and better quality the flowers, the better they will be preserved, so after receiving the bouquet you should not delay, it is better to immediately select several flowers for storage.
The procedure for preserving flowers is simple and is based on the fact that a glycerin solution gradually displaces water in the plant tissues. True, this takes time, depending on the size of the flower, from 2 to 4 weeks.
In order to preserve a flower, you will need:
After the plant is completely saturated with glycerin, you can take it out into the light and store it as a regular interior decoration.
Glycerin is responsible for the shape of the flower, but the brightness of its color should be taken care of separately. To do this, immediately after purchasing a bouquet, water-soluble dyes, sold in flower shops, are added to the water. They will saturate the flower petals with the color you want, and then the glycerin solution will fix it.
We preserve bouquets in glycerin. Master Class
Before you dip the flowers in glycerin, they need to be well prepared. Evergreens are cut at any time of the year, but seasonal ones are harvested at the end of summer. When you cut the flowers, put them in water. The stem should be cut at an angle. If juice flows from the stem, then you need to hold it over the fire so that the ends darken. In order for glycerin to be better absorbed, the stem is split in the center up to 6 cm long. It is advisable to remove the lower leaves from the stems, since glycerin does not cope well with young leaves.
Materials for preparing flowers:
- beautiful bottle; - glycerin; - tapes; - decorative paper; - flowers.
You will notice how the flowers and leaves gradually absorb the glycerin. Add the solution periodically so that the plants are completely covered. The period for preserving flowers depends on the type of plant itself and can range from a week to 8-9 months.
After the flowers stop absorbing glycerin, you can put them in a decorative bottle and close the lid. The bottle should also be decorated with threads or ribbons.
To prevent the solution from becoming cloudy and the flowers losing their bright colors, canning is best done in a cool, dark place.
Flowers in glycerin will look original in the interior of a bedroom or kitchen. In addition, they will become a pleasant gift that can be kept forever. Glycerin will keep the flowers alive, while the difference in natural shade will be only half a tone.
We hope these simple tips and videos
How to make flowers in glycerin will help you present a creative surprise for loved ones.
flowers in glycerin with your own hands
without much effort and extra costs. Now any bouquet can retain its original attractiveness for longer than one week.
Flowers are so beautiful, without any doubt, everyone likes them. But when the flowers wither, it becomes sad - the fading beauty reminds us that everything in life passes. It's a shame when bouquets lose their attractive appearance.
Preserving flowers in gelatin and salt
If for some reason you were unable to get glycerin, you can replace it with more affordable products - salt and gelatin, or rather, a very strong solution based on these ingredients.
For 100 g of hot water you will need 25 g of gelatin and 2 tbsp. table salt. The solution is prepared simply: pour water into gelatin, let it brew, add salt. Then this solution is filled with a container in which prepared flowers, beads, ribbons and other decorations were previously placed. Until it hardens completely, place the container in a cool, dark place.
You can add your favorite essential oil or any other flavoring to the solution.
Also, if you are going to store the preserved flowers in a closed container, you can prepare a very strong salt solution and pour it over them. But be prepared for the fact that their color will change, and any violation of the seal will ruin the craft.
Prospects for a business idea and maximum income
The market value of one composition varies on average from 60 to 300 rubles. The price depends on the complexity of the product, the colors and decorative elements used. The cost will be several times lower. You won't have any problems with implementation, since this is a fairly new idea. There is minimal competition in the market, and this is the optimal gift. You can sell online or negotiate with stores. Profit can be within the average salary of 30,000 rubles. Get started today and you will see that the idea is worth your attention. For example, a composition of flowers in glycerin in a bottle will look very beautiful and original.
Storing flowers in salt
There is another way to preserve flowers, but it is quite controversial. After all, firstly, only unblown roses can be stored this way, secondly, storage lasts no more than 2-3 weeks, and finally, no one sees the flowers at this time. Unless you want to take a bouquet with you by train to Vladivostok and are ready to take a risk.
So, cut off the roses that are ready to bloom. Then heat a couple of kilograms of table salt in a frying pan and cool. Pour salt into a tin or cardboard box and place the flowers on it so that they do not touch each other. Sprinkle another layer of salt on top, completely covering the roses. Close the box hermetically and put it in a cool place. When you need the flowers, take them out, shake off the salt, trim the stem and put them in water - the flower should come to life and open.
A flower preserved using one of these methods will give you joy not for 3-4 days, but for a long time and will turn into an unusual decoration for any interior or a wonderful gift.
Source