Tools and materials
Do-it-yourself paper toys are made using the following tools and materials:
- Various papers (thin, thick, metallized, colored).
- Paper napkins.
- Cardboard.
- Wallpaper scraps, foil, various candy wrappers.
- Fabric for decoration.
- Glue pencil.
- PVA glue.
- Stapler.
- Scissors are small and medium with rounded ends.
- Ruler.
- Toothpicks.
- Awl.
- Pencil.
Volumetric paper toys
To develop creative abilities in children, it is worth making voluminous paper toys together.
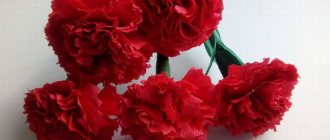
Cat Matroskin
To make Matroskin the cat out of paper, you should transfer the proposed template to a landscape sheet, print it, then paint the picture with the desired colors, and then cut it out along the contour lines.
Print and cut out the toy from paper, glue it and get a sailor cat
In places where the dotted line is laid, it is necessary to bend parts of the product inward and form the figure of an animal. The folds on which the pink dots stand should be glued together.
Dog
To design the product, you should print out the given pattern and color the figure at your own discretion. Then, along the dotted lines, you need to bend the parts of the template and glue them in those places where the unpainted parts of the layout are located. After the paper craft is ready, glue the tail to the back.
Butterfly
When creating three-dimensional multilayer butterflies, several pieces of the same configuration are cut out of paper material (the size and color scheme may be different). After this, the parts need to be stacked on top of each other and connected with glue, and the wings be bent at different angles.
A beautiful effect can be obtained if you make moths of the same shape, but from paper of contrasting colors or different shades . Make some of the blanks openwork, and the rest simple. Then they need to be combined by placing the link without a pattern down.
Dymkovo toy
To make a Dymkovo toy, you can use templates in the form of a laying hen, lamb, horse and cockerel. The fragments should be printed, colored to your liking and cut out along the contours.
To add brightness, it is better to choose a color scheme in which blue, scarlet, green and yellow shades predominate. The parts that need to be glued together are indicated by arrows.
Cardboard house
The house can be built from cardboard.
Step-by-step design:
- First you will need to print or draw a pattern and cut out cardboard elements according to its outlines.
- Then the blanks should be traced on the fabric, leaving an allowance of 1.5 cm. In the cut out fabric fragments, you need to cut the corners.
- In the window area, the material should be cut in the shape of the letter X on the fabric, then fold the resulting shreds inside and glue them.
- When all the parts of the cardboard house are ready, they are glued together.
Airplane
To create an aircraft, the following steps are provided:
- Fold a rectangular sheet of any shade in half lengthwise, then open it and fold 2 corners inward, aligning it along the central bend.
- In the new rectangle that is formed, the corners should be tucked inward again, leaving a small triangle visible at the bottom. Bend the peeking corner up, fixing the future wings with it.
- Bend the product along the middle line so that the ends of the triangles are at the bottom.
- Fold in the wings, aligning the line with the base.
- Finally, spread the wings.
Ship
Step-by-step process for making the simplest paper boat:
- Fold a rectangular piece of paper in half.
- Bend the upper corners towards the center at a right angle.
- Bring the corners of the base of the figure together to form a square.
- Fold the bottom corner points on both sides upward, a triangle should emerge.
- Connect the corners of the resulting figure together to form a square. You need to hold it by the upper corners and spread them to the sides until a boat is formed.
- Align the figure so that it becomes stable.
Volumetric toy made of colored paper
Step-by-step production of a lion cub:
- Cut out a beard, muzzle and ears from white paper, a mane and a tail tassel from orange paper, and make all other blanks from yellow raw materials.
- Attach the beard to the body of the animal using glue, then roll it into a cone.
- You need to glue the muzzle to the bottom of the head, and glue slightly smaller white fragments onto the yellow parts of the ears, and then glue them to the head.
- On the face you should draw a mouth, eyes and nose with your hands.
- Attach a mane in the form of sun rays to another head blank with glue, then fold the orange stripes in half and glue the painted blank onto the resulting part.
- Connect the head to the body with glue.
- For the paws, roll the prepared elements into a tube, fix them with PVA and attach them to the lion cub’s body. Draw claws on them or simply cut them into fingers.
- Glue the parts of the tail together, attach a tassel to it and fasten it with the lion's body.
Paper car models
DIY paper toys that boys prefer to make are various cars.
Racing car
Kids can make their own racing car.
Technology of its design:
- Cover a cylinder of used toilet paper with paper of any color and draw numbers with a felt-tip pen.
- Using a compass, draw 4 black circles and 4 white circles of slightly smaller diameter, cut out and glue the smaller parts onto the larger ones.
- In front and behind the cylinder, use a pin to pierce holes for the axle made from a toothpick.
- Place the roll on the toothpicks and secure the wheels on both sides.
- Use scissors to make a semicircle in the upper part and bend its outer fragment in the form of a windshield.
Fire engine
The proposed fire truck template should be enlarged and cut out along the contours.
Then decorate the model, bend it in the right places and glue it with PVA.
Truck models
The recommended diagram must be drawn according to the specified dimensions and the parts cut out. You can decorate it at your own discretion or as indicated in the picture. Bend the paper along the drawn lines and form parts of the machine. Connect the darkened areas with glue.
Police car
Enlarge the model of the police car, then print it out and decorate it. Cut along the outer lines, then fold the model and secure with glue.
Sports cars
Print the car pattern and cut along the contour borders.
Decorate the layout as desired, bend the parts to form a machine and fasten with PVA.
War vehicles
Transfer the military truck template onto a piece of paper and preferably print it using a color printer. Cut out the sample and glue it in the area of the white parts.
Other paper car models
The car can be made in origami style using the diagram below.
Crafts for Valentine's Day - a heart and a ballerina made of cardboard. Master class with photos
Every day the number of people who want to celebrate Valentine's Day and make a gift or card with their own hands is growing. We suggest making an unusual Valentine card - it is made of cardboard according to the principle of a twitch toy. An elegant ballerina doll can also become an original gift for Valentine's Day. A detailed master class with templates and photos will help you master a new technique for making crafts.
A jerk is a variant of a mechanical toy, the parts of which are loosely connected and driven by threads attached to the back of the toy. Twitch toys have been known since the ancient world. In the 19th century they were popular in all European countries. In Germany they were called "Hampelmann", in France - "Pantins", and in English-speaking countries - "Jumping Jack". Such toys were also made in Russia, they were called “dancers”.
Even children can handle making a heart-shaped valentine with movable wings. More delicate work remains with the ballerina figurine, whose arms and legs can be made movable.
Paper toys based on templates
You can make paper toys with your own hands using different methods. This will require perseverance and care in folding the paper sheets correctly.
Giraffe pattern
The giraffe is easy to glue using this template. It needs to be printed on a printer or drawn by hand, then decorated with paints or pencils and cut out along the contours. In the places of the dotted lines, the workpiece should be bent and the body of the animal should be formed. Then you need to coat the white areas with glue and fix the model. Separately glue the head and tail of the giraffe.
Pet templates
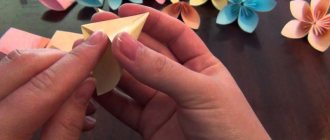
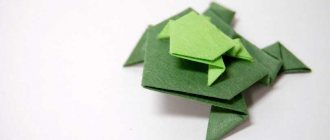
Pets are easy to make using the origami method from a colored paper sheet.
In this case, you must follow the step-by-step technology shown in the picture.
Fruits
Fruits can be created using the templates below, which are formed by transferring to paper, decorating, cutting, shaping and gluing.
Here it is better to choose the following color scheme for the fruit:
| Name | Color |
| Watermelon | Raspberry, black, green |
| Banana | Yellow |
| Kiwi | Brown, dark green |
| Blueberry | Dark purple |
| Raspberries | Red |
| Strawberry | Bright red |
| Lemon | Pale yellow |
Little gremlin
To make a small gremlin, you need to enlarge the recommended pattern, make a blank out of paper and color it. Then you need to fold the figure and glue it in the gray areas.
There are stripes on the body of the creature; the arms and beard should be glued to them, and the legs should be attached below.
Kitty pussy
Kitty's pussy can be made using the template provided. The craft is made by enlarging it, printing it on paper, and then cutting it out. The layout needs to be decorated, all parts of the body must be formed separately and glued to one another so that the indicated icons match. Finally, glue all the parts together.
Olaf
Olaf is made in the manner indicated in the previous paragraph.
Elsa
Elsa can be glued based on the recommended paper template. It is necessary to fix the parts with glue, and it is better to paint the model with felt-tip pens.
Other cartoon characters and animals
In a similar way as given in the previous paragraphs, you can create a bird, a princess and a teddy bear.
Cubes with photographs
Such decorations are considered not only original, but also memorable for the owner of the installation. Photos can be placed on the edges of the figure. It is preferable to print them on a printer in order to select the correct measurements.
How to make a cube correctly:
- cut out six circles, rectangles or squares;
- bend the edges of each face so that the base is square;
- glue the bent edges together.
The fruit will pleasantly surprise you - it can be hung not only on a holiday tree. Choose a loop to your liking that will hold everything in place.
Paper weapons
DIY paper toys involve making weapons, which is a good choice for boys.
Kunai
Step-by-step method for making a kunai blade:
- Prepare 2 thick paper squares of dark color. One of them should be smaller.
- For a smaller piece, bend one corner to the opposite edge to create a triangle. Fold the resulting shape in half to create another triangular shape.
- Open the end fold.
- Bend the short base of the figure towards the center so that the side line coincides with the line from the fold in the middle. Make a fresh fold on the paper.
- Using 2-3 folds, you need to wrap the remaining piece of paper around the resulting narrowed triangle. Push the protruding ends inside.
- Press down the product from the sides and press additional bends so that the blade of the weapon becomes tetrahedral.
The handle should be made in the following way:
- Roll a thin tube from a large square and secure it with tape.
- The tube must be inserted into the hole of the manufactured knife.
- Take the roll protruding from the tip in your hands and flatten the excess paper.
- Using bends on the flat edge of the handle, make a ring and secure it with tape.
- Connect the blade and handle with a stapler.
Dagger
Making a dagger by gluing the material:
- Draw a dagger on the cardboard using the outline of the weapon and a ruler.
- Cut out the template.
- Trace the pattern on sheets of paper (at least 10), then align the cut out parts and glue them together. Smooth out the product so that there are no wrinkles. In order for the dagger to have sufficient thickness, you should add as many fragments as needed.
- Trim any excess that sticks out.
- At night, the weapon must be placed between parchment sheets, and something heavy must be placed on top.
- At the design stage, you can attach objects that resemble jewelry to the handle.
- At the end, paint the dagger, the handle can be painted with curls.
Nunchakus
To make nunchucks, follow these steps:
- Roll the album sheet along the narrow edge like a cylinder. The diameter should be 5 cm.
- Secure the edges of the part with tape.
- Form a similar cylinder from rolled old waste paper and insert it into a paper blank.
- In a similar way, make part 2 of the nunchuck.
- Wrap the resulting sticks with twine, at the same time fixing the thread with hot glue, and attach the ends with tape.
- To secure, the cord must be pulled along the entire length of the weapon.
- Insert the twine into the cylinder and secure it to the outside knot. Do this process with 2 parts.
A spear
Paper spear design technology:
- A thick sheet of paper should be folded in half and then in half again.
- Unfold the fold, fold the corners at the top inwards towards the center, and then again, as when forming an airplane.
- At the bottom of the paper you need to repeat the same steps, only fold the corners once.
- The upper segment must again be folded with its corners in the middle, with the lower corner parts being under the upper ones. Seal them with tape.
- The holder can be made from several layers of paper rolled into a tube, securing them with tape. You can insert a thin wooden stick and insert it into the center of the paper blank and secure it with glue.
- To ensure that the tip adheres well to the base, you can wrap a strip of colored paper around the joint and attach the tip with tape or glue it.
Morgenstern
Morningstar manufacturing process:
- Crumple a ball from newspaper and cover it with colorless tape.
- Attach the ball to the stick (length 20 cm) using adhesive tape.
- Wrap the newspaper sphere in corrugated paper and secure it at the base with tape. Trim off excess paper pulp.
- Make paper blanks in the form of small cones with a base for glue.
- Roll up the parts and bend the legs inward.
- Apply glue to the support and glue them to the base.
Paper katana for children
The proposed diagram needs to be enlarged and cut along the contours. The white teeth should be bent and the layout should be glued along them.
Gun
To design a pistol you need to follow these steps:
- Bend a thick square sheet of colored paper in both directions, then straighten it.
- Fold the side parts to the side towards the center so that the colorful surface is on top.
- Fold the workpiece in half again.
- Then bend the product diagonally to form a handle.
- Finally, you need to fold the two halves of the barrel inside and the toy is ready.
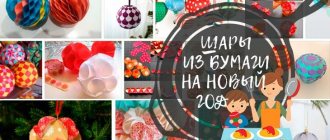
Christmas tree toys made of paper
Christmas tree decorations are made from paper with your own hands. Such crafts are inexpensive, but look original and elegant.
New Year's ball
Method of making a New Year's paper ball:
- Paper sheets for notes are suitable for crafts. You will need 3 shades - for each of them 4 leaves.
- Place the bottom of the glass against one sheet and trace its outline.
- Using the template, cut out circles from the rest of the prepared paper.
- Fold the resulting circles in half separately and fold them together. It is better to combine colors symmetrically.
- Fasten the round fragments along the fold line with thread or a stapler.
- On a landscape sheet, draw another template, which will be required in order to fix the circles in a certain place. Apply markings, dividing the semicircle into 3 equal parts, then mark 1/3 from the bottom and top and draw lines, aligning the ruler with the middle of the circle and the drawn marks.
- After this, apply a ruler and align it with the line until you coat only the required area with glue, and cover the upper segment limited by the strip with adhesive.
- Turn the page of the round brochure over, gluing it, then move the ruler to the bottom and repeat the manipulation again.
- In this way, connecting alternately the leaves from below and from above, there comes a time when only two fragments of the book remain to be glued together before unfolding the craft into a festive ball.
- At the last stage, you should glue a bright thread on which the ball will hang on the Christmas tree.
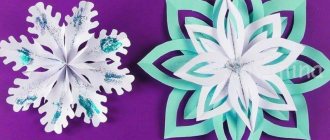
Volumetric snowflake
Step-by-step production of paper snowflakes:
- On a white sheet of paper, mark 6 squares with sides of 9.5 cm and cut them out.
- Fold the figure diagonally, on one side at a distance of 1.5 cm. Make 6 cuts, not reaching the fold line. Then unfold the part.
- Now take the 2 bottom strips in one blank and connect them together with glue.
- Turn the product over and glue the following sections together. In a similar way, combine all the strips of the fragment.
- Repeat similar actions on the remaining squares. You should get 6 blanks.
- To connect them together, you need to drop glue into the base of the part and connect it to the other part.
- In the same way, fasten the remaining 3 fragments.
- Glue the resulting 2 parts together.
DIY Valentine's card
Height - 10 cm, width - 15 cm
- Cut out a heart from packaging cardboard according to the template. Using a glue stick, stick it onto red felt or fleece. When the glue dries, cut the fabric along the contour of the heart.
- Cut out two wings from white cardboard according to the template. Make holes in the designated places (they are indicated by circles) and attach the wings to the heart with clips, as shown in the photo. When you bend the antennae of the clips, do not press them close to the cardboard, leave something like a leg. This can be done by hand or using tweezers.
- To connect the wings to each other, pierce one of them with a needle in the place marked on the pattern with a bold dot. Secure the end of the thread with two strong knots. Without cutting the thread, pierce the second wing in the same place. Tie a few strong knots again. Cut the thread. During the connection process, the wings should be lowered down. The thread connecting them should be horizontal - not sag, but not too tight.
- Tie a control thread to the middle of the connecting thread and secure a bead at its end. Use double-sided tape to attach a wooden stick to the back of the heart.
Flashlights
To decorate a New Year's lantern you need to follow these steps:
- Fold a colored paper sheet in half.
- Using scissors, make cuts from the bend side, not cutting 1.5-2 cm to the edge.
- Unfold the workpiece, then roll it widthwise into a tube, gluing the edges.
- Cut a handle out of paper and fix it with glue.
- Alternatively, a cut paper sheet can be wrapped around a painted cardboard roll.
History of origami
Nowadays, origami captivates mainly children. However, this was not always the case. Most animal figurines were created as iconic figures in Chinese and Japanese mythology. Photos of origami toys are still motivating to create something new.
Paper rainbow toy
To make a paper rainbow, follow these steps:
- It is necessary to cut strips from colored paper, starting from the longest red stripe and ending with the shortest purple blank.
- The difference in their footage is 0.5 cm, it is advisable to make the width about 2 cm.
- Place the fragments in a stack, in the order of the colors in the rainbow, and connect the edges with a stapler.
- Thread a fishing line into a needle with a thick eye and pull it through the rainbow. You can decorate the threads with beads, and attach cotton wool in the form of clouds to the bottom of the craft.
spinner
Spinner manufacturing technique:
- Fold 2 multi-colored squares (19x19 cm) towards the center of the edge to form a narrow triangle, then bend the strips in half.
- On each of the bottom strips, bend the corners towards each other, and turn the top corners in different directions.
- Do the addition in the opposite direction. The formed blanks need to be turned inside out and folded one on top of the other.
- Place the corners in the pockets of each part to secure them.
- The workpiece should look like a star with 4 ends.
- Then, using an awl, punch a hole in the center and insert a toothpick there so that it does not touch the walls of the product.
- Shorten the toothpick to 1.5 cm, secure it with beads on both sides using glue.
- The spinner needs to be spun with your fingers, while holding it by the beads.
Yula
Step-by-step production of a spinning top:
- Prepare 2 squares of equal size from colored paper. On both sides of the figure you should put 2 dots dividing the side into 3 equal parts.
- Bend the parts along the first marks, then bend them along the second marks.
- Bend the lower left corner and the corner opposite it to form 2 triangles, and a square between them.
- Place one piece on top of another.
- After this, you should alternately bend the triangles into the middle.
- Raise the first folded triangle slightly to create a pocket.
- Place the last unoccupied triangular figure in the pocket.
- Use an awl to make a hole in the center, capturing all the layers.
- Insert a toothpick into the hole and start the spinning top.
Folding the boat
Unfold, leaving the short sides underneath. And we attract the upper corners to the resulting middle line. We get a large angle. We turn the free sides from below upward from different sides. We take the middle line from both sides and unfold it so that it turns out to be a square. We lift the free corners of the square up from different sides, pull and unfold the boat.
This little magic, created in a few minutes, will keep your child busy for a long time.
Pinwheel
Step-by-step methodology for decorating a turntable:
- You need to prepare 4 yellow and 4 red squares from paper.
- Fold the red shape in half, then unfold it and fold the side edges to the center line.
- The straightened square should be divided by kinks into 4 longitudinal strips.
- Such folds should be made across. As a result, the figure will be divided into 16 squares. In one of them (located in the second bottom right row) diagonal bends should be made. Make symmetrical bends on the left side.
- Bend the side corners at the bottom.
- The right edge of the part must be bent back, while its lower segment must be at an angle.
- Do similar actions with the left half.
- Bend the top of the module back (to the width of 1 square).
- Complete 7 more similar modules.
- To connect, take 2 fragments, and place the protruding segment of one of them in the pocket located on the reverse edge.
- Connect all the parts in a similar way and close them into a ring.
Types of balls
Kusudama balls have a variety of shapes: these are classic balls, diamonds, stars and even flower balls. Let's consider collecting the simplest of them.
Kite
Step-by-step technology for making a kite:
- Place an A4 sheet of paper vertically and bend it in half so that the fold is at the bottom.
- Place a dot on the fold at a distance of 5 cm from the edge on the left side. Place another mark 5 cm from the first, on the same line. They are needed to attach the thread.
- To fix the wings, you need to bend the upper left corner of the paper to the first mark. Do a similar procedure with the bottom of the paper so that both halves of the product are symmetrical. Fix the corners connected together with a stapler at the location of the first point.
- Cover with tape the area where the thread is attached in the area of the second point. Use a hole punch to make a hole in the craft above the pencil mark.
- Thread a thread into the hole of the kite and tie it with a strong knot.
Giving gifts made with love with your own hands fascinates with its uniqueness, even if they are toys made of paper. Crafts made with your child will help show children's creativity, strengthen relationships and bring a lot of positive emotions.
Article design: Vladimir the Great
Ship
To fold this simple three-dimensional figure, we only need a sheet of A4 paper.
First, fold the sheet in half, connecting the short sides. Then cut in half again, again along the short sides.