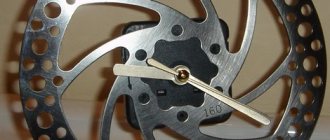
Don’t rush to throw away hard drives left over after upgrading your computer or hard drives that have failed - you can always find a new use for them. For example, make a mirror, a clock, a safe for storing cash, a network drive and other useful things.
The purposes for which old hard drives can be used depend on whether they are in working order or not. It is curious that a functioning hard drive has many fewer uses than a non-functioning one.
♥ ON TOPIC: What can be made from an old monitor? 12 ideas.
Portable storage
If the hard drive is in working condition, it can be turned into a portable drive. To do this, just buy an external hard drive container and place the hard drive in it. Depending on the size of the drive, a power adapter may be required, for example if the drive is 3.5" while 2.5" drives usually do not require an adapter.
♥ ON TOPIC: How to make a barbecue, an aquarium, a bench, a lamp, a mailbox, motorcycle cases, etc. from old Macs. (30 photos).
Crafts from non-working HDDs - mini pump
I somehow needed a water pump for future homemade projects.
Yes, not simple - with restrictions on dimensions - thickness up to 25mm, width up to 50mm (length can already be varied). The desired characteristics include a head of 1 m and a flow rate of 100 l/h. Having not found what I wanted in sales (mainly in terms of dimensions), due to my stubborn, stubborn nature, I began to implement my solution to this issue! Attention - a lot of photos!
“Brains” and a little background:
Strictly speaking, the idea of using HDD motors for pumps is not new.
Since 2009, there has been a whole thread on one well-known forum. So I was initially aimed at making a pump from a “laptop” hard drive and finding a suitable driver with integrated power switches and touchless control. But I wasn’t able to learn from the experience “out of the box.” A series of tests with different drivers (MTD6501C, DRV11873 and a number of other Chinese handicrafts) gave a disappointing result: larger motors from 3.5 disks work perfectly. But with small motors, at best, only a few can be started, and they work extremely unstable. With such a disappointing result, the long-standing idea was abandoned and on the verge of oblivion.
But relatively recently I came across a rather interesting driver from TI - DRV10987. Despite its modest dimensions, it has quite impressive potential:
- Operating voltage from 6v to 28v
- Integrated 5v step-down converter (you can power the MK for control)
- Constant operating current up to 2A (peak - 3A)
- A huge number of software-defined parameters (setting the values of configuration registers via the I2C bus) to control the operation of the motor
- Automatic restart of the motor after an emergency stop/failure (if the failure conditions have passed)
- Overcurrent protection
- Surge protection
- Rotor stall/lock detection
- Shutdown when controller overheats
Armed with an Arduino
(may local electronics engineers forgive me for this dirty word) to set parameters, a board made by LUT for this driver, I delved into experiments on starting motors. Well, this controller did not disappoint me! Despite the “scientific poking” method used when selecting parameters, we managed to find an approach to any HDD motor!
online settings configurator helped me with this
.
Enjoy!) Here is a sketch for filling parameters via Arduino:
#include #include #define I2C_DRV10983_Q1_ADR 0x52 #define Fault_Reg 0x00 #define MotorSpeed_Reg 0x01 #define DeviceIDRevisionID_Reg 0x08 #define SpeedCtrl_Reg 0x30 #define EEPROM_Access_Code_Re g 0x31 #define EEPROM_EeReady_Reg 0x32 #define EEPROM_Iindividual_Access_Adr_Reg 0x33 # define EEPROM_Individual_Access_Data_Reg 0x34 #define EEPROM_Access_Reg 0x35 #define EECTRL_Reg 0x60 void setup() { Serial.begin(9600);
Wire.begin(); } byte readByAdress(byte reg_adr, unsigned int &result) { //I2C write 2-byte register byte i = 0, err = 0; byte bytes[2] = {0, 0}; Wire.beginTransmission(I2C_DRV10983_Q1_ADR); Wire.write(reg_adr); err = Wire.endTransmission(); if(err!=0) return err; Wire.requestFrom(I2C_DRV10983_Q1_ADR, 2); while(Wire.available()) { bytes = Wire.read();
i++; } result = ((bytes[0] << | bytes[1]); return 0; } byte writeByAdress(byte reg_adr, unsigned int value) { //I2C read 2-byte register byte bytes[2]; bytes[1 ] = value & 0xFF; bytes[0] = (value >> & 0xFF; Wire.beginTransmission(I2C_DRV10983_Q1_ADR); Wire.write(reg_adr); Wire.write(bytes,2); return Wire.endTransmission(); } boolean flag = true; void loop() { if(flag){ unsigned int onReady = 0; writeByAdress(EECTRL_Reg, 0xFFFF); writeByAdress(EEPROM_Access_Code_Reg, 0x0000); //Reset EEPROM_Access_Code_Reg writeByAdress(EEPROM_Access_Code_Reg, 0xC0DE); //Set EEPROM_Ac cess_Code_Reg while (onReady == 0){ // Wait EEPROM ready readByAdress(EEPROM_EeReady_Reg, onReady); } Serial.println("EEPROM_Access."); onReady = 0; //Write values on shadow registers //writeByAdress(EEPROM_Access_Reg, 0x1000); //Not use EEPROM storage. Store values in shadow registers writeByAdress(0x90, 0x154F); writeByAdress(0x91, 0x042C); writeByAdress(0x92, 0x0090); writeByAdress(0x93, 0x09EA); writeByAdress(0x94, 0x3FAF); writeByAdress(0x95 , 0xFC33); writeByAdress(0x96, 0x016A); writeByAdress(EEPROM_Access_Reg,0x0006); //EEPROM mass access enabled && update while(onReady == 0 ){ // Wait EEPROM ready readByAdress(EEPROM_EeReady_Reg, onReady); } Serial.println("EEPROM_Update."); writeByAdress(EECTRL_Reg, 0x0000); //Run motor flag = false; } } Then more presentable scarves were ordered from the Middle Kingdom:
After registration (well, that’s what they require), you can download the project files for free. Or immediately order boards here
.
About "heart transplant"
All that remains is to get the motor out of the HDD case, which, by the way, in 2.5 disks (and in most 3.5 ones) is its integral part.
The process can be briefly described by the famous phrase “ Saw, Shura, saw!” ":
An external guide for a metal crown is made from plywood and is attached to the disk body. For safety, the motor cable is glued to its base so that it is not cut off by a crown
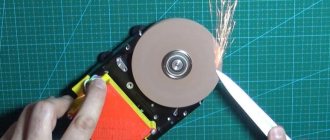
After drilling, we get round pieces with a motor. After processing with a file, we obtain a base diameter of about 25mm.
Preparing the recipient for transplantation:
The brains and heart of the future pump get along well with each other and are ready to find a new habitat.
So it's time to think about the housing and impeller. Since it is necessary to obtain high pressure with a small working volume, I designed the impeller with 7 beams:
Printing on a 3D printer with polycarbonate
3D model
Polycarbonate is an excellent thing for a case. But it’s expensive for them to print an entire body. Pieces of thick sheets are very difficult to find and milling is not free (for me). But you can ask advertisers for thanks for scraps from sheets 4mm and 2mm thick. So the body was designed for subsequent laser cutting of parts and gluing them into a single whole without the need for milling. All that will be required is drilling holes for fittings and nuts.
View of the 3D model
3D model
A set of parts for gluing the “top” of the pump. At the junction of the inflow and outflow channels, the edges are cut off
Progress of the operation:
Here I would like to make a lyrical digression and remind those who want to repeat and not only that the dichloroethane used for gluing contains few vitamins and you need to inhale more of a rather toxic and volatile substance. Work with it must be carried out either outdoors or in a well-ventilated area.
Stack of “top” parts drying after gluing - top-inflow-separator-impeller-rotor. The base for the motor is glued in the same way (or make it entirely from a 6mm piece of polycarbonate)
After gluing, holes are drilled for the fitting - an 8mm brass tube along the notches on the “separator” part
The good old composition BF-4, as for me, gives reliable gluing of brass and polycarbonate
The base of the motor at the bottom of the pump is glued with the same glue. The top part is drilled ( not
right through!) holes for gluing M3 rivet nuts. And the photo shows a thin silicone gasket
Testing:
Now it's time to test the homemade product in action. For this purpose, a test bench was quickly assembled. Since Habr is read by the children of serious developers, for whom the appearance and composition of the stand can cause attacks of panic, horror and disorientation, I wanted to hide it under a spoiler... but I hope everything will work out, and then don’t say that I, dear readers, didn’t warn you !
The Arduino supplies a PWM control signal, the duty cycle of which is set manually by a variable resistor, reads the value of the configuration registers, and also determines the rotation speed both through the internal driver registers (RPMrg) and the FG signal (RPMfg).
Motor power supply - 12v Starting the motor without load.
Adjusting speed and measuring energy consumption The motor successfully starts from 6% of the PWM control signal. And at the end of the video you can see how at high speeds the speed values in the internal register “freeze” in the range from 10k to 13k revolutions, although through the FG output the frequency is fixed without changes.
With idle speed everything is clear - we got 13k revolutions at a voltage of 12v and a consumption of 0.16A. But the water pump was being assembled, and I’m moving air here. So the next stage is to escort the household members outside so as not to interfere, and occupy the bathroom!
Unfortunately, I was unable to take measurements and shoot a video. So we'll make do with general photos. A stopwatch and a 3L jar were added to the measuring equipment
Based on the results of measurements, the following table was obtained:
Consumption schedule
As a result, this craft completely satisfies my requirements. And in the event of a breakdown, thanks to the collapsible design and the presence of boxes with dead 2.5HDDs in any repair shops/service centers, it will not be difficult to repair. And the path to further construction of the SVO is open! So to be continued!
Home cloud server
If you already have an external drive and don't need another, you can use a working hard drive to create your own network-attached drive, allowing you to access the data on the drive from any device connected to your Wi-Fi network. If you are not ready to spend extra money, you can build your own network storage device based on a Raspberry Pi single-board computer.
♥ ON TOPIC: 5 creative ways to use old or unnecessary boards.
The essence of the problem
The main advantage of computers is their high data processing speed, improved performance compared to other devices, as well as the ability to store and instantly process a huge amount of data. Not the least role in achieving the peak of popularity of personal computers is played by internal devices for storing user information - hard drives "HDD"
.
The use of modern materials and technologies makes it possible to create high-capacity hard drives at a fairly low final cost. You won’t surprise anyone anymore with a hard drive with a capacity of “10 TB”
,
“12 TB”
and even
“16 TB”
.
(SSDs) have become widely used.
.
Made using chip-based technology, SSD
use flash memory to store information. Thanks to this approach, solid-state drives are smaller, lighter, and have significantly higher loading and processing speeds than standard hard drives. However, they are inferior to the latter due to several times higher prices and much lower wear resistance.
It is not surprising that users decide to replace outdated versions of hard drives with new data storage devices, more modern and faster.
However, no matter how attractive the option of using a hard drive to store basic user data may be, there are objective reasons to use other information storage facilities. Today there are a large number of external drives and USB
flash drives. Additionally, due to the ability to access from anywhere, various cloud data storage facilities on the Internet are becoming widely popular.
One of the important reasons for replacing an old hard drive with a new one is the high probability of the latter failing. Very often, the average duration of uninterrupted operation of a HDD
is five to six years.
And when the disk's service life is coming to an end, a number of signs appear signaling this. We described in more detail about the possible signs of failure of your hard drive in our earlier article: “Five signs that your hard drive is reaching the end of its life, and what to do about it now?”
.
Or your hard drive has already become unusable, and you are determined to throw it away as unnecessary. But don't rush to make hasty decisions. And in this case, your disk still has some value, even if you have checked it and it is not possible to recover information from it. Read our article about the possible use of old disks in any condition.
Magnetic knife bar
Hard disks contain large neodymium magnets that can be used to create a magnetic knife holder. All you need is a strip, magnets, glue and a set of common tools.
♥ ON TOPIC: 5 functions of old mobile phones that are not present in modern smartphones.
The drive still works great!
Not every hard drive is bad just because it's old. As we wrote above, there are various reasons for replacing a hard drive, one of which is insufficient disk capacity. You can continue to use the old hard drive together with the new one by first reinstalling the operating system on the new drive and transferring all important data to it. Your old drive may still serve you for a long time. And if you don't plan to use it to store important information or back up your data, then you have nothing to fear.
By the way, you need to make sure that you do not find any obvious signs of hard drive failure. You may need to run some disk maintenance tools that can predict and prevent potential hard drive failure.
As long as the old hard drive works well, there's no reason for you to get rid of it!
Mirror
Magnetic disks located in the hard drive can serve as an excellent mirror. The discs must be removed very carefully to avoid chips and scratches. They can then be placed in the office, used as a signal or pocket mirror.
♥ ON THE TOPIC: An orchestra made of old electronics (floppy, HDD, scanners) played the hit of Nirvana (video).
The disc may still be useful!
Are you sure you don't want to use your old hard drive anymore? If it still works fine, there are many different and useful ways to use it for its intended purpose.
There are various uses for your old drive. For example, think about setting up a "RAID system"
.
A "RAID"
is a redundant array of inexpensive disks that allows you to use a spare hard drive to mirror data from another drive.
Alternatively, you can set up a second operating system on it and share it on one personal computer. An old hard drive gives you the opportunity to work on a different operating system without compromising the main hard drive.
Or turn it into your own media center. This is not a complete list of possible options for using an old working hard drive. Depending on your needs, you can independently decide on the further purpose of your disk.
Wind chimes
From the disks of a non-working HDD you can create not only mirrors, but also other cute little things, for example, wind chimes. To make them, you will need the disks themselves, the hard drive case, a metal fastening ring and a cord with which the structural elements will be connected.
♥ ON TOPIC: The “con” folder in Windows: why can’t you create a directory with that name?
The disk contains personal information!
You can simply sell or donate (donate) your old disk if you no longer need it. This may not bother you, but you should be aware that your old drive contains a variety of personal information. And even if you don’t plan to look for it there, someone else can do it. Some attackers may search your stored information to use it for their own personal gain. You have formatted your old hard drive and are sure that it is impossible to access your stored data. But, this is not true, your data is still on the disk, and can be restored back with special software.
You must understand that this is a feature of the Windows file system.
. When you normally delete a file or format a disk, the system does not actually delete the information, but marks this location as free for further recording and use! The only way to make sure that attackers cannot recover your personal files is to overwrite them many times.
If the knowledge that someone might be able to access your files makes you nervous and worried, then you will have to look into ways to completely wipe your hard drive's memory to permanently delete sensitive data. However, such methods are not a 100% guarantee of protecting your personal data from recovery and access to third parties.
In case the software can no longer access your hard drive, you can always physically destroy it to prevent any data recovery.
Secret safe
Creative uses can be found not only for the components of the hard drive, but also for its case, for example, using it as a safe for storing money. It is quite easy to make - just remove all the components from the case and screw the cover to one of the upper corners of the case using a bolt. As a result, you will have a rotating container where you can put money.
♥ ON TOPIC: What computer viruses looked like in the 80s and 90s of the last century.
Perhaps your disk is not completely damaged!
So, do you think that your old hard drive is completely broken after it crashed? If you have data stored on such a drive and want to recover it, then you should run a full diagnostic on the drive and see if it can be fixed before getting rid of it completely. Maybe the situation is not critical and you will be able to recover the data. If your hard drive shows certain signs of life, then try to immediately create a backup copy of your data. The right step is to always back up your data, regardless of the condition or age of the hard drive. Then you can be confident in the safety of your information. If the hard drive simply won't boot the operating system installed on it, but is otherwise working fine, you can probably copy the data using relatively simple methods. For example, using "Linux Live CD / USB"
, which helps restore data and functionality of the main operating system after a failure.
If you have reason to suspect that your hard drive has bad sectors and corrupted data, then you can try using a professional tool such as Hetman Partition Recovery.
, to recover your data.
Using Utilities
Using such a program, you can not only turn the drive into a hard drive, but also achieve the opposite effect. The most famous utility of this kind is Lexar Bootit.
Lexar Bootit program interface
With its help, it is possible to store the most common OS - Windows, regardless of the latest version.
How to install Lexar Bootit utility?
- Download the archive with the program from the official website of the brand. It is worth paying attention to the fact that the mentioned site contains versions for both MacBooks and personal computers. On the official website download the Lexar Bootlt utility for your computer
- Run the program. A prerequisite is to run as an administrator. Right-click on the program shortcut, select “Run as administrator” Click “Run”
- Next, the user will be presented with a selection of portable devices. Accordingly, you should choose the flash drive that you plan to share. Choose your flash drive
- Click on the “Flip Removable Bit” button. Click on the button “Transform a portable device” (“Flip Removable Bit”)
- Confirm completed actions. We confirm our actions by clicking the “OK” button
- Remove the flash drive using Safe Eject, and then plug it in again. In the “Volumes” tab, “Basic” should be indicated opposite the “Type” characteristic. In the “Volumes” tab, “Basic” should be indicated opposite the “Type” characteristic.
In case of problems with the operation of the utility, it is recommended to restart Windows. As a rule, in this case, the “transformation” of the card into a disk occurs within a few minutes.
The disc must be recycled!
If your old hard drive is no longer functional and cannot be used for other purposes, then it definitely needs to be recycled!
Electronics contain various types of precious materials, the extraction of which requires enormous amounts of energy, possibly pollutes the area and causes significant damage to the environment. If we refuse to process and extract such materials from electronic devices, their extraction will increase environmental, social and economic damage every year.
Today, environmental protection and recycling of materials come first in importance. Therefore, it becomes no longer advisable to throw away expensive materials. You can also contribute to the conservation of natural resources by reducing your consumption and reducing the amount of waste you create. This last statement means that you should consider recycling your failed hard drive.
Filter driver for Hitachi Microdrive flash drives
In order for a USB flash drive or SD card to be recognized in the system as a hard drive, we need a special filter driver that allows us to modify the data transmitted through the system stack of the current device driver. We will use a filter driver for USB flash drives from Hitachi (Hitachi Microdrive driver), which at the OS driver level allows you to change the type of flash drive device from removable to fixed (USB-ZIP -> USB-HDD). Thanks to the use of this driver, you can hide from the system that the connected device is removable. As a result, the system will consider that it is working with a regular hard drive, which can be divided into partitions that will be simultaneously accessible in the system.
Hitachi Microdrive driver archives:
- Hitachi Microdrive version for 32 bit systems - Hitachi Microdrive (3.0 KB)
- Hitachi Microdrive version for 64 bit systems - Hitachi Microdrive x64 (3.8 KB)
You need to download the driver version for your system according to its bit capacity. Both archives have the same structure and consist of two files:
- cfadisk.inf – installation file with driver settings
- cfadisk.sys - Hitachi driver file
The next stage is identifying the device code of our flash drive. To do this, in the disk properties on the Details tab, in the Device Instance Path parameter, select and copy (Ctrl+C) the device instance code.
In our example it would be:
USBSTOR\Disk&Ven_Linux&Prod_File-CD_Gadget&Rev_0000\0123456789ABCDEF&0
Let's assume we plan to install the driver on a 64-bit system. Using any test editor, open the cfadisk.inf file for editing. We are interested in the cfadisk_device and cfadisk_device.NTamd64 sections.
%Microdrive_devdesc% = cfadisk_install,IDE\DiskTS64GCF400______________________________20101008 %Microdrive_devdesc% = cfadisk_install,IDE\DiskTS64GCF400______________________________20101008
We change the value DiskTS64GCF400______________________________20101008 to the code of our device.
Important! In the device instance code, it is necessary to discard the part after the second “\” (in our example we discard 0123456789ABCDEF&0).
We get:
%Microdrive_devdesc% = cfadisk_install,IDE\USBSTOR\Disk&Ven_Linux&Prod_File-CD_Gadget&Rev_0000 %Microdrive_devdesc% = cfadisk_install,IDE\USBSTOR\Disk&Ven_Linux&Prod_File-CD_Gadget&Rev_0000
Save the file.
If the driver is installed on a 32-bit system, you need to download the recommended archive, unpack it and open the cfadisk.inf file for editing. Let's find the section:
%Microdrive_devdesc% = cfadisk_install,USBSTOR\Disk&Ven_LEXAR&Prod_JD_LIGHTNING_II&Rev_1100 %Microdrive_devdesc% = cfadisk_install,USBSTOR\Disk&Ven_JetFlash&Prod_TS1GJF110&Rev_0.00 %Microdrive_devdesc% = cfadisk_install,USBSTOR\DI SK&VEN_&PROD_USB_DISK_2.0&REV_P
Then we change the data in the last line, indicating the code of the instance of our flash drive, i.e. in our example we get:
%Microdrive_devdesc% = cfadisk_install,USBSTOR\Disk&Ven_LEXAR&Prod_JD_LIGHTNING_II&Rev_1100 %Microdrive_devdesc% = cfadisk_install,USBSTOR\Disk&Ven_JetFlash&Prod_TS1GJF110&Rev_0.00 %Microdrive_devdesc% = cfadisk_install,USBSTOR\Di sk&Ven_Linux&Prod_File-CD_Gadget&Rev_0000
Advice. If you want the USB flash drive to appear with a specific name in the device manager, you need to edit the value of the Microdrive_devdesc variable, for example: Microdrive_devdesc = “Transcend 64GB DIY SSD”
