In the hectic pace of modern life, we often miss important little things. So, for example, when we need to send a postcard or make a monetary gift, it turns out that we forgot to purchase an envelope. But you can find a way out of any situation. In this case, a couple of methods will be useful, describing how to make an envelope from A4 sheet.
Do-it-yourself envelopes have the main advantage of being variable in design and size. As for the first, envelopes made from:
- multi-colored packaging paper;
- thick colored sheets for the printer;
- paper for creativity.
Such products can be decorated with elements of scrapbooking or quilling - then the envelope will become even more attractive and original. The size of the envelope can be any size that matches the contents - from a disk or package of banknotes to thin books or flat paintings. The main thing is to choose the format of the sheet of paper.
How to make a CD envelope from A4 sheet?
Everyone is familiar with the situation when you need to find an envelope for a CD. And, if the original packaging is lost, there is no problem: a regular A4 sheet will help.
Instructions:
- Fold the sheet in half across the long side.
- We unbend the fold - this is the outline of the middle of the product.
- We fold one short side into a triangle so that its sides meet in the middle.
- Now we bend 4 cm inward on both long sides.
- Fold the workpiece along the intended fold.
- We bend the top edge inward to the level of the base of the triangle and wrap it inward.
- We bend the triangle with the top down. The disc envelope is ready.
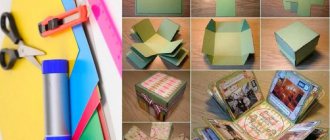
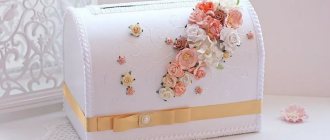
Making a box for discs
To prepare the box we will need: - cardboard; — paper for scrapbooking in several colors; - scissors; — glue moment transparent; - satin tape; - watercolor paper; - scoring board.
1. We cut out the base of our box from cardboard, measuring 14 x 28.4 cm. The thickness of the spine of the box will be 0.4 cm. Then we mark the lines of the spine and make creases so that the cover folds beautifully.
2. After this, cut out the same rectangle from watercolor paper and scrapbooking paper and also crease it. 3. Take a cardboard base and a rectangle of watercolor paper, glue the spine of the watercolor paper to the spine of the cardboard base. The watercolor paper should lie face down on the table, and the cardboard base on top.
4. Lubricate the cardboard base with glue and glue it to watercolor paper. We repeat the same operation on the other side.
Gift envelope for quick money
Banknotes as a gift are certainly not the most ethical souvenir, but they are nonetheless the most popular. To make up for some inconsistency with etiquette, it is customary to give money in an envelope. And here you don’t have to limit your imagination in choosing the shape of the holiday packaging, using a standard A4 sheet.
Instructions:
- Cut off part of the sheet to make a square.
- Fold the sheet along 2 diagonals and smooth out the folds.
- We bend one of the corners inward towards the center.
- We fold the workpiece along the center fold line.
- We reduce the lateral angles to the middle of the base of the resulting triangle.
- We bend the upper corner, which is in the middle, in the opposite direction and use our finger to form a rhombus out of it.
- We bend the upper triangle along the base line so that the top falls into the diamond. The envelope is ready.
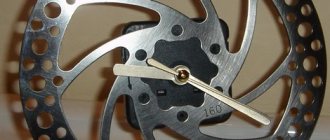
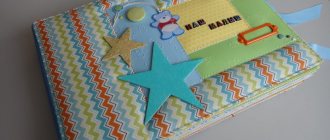
Maze game
Treat your children to an educational game made with your own hands. You will need an old CD case, black cardboard, ready-made balls or self-hardening polymer clay, Bendaroos wax sticks (you can buy these in children's art departments).
Cut a suitable size shape from cardboard and insert it inside the box. Using wax sticks (they stick well to paper), lay out the labyrinth according to the previously prepared sketch. Place a couple of ready-made balls inside the maze. You can also make them yourself from polymer clay.
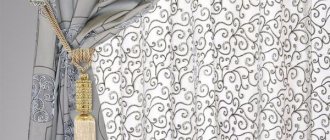
Making a beautiful envelope with a jumper
An elegant resealable envelope with a jumper can be made from brightly colored wrapping paper. Only the format for this model is still better to take A4.
Instructions:
- We bend the A4 sheet across the long side.
- Bend the top edge outward so that it meets the fold line.
- We again bend the resulting rectangle in half outward and upward.
- We straighten the last fold and make a fold along the line of its middle.
- We bend the lower corners of the workpiece slightly outward.
- We bring together the sides of the figure along the boundaries of the triangles.
- We unfold all the folds and fold the sheet along the first fold in the middle.
- Bend the folds of the rectangles outward and inward in 2-4 steps.
- We flatten the lower triangles along the folds so that the outer sides remain in their original position, and the inner ones fold inward.
- In the center of the triangles we bend the entire sidewall inward.
- We tuck the bottom corners inward.
- We fold the upper part with a tongue and bend it along the lower base of the resulting triangle.
- We hide the tongue behind the jumper in the center. The envelope is ready.
How to pack a CD as a gift When it comes to what kind of gift you can give a man with your own hands, many give up. Indeed, not every man may like handmade gifts, so I always emphasize that you need to think a hundred times before deciding to make something for your man. But today I want to offer a rather interesting gift idea - a CD in a gift box. Read on for details...
Dear women and girls, in this article I will tell you how to make a small but rather original gift for a man with your own hands. Not every girl decides to make gifts for a man with her own hands, believing that they (men) are not fans of needlework and may simply not appreciate the efforts.
But a homemade gift doesn’t have to be knitted, embroidered or painted. Let's try to give a man a CD. Almost every home and every man now has a computer or laptop, so this gift will be very relevant for many. Such a small and modest gift is quite suitable for the New Year holidays, February 14 or 23, or you can even give it to a work colleague. But it’s up to you to decide what exactly will be on this disc. I will offer you two options.
Option 1 is simple.
Go and buy a disc in the store with some game (if a man is interested), a favorite musical group (for a music lover) or any other information that is interesting for your man and package it beautifully with your own hands.
Option 2 is difficult
.
Buy an empty disk and write something on it yourself (I don’t know what, decide for yourself). For example, a collection of his beloved’s favorite songs will listen to them in his car and he will remember you with a kind word of a company that will not only select songs, but also make a cover with the image of his beloved.
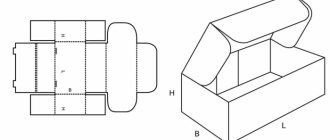
Then you put this disc in a special box and pack it in colored paper or cardboard. Here, for example, look at a simple master class from the site barammaneo.com on how to make packaging (box) for a CD
made of corrugated cardboard with New Year's symbols.
First you need to measure the plastic box for the disc, and then, using these indicators, make a blank like this, in which the fold lines must be pressed with some thin, blunt object so that the folds are neat.
We bend along the pressed lines.
We put the disc inside the box and, using glue or double-sided tape, seal our cover.
If the cardboard is simple, then you can decorate it with a piece of beautiful colored paper, with musical or New Year’s motifs. But if the cardboard from which you make the packaging already has a pattern, then you don’t need to go overboard. After all, we are preparing a gift for a man, and for the most part they love brevity and restraint.
The author of this master class suggests decorating the box itself with a small disk so that it is immediately clear what it is. Men - they are not so quick-witted!
You can glue a snowman or something else related to the holiday itself on voluminous tape. For example, hearts or doves, if this is a gift for Valentine's Day. Well, don’t forget to tie it with a ribbon. In this case, it is better to choose a narrow ribbon - a wide one will cover the entire gift.
Need to put in a disc? But it turned out that the box or envelope was not at home? We offer you a simple way to make a CD envelope from a regular A4 sheet.
How to make an envelope for a disc from A4?
To get a good product, you must strictly follow the instructions. To make it, we need the disc itself (CD or DVD) and a regular sheet of A4 paper.
Let's get to work!
1.
We place the disk on the edge of the long side of the sheet of paper so that the center of its hole is in the middle of this edge - photo No. 1.
2.
We bend the edges of the sheet to the size of our disk - photo No. 2.
3.
Bend the sheet folded from the sides again to half the size of the disk.
We insert our disk into the resulting pocket - photo No. 3. 4
.
We bend the remaining part of the sheet towards the disk and press it against it - photo No. 4. 5.
We turn the same part of the sheet back and make small bends on the sides, in the form of wings - photos No. 5 and No. 6.
6.
Insert the edge of the sheet with curved wings into the opposite pocket where disk photo No. 7 is located.
7
. Our A4 paper disk envelope is ready - photo No. 8.
This arrangement of the disc in an envelope is well suited for home storage. And if you want to take it to a friend, then it is better to put it not in your pocket, but in the middle of a sheet folded on the sides, as shown in the video below, to avoid street dust getting on the disc.
Video. How to make an envelope from paper for a disc?
If you are going to give a CD with a selection of photos, videos or other form of congratulations, then you should package the disc beautifully.
Moreover, you can make a package in which the disc will be stored.
This will not be wrapping paper, but a mini-box that will never be thrown away.
Step-by-step master class on making a cover
We cut out 2 blanks from millimeter cardboard, measuring 14 by 14 cm.
First, we need to cover them with paper to cover the ends. You can use craft paper or thin scrap paper. We cut out a rectangle from it, its minimum size is 17 by 32 cm - we left 1.5 cm allowances on all sides and a 1 cm gap in the middle to form a “binding”.
To evenly glue the cardboard covers to the kraft paper, draw 3 lines: 2 lines in the middle with a step of 1 cm and 1 line at the bottom, at a distance of 2 cm from the edge. Now we need to glue it, apply PVA glue to the cardboard itself, in a continuous thin layer.
We cut off the corners, leaving approximately 1.5mm from each corner.
We bend and glue the allowances, first horizontally. We still use the same PVA glue, coat it well, carefully bend it so that everything is even,
In the middle we go through it several times with our index finger.
This way everything will be covered beautifully.
Next, apply glue and bend our vertical allowances. We glue a piece of “extra” paper to the end, it turns out like this.
Source
Let's make a box for discs with our own hands
The dimensions are indicated only taking into account that the elements fit on an A4 sheet. But there are some dimensions that must be strictly adhered to. These are, first of all, the covers themselves, 130 x 130 mm, and spine strips, 130 x 17 mm. All other sizes “dance” from these basic ones. The dimensions of the spine will depend on the thickness of the future digital book, which, in turn, depends on the number of disks.
Let's start collecting the covers of our book.
The illustration above shows that our spread is almost ready. Now you can tuck the edges of the cover and try to glue them tightly.
Please note that the top and bottom margins are also glued to the spine area, but for now we leave the narrow strip on the right as is.
We immediately design the back of the cover, where there may be printouts of the tracks. We do not touch the root part.
Now you can start gluing the bags with discs. To do this, we need narrow strips of cardboard prepared in advance. The strips should be of sufficient thickness, approximately one or two times the thickness of the disk. You can do as you wish, however, if you plan to glue more than two bags with disks, and if the strips of cardboard are thin, this will increase the likelihood of the spine tearing from excessive pressure when closing the book.
We glue the strips and envelopes into an alternating bag. You can glue cardboard circles in the holes so that the strips have direct contact with each other in at least two small areas.