Basic requirements for local lighting of machines (drilling, turning, milling)
Good lighting that is comfortable for the eyes at the workplace is one of the main conditions for high labor productivity. This factor is responsible for the local lighting of the machines, the requirements for which are established at the state level. We suggest that you familiarize yourself with the basic information about machine lamps and what they should be according to the standard.
Drill sharpening angle
If we talk about those drills that are used by craftsmen at home, their cost in stores is low.
But even in this case, you should not use them as a consumable for one-time use. After all, updating the drill to the best working condition will not be difficult if the master has the skill or special tools. There are factory-made machines that are designed for sharpening, but this is a separate expense item, so most often craftsmen create such devices with their own hands.
Most of the problems are caused by drills for metal, and wooden blanks do not quickly reduce the sharpness of the cutting edges.
To make a machine for restoring the sharpness of cutting elements, the necessary control means (template) are used to check the tool.
Typically, tools for ferrous metal, carbide bronze, steel or cast iron - with an edge angle of 115-125 degrees. The length of another material, these parameters are different.
for soft bronze, red copper – 125, for brass alloys – 135;
for aluminum and soft aluminum alloys, granite, ceramics and wood – 135 degrees;
for magnesium and its alloys – 85 degrees;
for plastic, textolite and silumin - from 90 to 100 degrees.
Masters, if necessary, make templates in accordance with the above data. By the way, theoretically, a single drill can be suitable for all these metals and other materials, if you sharpen different working surfaces each time.
An elementary handicraft device that is often used, bushings attached to the base. There are many drawings on the Internet for self-production. It is necessary to take into account that the tool must be well clamped, the accuracy depends on 1 degree.
If desired, you can make a large-sized holder by using aluminum or copper tubes corresponding to the standard characteristics of drills, or drill many holes in a soft metal workpiece. It is necessary that the sharpener has a comfortable hand rest to move the device and hold the stop.
This primitive sharpening machine is easy to install on a workbench or table.
A practical example of working with a drawing
The essence of the problem: there are drills, they need to be sharpened. We will use one of the sharpening methods, close to the factory ones. Too lazy to catch with your hands. Better than the monkey method - set it and you're done. It took approximately 1 hour to manufacture the device according to the finished drawing.
A little welding work according to the template. A corner was made. We put the washer on, it’s just pressed on.
Let's try the first sharpenings, if everything is assembled correctly, we will refine and refine it, make a quick adaptation.
After sharpening the drill, we carry out a test. Two casting chips are visible, which means that sharpening was carried out correctly.
The only drawback is that one chip is longer than the other, which means they missed the length of the edges. It is necessary to make a stop that will regulate the sharpening length and ensure the symmetry of the edges. To do this, we will make a thrust washer that will be aligned and machined. Or we’ll cut it to make it possible to process shorter drills.
Video of the channel “Anton Fomenko”.
How to repair a screwdriver button if it doesn’t work - detailed instructions
To diagnose and repair a screwdriver, you will need the following tools:
- Crosshead screwdriver;
- Screwdriver with a narrow flat slot.
As a result of active use of any power tool, dirt inevitably accumulates inside its body.
Getting into the control unit, it prevents the “trigger” from moving fully and blocks it.
Therefore, before you go to the store for a new unit, you should try to clean the old one. The carbon deposits formed on the contacts should also be cleaned with fine sandpaper. If the button is not removable, you will have to replace the entire unit.
Stages of diagnostics:
- We disassemble the tool body. To do this, disconnect the battery and unscrew all the screws (they can be hidden behind decorative trims that will have to be removed).
- We check the serviceability of the electric motor. To do this, disconnect the two power wires from the control unit and connect them to the battery contacts (the engine should start).
- We disassemble the screwdriver button. To do this, you need to squeeze out the plastic latches and separate the two parts of the button body.
- We visually inspect the condition of the button for dirt and damage.
- Next, you need to carefully assemble the screwdriver button, install it in place and test it.
VIDEO INSTRUCTIONS » alt=»»>
If cleaning the control unit does not produce results, it is necessary to replace the entire button unit.
To do this you need:
- Disassemble the screwdriver (the process is described above);
- Install a new button in place of the old one;
- Connect the motor to the button terminals (observing polarity in this case is not necessary);
- Assemble the screwdriver, carefully placing the wires in the housing.
It is very important to select a button for a specific screwdriver model, since despite all the external similarity and visual correspondence, the part may not fit into the grooves. As a rule, new buttons are sold complete with battery terminals and a transistor.
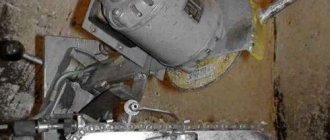
DIY sharpening machine
Electric grinders, or, as people say, emery stones, are collected in a great variety from everything that falls to hand; they are often made from motors from washing machines.
I also decided to make myself a homemade machine for sharpening drills, knives, etc. I have a Chinese sharpener, but its quality is

