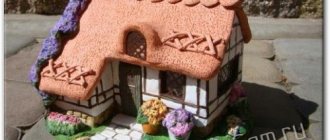
Before constructing any building (private residential or apartment building), it would be a good idea to first make a smaller version of the future building to visualize the idea.
The layout of the house can be very simple or detailed, with the smallest details and interior layout of the apartment.
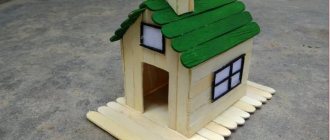
The materials usually used are furniture board or plywood (less commonly, chipboard). But wood is not the only material that can be used. A model of a paper house can be made from corrugated cardboard or regular thick paper.
You can also use plastic pipes (for example, polypropylene) to create a layout.
For beginners, we recommend making buildings out of paper or corrugated cardboard. If you have experience and the accompanying tools, you can try your hand at making a model from wood. In this article we will look at all the options.
Pros of DIY
The advantages of making a dollhouse with your own hands from plywood include the following:
- A product made according to an individual drawing involves the use of its own dimensions, design and functionality. The main advantage of such a toy is its uniqueness and the ability to take into account the child’s wishes when arranging and decorating rooms, choosing layout and furniture, accessories and decor.
- The house can have the necessary and convenient size, which is selected taking into account the free space in the children's room and the wishes of the child. This can be a tabletop or floor-mounted design.
- You can involve the child in decorating and arranging the interior space even at the stage of drawing development - joint work brings the child together, allows him to reveal the creative potential of the child, teaches him to make independent decisions and bear responsibility for them.
- Working with plywood is a creative and fun process that the whole family can participate in.
If you make it yourself, you can give the house any appearance.
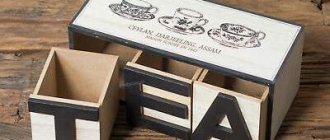
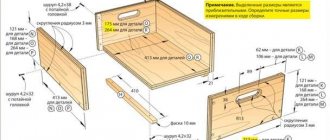
If you need a drawer
In general, a wooden box with a drawer is made in the same way as the classic version, but there are a number of features.
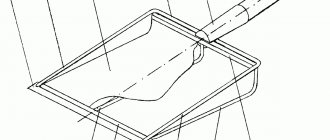
A simple rectangular shape of the lid and bottom will spoil the appearance of the product. It is better to make the long sides of these elements wavy using an electric router. In addition, by choosing this option, the lid and bottom are not placed inside the body, but left outside.
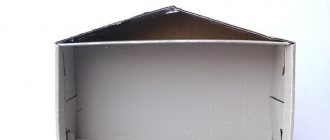
The walls are made of different heights. In particular, the back part and ends are made of the same height and glued together. For the front wall, cut out a die half as wide as the back part. This element is not recessed between the ends, but is installed overlapping and fixed with glue.
The box consists of two parts: the box, which fits freely between the walls, and the front part, which is similar in size to the top die. The elements are also mounted on wood glue.
A partition is installed between the upper and lower parts, which will serve as the bottom of the upper compartment of the box. Inside the retractable and stationary drawers, you can make partitions from thin plywood, delimiting the internal space into several compartments. The lid is installed on decorative hinges, the wood is covered with several layers of furniture varnish.
Expert opinion
Strebizh Viktor Fedorovich, leading construction foreman
For beginners who decide to try their hand at wood carving, experienced craftsmen recommend starting with simple geometric shapes and large patterns. If you want to clarify something, please contact me!
Advantages of plywood
Any materials can be used to make a dollhouse yourself, but plywood is used more often, as it has a number of advantages:
- A whole category of toys for children are made of wood, in particular plywood, due to its pleasant to the touch, warm surface.
- The light weight of the material allows you to create large structures that even a child can move from place to place.
- Plywood is a durable material, so structures made from it are reliable and durable.
- The material is affordable, which allows you to make a toy no worse than the one sold in the store, but for much less money.
- Working with plywood is easy, it is easy to process and does not require the use of special tools or professional skills.
- After assembly, the house can be painted or left as is, covered with transparent varnish - the surface of the plywood is smooth, with a pleasant natural pattern and shade.
Plywood has an attractive appearance and natural shade
Note! E0 grade plywood is an environmentally friendly and safe material. This type of material is used in the manufacture of goods for children.
How to put a lock
An interesting solution is a mortise lock, which will be opened with a small key, but such work is difficult to do even for an experienced specialist. Therefore, it is better to limit yourself to a padlock or a decorative hook.
To install a padlock, loops are placed in the central part of the side wall and lid, which are screwed with small screws. The location of the hinges must be calculated in advance: even a slight displacement will break the symmetry, and the box will lose its attractiveness.
Preparatory work
At the first stage, you will need to decide on the dimensions of the structure. To do this, you should take into account the size of the doll the child is playing with - the toy should fit freely at full height with a margin of a few centimeters to the ceiling. There should also be enough space for arranging toy furniture - a crib, a table with chairs, kitchen furniture.
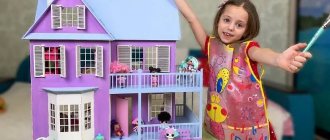
Houses for Barbie
The number of floors in the house depends on the size of the toys and the height of the child. If the figures do not exceed 20 cm in height, then the house can have up to 3 floors. If the structure is assembled for a standard Barbie doll, then it will not be possible to make more than 2 floors - then it is better to arrange the rooms horizontally.
Floor-mounted 3-storey house for playing with small figures
Having decided on the concept, you can begin to develop the project in more detail by drawing a design drawing to scale on a piece of paper.
Project details
Drawing
The drawing of the details of the house must be done to scale - you can draw it on a sheet of paper or in a special computer program. This will allow you to reflect the dimensions of the product, the number and sizes of parts, and determine the methods and locations of fastenings. Also, at the stage of creating the project, you should decide on the internal layout, shape and design of the house. This stage of preparatory work should not be skipped, as it allows you to determine the required amount of material and the sequence of assembly of the product.
Basic elements of a dollhouse
Note! To make a house, you can use a standard drawing. It is worth remembering that when changing (increasing, decreasing) one size, a proportional change in the remaining sizes follows.
When developing a drawing yourself, you will need to consider the following:
- The shape of the rear wall is a rectangle or pentagon, which allows you to make a gable roof.
- To make the assembly process easier, the base is made slightly wider than the space inside.
- The ceilings of the upper floors should have smaller dimensions than those at the base.
- The main structural elements also include sidewalls, interior partitions and roof parts.
Sketch diagram of the house
Comments2 comments
- Tatiana:
03/24/2017 at 15:36Great. I'll take note of some of the layouts. Not long ago, kindergarten teachers warned that it would be necessary to make a fairy-tale city for a competition. For example, you can build a house for Baba Yaga from paper cylinders. The game is a game, but with the help of a paper model you can see a miniature example of the structure and correct anything on paper, rather than disassemble the logs later. I want to try to make a model of the future Russian bathhouse in our landscape.
- Masha:
03/03/2019 at 20:01
Beautiful
Tools and material
Making a plywood house is carried out in several stages. Particular attention should be paid to acquiring the necessary tools and materials.
List of materials and tools:
- Plywood sheets, the number of which is calculated in accordance with the drawing, taking into account the size and number of parts. The resulting value is rounded up. On average, it takes 3 sheets of plywood to make a dollhouse.
- The roof of the house is made of plywood, corrugated or regular cardboard.
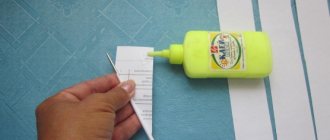
- To ensure strong fixation of plywood parts, use quick-drying wood glue.
- For temporary and additional fixation of parts, you can use mounting tape.
- Sandpaper is used to sand parts. Particular attention should be paid to the ends of the elements.
- The parts are cut using an electric jigsaw.
- The parts are fixed when assembling the house using self-tapping screws.
- At the stage of preparing the material for cutting, you will need a ruler, tape measure, and pencil.
Required Tools
After assembling the house, it needs to be decorated. To do this, use scraps and other remnants of finishing materials: wallpaper, film, colored paper, pieces of linoleum, fabric, felt, laminate. Window openings are filled with transparent plastic or plexiglass.
Step-by-step instructions for making and assembling a plywood house
The sequence of making a dollhouse from plywood is as follows.
Table 1. Making a dollhouse
| Illustration | Description |
Step 1 | In accordance with the drawing, the dimensions of the parts to be cut are applied to the surface of the plywood. |
Step 2 | Fragments of large size and simple shape are cut out on a machine. |
Step 3 | In accordance with the drawing, the required number of floors is cut out. |
Step 4 | To cut out smaller parts, use a jigsaw |
Step 5 | The junction of two roof elements (slopes) on one side is taped with tape. |
Step 6 | The parts are turned over and the ends are coated with glue at the points of contact. The parts are pressed and installed in the required position. |
Step 7 | Glue the pediment. |
Step 8 | A jigsaw is used to make window and door openings. |
Step 9 | To insert a jigsaw file and start cutting out the window opening, first drill a small hole. |
Step 10 | You will have to drill a hole on all sides of the window opening. |
Step 11 | The inside of window and door openings is sanded using sandpaper. |
Step 12 | For large parts, use a grinding machine. |
Step 13 | Holes for self-tapping screws are drilled using a countersink drill so that the screw head is subsequently recessed into the solid part. |
Step 14 | The parts are painted in the selected colors. |
Step 15 | The house is assembled using ordinary self-tapping screws, the heads of which are subsequently painted to match the color of the part. |
Note! The method of fastening plywood parts depends on its thickness and the size of the elements. When the material is thin and the house itself is not large, the elements can be fixed using wood glue or using special grooves.
Assembling a small house
Video - How to make a plywood dollhouse
Drilling holes in the parts
As you have already noticed, there are many elements drawn in our parts that need to be cut out. To cut out such parts, you need to drill holes in them using a hand drill or, as in the old fashioned way, make holes with an awl. By the way, the diameter of the hole must be at least 1 mm, otherwise you can damage the elements of the drawing, which, alas, are sometimes difficult to restore. To avoid damaging your work table when drilling holes, you must place a board under the workpiece so as not to damage the work table. It is always difficult to drill holes alone, so ask a friend to help you in your task.
Features of product decoration
Paint the dollhouse with environmentally friendly paint, such as acrylic. You can get a bright, rich or soft, pastel shade by adding tinting paste to the base composition.
Material for painting plywood
After the house is assembled, you can begin to decorate the interior walls, floors, and arrange plywood doll furniture.
Internal filling of the dollhouse
To make the structure more realistic, it is electrified using autonomous lamps powered by batteries, which are secured with double-sided tape.
Autonomous lamps
Plywood growth house
This design can be used both outdoors and in the apartment. The house is easy to assemble, literally within 5 minutes it can also be easily disassembled into convenient fragments that can be stored in the pantry.
On a hot day, such a house on the site will provide comfortable conditions for playing outdoors.
Play structure for home
In essence, it is an enlarged copy of a dollhouse. Therefore, its production takes place using the same technology.
Table 2. Step-by-step instructions
| Illustration | Description |
Step 1 | First, a drawing is made with details: determining the dimensions, shapes, number of parts, fixation points. |
Step 2 | Patterns of individual fragments are made on a scale of 1:1 and transferred to sheets of plywood. After this the material is cut out. |
Step 3 | The parts are polished. |
Step 4 | If necessary, parts are painted. |
Step 5 | The house is being assembled. |
Particular attention should be paid to the interior decoration of the house. The design may provide for a bench and a folding table, or a shelf on the wall. Furniture can also be portable plastic or wooden.
When operating the house outdoors, it is necessary that the base be dry, so the structure is placed on a podium or dry grass
Plywood is often used in the furniture industry and for the manufacture of a large number of boxes of various sizes and other very beautiful and functional crafts. What plywood products can you make with your own hands? Read in the special article.
Inside the house, you can lay a soft mat or mattress on the floor, on which the child will feel comfortable.
Architectural layout of a house: choosing a scale
After planning your model, the next step is choosing the scale that best suits your specific project. This decision is influenced by two factors: area and detail. If you need to show large areas, for example, architectural models of cities, set the scale to 1:500 or 1:1000. Then the model will not be too large and easily visible.
For a single building, choose a scale of 1:200 or 1:100. At this scale, quite detailed detail is obtained, and windows, doors and balconies will be clearly visible. To show only part of the house, a scale of 1:20 - 1:50 is suitable. The larger the scale, the more details can be discerned.
We will even print out an architectural model of Kiev. Order a service from the KLONA industrial design studio.
3D model of San Francisco.