A functioning wind generator includes a generator, controller, masts, tail, inverter and battery.
Traditionally, the wind mechanism has three blades fixed to the rotor. When the rotor rotates, a three-phase alternating current is generated and supplied to the controller, then the current is degenerated into a stable voltage and goes to the battery.
As current flows through the batteries, it energizes them and operates them as conductors of electricity.
Subsequently, the current enters the inverter and reaches the required values: single-phase alternating current 220 V, 50 Hz. With a modest consumption of the generated electricity, sufficient for the use of light and electrical appliances, the lack of current is compensated by batteries.
Main characteristics
The performance of a wind generator depends on the number and size of the blades installed on it, as can be clearly seen from the formula:
N=pSV3/2, where
N – air flow power, which determines the power of the device;
p – air density;
S – area swept by the wind generator;
V - wind speed.
The main characteristics of this element of technical devices of this type are:
- Geometric dimensions.
According to the diagram below:
R is the radius that determines the swept area of the device;
b - width, determines the speed of a particular model;
c - thickness, depends on the material from which it is made and design features;
φ — installation angle determines the location of the plane of rotation of the blade relative to its axis;
r is the section radius or internal radius of rotation.
- Mechanical strength - determines the ability of an element to withstand loads applied to it and depends on the material used in manufacture and its design.
- Aerodynamic efficiency - determines the ability to convert the translational movement of wind energy into the rotational movement of the wind generator shaft.
- Aeroacoustic parameters – characterize the level of noise produced during operation of a wind turbine.
The principle of operation of a wind turbine
A wind generator or wind power plant (WPP) is a device that is used to convert the kinetic energy of wind flow into mechanical energy. The resulting mechanical energy rotates the rotor and is converted into the electrical form we need.
The principle of operation and design of a kinetic windmill are described in detail in the article, which we recommend that you read.
The wind turbine includes:
- blades forming a propeller,
- rotating turbine rotor,
- the generator axis and the generator itself,
- an inverter that converts alternating current into direct current, which is used to charge batteries,
- battery.
The essence of wind turbines is simple. As the rotor rotates, three-phase alternating current is generated, which then passes through the controller and charges the DC battery. The inverter then converts the current so that it can be consumed to power lights, radios, TVs, microwaves, and so on.
The detailed design of a wind generator with a horizontal axis of rotation allows you to clearly imagine which elements contribute to the conversion of kinetic energy into mechanical, and then into electrical
In general, the operating principle of a wind generator of any type and design is as follows: during the rotation process, three types of force effects occur on the blades: braking, impulse and lifting.
This diagram of the operation of a wind turbine allows you to understand what happens to the electricity produced by the operation of the wind generator: part of it is accumulated, and the other is consumed
The last two forces overcome the braking force and set the flywheel in motion. On the stationary part of the generator, the rotor forms a magnetic field so that electric current flows through the wires.
How to calculate correctly
The efficiency of a wind generator is significantly influenced by the aerodynamic characteristics of the blades installed on it, therefore, before their manufacture, special calculations are made. As a result of such calculations, products are checked for compliance of the results obtained with the required parameters and other requirements imposed on them.
The wind exerts an impact on the generator blades and this force, or in other words, pressure, acts in the direction of the air flow. In turn, a lifting force acts perpendicular to the pressure force, which is what works in wind generators with a horizontal axis of rotation (shown in the diagram below).
When calculating the geometric dimensions of the blade, the width of its chord and the angle of its installation are determined, in diagram β, over the entire length of the device element.
When carrying out calculations, the finite element method is used, the essence of which is that the blade is considered as a set of individual elements that make up its composition.
The force of pressure of wind flows is directed against the movement of the blade (in the diagram it is called “true wind”) and in the diagram it is decomposed into vectors - “wind speed” and “peripheral speed”. The peripheral speed ensures the movement of the blades in the plane of rotation, while the lifting force acts in this direction.
The pressure force and lift force determine the performance of the wind generator (the formula is given in the “Main characteristics” section) and depend on the lift coefficient, as well as the drag coefficient. In addition, these coefficients are directly dependent on the geometric profile of the blade and the angle between its chord line and the direction of the air flow.
The chord line is the longest line when considering its cross-section, from the tip of the blade to its trailing edge.
The angle between the chord line and the direction of the air flow (incoming flow) is called the angle of attack (angle α).
The lift and drag coefficients are determined experimentally and recorded in special journals (atlases). The graph of lift versus angle of attack (blade shape) looks like this:
The best aerodynamic performance is achieved by similar elements with an angle α (angle of attack) equal to – 5.
Another important parameter when arranging elements is their installation angle (angle β), which is determined by the formula:
Where:
R – radius of the outer circle of rotation;
r – radius of rotation, excluding the butt and butt part;
Z is the speed of the tip of this device element.
The blade width (dimension “b”) is also an important parameter that requires appropriate calculation. The most important part is the outer part, due to the wind ring and the coverage area with which this part of the device works.
The calculation is performed using the formula:
Where:
R – outer radius of rotation;
r – internal radius of rotation, excluding the butt and butt part;
Z – tip speed.
i – number of blades.
From this formula it is clear that:
- The width is inversely proportional to the internal radius of its rotation, and which, in turn, suggests that the most optimal shape is the shape of a triangle;
- A wind generator with a small number of blades must have wider blades;
- Increasing speed reduces their width.
Speed with the indicator “5” is the most optimal, which allows you to reduce installation losses with the maximum number of blades. The figure below shows how the number of similar elements installed on a wind generator affects its speed:
High speed allows you to increase the efficiency of wind generators, while the negative factors when operating such devices will be:
- Increased noise level;
- Vibration when using one or two blades;
- Increased edge erosion;
- Difficulty starting with low wind flows.
To reduce noise levels, the tips of the blades are made pointed, and to make starting easier, the bases are made slightly wider than size “b”.
Vertical and horizontal wind generator
Vertical wind generator
Can be classified by rotors:
- orthogonal;
- Daria;
- Savonius;
- helicoidal;
- multi-bladed with a guide vane;
Vertical wind generators are good because there is no need to direct them relative to the wind; they operate in any wind direction. Because of this, they do not need to be equipped with devices that detect the direction of the wind.
These structures can be placed on the ground; they are simple. Making such a structure with your own hands is much easier than a horizontal one.
The weak point of vertical wind generators is their low productivity and extremely low efficiency, which is why their scope of use is limited.
Horizontal wind generator
Horizontal wind generators have a number of advantages compared to vertical ones. They are divided into one-, two-, three- and multi-lobed.
Single-bladed designs are the fastest; they spin twice as fast as three-bladed ones with the same wind force. The efficiency of these wind generators is significantly higher than that of vertical ones.
A significant disadvantage of horizontal-axial structures is the dependence of the rotor on the wind direction, which is why it is necessary to install additional devices on the wind generator that capture the wind direction.
Types of blades
Depending on the type of wind generator, the type of blades used in each specific case may vary, but the basic designs correspond to the following types.
1. Wing type - used in installations with horizontal and vertical axis of rotation and can be made of hard materials.
2. Sailing type, can be wing-shaped and made using soft materials:
3. Flat - in the form of mill blades, they combine both of the above types, and can be made of light and durable material (plywood, plastic, etc.).
Stator manufacturing
As you can see in the photo, the coils have a shape similar to an elongated drop of water. This is done so that the direction of movement of the magnets is perpendicular to the long side sections of the coil (this is where the maximum EMF is induced).
If round magnets are used, the inner diameter of the coil should approximately match the diameter of the magnet. If square magnets are used, the configuration of the coil turns must be constructed in such a way that the magnets overlap the straight sections of the turns. Installing longer magnets does not make much sense, because the maximum EMF values occur only in those sections of the conductor that are located perpendicular to the direction of movement of the magnetic field.
Stator manufacturing begins with winding the coils. The easiest way to wind coils is using a pre-prepared template. Templates range from small hand tools to miniature homemade machines.
The coils of each individual phase are connected to each other in series: the end of the first coil is connected to the beginning of the fourth, the end of the fourth to the beginning of the seventh, etc.
Let us recall that when connecting the phases according to the “star” circuit, the ends of the windings (phases) of the device are connected into one common unit, which will be the neutral of the generator. In this case, three free wires (the beginning of each phase) are connected to a three-phase diode bridge.
When all the coils are assembled into a single circuit, you can prepare a mold for filling the stator. After this, we immerse the entire electrical part into the mold and fill it with epoxy resin.
Alexei2011
Next I post a photo of the finished stator. Filled with regular epoxy resin. I put fiberglass on the bottom and top. The outer diameter of the stator is 280 mm, the inner hole is 70 mm.
Material selection
Various materials are used to manufacture blades; the main requirements for them are the following:
- Strength – the ability to withstand constant loads caused by wind currents;
- Light weight – increases the service life of the units and mechanisms of the device (bearings, extensions, etc.);
- Resistance to atmospheric conditions (precipitation, sunlight, ambient temperature).
All of the above requirements are met by: fiberglass, composite materials, plastic and light metals (aluminum, titanium and others).
The choice of material is made by the manufacturer, in accordance with economic feasibility, the availability of the material in the relevant market, as well as the complexity of its processing during the work process.
How much power do you need?
Before buying a wind power plant, you should fully determine the value of the peak total power consumed by all household appliances, appliances and electrical installations in the house, everything that can be connected to the network at the same time
And here it is very important whether the wind farm will be used as an additional or backup source of energy, or whether you want to transfer your farm to a completely autonomous power supply
In the first case, you just need to know the minimum energy consumption that is necessary in the event of a blackout of external power supply, and buy an installation of the appropriate power. For complete energy autonomy, it is necessary to purchase high-power wind generators that can ensure the total consumption of all home appliances. Of course, this is not cheap, but you will no longer need to buy electricity from the outside.
How to make it yourself
If you know how to work with various hand tools and decide to build a wind generator on your own, you can also make the blades of such a device yourself. In this case, the choice of material used for manufacturing depends on what is available, and these may be the following options:
PVC pipe
In this case, pipes used for sewer or water supply networks are of large diameter and have high strength, which is due to their use in networks with excess pressure.
Calculating the shape of the blade on your own is quite difficult, so the best option is to find a template of the required size. To do this, you can use specialized literature, magazines or Internet resources, which contain a large number of products of various configurations and geometric dimensions.
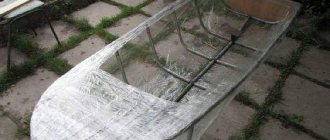
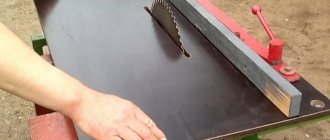
According to the template, dimensions are applied to the surface of the pipe, after which, using a cutting tool, the blades are cut out, as in the figure below.
The side edges are cleaned, burrs and irregularities are removed. After the required quantity has been produced, the blades are combined into a single unit and placed on the shaft of the wind generator.
Made from fiberglass
When using fiberglass (fiberglass), first a template is made from wood, from which the blade elements are subsequently made. As a rule, in this case, they are made hollow; if necessary, it is possible to install reinforcing spars and fill the voids with various components.
When creating a template, the surface of the blade is conditionally divided along the horizontal axis, after which a template for the lower and a template for the upper parts are obtained. Based on the manufactured base (template), which can be called a matrix, individual elements of the blade are manufactured. To do this, several layers of fiberglass are applied over the matrix, using epoxy resin and a hardener, which must harden. After hardening, spars and a seal (in the tail section) are installed inside the surface of the manufactured product. The sealant is laid if necessary, which must be confirmed by appropriate calculations or justification given in the technical literature where the template was taken.
The manufactured parts are connected to each other using glue; in the butt part, a shank is mounted, with which the blade is attached to the wind generator shaft.
When performing work you will need the following tool:
- Hacksaws of various types, depending on the material used;
- Metal scissors or hand-held electric tools (jigsaw, grinder, etc.);
- Markers and scribers used for marking manufactured parts;
- Abrasive materials: sandpaper, grinding wheels for an angle grinder, files - used for surface treatment.
Maintenance
For long-term trouble-free operation of the wind generator, the following measures should be taken:
- Ten or fourteen days after the start of operation , the wind turbine should be examined, especially the mountings. This is best done in calm weather.
- the rotary mechanism and generator twice a year
- If you suspect a wheel imbalance , which may result in vibration of the blades when twisting in the wind, it is necessary to perform balancing.
- Inspect the pantograph brushes annually.
- If necessary , coat the metal parts of the wind generator with paints.
It is quite possible for a home craftsman to make blades for a wind turbine; you just need to calculate and think through everything, and then a real alternative to power grids will appear at home. When choosing the power of a homemade device, you must remember that its maximum power should not exceed 1000 or 1500 watts. If this power is not enough, you should consider purchasing an industrial unit.
Where can I buy?
A wind generator and its components are a specialized product that is not sold in regular retail chains, which means there is not a wide range of companies selling it.
If there is a need to purchase a set of blades or their individual elements, it is best to contact a company that produces such equipment. If you have and operate a generator of a certain brand, you should contact its manufacturer, which will avoid installation difficulties, and will also preserve the technical characteristics of the device and will not violate its operating conditions.
When making a wind generator on your own, you can purchase factory-made blades, which are sold by specialized trade organizations and online stores.
Which wind turbines to choose
Well, for those who live far from substations and 0.4 kV overhead lines, it is worth purchasing the most powerful models of wind turbines that you can afford. Since you will get no more than 15% of the power indicated in the pictures.
Another category of consumers, quite rightly, makes a choice not in favor of Chinese factory models, but, on the contrary, prefers homemade windmills from self-taught craftsmen. This also has its benefits.
For the most part, the inventors of such devices are competent and responsible guys. And in almost 100% of cases, you can return the installation to them without any problems if something goes wrong or it needs to be repaired. There will certainly be no problems with this.
Industrial Chinese windmills have a prettier appearance, of course. And if you still decide to buy it, immediately after checking it with an electric drill, do preventative repairs and replace Chinese scrap metal with bearings with high-quality lubricant.
If you have large bird nesting areas nearby, it wouldn't hurt to purchase an extra set of blades.
Chicks sometimes get caught in the spinning “mini mill”. Plastic blades break and metal blades bend.
And I would like to end with wisdom from those users who did not listen to all the arguments and came face to face with all the problems described above. Remember, the most expensive weather vane for a home is a wind generator!
Average prices
The cost of the blades depends on the power of the wind generator on which they are installed, the material from which they are made, the country and brand of the manufacturer, as well as the place of purchase.
Thus, the cost of a set of blades for wind generators brand “Exmork” (Zonhan) manufactured in China, depending on the power of the device, is:
- For P=1.0 kW – from 13,000.00 rubles;
- For P=1.5 kW – from 22,000.00 rubles;
- For P=2.0 kW – from 23,000.00 rubles.
- For P=3.0 kW – from 34,000.00 rubles.
Blades for a wind generator brand SWG FD2.7-500 (China), are sold at a price of 7500.00 rubles.
Blades for generators of the “RV” type (Russia), depending on the geometric dimensions, are sold at the following prices:
- 1.2 meters – from 4500.00 rubles;
- 2.6 meters – from 12,000.00 rubles;
- 3.0 meters – from 15,000.00 rubles;
- 4.0 meters – from 29,000.00 rubles;
- 6.0 meters – from 75,000.00 rubles;
- 7.5 meters – 135,000.00 rubles.
Does it make sense to invest money in this device?
Yes, but only in places where the average (throughout the year) wind speed is 8 meters per second. The blades of some large wind generators are capable of moving even if the wind speed is only 4 m/s. In this case, the maximum efficiency is achieved at a wind speed of 12 m/s.
The power of a device with three blades is calculated using the following formula:
— P=0.6·(¶r2)v3 where, 1. P – design power, kW; 2. r – distance from the central point of the rotor to the end of the blade, m; 3. v – average speed, m/s; 4. ¶=3.14.
Wind generators are installed in desert areas, valleys, in the seas: wherever the wind blows with a stable consistency.
Types of generators
Before deciding how to make a wind generator with your own hands, let’s consider the design features:
According to the location of the generator, the device can be horizontal or vertical
- Classic design - the axis of rotation is parallel to the ground, the plane of the blades is perpendicular. This scheme provides for free rotation around a vertical axis for positioning “downwind.” In order for the plane of rotation to always occupy an effective position perpendicular to the direction of the wind, a tail unit is required, which operates on the principle of a weather vane. The principle of operation is simple: the wind changes direction, acts on the tail plane, the axis of rotation of the generator is always located along the movement of the air flow. The only difficulty is connecting the power cables. If the generator body makes several revolutions around the vertical axis, the wires will wrap around the mast and break. Therefore, a limiter must be installed. It does not allow a full rotation, but leads to the body hanging in dead zones. Industrial samples have an electronic direction tracking controller, and turns the body using a built-in electric motor. The problem can be solved using a cylindrical propeller, which receives air flow both transversely and and along the axis of rotation. True, the effectiveness depends on the angle of attack. The more the wind deviates from an angle of 90°, the lower the efficiency. But such a design is difficult to make with your own hands, due to the difficulties in the aerodynamics of the propulsion unit.
- The best option is vertical generators (that is, the shaft rotation axis is perpendicular to the ground). With this arrangement of the aerodynamic propulsion, you are not at all dependent on the direction of the wind. Rotation is equally effective, and depends only on the strength of the air flow. The shape of the blades can be very different, there is room for engineering. There are many interesting aerodynamic projects developed by scientific institutions. Moreover, the drawings of most of them are presented in the public domain. Moreover, the designs published in technical literature from the times of the USSR sometimes turn out to be the most rational. Rotor screws have an undeniable advantage: the vertical generator is statically fixed, which simplifies the electrical connection. There is no need to install rotation limiters, as in horizontal circuits.
According to the generated voltage rating
- Do-it-yourself 220-volt wind generators do not require additional voltage converters and are direct-use designs. However, their work depends on the strength of the wind. At a minimum, an output stabilizer is needed that acts as a regulator at different shaft speeds. In the absence of wind, the system simply does not work. The advantages are undeniable: as a rule, a powerful electric motor is used, on which a propeller can be installed, directly attaching it to the rotor shaft. Alterations are minimal in terms of labor costs, such motors already have a convenient pedestal, all that remains is to make a support platform. Electric motors can be found with minimal financial costs: from any decommissioned electrical installation. For example, an industrial fan. Motors from household appliances are also suitable: washing machines, vacuum cleaners.
- 12 volts (less often 24 volts). The most popular design is a DIY wind generator made from a car generator. Moreover, it is dismantled from the donor car complete with a voltage converter. No modification of the circuit is required: at the output we get either 14 volts (in a car the battery is charged with this voltage) or the 12 volts required to power your power system. The presence of a pulley allows you to design a belt drive with the required speed ratio. The counter part can also be removed from the donor's car. If desired, the blades are attached directly to the shaft. Such wind generators can be used both for direct connection to the consumer and in automobile mode, reproducing the charging system complete with a battery. If 12 volts are required to organize the power supply, the power is taken directly from the battery terminals. To obtain 220 volts, a converter is used. A suitable option is an uninterruptible power supply. The system works as follows: if the power taken is lower than the generator can provide, the batteries are charged. If the threshold is exceeded, power is generated from the battery.
Meaning of the procedure
If you neglect to calculate the load of air movement, you can, as they say, ruin the whole business and endanger people's lives.
If there are usually no difficulties with the pressure of snow on the walls of buildings - this load is visible, you can weigh it and even touch it - then with wind it is much more complicated. It is not visible, it is very difficult to predict it intuitively. Yes, of course, the wind has some impact on load-bearing structures, and in some cases it can even be destructive: it twists advertising banners, overwhelms fences and wall frames, and tears off roofs. But how is it possible to predict and take into account this force? Is it, in principle, calculable?
Gives in! However, this is a tedious task, and non-professionals really don’t like to calculate the wind load. There is a clear explanation for this: the importance of calculations is a very responsible and difficult matter, much more difficult than calculating the snow load. If in the joint venture specially dedicated to this, only two and a half pages are devoted to snow load, then the wind calculation is three times larger! Plus, a mandatory appendix is assigned to it, placed on 19 pages indicating aerodynamic coefficients.
If citizens of Russia are still lucky with this, then for residents of Belarus it is even more difficult - the document TKP_EN_1991−1−4−2О09 “Wind Impacts”, which regulates standards and calculations, has a volume of 120 pages!
Few people want to understand the Eurocode (EN_1991−1−4−2О09) on the scale of construction of a private structure regarding wind influences at home over a cup of tea. Those who are professionally interested are recommended to download and study it thoroughly, surrounded by a specialist consultant. Otherwise, due to the wrong approach and understanding, the consequences of the calculations can be disastrous.
About security
The issue of safety in using a wind generator is not simple. Windmill blades at high speeds and large sizes can cause serious injuries, including death. In addition, high masts are dangerous when there is strong wind, as they can tip over on residential buildings, people nearby, and cause damage to property or buildings.
At the same time, most opponents of wind energy do not find problems where they exist. There are a lot of statements about the dangers of devices:
- presence of noise
- vibration
- flickering shadow contributing to neuropsychiatric disorders
- magnetic background
- interference with radio and television receivers
- intolerance of installations by animals, danger to birds
Most of these statements are a consequence of arguments made by opponents of autonomous power supplies. They do exist, but the magnitude of the problems is so out of proportion to reality that these problems simply do not deserve time to discuss. If wind generators pose a danger, it is only for representatives of resource supply companies who do not want to lose customers.
However, powerful industrial plants used as part of large power plants can create inconvenience for residents, as proven in American court. Windmills produced infrasound, which caused health problems among Indians living on a reservation 200 km away. However, given the size and power of a private wind turbine, there is no need to talk about harm from it.
Where to begin?
As they said, you start making a windmill with your own hands by searching for a large capacity. It will form the basis.
Markings are applied to it using a marker, i.e. divided into equal 4 parts. The following will explain how to make cuts with a grinder. When performing them, the metal cannot be completely cut.
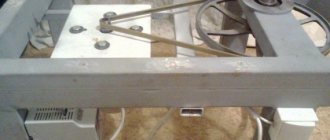
In parallel with the manufacture of blades, the generator’s pulley is being rebuilt. It is necessary to drill holes in it and the bottom of the original pan into which the bolts will be inserted.
They do this as carefully as possible to maintain symmetry. This is necessary so that imbalance does not arise during work.
Next, we bend each blade one by one. But we do this taking into account the direction in which the generator will rotate. More often it coincides with the movement of the clock hand. The angle of bending determines the speed and area of influence of the air flow.
To connect the battery, choose a wire with a diameter of 4 mm². 1 meter will be enough. The same one will be needed to connect the inverter.
If, for example, you used a 75-amp battery and a 1000-watt converter, a do-it-yourself windmill is enough to keep the security alarm, CCTV cameras and street lighting working at the same time.
Three little secrets
The first secret is at what height the homemade wind generator will be installed. It is clear that it is easier to mount it at a height of several meters from the ground, but then it will not be of much use. It should be borne in mind that the higher the wind generator, the stronger the wind, the faster its blades spin, and the more energy you can get from a home-made power plant.
The second secret is the choice of battery. On the Internet they advise not to split hairs and install a car battery. Yes, it is simpler and, at first glance, cheaper. But, you need to know that car batteries should be installed in a well-ventilated area, they require care, and their service life does not exceed 3 years. It would be better to purchase a special battery. Although it costs more, it will be worth it.
The third secret is which wind generator is better for making yourself - horizontal or vertical? Each option has its own advantages and disadvantages. We will consider vertical wind generators, the operating principle of which is shown in Fig. 2.
First, about the disadvantages: a vertical wind generator has low efficiency compared to horizontal models; its assembly requires more materials, which, accordingly, leads to an increase in the cost of the structure. On the other hand, vertical wind turbines can operate in lower winds than their horizontal counterparts, which compensates for their low efficiency. They do not need to be raised too high and are easier and cheaper to install and install, negating the difference in material costs.
An important factor is that a vertical wind generator is more reliable during sudden gusts of wind and hurricanes, since its stability increases with increasing rotation speed. In addition, vertical structures are practically silent, which allows them to be installed anywhere, right up to the roof of a residential building. All of the above leads to the fact that these installations are in growing demand and are produced in various modifications, in relation to the required power and winds prevailing in certain regions, which, by the way, can be seen in the video below.
Technological features of wind turbine assembly
What are windmill blades made from? The easiest way to make blades is to use plastic pipes. They are quite easy to process and can withstand considerable dynamic loads. But in order to prevent the windmill from falling into pieces during operation, it is advisable to take into account several important nuances:
- Pipe thickness. During rotation, the load-bearing parts of the device experience a large load due to the influence of centrifugal force. To reduce it, it is advisable to use a sewer or gas pipe as a material with a larger wall thickness - at least 4 mm;
- Blade length. The longer the blade, the greater the load it experiences. To extend the life of the structure, do not make the wings too long. The most acceptable option would be a wing with a length of 30 to 50 cm;
- Number of blades. The resistance of a windmill to air masses directly depends on the number of wings. To increase its efficiency, the number of wings should be increased. The best option would be a wind turbine with 5 or 6 wings.
PVC pipe marking
As an example, consider the process of marking wings for a wind turbine made from a pipe with a diameter of 10 cm and a wall thickness of 5 mm.
Vertical type generator
How to mark the workpiece?
1. To correctly mark the cylindrical surface, wrap the pipe with a sheet of paper; 2. The edge of the sheet will become a guide for forming an axis on the pipe; 3. The width of the sheet will indicate the circumference; 4. Now fold the piece of paper in half to mark half the circumference of the workpiece; 5. Fold the paper four times to mark 4 lines on the cylinder for the intended cuts.
PVC pipe cutting
How to cut PVC pipe? In order to cut the workpiece, it is best to use a jigsaw with a metal file. Cutting a pipe into its component parts is done as follows: 1. First, the marked workpiece is cut into two equal parts; 2. Now the pipe halves also need to be cut in half; 3. At the base of each of the blades, make rectangular cuts no more than 5-6 cm long; 4. In order not to destroy the structural integrity of the material, small holes must be drilled in the corners of the wings; 5. After this, the prepared parts should be cut diagonally; 6. Thus, you will get cone-type blades.
Features of parts assembly
At the final stage of constructing a wind generator, you need to connect the wings to the wind wheel and turbine.
How to do it?
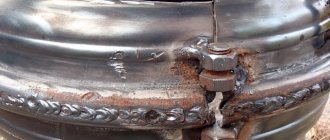
- It is necessary to make a connecting unit. The part is a steel disk with six metal strips>;
- The shape of the unit is determined by the configuration of the generator itself, which acts as a converter of kinetic wind energy into electrical energy;
- To prevent the wind generator blades from breaking or deforming under the pressure of air masses, the thickness of the steel strips and disk should vary from 2 to 6 mm.
Sources
- https://o-trubah.com/materialy/pvx-truby/lopasti-dlja-vetrogeneratora/
- https://Energo.house/veter/lopasti-dlya-vetrogeneratora.html
- https://pechiexpert.ru/lopasti-dlya-vetrogeneratora-01/
- https://alter220.ru/veter/lopasti-dlya-vetrogeneratora.html
- https://slarkenergy.ru/vetrogenerator/lopasti-svoimi-rukami.html
- https://SdelaySam-SvoimiRukami.ru/6448-kak-sdelat-samye-prostye-lopasti-vetrogeneratora.html
- https://vetronet.com/raschet-lopastey-dlya-vetryakov/
About security
The issue of safety in using a wind generator is not simple. Windmill blades at high speeds and large sizes can cause serious injuries, including death. In addition, high masts are dangerous when there is strong wind, as they can tip over on residential buildings, people nearby, and cause damage to property or buildings.
At the same time, most opponents of wind energy do not find problems where they exist. There are a lot of statements about the dangers of devices:
- presence of noise
- vibration
- flickering shadow contributing to neuropsychiatric disorders
- magnetic background
- interference with radio and television receivers
- intolerance of installations by animals, danger to birds
Most of these statements are a consequence of arguments made by opponents of autonomous power supplies. They do exist, but the magnitude of the problems is so out of proportion to reality that these problems simply do not deserve time to discuss. If wind generators pose a danger, it is only for representatives of resource supply companies who do not want to lose customers.
However, powerful industrial plants used as part of large power plants can create inconvenience for residents, as proven in American court. Windmills produced infrasound, which caused health problems among Indians living on a reservation 200 km away. However, given the size and power of a private wind turbine, there is no need to talk about harm from it.
Mast
The mast on which the wind generator is mounted is one of its most important components. It not only ensures the safe operation of the windmill (the lowest point of the circle described by the blades must be no closer than 2 meters to the ground), but also allows it to make the most efficient use of wind energy, the flow of which becomes more turbulent close to the ground.
The high height leads to low rigidity of the wind generator mast and makes its strength calculation quite difficult not only for an amateur craftsman, but also for an engineer. We can only list the main points:
- Place the mast as far as possible from the house and trees that obscure the air flow. In addition, in strong winds, the wind generator may fall on the building or be damaged by trees;
- The optimal mast design is an openwork welded truss like power transmission towers, but it is complex and expensive to manufacture. The simplest, but quite effective option is several parallel pipes with a diameter of 80-100 mm, welded with short seams to each other and concreted to a depth of at least a meter in the ground. It is highly advisable to reinforce a single-pipe structure with cable braces, which are also attached to supports cast into concrete.
- To simplify the maintenance of a windmill, its mast can be made to be fractured: in this case, when the guy wire going in the direction of the fracture is loosened, the mast can be tilted towards the ground.
A story about a very simple wind generator from a home fan