This DIY Paper Bird Craft is an easy project. A simple craft that you can then play with! I love crafts that keep kids entertained not only while they're making them, but also afterwards. And you?
The finished Craft: A bird made from paper with your own hands will go down the rope and peck! Isn't that great?
Perhaps you have seen such a woodpecker descending on a rod and pecking at it. Today we will make a cheap analogue of this toy.
Woodpecker toy in Ali
Paper craft DIY bird made from paper
The idea of such a paper craft is based on a folk toy and has been popular with children for centuries.
Easy to make, fun to play!
Here you can download a craft template (but you can also draw your own).
Paper woodpecker: voluminous and simple crafts
For the development of craftsmanship, creative skills in children, as well as broadening their horizons, learning to do crafts independently plays an important role. For example, the woodpecker applique always turns out very bright and beautiful. When creating a paper bird - a woodpecker, during the work, the child learns (from adults) what the bird looks like, what and how it eats, and why it knocks on tree trunks. We offer you all the necessary material for the creative process: diagrams, video materials, types and methods of assembling crafts.
How to make a DIY Bird craft
- Download and print the Birds template. Use the dotted lines to fold the craft in half and cut out both sides of the bird at the same time.
- Take a plastic straw and cut 2-3cm, then glue it between the bird halves.
- Apply glue to the rest of the bird and fold in half, gluing both sides together.
- Cut a thin strip of rubber (the thinner the better) and thread it through the straw. Now the bird will start pecking!
- To activate the toy, shake the stretched rubber band a little (as in the video).
If the woodpecker doesn't work, experiment with a smaller diameter straw.
Do-it-yourself dynamic toy “Pecking birds”. Step-by-step instructions with photos
DIY Birds toy. Master class with step-by-step photos
Alexander Yashin
Feed the birds in winter! Let flocks of people flock to your porch from all over , as if it were home . Their food is not rich. They need a handful of grain, one handful - and they won’t be afraid of winter. It’s hard to count how many of them are dying. It’s hard to see. But in our heart there is also warmth for the birds. How can we forget: They could have flown away, But they stayed to spend the winter Together with the people. Teach the birds to your window in the cold, we don’t have to welcome spring
without songs Making a dynamic toy “Pecking Birds”. Master class with step-by-step photos.
The master class “Making a dynamic toy “Pecking Birds”” was recommended for participation in the “Living World” competition by a methodological association of additional education teachers of a scientific and technical orientation.
Head of the association T.V. Rassushina Author: Erygina Natalya Nikolaevna, additional education teacher of the first qualification category of MBU DO SUT Angarsk Description: This material will be useful to additional education teachers, technology teachers, kindergarten teachers, children of primary and secondary school age and creative people. Application: Children can use their crafts in the game, use as a gift. Goal: Making a dynamic toy “Pecking Birds”. Educational objectives: 1. Introduce the concept of a dynamic toy, increase interest in this activity. 2.Expand knowledge about the appearance and lifestyle of birds. 3. Teach how to make a dynamic craft “Pecking Birds”. Developmental tasks: 1. To develop fine motor skills of fingers in children. 2.Develop attention and memory. Educational objectives: 1. To cultivate perseverance, accuracy, and the ability to bring the work started to its logical conclusion. Birds are warm-blooded creatures. Their average body temperature is 41°C. This means that they can remain active during the cold season, but require more food. Therefore, many birds leave their snowy native places and go to warm countries for the winter. Sparrow. They move on the ground by jumping. The voice is relatively high-pitched, the well-known chirping sound. Prefers forest edges, gardens and vegetable gardens. Lives on the outskirts of cities, in villages and towns, in the south - in forests and bushes. It feeds on various seeds and feeds its chicks with insects. Often settles in groves, parks and gardens. In November, tree sparrows concentrate in human settlements, where they spend the entire winter. Winters in nesting areas. The tree sparrow catches a lot of harmful insects, but in the fall flocks of sparrows can cause quite significant damage to gardens and vegetable gardens. Nuthatch. Lives in forests, gardens and parks with old trees. It feeds on insects, less often seeds, nuts and acorns. It usually feeds on thick tree trunks, moving upside down. Often visits feeders, in city parks it learns to take food from an outstretched palm. For the winter, it stores tree seeds in cracks in the bark. A significant part of these reserves subsequently goes to tits. Thanks to its peculiar manner of movement, the nuthatch avoids competition with its flock mates - tits and pikas. Crawling down the trunk, it takes out small insects mainly from cracks in the bark that open upward. In winter, it often wanders in flocks of tits.
Crow. Raven and crow are completely different birds, not male and female. It moves along the ground with long strides and, in case of danger, begins to “jump.” Crows are omnivorous birds, they feed on insects, chicks and eggs, rodents and lizards, frogs, fish; plant food - seeds of various plants, as well as the plants themselves, as well as food waste. The intelligence of crows and their ability to use objects in their environment are also well known; for example, if a city crow comes across a nut in a shell, it can throw it on the road and wait for the car to crush it, after which it calmly eats it. In the 1970s-1980s, when stores sold milk in half-liter cardboard tetrahedral pyramids, crows often stole these packages, took them to a secluded place, punched a hole in the cardboard with their beaks, and drank the milk. To prevent the bag from slipping out of its beak in flight, the crow used its beak to bend one of the corners of the bag in advance. By autumn, crows concentrate in large numbers around landfills, garbage dumps and other food sources. The maximum age known with certainty is 20 years. Crows are able to show ingenuity, for example, remembering the location of hidden prey, returning for it when necessary, or throwing nuts from a great height.
Pigeon. Possessing excellent vision, the bird is able to distinguish not only the colors of the rainbow, but also ultraviolet rays. Hearing can detect sounds of a much lower frequency than humans are able to hear - for example, the sound of wind or the distant sounds of a thunderstorm, and this may be why birds sometimes leave an area for no apparent reason. The ability of rock pigeons to always find their way home, no matter where they are, is well known - this behavior has been used by humans for postal communications since ancient times. Birds with this quality are able to travel up to 1000 km per day. The rock pigeon, due to its predominantly rocky lifestyle, does not know how to perch on tree branches; it moves along the ground at a walk, constantly shaking its head. It flies superbly, reaching speeds of up to 185 km/h. The rock pigeon feeds mainly on plant foods: seeds, berries, fruits of fruit trees. There are pigeons that cannot fly. This breed is called a salon roller.
Tit. Lives in forests and parks. By destroying a large number of forest pests, it brings undoubted benefits to nature. In winter, it forms mixed flocks with other birds and wanders in search of food. More often than other birds, it settles near humans. Looks for insects and spiders on branches and trunks. In winter it feeds on seeds and other plant foods. A common visitor to feeders in city parks. In some places, by December, tits are already accustomed to taking food from an outstretched palm. Distributed in the European part of Russia, the Caucasus, southern Siberia and the Amur region.
Goldfinch. The goldfinch is one of the most beautiful birds found in our forests. Because of its festive, smart attire, the bird was called the “goldfinch.” A cheerful, agile, agile bird. In the conditions of enclosures and cages, they quickly master and quickly get used to it. Even in captivity they love to sing a lot. With good maintenance, proper care and feeding, they sing all year round and live up to 15-20 years.
Crossbill. They have a special beak structure: the ends of the mandible and mandible overlap each other, crossing each other crosswise. On the territory of Russia there are 3 species: spruce crossbill, pine crossbill and white-winged crossbill. Common nomadic birds. From the taiga, crossbills, during their frequent migrations, fly into all regions of Russia, often very far from their nesting sites. They stay on coniferous trees in flocks, often hanging from cones, tearing them off and dropping them. During the flight they constantly call to each other, but, having settled on a tree, they fall silent. They feed mainly on the seeds of coniferous plants. Crossbills are often kept in cages. Captured birds very quickly get used to captivity.
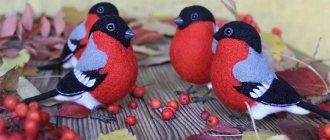
Bullfinch. Lives in forests (only pure pine forests are avoided) with dense undergrowth, in gardens and parks. In summer, the bullfinch lives both in dense forests and in open forests on the edges of burnt areas and clearings, but is very secretive and rarely catches the eye. But in winter it’s simply impossible not to notice a colorful flock of bullfinches. It feeds mainly on seeds, buds and berries. Feeding on berries, it eats the seeds from them and throws away the pulp of the fruit.
Magpie. Thanks to its characteristic black and white plumage and unusually long tail, the magpie is unique and easily recognizable. On the ground, the magpie most often moves by jumping, but can also walk. She moves very skillfully in the crown of trees. The flight of the magpie is wave-like and gliding. Common magpies are sedentary birds. They live in small forests, parks, gardens, groves, copses, often not far from human habitation. Magpies eat a wide variety of foods. Its diet includes both small mammals and insects. Magpies also often destroy bird nests, carrying eggs and chicks. And sometimes they even steal bones from dogs. Magpies living next to a person are not afraid to steal some food from him. The magpie is considered one of the most intelligent birds. Magpies were found to have elaborate social rituals, including possibly expressions of sadness. The magpie is the only non-mammal currently known to be able to recognize itself in a mirror, unlike, for example, a parrot, which perceives its own reflection as another parrot.
Waxwing. Inhabits sparse coniferous and mixed forests, overgrown burnt areas and clearings. In summer it feeds on insects, which are often caught in flight, larvae, various berries and young shoots of plants. At other times, they feed mainly on berries and fruits, for example, lingonberries, rowan, viburnum, mistletoe. In winter, it wanders widely, appearing in large flocks in cities, especially during the years of the mountain ash harvest. Waxwings play an important role in the life of the forest, as they widely distribute the seeds of rowan and other juicy berries, which, having passed through their intestines, do not lose their germination.
Woodpecker. The Great Spotted Woodpecker is widespread in the forest zone of Russia, including mixed and deciduous forests. Woodpecker is a good tree climber. The woodpecker deftly moves in short leaps up and sideways along the trunk, moving in a spiral. At the same time, he constantly chisels the bark in search of insects, their larvae and pupae. Its beak, straight and sharp, hits the tree with force and not only destroys the bark, but also breaks the wood, making a depression in it. The woodpecker inserts a long flexible tongue covered with sticky saliva into the cracks formed in the bark, the end of which is seated with small teeth directed backwards. Having pricked the insect with his tongue, he pulled it into his mouth. This is how it feeds all summer, destroying many forest pests (bark beetles, borers, etc.). In winter, the woodpecker feeds on the seeds of coniferous trees, breaking the cones with blows of its beak, having previously squeezed them into a crack in the bark or a slot hollowed out in the wood. Although woodpeckers destroy many seeds of coniferous trees, reducing their yield, in general they should be considered useful birds, since they destroy many insects harmful to the forest, and by making new hollows every year, they provide housing for insectivorous birds. In addition, woodpeckers cull sick trees infested with pests that are subject to sanitary felling. Tools and materials: Cardboard, colored paper, scissors, gouache, pencil, brush, glue, wire, toothpick, needle.
Rules for safe work with scissors. 1. Before work, check the serviceability of the tools. 2.Do not use loose scissors. 3.Work with scissors only at your workplace. 4. Watch the movement of the blades while working. 5. Place the scissors with the rings facing you. 6.Feed the scissors rings forward. 7.Do not leave scissors open. 8. Store scissors in a case with the blades facing down. 9.Do not play with scissors, do not bring scissors to your face. 10.Use scissors as intended. Safety precautions when working with glue. 1.Work carefully, trying not to drip glue. 2. Try not to get the glue on your clothes, face, or especially your eyes. 3.If glue gets into your eyes, rinse them well with water. 4.After work, close the glue tightly and put it away. 5. Wash your hands after work. Safety precautions when working with needles. 1. Store needles in a pincushion. 2.Always thread the eye of the needle. One thread runs out - a new one is needed. 3.Needles should not be put in the mouth. 4. Before work and after finishing work, count the needles. 5.Needles should not be attached to clothing or left in the fabric. Elena Blagina The frosts are severe this year! Worried about the apple trees in our garden. Worried about the Bug: It’s as frosty in her kennel as in the yard. But most of all I am worried about the birds - For our sparrows, Jackdaws, and tits. We have everything prepared for winter: will wrap the apple trees in matting. more hay to the kennel and save the poor mongrel But the birds! How cold it is in the air! Will we help the defenseless? Let's help! They need to be fed, and then it will be easy for them to survive the cold. Dynamic (or moving)
toys are those that convey the types of movement of living beings and mechanisms.
Manufacturing algorithm.
1. Trace the templates on yellow cardboard. The templates should be placed compactly on the cardboard and traced on the back side of the colored cardboard. Be sure to mark the points - the places where we will pierce the cardboard with a needle.
2.Cut out the craft blanks.
3. Glue them together to make double-sided parts.
4. Color the birds and wings with gouache.
5. Bend the base of the wing.
6. Apply glue only to the base of the wing and glue it to the bird.
7. Glue the wing in a similar way on the reverse side.
8. On a sheet of white cardboard on the back side, draw four lines at a distance of 1.5 cm. 9. Cut into strips. 10. Glue together to make double-sided parts (to give rigidity, you can glue several strips together).
11. Draw a drawing on the feeders with a simple pencil.
12. Color the drawing with gouache and glue it to the strip on both sides.
13. We pierce holes with a needle in pre-designated places (children do this with the help of a teacher).
14. At a distance of 5.5 cm from the feeder, we pierce holes with a needle. We place the second strip under the first, moving it 2-2.5 cm to the side. We pierce a hole in the second strip (the distance between the top and bottom strip should be at least 0.5 cm).
15. Making a nail for attaching birds: cut a piece of wire about 5 cm. Wind two turns of the wire around a toothpick.
16. For fastening, 4 such blanks are needed.
17. Bend the caps of the carnations at right angles, the carnations are ready. 18. Attach the bird to the strip: insert the nail first into the strip, and then into the upper hole of the bird.
19.Insert a toothpick into the hole and wind two turns of wire.
20.Take out the toothpick, cut off the excess wire and press it (the connection should be free).
21. Similarly, attach the bird to the bottom strip.
22. We attach the second bird in the same way.
For younger children, you can make the craft easier.
We recommend watching:
Paper plastics. Do-it-yourself bird Do-it-yourself fairytale bird. Master class with step-by-step photos Making a papier-mâché model in elementary school on the theme “Wintering Birds” Crafts from CDs for children. DIY birds
Similar articles:
Origami bird
Feather applique Bird. Master Class
Comments for the teacher
Physics propaedeutics for primary school: during the lesson, scientific concepts that have visual manifestations in the toy are discussed: vibrations, forces, etc.
In middle school, the toy and its homemade versions can illustrate relevant lesson topics. Particular attention is paid to the ratio of the diameters of the support and the mating part, as well as the materials from which they are made.
Olympiad physics and STEM for high school students: using the example of a toy, scientific and technical concepts such as an oscillatory system, oscillator, braking, sliding, vibration, inertia, pendulum, energy conversion, bushing, coupling, damper, skew, beating are studied. The relationship between all components of the oscillator is so complex that stable operation of the toy is achieved empirically, and a complete description of the oscillator is a complex task of modern physics.
Source
How to make a woodpecker from plasticine with your own hands step by step
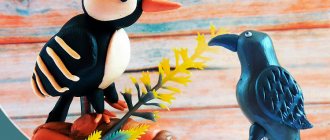
To mold the tireless forest orderly, the hardworking woodpecker bird, you will need three shades of plasticine: black and white and a drop of red. We provide details on sculpting this object below so that you have no doubt that this process is completely doable.
As with sculpting any bird, to create a woodpecker you need to complete the following elements: head, body, wings, tail and beak. Next, all that remains is to fasten the parts together. So let's start the lesson.
Step-by-step photo lesson:
Prepare bars of the desired color. You can make the head and body of a woodpecker using white plasticine and attach black parts to them, or, conversely, make black blanks and add white elements. Focus on the availability of material. Beware of the dark mass, because your hands will get dirty after it, which means that the white plasticine may also be ruined.
Make a small ball for the head.
Prepare another ball, but 2-3 times larger for the body.
Deform both pieces and fasten the head and body.
Place thin black cakes on the bird's head and back.
Glue together several black sausages to form a tail.
Attach the ponytail to the back of the body.
Make blanks for sculpting the wings. First of all, these should be black cakes, shaped like a comma. White oval blanks and thin white threads are also needed to create stripes. Although the pattern on the wings of a woodpecker can be arbitrary, there are different breeds of these birds.
First, attach the white oval islands closest to the wide part of the wing. Attach a few white stripes just below. Then draw a series of longitudinal stripes in a stack to show the relief of the wing.
Attach the wings to the sides. They must be symmetrical.
Attach small dots-eyes to the muzzle. Put a red beret on the top of your head. Attach a long, strong beak.
Add little paws.
The plasticine woodpecker is ready. The figurine can be placed on any perch to decorate the room. The woodpecker looks like a real one.
Source
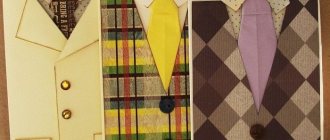
Ideas and patterns for making New Year's elk
You can see and select ideas and patterns for making a moose for the New Year with your own hands in the photo below:
- A strict craft of an animal with clothes and a briefcase. Adults will like it as a New Year's gift.
- A bright cap and scarf will not leave a child indifferent.
- A large soft toy will decorate any room for the New Year.
- Decorations with Christmas trees will complement the New Year's landscape.
Master class and template “Aristotle the Moose”
The simplest thing is to print a template on a printer and cut out a cartoon from paper, and then bend it as expected and glue on the eyes and tie. But the elk made from paper alone will be too flexible and will not hold its shape. Therefore, it is better to stick the template on a sheet of corrugated cardboard, like in the cartoon. Glue 1 part of the template, cut it out together with the cardboard base, and glue the second part of the template on the back side. We make cuts along the lines of the limbs. Cut out the eyes and tie and glue them in place.
The second option is to print the template and transfer it to a sheet of blue cardstock (or double-sided colored cardstock, or pre-color it on both sides). Cut out the elk template, bend it, glue on the eyes and tie. And don’t forget the paper clips on the horns to make everything look like it’s for real :)
Just don’t forget to make Aristotle his faithful friend, a woodpecker.
Cat hare template
This animal is even smaller than a woodpecker, so we reduce it and print it out. We glue it onto cardboard, make slits for the eartail, and insert it into place. We stretch out the ears - we get a hare, we stretch out the tail - we get a cat.
You can already play with such an elk, woodpecker and pink cat. We also do the rest of the furnishings. Table? Easily! A cardboard circle for the tabletop and a rectangle for the leg. Chair? Also a rectangle, bent in 3 places. A boat? An ordinary origami boat. You can make a whole cartoon world, as they teach in “Paper”, and an apartment, and furniture, and nature, and fishing equipment.
Bale-Bale Template
Bale-Bale will not cover the entire sheet of paper, make the template smaller before printing it. A woodpecker should be approximately the size of an elk's head.
Also, for strength, we glue the template onto the cardboard on both sides and cut it out along the contour. We make a triangular cut in place of the beak. Glue on the bow and eyes. We bend the wings and crest.
Learn how to make colorful papers with your own hands in step-by-step lessons
Of course, first of all I want to make the cartoon characters themselves. To make them, you will need thick colored cardboard and felt-tip pens to draw faces. From a blue sheet you can cut out the main character - Aristotle's resourceful moose.
How to make Aristotle's moose:
1) Transfer the template to blue double-sided colored paper.
2) Bend the strip located above the horns so that the fold is at their level.
3) Bend the uppermost rectangle (this is the nose and mouth) like an accordion.
4) Draw two dots on the nose.
5) In the upper part of the muzzle near the horns, glue a blue rectangle bent in half, and only the lower part of the fold should be glued. On the upper, free part of the rectangle, glue two circles of different sizes in the shape of a figure eight. On them - a strip of white paper, draw dots-eyes on the strip.
6) Glue a tie made of red colored paper.
And from purple cardboard you can cut out a cheerful woodpecker Tyuk-Tyuk. To make the wings, you can use nail scissors or a sharp paper cutter.
1) Cut out a rectangle from double-sided bright green colored paper.
2) Cut out small rectangles from each corner so that a cross-shaped figure remains.
3) Make triangular cuts on the wings, head and tail.
4) Glue on the eyes - two white circles in the shape of a figure eight with black dots drawn with a felt-tip pen.
5) Using a stationery knife, make a triangular cut-beak (you can fold the figure in half and make a cut at an angle with scissors on the fold, and then straighten it).
6) Glue on a bow tie made of red paper.
It is better to print the figure templates on a not very large scale, because... It will be more convenient for children to play with miniature figures.
Now let’s start making crafts based on the advice of the characters from the cartoon “Paper.”
How to make a parachute out of paper:
1) Take a square sheet of paper. You can use a regular sheet of A4 paper by simply tearing off the bottom part.
2) Fold the square piece in half and bend it back. Turn it over 90 degrees and bend it in half again and straighten it back.
3) Make holes in the corners of the square blank.
4) Tie strings at the corners.
5) Bend the corners towards the center.
How to make a boomerang with your own hands:
1) We will need a sheet of A4 paper.
2) Fold it in half horizontally and bend it back. We cut half the sheet with scissors along the fold line and put one part of the sheet aside - we won’t need it for now.
3) Fold the half of the sheet that we have left in half horizontally and bend it back.