A cute hedgehog made of cones will become a true friend for your child, and an excellent souvenir for you! How to make a hedgehog from pine cones?
By following our instructions step by step, you can easily make this prickly forest dweller.
How to make a hedgehog from pine cones: master class with step-by-step photos
Hedgehog made from pine cones and salt dough
Before making a hedgehog, we remove the scales from the cones - just carefully separate them from the core and put them in one pile. You can use tweezers or nail scissors.
We take out the scales
This is where the preparation ends, now let’s get started with creativity. First of all, roll the dough into an even ball.
Dough ball
We fashion the body and head of a hedgehog out of it, sharpening its nose a little.
Sharpening the nose
We should get a completely recognizable silhouette.
Hedgehog silhouette
Carefully, in even rows, insert individual scales into the body. First we make a row around the circumference of the hedgehog’s body.
Row around the circumference
And from there we go inward, trying to select scales of a similar size so that the hedgehog’s “hair” turns out smooth and neat.
We insert the scales in even rows
We roll another one out of the dough, this time, a small lump - a spout, and attach it. You can moisten it a little to ensure a stronger attachment.
Spout
Our hedgehog is almost ready, all that remains is to bake it in the oven at minimum power. You can dry the craft under normal conditions, but it will take more time.
Drying the craft
When the hedgehog dries well, all that remains is to draw its eyes and paint its nose with oil paint or acrylic.
Coloring
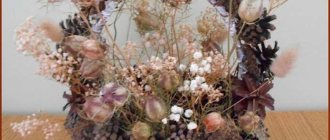
We have a charming hedgehog made from pine cones!
Hedgehog from a cone
The simplest way to make a hedgehog from a pine cone is to add paws and a muzzle to the pine cone and glue an apple.
Hedgehog made from pine cones and plasticine
The craft can be based on a foam ball and a cone. More details in the video:
How to color salt dough?
There are two most common ways to color salt dough. The first method: after drying, paint the finished craft with acrylic paints or gouache using a brush. Second method: food coloring is diluted in water, then added while preparing the dough. When the craft is completely painted and dried, it must be coated with transparent manicure or furniture varnish in 2-3 layers. Each layer must dry before applying the next. This way the craft will last for a long time.
Hedgehog made from pine cone and paper
Cut out a small circle from brown paper and make one radial cut in it.
Cut out a circle, make an incision
Using a stapler, we overlap the edges of the cut - we get a cone with a wide base.
Making a cone
Glue on the eyes, draw ears and a nose. The result is the face of a hedgehog.
Glue the eyes, draw a muzzle
Glue the paper face to the pine cone.
Glue the paper face
We sit the hedgehog on paper grass. Ready!
Hedgehog made from pine cone and paper
From one fir cone and plasticine you can make a very charming hedgehog standing on its hind legs.
Hedgehog made from fir cones and plasticine
Simple hedgehogs made from cones can be used very surprisingly well in an autumn meadow made from natural materials. Here you have a simple and bright craft made from natural materials.
Hedgehogs made of cones in an autumn meadow
Step-by-step photo lesson:
Prepare two balls of plasticine: black and beige. The body and spines of the future hedgehog will be made from them.
Turn the beige ball into an oblong body with a pointed tip.
Attach a black nose ball to the sharp tip. Using your fingertips, press the plasticine in the places where the eyes will be located.
Place black dots-eyes on the formed tubercles.
Place a thick layer of black plasticine on the beige body. Leave the muzzle and breast uncovered.
Use the tip of the stack to create sharp spines. Move the spatula along the back and push portions of plasticine out. Press down any protruding plasticine with your fingers to form sharp needles.
Turn all the black plasticine into hedgehog spines. Miniature triangles should stick out in different directions.
Attach beige legs to the base of the craft.
The plasticine hedgehog craft is ready. You can treat your handmade animal to an apple or other fruit treat. We hope you liked our step-by-step instructions.
Perhaps, many consider hedgehogs to be one of the cutest and funniest animals. They are the heroes of your favorite cartoons. Just remember “Smesharikov” or cartoons based on Kozlov’s fairy tales “Shake! Hello". And how wise and reasonable the hedgehogs look in Suteev’s fairy tales “The Magic Wand”, “The Bag of Apples”, etc. Having figurines of funny prickly animals on hand, you can play various games (role-playing, educational) with your children, and also decorate the children's room, window sills, and shelves with fairy-tale characters.
Making hedgehog figures with your own hands is not at all difficult. We suggest using several simple master classes with a detailed description of each stage of work.
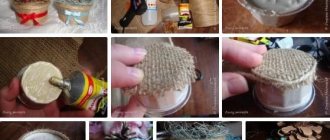
Hedgehog made from cones and a plastic bottle
A very cute hedgehog can be made from a plastic bottle and pine cones. For this craft, a plastic bottle with a round cap is best. Color the end of the bottle with a black marker.
Color the bottle with a marker
Wrap the remaining part with fabric.
Wrap the bottle in cloth
Glue the cones to the rag, forming a hedgehog's fur coat.
Glue the cones
When the cones are glued all over the bottle, we complement the composition with apples, spruce branches and rowan berries.
Hedgehog made from a plastic bottle, pine cones and other gifts of autumn
Hedgehog made from cones and a plastic bottle (large)
To make a hedgehog, we will need natural materials: cones, rowan branches, leaves, birch sticks. The craft is based on a plastic bottle, which we cut off.
Hedgehog made from cones and a plastic bottle
For a detailed master class, watch the video:
This hedgehog is also based on a plastic bottle. Thanks to this, the muzzle is rounded and the base is strong.
Hedgehog made from cones, plasticine and a plastic bottle
This hedgehog made of cones was “revitalized” with the help of factory-made eyes.
Hedgehog made from pine cones with factory eyes
The hedgehog's face can be sculpted from plasticine, and the basis can be a cardboard cylinder or a small box.
Hedgehog made of cones and plasticine
You can make a hedgehog from cones a little differently. This craft is based on the bottom of a plastic bottle. The cones are attached to it using plasticine.
Another popular option for decorating a craft is to wrap threads around its face. We make the nose and eyes from buttons. This hedgehog looks very cozy and cute.
Hedgehog made of cones and threads
The bottle can be wrapped with jute rope around the muzzle.
Hedgehog made of pine cones with jute rope and bottle
Autumn vegetables
It is very easy to sculpt vegetables from salt dough. Before sculpting, you definitely need to have a conversation with your child, remember what vegetables he knows, where they grow, what color. Consider either the vegetables themselves or their image in the pictures.
It is also advisable to repeat what shape these vegetables are and how best to sculpt them. Then the sculpting process itself begins. Turnips and beets are molded from a large ball by pulling the tail-spine down the center. If you wish, you can mold the tops separately and attach them together in a bunch on the flat side.
Parsley root and carrots are sculpted using the “sausage” method, then one side of the product is made thinner. Several branches are inserted into the middle from above.
The tomato is also made from a round piece. You need to attach a tail in the center at the top. The cucumber is rolled out from a “sausage”, rounding the ends.
After drying, the vegetables are painted.
DIY hedgehog made from seeds
A lump of plasticine, a handful of seeds and three peas of allspice in your hands can turn into a charming prickly hedgehog! Soften the plasticine well so that the bases of the seeds and peas can be easily inserted into it. Let the plasticine harden, and then attach a walnut or hazelnut to the “needles”. The hedgehog will immediately turn into an active forest dweller.
DIY hedgehog made from seeds and plasticine
It will be easier for kids to insert the seeds not with the bases, but with the point down. But the hedgehog will not lose its charm from this approach!
Insert the seeds point down
A master class on creating hedgehogs from seeds is in our video.
All the best for children!
Every parent wants their baby to constantly develop and learn something new. This simple but very useful recipe will show you how to quickly and easily make beautiful cookies or a fun toy for your child.
By making animals with your children, you will not only have fun, but also spend time usefully. It is much more pleasant to decorate any shelf in the kitchen with handmade crafts, which will give an atmosphere of coziness and homely warmth.
For a toy product, use gouache or watercolor. But if you decide to bake cookies, then food coloring can help.