For convenient storage of books with the ability to quickly get the desired copy, it is best to use a cabinet with glass doors. Furniture stores pay little attention to this piece of furniture - with the advent of electronics, there are very few lovers of paper publications. Making a bookcase with your own hands to match the interior of the room is a good solution for an experienced craftsman.
We will talk about making homemade furniture from selected materials. The instructions will help you make a drawing, select fittings, correctly assemble the body and decorate the doors at home, even if you have no experience.
The simplest type of book storage is a shelving, the disadvantage of which is the penetration of dust.
Bookcase options
There are 4 types of basic design solutions to assemble a bookcase.
Corpus. A traditional structure in the form of a free-standing building, with open shelves or closed with sliding, hinged doors.
Modular system. It represents a set of furniture from several separate buildings, from which various combinations of book storage with facades of the same style are made. All that remains is to choose a variation of the module layout for installation in the living room, bedroom or children's room.
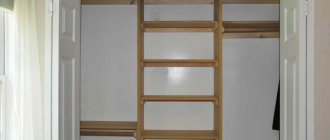
Built-in. Occupies the space between adjacent walls, ceiling and floor. There is no need to install a top plate and side walls. Often homemade built-in furniture is mounted around the doorway.
Angular. Effective use of usable space in the corner of the room combined with ease of use of the interior of the cabinet.
Drawing
When drawing up a drawing, you need to pay attention to two nuances. You should use a level to check how horizontal the floor in the room is. If this is not taken into account, it is possible that the shelves will be located at an angle to the surface. If there is a slope, you should decide what is easier - to level the surface of the room itself or to take into account the slope in the design and compensate for it at the base of the cabinet?
Bookcase drawing.
It looks like this: if the slope is 2 mm per 1 m distance, then the height of the legs should compensate for this. If the cabinet is 1.5 m long, then in the direction of the slope the first leg should be 3 mm less than the second.
The level must be checked both along the wall and perpendicular to it.
Pay attention to the presence of baseboards in the room. If it exists, you should either again take this into account in the design, which will involve a large amount of work when preparing the drawing and manufacturing the structure.
Or you will need to remove the baseboard where the bookcase is supposed to be located.
Making a drawing
After choosing the materials and design of the bookcase, we begin drawing:
- Designate the location for installation.
- Using a plumb line and level, determine the correctness of the floor horizon and the verticality of the adjacent walls; if you find violations of these parameters, correct them according to our instructions.
- Sort through your library collections to determine the sizes of all book formats. Their approximate samples are given in the table:
| Format | Height, mm | Width, mm |
| Standard (subscription editions) | 205 — 220 | 135 – 150 |
| Landscape, magazine | 290 — 300 | 205 – 210 |
| Small, brochure | Up to 180 | 100 – 115 |
- In accordance with these data, calculate the number of shelves and the dimensions of the intershelf space. Consider single or double row arrangement of books. Add 50 - 70 mm to the calculated size to make it convenient to move the volumes.
- When determining the height between the shelves, add 50 mm to the calculated value for the same reason.
- If you have accumulated a lot of non-standard literature, then it is better to store it in the lower compartment of the cabinet behind the hinged blind doors.
- Using the accumulated initial information, you can now draw a detailed diagram of the layout of the cabinet parts.
- Make a detailed list of the quantities and sizes of materials needed to assemble your homemade furniture.
Furniture and interior items
0 votes
+
Vote for!
—
Vote against!
Buying a bookcase is a rather expensive process; moreover, it is not always possible to find in the store the model that will fully satisfy all the needs of a book lover. Making your own bookcase not only helps you save money, but also opens up new possibilities for designing an individual model of the right size. Learn about the features and methods of making a bookcase with your own hands.
Table of contents:
- DIY bookcase: features and varieties
- DIY plasterboard bookcase
- DIY bookcase made of wood
- DIY bookcase made from chipboard
- Making a bookcase with your own hands
DIY bookcase: features and varieties
Before you start making a bookcase, we suggest you familiarize yourself with its varieties. In relation to the design features, open and closed models are distinguished:
- open bookcase - provides the opportunity to select a book without opening the cabinet door, however, in this case, the products absorb dust and moisture from the room, losing their presentation over time;
- closed bookcases are more bulky and less aesthetically attractive; such designs perfectly protect books from external irritants.
In addition, there are:
- vertical;
- horizontal bookcases.
This design option is determined by the availability of free space in the room, its dimensions, and the style of interior design.
Cabinet-type bookcases are quite popular both in apartments and in private homes. They differ in a variety of shapes and configurations; in relation to the design, the number of shelves, the presence or absence of sashes, and their material are individually selected.
Modular designs are a combination of individual elements from which it is possible to obtain a cabinet of various shapes, heights and widths. This cabinet is universal and perfectly adapts to the various parameters of the rooms in which it is installed.
Built-in type bookcases are a sliding door system; the main structural parts are fixed to the ceiling or walls.
A corner bookcase is an excellent solution for small spaces. The design fits well into any interior, is distinguished by its large capacity, compact size, optimal use of corner space, and easy accessibility of books.
DIY plasterboard bookcase
Drywall is an excellent material for making various furniture at home. The work requires a minimum of skills and tools. Bookshelves or a bookcase made of plasterboard must have a certain strength, so it is recommended to build a high-strength frame and use several layers of plasterboard.
To obtain perfectly smooth internal and external corners, use a special steel profile for additional reinforcement. If the bookcase will be located near the kitchen or bathroom, use a moisture-resistant version of drywall. In order to fill the internal space of the shelves and avoid dull sounds when hitting the structure, install insulation inside, for example, mineral wool.
It is possible to manufacture a combined bookcase, the walls of which are made of plasterboard, and the shelves are made of glass or wood.
Before starting work, make your own drawings for the bookcase. The layout of the bookcase is determined by its installation location and the dimensions of the structure. Determine the thickness of the shelves and their number.
Next comes the process of marking the wall on which the bookcase will be located. For these purposes you will need:
- level;
- plumb line;
- painting cord;
- pencil;
- square
It is possible to supplement the design with a built-in lamp. The wiring is done before installing drywall. In relation to the marked lines, install the guides using dowel nails. After constructing the frame part, the profiles are fixed using a suspension or special screws. The crossbar provides additional rigidity to the structure. The strength of the structure determines the installation step of the profiles.
There are two options for the frame for drywall:
- metal;
- wood.
The first option is used more often, as it has maximum strength and good performance characteristics. The wooden frame is prone to shrinkage and is destroyed under the influence of a humid environment. In any case, after installing the frame structure, the process of sheathing with plasterboard follows.
Depending on the load, the cladding is done in one or two layers. All sheets are fixed in a checkerboard pattern. The following is the process of finishing a previously designed cabinet:
- separating tape is glued to the connections between the planes;
- the seams are puttied with reinforcing mesh or tape;
- perforated corner connections are installed in corner areas;
- the entire surface is puttied and painted.
If there is lighting in the closet, pre-construct holes for the lamps. Their installation is carried out at the final stage.
DIY bookcase made of wood
Bookcases made of solid wood are highly expensive and belong to the elite class. Such furniture requires intensive care to avoid loss of presentability. Wood is a living material that is prone to absorbing moisture and foreign odors. Do not place hot water mugs or sharp objects on wooden surfaces.
Among the advantages of bookcases made of natural wood, we note:
- environmental safety - the material “breathes”, the furniture is characterized by zero toxicity; when the humidity in the air is high, it absorbs it, and when it is low, it releases it back, thus regulating a healthy atmosphere;
- long service life - proper processing of wood ensures long-term use in everyday life;
- a natural and aesthetically attractive appearance is another undeniable advantage of wooden furniture; with the help of such a cabinet, the room becomes more comfortable.
DIY bookcase photo:
There are different types of wood for making bookcases; linden, alder, cedar, and linden are softer and more pliable. Materials with medium hardness include birch, oak, and rowan wood. Birch, acacia and pistachio are considered the most durable and hardest.
Before you start working on a bookcase, decide on its dimensions. Next comes the process of calculating the amount of wood, fittings and fasteners. As additional materials for finishing, slats, border elements, metal or glass connections are used.
If you do not have experience in making bookcases, we recommend using cheaper types of wood. After choosing the appropriate material, decide on the model. The basic elements of bookcases are:
- side panels;
- shelves;
- top and bottom sides;
- front overlays;
- additional shelves.
These components vary depending on the type of cabinet. After determining the model, the process of acquiring materials and preparing the tool for work follows.
Among the standard tools for working on a wooden bookcase, we highlight:
- electric drill;
- jigsaw;
- roulette;
- screwdriver;
- fittings components.
At the initial stage of work, prepare the parts and process them using special equipment. Next comes the process of assembling the frame part. The most difficult option is a corner bookcase. There are several options for such designs:
- triangular;
- trapezoidal;
- L-shaped;
- five-walled.
To avoid distortion or deformation of the structure during operation, it is not recommended to build overly complex models. The ratio between the height and width of the cabinet is five to one.
Initially, the frame part of the cabinet is assembled; for these purposes you will need a screwdriver, previously prepared parts and fasteners. Using a level, check all connections for evenness. After constructing the frame, install the shelves. We recommend making the back wall from plywood in order to save material.
The finished structure is covered with a primer, moisture-proof material and paint or varnish. Additionally, front doors made of glass and fittings are installed to decorate the finished structure.
DIY bookcase made from chipboard
The optimal depth for a home cabinet is 40 cm. The dimensions of a home cabinet are 20x80x40 cm. These dimensions are optimal for storing books and magazines. The optimal material for building a bookcase is inexpensive and easy to process - chipboard.
During the work process, you will need the following tools:
- shooter;
- confirmation drill;
- tape measures and pencils;
- self-tapping screws
In addition, prepare fasteners in the form of confirmations, furniture corners, and thrust bearings. Before starting work, make drawings or use ready-made options. To cut and trim parts, use highly professional equipment or contact specialists.
When using a jigsaw to cut parts, be careful as there is a risk of damaging the appearance of the chipboard. To make the back wall of the cabinet, use white plywood or fiberboard, at least 3 mm thick.
After preparing the parts for work, the assembly process follows, which is consistent with the drawings. Initially, the frame part is assembled in the form of a rectangle. For these purposes, confirmation documents will be required. Install the confirmat and secure it with a screwdriver. All ends must connect flush; check the evenness of the connections with a level. Check the diagonals of the structure.
Next comes the process of fixing the back wall of the cabinet; to do this, use self-tapping screws or nails, in relation to the material of the part. The minimum installation pitch of self-tapping screws is 10 cm. Additional rigidity of the structure is provided by confirmats installed in the places where the shelves are fixed. To close the caps, use special caps, matched to the color of the cabinet. Install the shelves in relation to the bookcase design. Install decorative overlays on the front of the product. Install overlays, fittings, and, if necessary, make a door on the bookcase.
Making a bookcase with your own hands
We offer the option of making a bookcase with your own hands with glass. Among the advantages of this design we note:
- attractive appearance;
- ease of manufacture;
- protecting books from high humidity and dust;
- availability of materials for manufacturing.
Building such a bookcase is more difficult than a regular shelf, however, this design has protective properties that protect books from the destructive effects of external factors.
In standard bookcases, the interval between shelves is about 22 cm, and the depth of the shelves is 35 cm. Bookcases of standard variations consist of two compartments - upper and lower. The upper part is intended for storing large books, and the lower part is a blank facade.
The main elements of a bookcase are:
- upper, side and lower sidewalls, from which the structure frame is constructed;
- vertical and horizontal faceplates;
- shelves;
- doors with glass inserts;
- the back wall is most often made of plywood or fiberboard.
To fix the shelves, brackets with corners are used, thus improving the aesthetic appeal of the structure. To mill grooves, use a special drill attachment.
Assemble the cabinet frame in accordance with the drawings, and then install the shelves on the sides. Additionally, secure the shelves with glue for working with wooden surfaces. Drying time for the structure is at least one hour. Use self-tapping screws to secure the top of the cabinet. Next comes the process of treating the bookcase with paints and varnishes. Additionally, we recommend using impregnation with moisture-resistant characteristics. All cabinet parts are pre-polished.
In order to keep books on the shelves, install front covers on them, which perform not only a practical, but also an aesthetic function. Glass for a bookcase, choose tempered glass. We recommend cutting it first using the services of specialists. It is possible to decorate the cabinet with multi-colored glass or mosaics.
It is more difficult to build a corner bookcase with your own hands; such designs have good capacity and save useful space in the room. The success of obtaining a high-quality product is correctly constructed drawings that determine the nature of further work.
Step-by-step instructions for making parts from MDF and chipboard sheets
When choosing a cabinet bookcase, proceed in this order:
- Step 1. Place the MDF sheets on a workbench or table.
- Step 2. Apply markings in accordance with the drawing with a marker or pencil.
- Step 3. Use a jigsaw to cut out the top and bottom plates, sides, middle partition and shelves.
- Step 4. In the edges of the shelves, we use a router to make two longitudinal grooves at the top and bottom.
- Step 5. Cut out sliding panels from glass.
- Step 6. Use a special drill to make holes for the handles.
- Step 7. Cut out the back wall from a sheet of fiberboard.
- Step 8. Cut out the hinged doors for the lower cabinet compartment.
To avoid mistakes when cutting materials, contact a specialized workshop. Glass and MDF sheets will be professionally cut there.
List of required parts
In order to make a bookcase, we will need:
- Side stands 400*2000, chipboard 16 mm – 2 pcs.
- Shelves 400*768, chipboard 16 mm – 5 pcs.
- Top 400*800, chipboard 16 mm – 1 pc.
- Front vertical overlays 50*2000 chipboard 16 mm – 2 pcs.
- Front horizontal trim (top) 100*700 chipboard 16 mm – 1 pc.
- Front horizontal trim (bottom) 100*700 chipboard 16 mm – 1 pc.
- Drawer between shelves (for rigidity) 400*380 chipboard 16 mm – 1 pc.
- Rear wall 800*2000 fiberboard 3 mm – 1 pc.
Assembly instructions
- 1. Mark the installation locations of the fasteners. Drill the fastening points with a confirmation drill.
- 2. Screw the legs to the bottom plate.
- 3. Place the horizontal slabs, sidewalls, middle partition and shelves on edge.
- 4. Connect all the elements step by step into a single structure, screwing in the confirmations with a special key.
- 5. Turn the case upside down. Use a tape measure to check the equality of the diagonals between the opposite outer corners of the cabinet.
- 6. Using self-tapping screws and a screwdriver, secure the back wall.
- 7. Place the cabinet in a vertical position.
- 8. Insert the glass panels into the grooves of the door frame and secure.
- 9. Screw on the handles.
- 10. Install the blind doors of the lower compartment, securing the hinges with screws to the doors and side walls of the cabinet.
- 11. Screw the outer vertical locking bar to one of the doors from the inside. Pre-process the rail with a router.
- 12. Attach the decorated slats to the ends of the sidewalls, top and bottom plates, and shelves with nails or glue.
- 13. Fill the shelves and lower compartment with books and various items.
You can do without decor by pre-milling the ends of the furniture. We prime their surface, then coat it with furniture varnish.
How to do it at home?
Blanks
According to the available drawings, the main parts for the cabinet are cut.
If you do not have the proper experience, it is better to order cutting of the material from specialists . For example, sawing chipboard with a jigsaw will take a very long time and the work will not look neat.
During the preparation of parts, all drawings and diagrams are checked.
After cutting, the workpieces are polished. To give the ends a beautiful embossed appearance, milling is performed. Milling rules:
- securely fasten and prepare the router;
- do not allow the workpiece to deviate when the router feeds;
- movements should be careful and smooth;
- slats are processed only after setting the desired size.
Advice . If irregularities appear after processing, they are smoothed out with sandpaper.
Assembly
Assemble the cabinet on a flat surface to avoid distortions and curvature in the structure. Sequence of work:
- Attach the side walls to the top, using a corner to check the correct installation of the elements.
- Make holes for fasteners. The diameter of the drill should be smaller than the fasteners used.
- The parts are pulled together using confirmations. They come with a hex wrench to make the tightening process easier.
Having connected the upper part, move on to the lower one. To adjust corner joints, use a corner.
Advice. It is better to install shelves without a back wall.
Shelves in a bookcase are subject to loads, so it is not advisable to make them removable . The shelves are attached with confirmations in 3-4 places on one side of the side wall. This ensures the stability and reliability of the entire structure.
At the final stage, the back wall is mounted. To fix it, take a sheet cut from chipboard or plywood. For fastening, use a construction stapler or nails or self-tapping screws. Doors are hung on hinges if they are provided for in the design.
Features of manufacturing and assembly of parts of a plywood bookcase
Cut the material and install furniture elements in the same order as in the previous case. Connect the parts with self-tapping screws, rest the shelves on furniture corners. Sand all surfaces with a sander or sandpaper. Then cover with primer and furniture varnish.
Expert opinion
Victoria Chernikova
Decorator
Advice. It is better to cover a homemade plywood cabinet in the Provence style with white or gray acrylic paint. The furniture will look impressive in any interior.
Milling the ends and back wall for the cabinet
End milling can be done at home. Before work, it is necessary to check the quality of the device on material blanks. Then you need to select cutters for the desired relief, set the offset, and securely fix the part.
When feeding a block into the machine, it is important to avoid deviations of the element. Actions must be smooth and careful.
After the work is completed, the quality of milling of the elements is checked. Irregularities are smoothed out with sheets of sandpaper.
Doors
You can make movable fences for bookshelves in the form of glazed swing frames. Assemble the frame from milled wooden slats with pre-made longitudinal grooves. Insert glass sheets into them.
In the built-in closet, close the shelves with sliding doors. Assemble the frames from an aluminum profile with longitudinal grooves for installing the filling. Door leaves can be made from MDF or glass. You will need a guide to the manufacture and installation of sliding systems.
It is convenient to use folding doors. Their advantage is the possibility of simultaneous access to all the contents of the cabinet. Installation of folding doors is described in a separate article.
Top and bottom belts will add attractiveness
1. Cut out the front L , side M and rear N strips of the upper/lower belt frames, as well as the front O , side P and rear Q bars of the extension from a 19 mm thick board. The width of the blanks for these parts is indicated in the “List of Materials”, and the length should be 13 mm more than indicated. On one of the edges of the front and side strips of the upper/lower waist frames, mill a profile in the form of a roller (Fig. 3a). Next, cut out 3 mm wide tongues on one face of these parts, as well as on two opposite edges of the extension bars, which serve to catch excess glue (Fig. 2a and 3).
Having pressed the front strap of the waist frame L to the body with a clamp, press the bevel of the side strap M to its end and mark its final length.
2. File the bevels on both ends of the front strap of the upper waist frame L , so that its length is 32 mm greater than the width of the case.
File a bevel at one end of each of the side strips of the upper waist frame M. Using clamps, press the front strap of the upper waist frame to the top panel of the body, centering it and setting the front overhang to 16 mm. Press the side straps of the waist frame against it and mark their final length (photo H). File the side strips to length, then glue the front and side strips of the waist frame to the body and additionally secure them with screws. Saw off the length of the back strap N of the waist frame, adjusting its length to the distance between the side strips (Fig. 3), glue and secure it with screws. Repeat in the same sequence with the details of the lower waist frame. Sand the frames with 220 grit sandpaper.
3. Measure the overhang of the upper waist frame LN relative to the upper crossbars B and the faceplates F of the side walls (Fig. 2a). Transfer this measurement to the top side of the top waist frame and draw lines along these marks, parallel to the outer edges of the pieces. File the bevels at the ends of the front O and side P bars of the extension in the same way as you did with the waist frames, so that the length of the bars corresponds to the length of the drawn lines (Fig. 2a). Sand the front and side bars of the extension with 220-grit sandpaper and glue them to the top waist frame. Cut out the rear block of the extension Q , adjusting its length to the distance between the side bars, finally sand it and also glue it in place.
Glue T corner bosses to the front R and side S base boards to reinforce the miter joints and ensure squareness.
4. Bevel the ends of the front base board R while sawing it to final length, then bevel and saw to length the side base S (Fig. 3). Mill a fillet with a radius of 13 mm along the top edge of these parts, and then mark the contours of the cutouts on them. Cut out the cuts with a band saw and sand the edges of the cuts smooth.
5. Using a band saw, cut six corner T according to the shape and dimensions shown in Fig. 3b. Glue the front R and side S base boards, installing a boss in each corner (photo I). Glue the remaining corner bosses to the rear ends of the side boards (Fig. 3), then glue and screw the U support bosses inside each miter joint (Fig. 3). Drill mounting holes in the two remaining support bosses, countersink them, and glue the bosses to the front face of the base at equal intervals.
6. Turn the case over and attach the base to it, aligning their back sides and centering them along the width. Drill and countersink mounting holes in the corner bosses T screw screws through them, as well as through the holes in the support bosses U (Fig. 3).
7. According to the specified dimensions, cut out the cover V , as well as the front W and side X edge trims with the width specified in the “List of Materials” and a length 13 mm longer than specified. File the bevels at the ends of the overlays, adjusting their length to the dimensions of the cover (Fig. 2). On the lower edge of all overlays, mill a rounding with a radius of 13 mm (Fig. 2a). Then give the lid a final sanding and glue it to the OQ , lining up the back sides and centering it widthwise.
Decor
Decorative details can change the appearance of a cabinet in a positive way. They can be made from wood or plastic. These are wooden slats, planks, cornices, rosettes and baseboards, processed by figured milling. Plastic products are cast in molds to match the color of wood of different species. If you don’t want to make decorative elements yourself, buy ready-made ones at a hardware store.
Expert opinion
Alexander Didenko
Furniture assembler at Mabaks
Attach the shaped strips to the ends of the shelves so that their upper edges are flush with the area for books. When you take out the volume you need, you won’t get the book caught on the decor.
Top 5 inspiring ideas
Thanks to the installed furniture, the apartment becomes an artistic space. Wardrobes play a key role in a room that should feel “comfortable”. Models include a wide variety of styles and sizes. Before deciding what the closet will be like, they look for the best place for it in space. The functional model should make it possible to easily classify and find a book without problems.
Using drywall
The advantage of a plasterboard stand with wood elements is that its dimensions and shape are completely adapted to individual needs and preferences. The “body” of such furniture is steel profiles, which are screwed to the floor and to the wall with dowels. In those places where the shelf is located, additional profiles are used to strengthen the structure.
Ceramics as an interesting alternative
A bookcase can be created by combining two materials: ceramics and wood. The design of this model is based on brick racks that are attached to the wall. Wooden bookshelves theoretically do not require fixing, since the protruding parts of the brick provide sufficiently stable support. It is preferable that the wood boards have a thickness of about 3 cm (shelf 25x50 -70 cm).
Application of furniture boards
The most famous and popular materials for bookcases are OSB and MDF furniture boards. Craftsmen often order pre-cut elements. To ensure stability, the extreme corners should be further reinforced with metal brackets. Such shelves can be finished by painting or varnished in the chosen color. If the bookcase was made from OSB panels, it must be properly primed.
Why are boxes needed?
Decorative plywood boxes with beautiful small details inspire a nod to the spirit of Cubism! It's easy to create an irregularly shaped cabinet using boxes of different shapes. To ensure its stability, the drawers are held together with simple black metal clips. Some of the boxes are painted inside with muted pastels, using two coats of water-based paints. Bright plywood stands out beautifully in contrasting color.
New life for an old staircase
Is the old staircase that has been lying in the attic for the last three decades no longer needed? It can be turned into a neat bookcase with minimal cost and minimal effort. It is placed in the corner of the room or used against the wall; it is suitable for magazines and children's books.
How to repair a bookcase
Over time, the furniture wears out, the outer covering ages, and the load-bearing units become loose. We provide several examples of repairs in the table.
| Type of failure | Repair |
| Scratches on MDF and chipboard panels | Paint over minor damage with a tinting pencil. Fill deep grooves with melted wax to match the color of the furniture. Then polish the repair area. |
| Loose hinges | Remove the hinges. Fill the mounting sockets with epoxy resin. Secure the hinges with new screws in the updated holes. |
| Skewed hinged doors and shelves | Take out all the contents of the bookcase. Check the base horizon. Eliminate the cause of body distortion by leveling the places where the legs rest on the floor, for example, by placing the remains of pieces of fiberboard or other suitable material. |
| Loosening of body parts at joints | Reinforce the cabinet elements with additional corners made of plastic or metal. |
| Replacing glass in the door | Remove the door from its hinges. Remove one of the frame slats and remove the damaged panel. Insert new glass, return the bar to its place. Hang the door back on its hinges. |
| Repurposing old furniture into a bookcase | Completely dismantle the filling. Disassemble the case and insert new shelves. Reassemble the cabinet in reverse order. |
What to consider when drawing a cabinet drawing
- First of all, decide on the model of the cabinet and the place in which it will stand. Break the cabinet drawing into several component parts, carefully drawing each detail. Specialized computer programs such as “Basis Furniture Maker” or “AutoCad” will be good assistants in this matter. When creating drawings, take into account any little things, even the baseboard on the floor of the room, which can easily eat up about five centimeters from the closet, and, moreover, will not allow you to move it to the wall. In this case, bevelling the vertical ribs from the baseboard side will help. You can also remove the baseboard completely.
- Now determine the exact dimensions of the cabinet. This means not only the width and height, but also the number of shelves, as well as the distance between them . The minimum depth of a shelf for books is 20 cm, for deeper shelves - 30 cm. The thickness of the shelf should be at least 2.5 cm with a length of 1 m, this will help to avoid sagging.
- Be sure to decide on the color of the furniture in advance. There will be no problems with this, since modern industry offers a large selection of colors and shades.
conclusions
We looked at 4 structural types of bookcases that can be made from 7 available materials: chipboard, MDF, fiberboard, plywood, plasterboard, furniture panels and glass. By following our guide, you can make your own storage unit for your book collection. Ideas for building cabinets can be found in the Ikea catalog or in the gallery below.
Tools and equipment
- Screwdriver.
- Level.
- Milling machine. Designed for making grooves for shelves, which gives the structure a more aesthetic appearance. Requires certain work skills. If there are none or it is impossible (inappropriate) to purchase a milling machine, an alternative would be to mount it using brackets, which will simplify production, but will make the finished product less attractive.
- Drill, chisel, hammer.
- Paint brushes, cloth for removing traces of varnish and stain.
Tools for making a DIY bookcase.
What tools will be needed during the assembly process?
For self-assembly we will need the following tool:
- screwdriver with a bit for confirmation;
- confirmation drill;
- roulette;
- pencil;
- bit for screws.
We also need fasteners:
- confirmations
- self-tapping screws
- furniture corners
- thrust bearings
The bookcase, the assembly of which is described in this article, turned out to be quite spacious thanks to a well-thought-out design.
All the necessary details can be made based on the drawings that will be attached at the end of this instruction.
It is better to entrust cutting and edging the ends of parts to professionals and order it all at once from a furniture shop. After all, doing this at home is quite difficult. In principle, there is nothing complicated about gluing furniture edges, but this only applies to paper melamine edges. ABS edges can also be glued at home. But we would still recommend that you do the plastic edge gluing on a professional machine.
Potato box
The fastest way to make such a box from an old cabinet is suitable for large volumes of potato storage. Simply place the cabinet on the back wall, open the door and add the potatoes. If you need a much smaller size, then disassemble the old cabinet and assemble a regular box from the walls. To add beauty, you can design a lid with a lock or latch.
vote
Article rating
From the wall - into a stylish set
The owners of this brown “wall” took it to their dacha, and then decided to try their hand at remodeling it into modern furniture.
The chipboard covering was cracked and peeling off in places, so it was completely removed. The cabinet frames were dismantled and re-attached with Euroscrews. The parts were sanded, puttied and painted. The tabletops and legs were made from old boards, and the door layout was re-nailed.
Moldings were added to the front of the cabinet, making it unrecognizable. The result was three sets for different rooms: two bedside tables for the living room, a wardrobe for the bedroom and another set of three cabinets.
And here you can watch a detailed video about remaking a bookshelf from an old wall. The owners turned it into a TV stand.