How to make wings for a Ladybug costume?
To make the Ladybug costume more realistic, you need to make wings. To do this, follow these instructions:
- Use pliers to shape the wire into the desired shape and wrap it with electrical tape.
Frame
- Attach the frame of the wings to tulle and red corduroy. Cut out the pieces.
- Connect the tulle and corduroy pieces using pins. Sew all seams using a machine.
Stitching
- Place the formed parts onto the frame and sew. Sew suede circles to the wings.
Sew on the circles
- Make straps from elastic so that the wings are well attached to the back.
From cement
We will need a container (an old ball, cut in half). A mixture of cement and sand in a ratio of one to three and water is poured into it. The consistency should be creamy. The bottom is first lined with film or a bag. This will make it easier to remove the workpiece from the mold, which is better placed in a depression in the ground or a basin.
The workpiece will harden over several days. We will not get an absolutely flat surface from polyethylene.
It’s a little easier to make a ladybug out of clay by replacing the mosaic with simple coloring.
How to make a headband for a Ladybug costume?
A ladybug should have antennae. To complete the Ladybug costume, you need to take a hairband and decorate it like this:
- Make small horns from wire and attach them to the headband. Wrap sharp joints with electrical tape.
- Place the horns on the black suede and outline them with soap. Cut out all the elements by hand and sew the edges.
- Cut a strip of suede fabric half a meter long and 10 mm wide. Place it on the headband and mark the places where the horns will be. Make slits.
- Place the strip on the horns, secure, and sew with thread and a needle.
- Decorate the horns with tulle ribbons.
Mustache
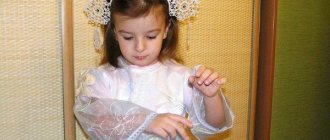
Costume
Fitting
Master class “Whiskers for bugs”
Publications on the topic:
Abstract of the educational activity "Dishes for insects" Topic: "Dishes for insects." Program content: Continue to arouse children's interest in activities with plasticine. Reinforce familiar techniques.
Master class Origami “Ladybug” For older children it is necessary to master the origami technique: it develops the accuracy of finger movements.
Master class “Stork” In order to make such a stork you will need: cotton wool, cotton pads, scissors, PVA glue. gouache, brush, glass of water, cardboard (blue.
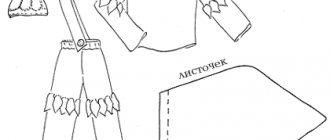
New Year's "Ladybug" costume for a girl with a skirt
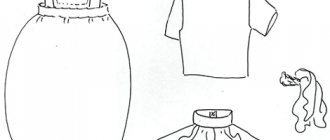
If you decide to make a Ladybug costume for a girl with a skirt, you will need:
- red tulle – 1x1.5 m;
- wire – 1.5 m;
- black fabric;
- insulating tape;
- threads, lighter, needle;
- satin ribbon in two shades – black and red. The size of the black tape is 1 cm by 3.5 m, and the red one is 5x10 cm;
- sushi stick, glue, chalk;
- hair bands in the shape of a ladybug;
- plastic card, pins, tape measure and pliers.
Step-by-step instruction:
- Cut 2 pieces of red mesh. Their optimal size is 40x20 cm. Fold each piece in half and draw a circle on them with a diameter of 20 cm.
- Sew the seams in a circle, leaving a margin of 2 cm.
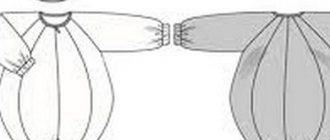
- Turn out the wings.
- Determine the circumference of the wing using a tape measure. Measure a distance from the wire that is 10 cm greater than the circumference of the wing. Bend the edge of the wire and insert it into the wing. Repeat the process with the second wing.
- Use the remaining ends of the wire to connect the 2 wings. Wrap sharp edges with electrical tape.
- Attach a black satin ribbon between the wings. Cover all imperfections with a red satin ribbon.
- Cut out circles from black fabric that will serve as spots on the wings.
Wings
- Start making a skirt. 2 pieces from red fabric To cut 2 m fabric, align the width of the opposite fold to the width of the plastic card. From the center of the ribbon, make counter pleats using a card.
- Secure each fold with pins.
- After attaching the folds, measure 100 cm of satin ribbon. Sew to the top of the skirt. Before doing this, connect the center of the skirt and the ribbon.
- To make the skirt more full, make 2 skirts of different colors.
- Finish the edges with ribbons. This element of the costume does not need to be worn over the head. Just tie a bow on your belt.
- Make black circles from fabric scraps and sew them onto the skirt.
Skirt
- To make a magic wand, apply glue to a sushi stick. Wrap it in red cloth. Decorate the top of the stick with rubber bands with ladybugs depicted on them.
- In addition to the suit, you will need black tights and dark socks.
Costume
The process of making the Ladybug costume is quite simple. Materials for the outfit will always be found in the house. If you need to purchase individual tools and fabrics, then their cost is not high. The total cost of purchasing parts will be much less than buying a ready-made suit. Making your own costume will not only delight your child, but it can also bring you two closer together. Ask your daughter to help create an outfit. She will definitely enjoy the process.
We will also tell you how to make a costume:
- "Night"
- Mice
- Carlson
- Puss in Boots
- Firefighter
- Bees
- Clown
- Crows
Savvy
Halloween is coming soon and a ladybug costume can be a completely original idea for a dress-up party.
We will need:
- Cardboard from boxes.
- Black and red paint and brush.
- 2 black wire brushes.
- Red ribbon or strips of red fabric.
- Black cloth or paper.
- Hot glue gun.
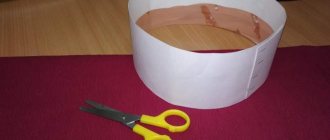
Cut two large circles from a cardboard box and cut them about 2/3 in the middle. After this, cut 12 small cardboard circles and 4 small circles for the rim. Cover large circles with red paint.
Paint the small circles black.
Cut two strips of red ribbon or fabric to hold the costume on your shoulders. For the side ties we used thin tape, but you could also use red tape or fabric. Cut short strips and secure them to the shoulders and sides with hot glue.
We glue the black circles onto red cardboard. 6 black circles for each red circle.
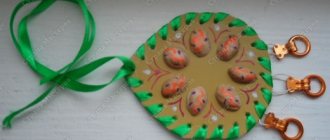
To create a headband-horns on your head, take a strip of black fabric or paper and make a headband according to the diameter of the child’s head. The horns themselves are made from two wire brushes, to which two small black circles are glued on both sides. We attach the horns to the headband with glue and the costume is ready.
The costume is held on the child by two shoulder ribbons and two more ribbons on the sides. Put on over the head like a poncho.
Hairpin in the shape of a dragonfly
This dragonfly, in the kanzashi style, is very easy to make with your own hands. In order to make such a master class (mk), we need the following material:
- pink ribbons;
- flame of a candle or lighter;
- metal hairpin;
- decorative material;
- textile glue.
The master class begins with cutting square ribbons. We make round petals from white material. Bend one square piece. Fold the pointed corners inward. We connect the resulting figure in the center. We cut off the excess. Cover the edges of the tape with fire. At the end of this part of the work, you should have 4 petals.
Now, let's move on to creating the body of our dragonfly. Make three pointed petals. They need to be connected using glue, as shown in the photo. We attach all the parts to a metal clip and connect them with glue. Our dragonfly is decorated with decorative material.
Look what a wonderful Kanzashi dragonfly we have created, you will see how easy it is to create such things with your own hands. If some elements are not clear to you, there is enough interesting video material on our portal.
Dragonfly
Another option for a hairpin is the kanzashi dragonfly. We will need:
- ribbons of a suitable shade;
- lighter or candle;
- base for hairpin;
- beads;
- glue.
The master class begins, as usual, with cutting satin ribbons into squares. You need to make round petals from white ribbons. Next, the square blank is bent obliquely. The next step is to wrap the sharp corners of the resulting triangular figure in the middle of the right corner. We take the resulting element and connect it along the central line. We delete what is unnecessary. The cut areas must be scorched with a candle or lighter. As a result, you should get a round petal, from which the wings of the kanzashi dragonfly will be formed. In total, you need to make four petals for the wings.
Next, the dragonfly must acquire a body. To create the body, we create a sharp-shaped petal. The square segment is folded in half several times. The corner is cut and singed with a lighter. This way we get a part for the dragonfly body. In total, we create three blanks. The round petals are connected to each other using glue. In the photo you can see this process. Then, using glue, attach the dragonfly wings to the base of the clip. Sharp-shaped elements are placed on top, thus creating the body of the dragonfly and covering the area where the rounded petals meet. All that remains is to decorate the dragonfly with beads with your own hands. This is the kind of wonderful dragonfly you should get.