If you often have to drill something, you probably have a whole set of tools on hand. For some, they are packaged in different boxes, for example, 1-5 millimeters, 5.1-8 millimeters, 8.1-12 millimeters. At the same time, the instruments are, as they say, “in bulk”, and not in single copies. Of course, this interval is very conditional, however, such storage is not entirely convenient.
Here's the thing: let's say you needed a drill with a diameter of 3.8 millimeters. To find it, you need to shake up the entire box of the first interval. And it’s good if this parameter is marked on the shank. If you don't have one, you'll have to use a caliper. All this takes quite a lot of time. To solve the problem, you need to have a drill organizer that keeps your most commonly used items within easy reach.
Basic storage rules
Drills are cutting tools. Their main task is to cut holes on various types of surfaces . Most often, drills are made of steel or other durable alloys. The determining factors for storing drills are the material of manufacture and the method of heat treatment of the products. However, signs of improper storage of tools most often include debris sticking to the product, broken blades, and more.
The corners are the weak point of the drill - they are the first, unlike all other parts of the tool, to break off. Storage in separate tanks also means that the possibility of various injuries in the workplace is significantly reduced. It is also worth noting that one of the significant advantages of various devices for storing drills is the ability to easily carry them. This becomes especially important when moving.
When the tools are laid out in a certain order, the speed of work also increases.
This is interesting: How to make a pipe bender with your own hands - drawings, photos and videos
Manufacturing instructions
Making a stand for an angle grinder with your own hands
The first thing you need to do is take care of a high-quality drawing. As mentioned above, finding it on the Internet will not be difficult.
Once the drawing is found, you can begin to work. The first step is to build a stand. It will serve as the basis for the item being manufactured.
To make it, you need to take a previously prepared wooden board or metal sheet, and then cut out a plate of your choice. It is not recommended to make it too big or too small.
The next step is to build a tripod stand. It is made from the same material as the stand. Here the dimensions need to be selected based on the size of the drill.
You need to attach the support to the frame, and attach the base to it. Using a beam you need to strengthen the manufactured device. The guides must already be welded onto the finished structure.
The last step is to make a mechanism that will allow you to move. To do this, you need to take the lever-handle and place it between the plates that are screwed to the frame. The springs are placed in the hollow of the guides.
If you followed all the steps in the instructions exactly, then you will have a wonderful DIY drill stand. As mentioned earlier, the design is simple to manufacture and its construction does not take much time.
Types of devices
The main purpose of cases, boxes, cases and other holders for drills is to conditionally isolate drills from other tools, and sometimes from each other, so that they do not rub against each other, which, as a rule, leads to dulling of the tools. The most famous and common containers for storing drill bits are these.
- Pencil cases. They are a convenient solution for storing drill bits in cars or when moving. Doesn't require much space. You can also include cases (soft pencil cases) in this category. The drill case can be used when hiking or transporting a small number of tools. There are also special portable bags for storing and transporting drills.
- Various wooden stands. Most often they are a three-layer structure. Holes-cells are drilled in the top two layers. Drills are inserted into them. The bottom layer plays the role of the bottom. The cells have different diameters. There is a wide variety of wooden coasters. They are durable. It is important to pay attention to the surface finish of the wood if you are making your own wooden stand. Otherwise, the service life of the wooden product will be significantly reduced.
- Plexiglas boxes . They look like pencil cases, but, as is obvious, they are only transparent. The main thing when buying or making it yourself is to check the strength of the lock.
- Organizers. Usually they are two or three parallel plates with holes of different sizes. The dimensions of the holes must correspond to the cross-sections of the tools that will be stored in them. The plates can be held together by one wall in the form of the same plate. This also includes plastic boxes. Sometimes they can be several cells into which drills can be inserted in a vertical position. In this case, the tools will not be isolated from each other, but will be sorted by size or frequency of use.
- Hanging structures. They are perhaps the most modern of all the species described here. However, the method of attachment to the surface and the structure of the surface must be taken into account. It is obvious that such holders are best secured by screwing them to the surface using nails. If the surface of the walls is covered with tiles or other similar materials, then the method of fastening must be changed. And also, especially when installing it yourself, you must take into account the load-bearing capacity of the structure. Some hanging structures will only need to be secured to the wall surface with epoxy glue. The very basis of such structures comes in two types - solid and perforated.
The latter are considered a more convenient and practical option, since, thanks to the holes located on the perforated panel, it is always possible to remove or attach new fasteners.
- Tool cabinets. They are distinguished by large dimensions. There are several subtypes - they can be mounted, stationary (similar to a regular chest of drawers or drawers), mobile (chest of drawers on wheels) and others. They represent the safest container for storing drill bits. There are combined models - hanging cabinets, which are a panel with shelves attached to it.
- Tubes . They are suitable for storing any long and thin items and tools. Most often they are stored together with similar tubes on large shelves. Tubes are used, as a rule, only when there is a shortage of free space. Tubes can be made of metal and plastic.
It is worth clarifying that almost all, and not just the last of the varieties mentioned here, can be either portable or stationary.
All currently produced models can be equipped with various parts - magnetic locks, clasps, rollers, as well as other various moving elements that make use more convenient.
Device bed
Do-it-yourself stand for a drill: how to make a stand and tips for choosing a device for drills (125 photos and videos)
The frame for the drilling device from the drill is made of metal (10 mm thick) or wooden (more than 20 mm thick) sheet. The massiveness of the bed that you will use as a base directly depends on the power of the drill used. The dimensions of the frame for a drill machine depend on the specifics of the work performed on such equipment. You can use the following recommendations for choosing frame dimensions:
- machines for vertical drilling - 500x500 mm;
- equipment for performing various technological operations - 1000x500 mm.
The metal frame is a thick plate with welded corners
The frame, made of metal or wooden sheets, is a very simple structure. A stand is placed vertically on it, the stable position of which is ensured by a special support. Such structural elements can be secured to each other using screw connections.
What about other materials?
To create such designs, you need to take into account the required sharpening angle. The greater the sharpening angle, the more ribs the nut should have. To create such a device, you can use, for example, an octagonal nut.
True, in this case, you need to take into account that the sharpening angle will be equal to one hundred and thirty-five degrees, that is, such a drill is suitable for wood or granite.
In order to sharpen a drill for plastic or soft alloys, you need to look for a square washer. But due to the fact that there are almost none, you can use a square block.
However, then you will need to take into account that it will be problematic to clamp the drill, so it is better to bypass an extra couple of hardware stores.
What is the best way to store it?
One of the main factors in this matter is the number of drills. If there are a large number of tools, then a cabinet would be the best option. If you have several drills at your disposal, you can store them in a small organizer (the cheapest, most convenient and accessible option). An excellent solution for a very large number of tools can be a multi-stage rotating organizer, where each stage will be made in the shape of a circle with holes for drills. The easiest way is to build one yourself.
If you plan to store drills along with other tools, then it is also recommended to purchase or make a cabinet yourself. The main thing in this matter is to think through and choose the internal design of the cabinet that suits you. A convenient option might be to combine two types of drill storage tanks. Such, for example, as a small organizer with holes in a cassette case, a wooden drawer and a pencil case with horizontal recesses for each drill and other options.
One of the not entirely rational, but quite popular “devices” for storing such tools are various jars - glass, canned food, coffee and others. This storage method is considered outdated, as well as inconvenient and unsafe. For those who don't want to bother with a stand, the best solution is a portable suitcase, which is usually sold along with a set of drills.
This is interesting: Wood cutters for drills: types and parameters
Additional equipment
Independent design of the installation allows you to provide additional structural elements that expand the functionality of the product and simplify the execution of technological operations. You can add a rotary plate, a vertical level, a coordinate table, an electric drive and much more to your homemade product.
The rotary plate allows you to make holes at an angle. To do this, holes are drilled in an arc on the frame at common angles. The drill is secured with pins in the working position. The coordinate table is used for milling surfaces and turning grooves. It consists of two mutually perpendicular screw jacks welded together.
Originally posted 2018-07-04 07:49:32.
Why?
The essence of our homemade tool for sharpening drills is that we use the fact that the angle of the edge of the hexagonal nut is exactly what is needed to sharpen a drill for metal.
The difference in the sizes of the cut triangles makes it possible to obtain a cone-like end of the drill.
A prerequisite is that after sharpening one side of the drill, you only need to turn the drill inside the structure.
The structure itself must be left in place. If you just sharpen the other side without turning the drill, the end will be shaped like the bottom of a boat and it will be very awkward to drill with.
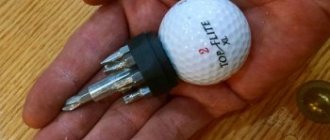
Communities › Garage Affairs › Blog › Small conveniences (drill organizer)
I continue to equip the garage with small amenities.
As a rule, a lot of all kinds of tools and devices always accumulate in drawers and on shelves. Recent work involved a large number of holes in the metal. And I put everything into different boxes. Finding the right drill sometimes takes quite a lot of time. And so, wandering around the Internet, I discovered an interesting organizer for drills. And when I found out where they made it, I went and bought it. Made well and, most importantly, very comfortable. Now you need to find a drill in a couple of seconds
What is it for?
The stand will help you perform various technological operations.
A device you make yourself can cost less than its Chinese counterparts and not be of inferior quality.
The drill stand is used as a support element during work; it is necessary when performing a number of tasks, when drilling a hole in a strictly specified angle, when it is difficult to hold the drill suspended.
Doing the work manually leads to:
- to towing the drill and its breakage;
- when creating many identical holes in a blank;
- when drilling thick material.
Benefits of use
The use of a resistant device brings additional improvements to the drilling process:
- the workpiece is fixed on the machine, which simplifies drilling when using hand tools;
- a home-made stand fits exactly the tool being used;
- the stand is created for a specific type of work, this further improves the process of its implementation;
- the home version of the device may cost less than ready-made stands;
- in the manufacture of the device it is possible to use scrap materials - parts of old furniture, equipment;
- the ability to expand the functional parameters of the drilling process, for example, make the drill rotate 180 when working.
Creating a rack allows you to get a functional device for a specific type of work.
Adviсe
Traditionally, the most convenient option is a wooden stand hung on the wall in the workshop. This way you can not only store tools, but also place them within easy reach. You also need to carefully consider the number and size of holes if you are going to use an organizer for storage and even plan to make it yourself.
A universal holder that takes up little space and can also fit into any room is a hinged design. The magnetic holder is also convenient. A thin magnetic strip is installed along one long part of the board. You can store not only drills, but also other tools on it. This design will be relatively safe for children, since it can be hung and secured at the required height. It can also be a convenient option for the garage, since the tools will be accessible.
Repair professionals recommend that you don't settle on just one drill bit storage option, but try several to see what suits you best.
To learn how to make a drill organizer with your own hands, see the following video.
Making a simple homemade organizer for drills
There are factory-made and home-made samples of organizers for drills.
Factory-made products may not suit you for various aspects or reasons, so you can independently modify them to suit your needs.
For example, add special plastic inserts to secure the tool in the compartment/groove of the organizer. Also, instead of plastic inserts, you can use a piece of a strip of soft rubber or several layers of electrical tape.
Accuracy in this process is not very important, because if you miss by a fraction of a millimeter, then it’s okay, because rubber, like electrical tape, tends to shrink under load.
And now, how to make an organizer for drills for a workshop or garage with your own hands.
To make a stand for drills, you will need a piece of board, timber, or chipboard.
The dimensions of your material should be selected based on the number of drills that the stand will need to accommodate and the following parameters of the slots for the drills:
- The depth of each groove is approximately 2.5 centimeters
- The distance between the grooves is at least 1 centimeter
These parameters are not strict, so they can be changed if it is more convenient for the user.
After selecting the material, holes are drilled in it that will serve as nests for drills.
The holes can be located in one/two/several rows or in a checkerboard pattern.
Next, under each socket, for convenience, you should mark the size of the tool.
Doing this on a wooden surface will not be problematic.
Afterwards, metal corners are installed to the rear edges of the stand using self-tapping screws, which are screwed into pre-drilled holes.
Source ad-cd.net
Finally, the stand is installed on the wall.
If desired, an additional shelf can be added to this design, which will increase the number of transportable elements and make the design “two-story.”
And if you add handles and a lid to the design, you can get a portable wooden organizer for drills.
Source ytimg.com
I recommend the following video, in which the author makes a homemade stand for drills and explains the process in detail:
How to properly organize drill storage
To store drills, you can come up with an organizer of your own design or use options that have already been tested by other home craftsmen. The main thing is that such a device provides convenient storage of drills and allows you to quickly find the required tool at any time.
Organizers for storing drill bits can be made from any available materials. These can be scraps of wooden blocks, parts from old furniture and much more.
This drill organizer is made from scrap aluminum profiles.
The stand for drills must be made with holes. The distance between the holes, as well as their diameter, are selected depending on the cross-section of the tool. The depth of the holes is usually within 25 mm. To make it easy to find drill bits in a homemade organizer, you can make a sticker below each storage hole on which the diameter of the tool will be written.
The shape and dimensions of a homemade organizer for storing drills can be any - it all depends on the preferences of a particular master.
A simple stand for drills made from planks
Made of wood
For simple hole drilling operations, wooden stands are often used.
They are easy to make yourself with a minimum set of tools. A slab with a thickness of 20 mm or more is used as the base of the structure, additionally reinforced with plywood, which will provide a smooth working surface. A vertical stand is a board 20 cm wide and up to 70 cm long. The carriage on which the furniture guides are attached is sized according to the size of the electric drill. The disadvantage of using wooden racks is the tendency of the material to deform under the influence of moisture, and lower strength in comparison with metal analogues. At the same time, this option is more affordable in terms of investment cost and is easier to process in a private workshop. It will not require the involvement of additional specialists in the manufacture of structural parts.
Wooden drill stand
Classification and purpose
The organizer is designed to conveniently store tools of specified sizes in one place and in a specific order, which ensures quick access and maximum efficient use.
There are many design options, the main ones being stationary and portable.
Stationary fixtures can be in the form of drill boxes built into the workbench, or wall-mounted elements. Their advantage is their large holding volume, that is, they can accommodate products of various diameters and types.
Portable options are also available in the form of boxes, but more compact ones, cases, and various holders. They are easy to transport, do not take up much space, but can accommodate a limited number of tools. Therefore, you need to plan in advance the types and volumes of work to be performed in order to take with you only the most necessary things.
The most compact in the portable category are cases and cases for drills. The first are folding “book” type products, made of soft polymers, artificial leather or genuine leather with pocket holders stitched or glued inside. The diameter of the instruments in this case does not exceed 3 millimeters.
The second type of products are, as a rule, cylindrical containers that can accommodate 15 - 20 drills of various diameters.
For convenience, on the surfaces of both types you can stick paper with the listed diameters and types of tools (for example, like this: 0.8; 1.3; 2.7; 3.2; 3.6 - for metal).
The best option is a factory-made drill box, where the grooves for the parts are cast and marked.
You can also purchase or make your own stand and box for drills. We will tell you how this is done below.
The problem and why such a stand is needed
Specialists in various fields often need to drill something in their work.
To do this, they have the necessary tools, in particular, a drill and a set of drills for drilling holes of different diameters.
At the same time, tools and drills lie in bulk.
Such storage is very inconvenient, so various organizers have been invented for carrying and storing drills and tools.
These organizers help you quickly find the required element (drill) of a certain diameter, and thanks to them, drills are stored safely and will not break or get lost.
If your tools and drills are lying in bulk, then you will need to check the entire box in order to find it.
If you have an organizer for drills, then each drill will have its own place and you can easily find a drill of the diameter you need from the set.