Organic farming without the use of mineral chemical fertilizers is becoming increasingly popular. And the best alternative to chemicals is compost - a substance obtained from the decomposition of various organic wastes during their processing by worms, bacteria and fungi. To obtain such natural fertilizer, all waste is collected in one place - in a compost heap. In order for it to ripen quickly and correctly, you need to know how to make a compost heap at your dacha with your own hands and what is needed for the decomposition processes in it to proceed correctly.
Large compost heap Source vipsad.com
Benefits of using a plastic composting bin
If a wooden composting box is equipped on the site, the bottom will sooner or later rot under the influence of the same bacteria. If there is no bottom, then the nutrients will go into the soil under the box irretrievably. It is much more economical if the composter has a bottom and is resistant to microorganisms.
You can make your own barrel composter aerobic and anaerobic. In the first case, you need to organize regular air access to plant debris. This compost matures faster. If you use accelerators - bacterial preparations, then you can get fertilizer in 1 - 1.5 months.
Video: Compost barrels
For anaerobic fertilization, the compost bin must be sealed. It is tightly closed or dug into the ground. The remains take longer to rot, but the fertilizer is more concentrated, since all the nutrients remain inside. Such compost is not used for seedlings in its pure form, but is always mixed with soil.
It is easier to set up a compost pit from a barrel than to make a storage facility from concrete, although concrete is also a very good material for a stationary composter. To immerse a barrel in the ground, it is enough to dig a hole corresponding to the size of the container.
You can wrap the walls and bottom with mineral wool or other heat-retaining material. In such a pit it will be possible to make fertilizer even in winter. The hatch will be a plastic cover, which is sold as a set.
How to set up a composter from a barrel
There are many ways to prepare compost in a barrel at your dacha. The simplest one is to leave it in the garden without digging it into the ground.
To make a horizontal compost barrel, you need some tools and additional materials - wood or metal pipes. The first step is to weld or knock down a frame that will hold a barrel filled with compost raw materials.
This could be something like a frame with welded support pipes or wooden blocks. A barrel will be attached to them, with a metal pipe running through the center. To avoid damaging the plastic, a PVC pipe is placed over the metal - it is smooth and durable.
How to prepare a barrel:
- Make a hole into which the raw materials will be placed. To do this, cut out a rectangular piece in the wall. Using metal canopies on one side, a piece of plastic becomes a door. On the other hand, it is necessary to provide a latch so that the ingredients do not fall out while scrolling.
- Holes are made on both sides - in the bottom and in the lid - to thread the pipe through.
- The lid closes tightly and the barrel is placed on the pipe, securing it to the frame. You can make a handle for convenience, but many people do without it.
Summer residents attach wheels to the base of the frame and transport the composter for the winter to a warm place - a barn or storage room.
Types of composts
In garden centers and other hardware stores you can find plastic composters of various shapes and sizes (what they offer us there: boxes, “suitcases,” tanks, “hives,” “flying saucers.”). Volume from one barrel (150-200 l) and above (400-900 l). Such an organic storage tank is installed in the garden. With their help, you can prepare a wide variety of types of compost, since very favorable conditions are created in a plastic container for reheating and processing any type of waste.
Plastic can be considered the best material for processing organic matter. It is neutral (steel quickly corrodes from organic compounds), lightweight, durable (unlike boards, which rot underneath) and relatively cheap.
A large plastic composter is reliable in maintaining the conditions for compost maturation due to its size. It “breathes” quite well, so special slots in the walls, which are found in some models, are not necessary.
Any other household plastic container is also used for composting: boxes, buckets from building materials, leaky basins. If necessary, plastic containers are immediately interchangeable; they can be temporarily removed from fertilizer production for other garden needs (sheltering plants on cold nights, heating water in the sun for irrigation, growing seedlings...). For this reason, one cannot give unconditional preference to large containers such as 150-200 liter plastic barrels. Such barrels are, of course, very practical, very productive, but in addition to them, a “park” of smaller buckets and containers of 50-60 liters or 10-20 liters would not hurt. Organic fertilizing at the height of the season is never too much!
Today, fruit sellers use all sorts of disposable plastic boxes with lattice bottoms, which they often throw away after emptying. These small boxes are suitable for a multi-tier composter, since they have a lattice bottom and are joined to each other with special grooves. So, they are used for vermicompost: another box with fresh food for earthworms is delivered above the lower boxes with food that has turned into humus. The boxes can also be used for regular compost, since the grates will create layers of air between the layers - this is very favorable for compost, which is periodically moistened with a watering can.
The simplest plastic composter is a plastic garbage bag or a regular grocery bag. Some gardeners use this “container”. The bag is filled with wet grass or leaves, tied and left somewhere in the shade for several months, and the decomposed humus substance is removed. It is important that the packages do not cake during storage.
Preparation and laying of raw materials
Before you make compost in a barrel, you need to prepare the raw materials. It should be a mixture of nitrogen and carbon containing components. At the same time, 4 times less nitrogen is added.
Nitrogen-containing products include all green components and manure. Carbon materials include straw, cardboard, dry leaves, sawdust, bark, pruned branches of trees and shrubs.
Each ingredient must be sprinkled with a five-centimeter layer of soil,
so that soil bacteria enter the compost and begin to multiply. If you use biodestructors, then it is not necessary to add soil. Bacterial preparations can be purchased at the store or prepared with your own hands from fermented milk products and yeast.
After laying, the compost is kept for 5–6 days.
with the lid open and then turned over.
When shoveling on the bed, the lid is closed, then opened again to allow oxygen access. Subsequently, the compost is turned every 3 to 4 days.
This speeds up its maturation.
To get the finished fertilizer, place a bucket, wheelbarrow or other container under the lid and pour out the required amount.
Did you like the article?
Share with friends: Any plot of land needs periodic fertilization. What could be better than high-quality compost? Buying it and then bringing it to the site is a long and expensive task. Why not produce this valuable fertilizer directly on your own land, since all the conditions have been created for this? During the warm season, a lot of organic and plant waste accumulates on the site, which must be disposed of. It turns out that you can combine cleaning an area of waste and producing compost from it. Let's look at how you can build a compost pit with your own hands, what is needed for this, and how to avoid basic mistakes in the production of fertilizers.
A compost bed on a plot of land is intended for storing all kinds of plant and organic residues, waste, and surplus of various products. Layered in layers, these components gradually decompose, turning into high-quality fertilizer. The question arises: how to build a compost pit with your own hands so that it produces fertilizer within a season? To do this, you need to make some effort to help the compost ripen faster.
With proper care, you can get ready-made compost in just 3 months. If you do not pay special attention to the pit, the process of waste decomposition will continue for about two years.
What to make it from?
A composter is a special structure that is designed for storing and further processing organic waste from a personal plot. As a rule, grass, branches, leaves and other plants are sent to compost.
When stored in a composter for a long time, they rot and the resulting product is a completely natural, useful fertilizer, which is suitable not only for application to any type of soil, but also for any plants.
Anyone can build such a device at home. There is no need to carry out any complex manipulations, and it can be made from scrap materials.
Most often, people build a composter with their own hands from:
- bricks;
- slate;
- boards;
- tiles;
- pieces of mesh and metal profiles;
- old wooden or metal pallets.
You can also convert a Eurocube into a compost bin, or simply dig a hole and concrete it.
In principle, all available materials can be used to make this device. However, it is preferable to choose those that will allow air to pass inside. It is oxygen that is necessary in order to obtain high-quality and truly useful organic fertilizer at the exit from the composter.
Requirements for a compost pit
For normal and rapid maturation of compost, it needs warmth, oxygen and moisture. How to properly make a compost pit so that its contents turn into high-quality fertilizer, and the pile itself does not harm the plants and people on the site? To do this, you should familiarize yourself with some of the requirements for such structures:
- The compost heap should mostly rise above the soil level. Thanks to this, the heap warms up better and makes it easier to loosen and water. It is recommended to deepen the hole by about 50 cm, leaving barriers above the soil surface of about 1 m. The ideal width of the structure is 1.5 m, and its length is 2 m;
- If there is a source of drinking water on the site, for example, a well, borehole or spring, then the distance from it to the pit should not be less than 25 m;
- It is advisable to place the pit in a place that will be remote from the house or gazebo. In this case, the unpleasant odor that may emanate from the compost heap will not annoy the owners of the site;
- It is advisable to place the pit in partial shade so that it is not constantly in the sun. This will help it dry out;
- How to make a compost pit so that the runoff from it does not flow through the soil into a source of clean water? To do this, if the site has a slope, it is enough to place the hole below the source;
- You cannot place a hole under fruit trees, as this can lead to their death;
- The dimensions of the pit are selected taking into account the amount of plant debris and waste that is available at the dacha and will remain in the pit for two years;
- Options for making a compost pit with your own hands should take into account that it is recommended to choose the height of the fences so that it is convenient to loosen and collect compost.
Tip: The bottom of the pit should not be covered with slate, metal, rubber or film. They will not allow moisture to rise up from the soil, as a result of which the compost will constantly dry out. The bottom must certainly be earthen. But the walls can be covered with any material.
Bottom line
If at your dacha an iron barrel has another use that has eluded us, take a photo and write about it. Maybe your idea will inspire other gardeners to get creative and become a classic of the garden genre!
In summer cottages, a compost heap is an indispensable attribute. After all, compost is an organic fertilizer of exceptional quality that enriches the soil with humus. Compost can partially or completely replace expensive manure, mineral fertilizers, or specially imported fertile soil. In addition, by collecting garbage and organic waste for composting, we simply clean up our summer cottage, and the area around it.
A compost heap or containers for composting waste are usually placed in a fairly secluded place on the site so that they are not conspicuous and do not spoil the view. However, they should always be, as they say, at hand. In the “classical” implementation of composting, it is necessary to create three compost heaps (or three compost bins): in one bin the process of storing waste is underway, in the other the compost is ripening, in the third the finished fertilizer is waiting to be transported to the beds. Regarding the size of the compost heap, most authors agree that its width should be 1.5 m; height - 1.0...1.2 m; length - up to 3-4 m
.
These are the dimensions given in all sorts of reference books, and for many years they were considered the minimum necessary to ensure a sufficiently high temperature and stable humidity for the normal course of the composting process. Using the same classical technology, it was recommended to shovel the contents of the piles annually to aerate the ripening compost, that is, to speed up the process of waste decomposition. The task, frankly, is not an easy one.However, the technology for composting in a garden plot has been constantly improved (and is being improved), so that the composting process has been speeded up by 2…3 times. So, to maintain moisture in the compost heap and to increase its temperature, the compost began to be covered with plastic film with holes to provide air access. To speed up composting, various accelerators of this process have been developed, for example, the drug “Tamir”. And the composition of the organic and other components of the compost heap being laid is easy to select in such a way that the composting process in it will significantly speed up. In other words, today it is no longer necessary to follow the rather strict recommendations developed back in the 20th century. So in our time, a compost heap can be made very small or waste can be stored for this purpose in a compact container with a capacity of only 1 m 3, built, for example, from boards.
However, remembering the cherished phrase - “laziness is the engine of progress,” we will not build anything. Let's just take an old metal barrel without a bottom and modify it a little. Firstly, to ensure access of air to the composting mass in the lower part of the barrel along its perimeter, we will make ten two or three holes, which, for example, we will drill with a drill with a diameter of 8...10 mm
or punch it with some kind of punch (Fig. 1).
We will place the holes at a height of 20...30 cm
from the base of the barrel. We do not provide any insulating gaskets between the barrel and the ground; microbes and moisture must circulate freely in both directions. Secondly, we paint the outside of the barrel with dark paint, due to which the walls of the barrel will heat up more strongly under the sun, providing an increased temperature inside the barrel, which, of course, will speed up the composting process.Cooking process; compost in such barrels is very convenient. We place 2...3 such compost barrels around the site, placing them in those places where waste accumulates most quickly - near the summer kitchen (food waste), near the beds (weeds). To speed up the composting process, the individual components of the future compost should be laid in a certain sequence, forming layers of a certain thickness.
So, first, green plants (or carbon-rich substances) are placed in a barrel, making a layer of them 15...20 cm thick. Then they put 5-
a centimeter layer of manure (or nitrogen-rich substances). Next, lime, superphosphate or ash is poured into the barrel (layer - 1...2 mm), after which everything is covered with a centimeter layer of earth. So we fill the barrel to the top, again laying down the layers of components in the mentioned sequence - weeds, manure, ash and earth. Cover the filled barrel with a piece of polyethylene film with holes, which is secured to the barrel with twine to prevent it from being blown away by the wind. And so that the prepared compost does not dry out, it is watered with water. Usually this watering is combined with watering the beds. When moistening the contents of the barrel, the plastic film is temporarily removed from it and a thin stream of water is directed into the barrel. Naturally, it is difficult to fill a barrel without a bottom with water, but you should not over-wet the compost mass. A mass corresponding in moisture content to a wrung out sponge is considered normal. If there are ants in the barrel, it means it has dried out and the composting process has been interrupted.
To “automatically” maintain the specified humidity in the striker, plant zucchini, pumpkin, and cucumber in the barrel. In this case, plastic film is no longer needed. Watering the mentioned plants ensures the required moisture content of the composted mass. The only difficulty with this option is the need to immediately fill the barrel to the top with layers of compost.
Experience has shown that in this design of a compost container - an old barrel - the compost preparation process is accelerated, so there is no need to wait 3 years, as in the classic version. There is no need to shovel the compost either. In one summer you can get several hundred kg
excellent fertilizer.
Rice. 1.
Composting in an iron barrel: 1- hole in the wall of the barrel; 2 - green mass; 3- manure; 4- ash; 5- earth; 6-polyethylene.
Gusev V. An old barrel to replace a compost heap. // Almanac “Do it yourself”. - 2004, No. 3.
A leaky metal barrel makes a great mobile place for making compost. Compost is usually prepared in special containers, boxes or piles. The preparation time ranges from two to three months to two years, depending on the volume of contents and the number of times it is handled.
To create our own unique place and method of preparing compost, we need a large diameter pipe. Using a hammer and chisel (an ax is better instead of a chisel), we cut out both bottoms in the leaky barrel. Now the pipe is ready.
For good country houses or country houses you will always need to buy new furniture. Furniture for the dacha is bought in the same place where kitchen tables are sold. After all, the kitchen table is a very important element of the interior of a country house. By choosing high-quality furniture for the kitchen, you are taking care of your wife, who can easily prepare you many delicious and healthy dinners.
Using a grinder (angle grinder), we make two cuts into two unequal parts, put them “on the butt” and connect them using a strong synthetic rope, but wire is more reliable. The result is a new, easily detachable pipe. This is a container for compost. It is necessary to make several holes - “pockets” for air access.
They put there: cut branches, mown weeds and grass, turf, collected leaves, sawdust, paper waste, rags, and so on. The process of compost formation goes faster if the container is covered with a lid, and to increase the temperature inside, it is necessary to paint it in a dark color. And also periodically water the contents with a solution of ammonium nitrate (a matchbox in a bucket of water) and use organic waste: leftovers from the dinner table, waste from fish during processing, and so on, but this is provided that your unique container is tightly closed.
What can and cannot be thrown into a compost bin?
A self-built compost pit will justify its purpose if the following types of waste are placed in it:
- leaves, bark, needles, chopped branches and roots;
- weeded and mowed weeds, grass;
- bird droppings and rotted biennial manure;
- vegetables, fruits and berries, including peelings;
- leftover coffee, tea;
- hay, sawdust, shavings, straw;
- ash from burning wood;
- paper, paper bags, cardboard, napkins.
Advice: If a thick layer of fresh grass is placed in a hole, then the process of its decomposition may take six months to a year. In this case, cover the grass with soil.
The following cannot be placed in a hole:
- inorganic products that do not decompose. These are rubber, plastic bags, plastic, metal, synthetic products;
- feces of pets, as they may contain helminth eggs;
- bones;
- tops of tomatoes and potatoes, as they are often infected with late blight;
- chemically treated plants;
- ripened weed seeds;
- thick branches that take a long time to rot.
Possible manufacturing options
A do-it-yourself compost heap can be made in several versions. Let's list them all, indicating the features of each of them.
An ordinary pile in which waste is placed
- Select a place on the site where the compost pile will be located;
- As various wastes accumulate, they are placed in the selected location. In this case, it is advisable to lay organic matter in layers. Alternate food waste with grass and manure;
- When the height of the pile reaches 1 meter, make several depressions in it, into which pour a special compost liquid. This will speed up the ripening of the compost;
- With regular loosening and watering, the compost will mature within 3 months.
This is an ideal option for those who want to get by with minimal effort but still get some compost. It is advisable to form several such heaps, each of which will rot gradually.
Simple pit
A simple do-it-yourself compost pit at your dacha will be provided by an ordinary pit dug in the chosen location:
- The depth of the pit should be shallow, which will ensure easier care of its contents. It's better to make it wider;
- Branches, hay, and tree bark are placed at the bottom of the pit;
- Next come layers of food and vegetable waste;
- Since the temperature in the pit is not very high, it is advisable to cover it with film.
This is the least successful way to set up a compost bin. Mixing its contents will require more effort, and the pit will warm up less. The advantages of such a pit are its small area and simplicity of design.
Box made of wood or other material
How to make a compost pit with your own hands so that it is convenient and inexpensive? Use boards, bars, slate, sheets of metal, etc. for this.
The order of arrangement will be as follows:
- The top layer of soil about 40 cm thick is removed from the soil;
- Pegs are driven in around the perimeter of the pit;
- A fence is installed around the pit. It can be wooden (boards, pallets, panels, bars) or any other. It is allowed to use any material: flat or corrugated slate, polycarbonate, metal sheets;
- The height of the fence should not exceed 1 m. This is necessary for the convenience of mixing the compost;
- The top of such a structure is covered with plywood or film.
This design allows the compost to warm up well, so it is considered optimal for use on land.
There is an original version of a wooden box. Its lower edges do not reach the soil surface by 25-30 cm. That is, boards or other material are attached at a certain distance from the ground. In the lower part of such a box, the compost matures faster, since it was laid earlier. As the compost matures, it is removed and the pile settles downwards. Such a pile practically does not need to be loosened. There is always the opportunity to get some ready-made compost.
Concreted pit
If you decide to build a durable structure that will last for decades, then use the advice on how to make a compost heap in a concrete pit.
The structure is set up like this:
- the site for future construction is marked out (approximately 2x3 meters);
- soil is selected at 60-80 cm;
- formwork about 10 cm thick is constructed around the perimeter of the future building;
- concrete solution is mixed;
- concrete is poured into the formwork;
- after the concrete hardens, the formwork is removed;
- waste is placed in layers in a concrete pit;
- From above, the pit is covered with wooden shields or covered with film.
This is the most expensive method of constructing a compost pit in terms of effort and investment. Such a structure should be placed where the pile will definitely not create any difficulties, since it will be impossible to move it to another place.
Tip: It is recommended to divide the compost facility into at least 2 sections. While you put fresh waste collected in the current season into one of them, last year’s compost will decompose in the second section.
It should also be noted that there are options for organizing a compost pit from a barrel or special plastic containers for compost, but you will additionally need to use drugs that accelerate waste processing, or add Californian worms.
Composter using Finnish technology
It is necessary to say a few words about containers made using the so-called Finnish technology. Today they are presented in two types.
The first one is very similar to the container, the creation of which was described above. The difference lies in the fact that it always consists of three compartments - raw materials - semi-finished raw materials - finished compost. Plants are moved from compartment to compartment once a year. Filling always starts only from the first box. In just three years, summer residents and gardeners will receive an uninterrupted operating conveyor for the production of organic fertilizer. Another difference lies in the fact that the very first compartment is made of either mesh or slate, while the remaining two must be wooden and have a cushion of turf about 5 cm thick at the bottom.
The second option is innovative for many domestic gardeners. Essentially, these are two connected containers with aeration tubes that allow you to compost the waste. Its second name is a compost pit, similar to a Finnish dry closet. Here, the basis for creating compost is human waste. After visiting the dry closet, it is necessary to pour a layer of peat or sawdust of a certain thickness into the container. When it is completely filled, it is moved to the side, and a second tank is placed in its place.
The compost from the first container is ready to use. All types of human food waste can also be used as raw materials for obtaining fertilizer.
- The first version of a composter using Finnish technology is suitable for those who have large garden plots and want to not only keep them clean, but also do it with further benefit.
- The second type of Finnish composter will be an ideal option for those who have little land, and therefore, limited raw materials for creating compost. But at the same time, the soil must be approved, and there is a lot of food waste available.
Installation of a “compost barrel”
In the barrel in the middle of the side, I used a jigsaw to cut out a 36x28 cm window for loading raw materials. From the inside, I screwed a strip of metal to one of the long sides (photo 1) - this is a stopper so that the door does not fall inside the container.
The cut piece was secured to the curtains (opposite the metal strip), a handle was attached to it (photo 2) I added two latches to hold the lid closed. I used a drill to drill chains of holes d 12 mm across the entire surface of the container at a distance of 10 cm from each other. In approximately half of the holes made, I inserted M 12 bolts 10 cm long (photo 3) (as long as possible) and secured them with nuts so that the ends protruded inside the container. Prepared the second barrel in the same way.
A piece of PVC pipe should be placed on the metal pipe to avoid damaging the edges of the barrels when rotating.
At the ends of the containers, I drilled holes in the center and inserted a pipe, which I fixed horizontally on a wooden T-shaped base 110 cm high from beams and slats into pre-drilled holes of a suitable diameter.
Loading compost into a homemade barrel
For compost, I use chicken manure, straw and a little soil (you can use dry leaves, grass cut from the area, crushed eggshells, food waste) - I load them into barrels and moisten them with water.
I rotate the drums every three days - the pins perfectly loosen and mix the biomass, which gradually decomposes under the influence of heat and moisture. With the usual composting method in boxes knocked together from boards, “ripening” takes from 6 to 9 months, but in my device it takes 1-1.5 months.
How to use a barrel composter
A rotating composter is not easy to make, but it is easy to use. Rules for its effective operation:
- It is convenient to place waste by turning the barrel with the door facing up.
- Once a week, the substrate should be mixed by rotating the container 90-360 degrees.
- As the substrate dries, it needs to be watered. You can easily check the moisture content by opening the lid after mixing. Excess liquid will drain through the vents.
- Composters are placed away from the house (no closer than 10 meters), in a shaded place hidden from view (behind buildings or plantings).
- You cannot add bones, feces of non-herbivorous pets, plastic, or diseased plants to the barrel.
The finished compost has
a slightly moist, loose consistency and a pleasant earthy smell.
Container for making compost with your own hands - photo
TOOLS FOR CRAFTSMAN AND CRAFTSMAN, AND HOUSEHOLD GOODS VERY CHEAP. FREE SHIPPING. RECOMMENDED - 100% CHECKED WITH REVIEWS.
Below are other entries on the topic “How to do it yourself - for a homeowner!”
- How to build a “barrel sauna” Many owners of country houses...
- Compostarium for preparing compost from…
Iron barrels of various sizes
For a long time, summer residents have been using iron barrels from various fuels and lubricants as water collectors under the drain pipes of their garden houses. Convenient volume, durable material and affordable price have made barrels an indispensable element of gardening.
Let's consider other possibilities for their use; Perhaps some ideas will be unexpected for you and they will end up in your plans for the coming summer. Just remember that before use, the barrels must either be rinsed from the contents or set on fire from the inside to burn off any remaining fuel and lubricants on the walls.
Fertilizer composition
Compost consists of organic compounds and is an excellent fertilizer. Microorganisms contribute to the decomposition of accumulated waste. Compost includes:
- nitrogen;
- carbon;
- oxygen;
- moisture.
Nitrogen is found in green grass, tops, and food debris. All this can be stored to obtain fertilizer.
Carbon is formed in compost from dry organic matter: tree bark, straw, fallen leaves, sawdust, paper and cardboard. These components should be half as much as nitrogen-containing ones. Manure, peat, and eggshells are also suitable as waste.
To create oxygen, you need to constantly stir the contents. Be sure to ensure that the walls of the composter allow air to pass through. Compost must be constantly moistened. If it is dry, then it must be watered periodically with a hose.
All constituent residues gradually rot, as heat is released as a result of the vital activity of microorganisms.
Do not use weeds, diseased plants, synthetics, or citrus fruit peels. Waste must be stored according to the rules.
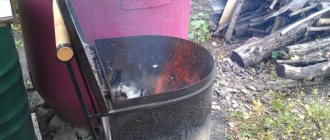
Barrels are a container for burning.
This method of using barrels has been known to gardeners for a long time. In the most hidden part of the garden, protected from the wind, an iron barrel with a sawn-off top (lid) is placed on a non-flammable base. The base can be a platform of several paving slabs or simply earth with the top layer of turf removed. Several holes must be drilled in the bottom of the barrel to allow oxygen to enter.
Gradually, the barrel is filled with flammable waste from the gardener’s activities, such as paper, cardboard, dry branches, and leftover building materials. Periodically, the contents of the barrel are set on fire and burn out very quickly, since the holes in the lower part create good draft for the fire. In addition, this method of burning is safe compared to an open fire - the wind does not scatter burning debris around the area, and you can extinguish the fire by simply pouring a bucket of water over it and closing it with a lid. The ash that accumulates in the barrel will also benefit the gardener, as it is an excellent fertilizer for plants.
Of course, the walls of the barrel burn out over time and need to be replaced, but it is enough for 5-6 seasons (depending on the thickness of the walls and the frequency of burning waste).
Iron barrel compost container
To organize compost, it is necessary to provide oxygen to the contents, for which it is necessary to drill holes around the entire circumference and in the bottom of the barrel. The more holes, the better the compost will “breathe”. Before adding plant residues, it is necessary to arrange a drainage layer of branches or twigs at the bottom of the barrel. Be sure to provide a lid for compost - it can be made from leftover metal tiles or ordinary boards. Compost ripening in such a container occurs at an accelerated pace; within a year it will be ready for use; you just need to stir it from time to time with a pitchfork.
Since in this case the barrel will not be exposed to temperatures, it can be painted on the outside with paints, enamel, or otherwise given a decorative appearance.
Mobile beds made of iron barrels
Preparing a barrel for a mobile bed is the same as when organizing a composter. Zucchini and cucumbers can be planted in such beds; Moreover, this can be done directly onto the compost, adding a 20-30 cm layer of fertile soil on top.
Such a ridge is convenient because the spreading foliage of planted crops does not take up space on the beds, but hangs down and entwines the barrel. In addition, if the garden is still at the beginning of development and there are no prepared beds, barrels can serve as a temporary option that is easy to move and change as the site is developed.
A simple option for organizing an outdoor oven for cooking dishes in a cauldron. It is better to use a small metal oven with a capacity of 60 liters. Cut off the lid of the barrel; Drill holes along the upper and lower belts, cut a door on one side for storing firewood. When purchasing a cauldron, take into account the diameter of the stove so that it is firmly installed on top.
Such a stove is good because it has a low cost, is simple to manufacture, and is absolutely unattractive to garden thieves.
Frying pan with iron barrel lid
The next stage in the evolution of the iron barrel is a roasting pan with a lid. It differs from all previous options in that the lid of the barrel remains in place; the barrel itself is sawn lengthwise into two parts. One of the parts serves as a base for laying coals and installing a grate or skewers, and the second part is a lid connected to the base using ordinary door hinges. As a base for the brazier, you can use an X-shaped structure made of non-combustible materials - iron pipes or fittings.
The roaster is convenient because it can be built into, for example, a gazebo and the contents are protected by a lid from precipitation.
Video description
Watch a video about the construction of a wooden composter:
Mesh composter
A suitable material for making a composter is a durable galvanized steel mesh with cells of any size. In addition to this, you only need wire and air-permeable non-woven material - spunbond or lutrasil.
- A cylinder is rolled out of the mesh, making an overlap of 15-20 cm, and fastened with soft wire.
- The resulting basket without a bottom is placed in place, having first removed the turf from the ground, and tied to a fence, pole, or any other support.
- The inner walls are covered with spunbond.
If appearance is not important, you can do without non-woven material Source myhappyhomestead.com
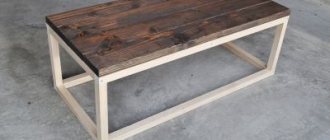
Outdoor and indoor furniture made from iron barrels
Furniture made from barrels is very diverse. A novice master will choose a simpler option, for example, a bar table made of a barrel with a round top. You can make the tabletop yourself, using large wooden reels for power lines as a model, or order a solid one from solid wood.
An experienced craftsman with a good set of tools can easily take on a set of patio furniture - sofas and armchairs, or make an original cabinet - a bar.
Craftsmen without tools or skills, but with a talent for drawing, can make an original cabinet out of a barrel, painting it in the manner of an old forged chest. The color and complexity of the product will be given by the handles and metal clasps screwed to it.