How to paint wheel caps - Tuningberg
Wheel covers are a smart solution to protect stamped wheels and improve the appearance of your car. Considering the condition of the roads on which you have to drive in our country, plastic decorative overlays often lose their attractive appearance. The idea of how to paint hubcaps regularly comes to the minds of car owners. In this article we will talk about painting products yourself, but remember that powder coating specialists will do everything faster and better.
Preparing for painting
They always start by dismantling the parts. To do this, you will need to cut off the plastic construction ties installed to secure the cap and prevent it from being lost at speed. Use a screwdriver to pry up the latches and pull out the cap. The selection of the necessary material and tools also applies to preparation work.
List of tools and materials required for painting caps:
- metal brushes (with iron bristles);
- primer for plastic surfaces (this type must be used, otherwise nothing will work);
- degreaser or solvent (it is better to take white spirit, it is more gentle);
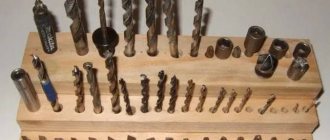
- grinding wheels and a grinder (can be replaced with fine-grained sandpaper, but then removing the old coating will take 2-4 hours longer);
- paint (choose according to your own taste, acrylic, enamel, neon and liquid chrome are suitable);
- rags (rags and napkins);
- varnish (if you decide to use it as a topcoat).
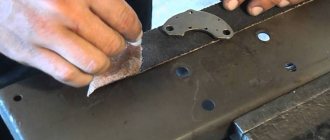
If all materials are available, after removing the caps, we begin to remove the previous coating. On the edges the paint does not adhere well due to wear and tear; it is enough to go over them with sandpaper. You will have to go through the central part with a brush with metal bristles; the paint sticks there stronger. A grinding machine will save time and effort, so we recommend using it. Watch the plastic heat up during grinding; at high temperatures, deformation is possible.
After cleaning the paintwork, thoroughly rinse and dry the caps. Next, we degrease the surface using a clean rag and solvent. Try not to touch the treated surface with your fingers; it is better to work with gloves. If you contact a specialized service, disk repair will take less effort and time.
Primer
The next stage is primer. It is better to purchase soil in a bottle. Spraying will save material and help spread the soil evenly onto the surface. The time spent on cleaning will also be reduced. Depending on the size of the caps, you will need 1 or 2 cylinders.
Apply primer in two layers. The first one – levels the surface and fills chips and cracks. The second one provides adhesion (adhesion) to the paint. If there are large scratches on the part, it will not be possible to smooth them out with primer. You will have to sand it in advance with sandpaper until a smooth surface is formed.
Let the soil dry. This procedure will take about five hours. After complete drying, take fine sandpaper and, after wetting it, go over the surface. This is necessary for better adhesion of the paint to the primer and removal of protruding coating particles. Dry again and degrease with solvent.
Applying paint
In this section we will tell you how to paint hubcaps on cars. In a tuning studio, the paint is applied with a spray gun; at home, hardly anyone has such a unit. And if it is present, then certain skills are required to use it. Therefore, we recommend buying a can of spray paint. Automotive stores have a large assortment of such products for every taste.
The main question that arises among car enthusiasts who decide to paint a part themselves is what paint to paint the wheel caps with. Be guided by personal preferences. Profile stores offer a variety of paint options:
- acrylic;
- neon;
- chrome plated;
- metallized;
- enamel;
- rubber.
Acrylic ones are most often used - ideal value for money. They have a large palette of colors, fit well on the ground, and it’s easy to buy a bottle of the desired color. If the caps are painted to match the body, then the color should be selected based on the VIN code.
Apply paint in three layers. The first is preparatory, applied by light spraying onto the ground. The second is thicker and smoother. The third is the final one, it allows you to hide the flaws of the first two. To avoid drips, hold the container at a distance of 25-30 centimeters from the surface to be painted. After applying each coat, wait 20 minutes to allow the paint to dry.
Applying varnish
Applying varnish to the painted surface is optional, especially when using acrylic paint. If you decide to apply varnish, then after the varnish layer has dried, you need to polish the surface.
The final step is to install the caps in place. At the same time, do not forget to use construction ties to better secure the hubcap to the wheels.
WHAT DO YOU GET THANKS TO NANOFILM
NANOFILM is completely invisible to the human eye.
Source
Do-it-yourself restoration and painting of car hubcaps. Step-by-step instructions and list of materials
Wheel caps are used not only to improve the appearance of the car, but also protect stamped wheels and bolts from dirt, mechanical damage and extend the life of their paintwork. But with intensive use of the vehicle, it is quite logical that they wear out and need to be repaired and updated.
In this article we will talk about how to paint hubcaps with your own hands, and consider the materials that you will need for this.
Preparatory stage of work
articles
- Preparatory stage of work
- Primer
- Apply paint
The first thing you need to do is remove the caps. First, we cut off the clamps that are often used to secure the hubcaps so that they do not fly off the wheels at high speed or when the wheel gets into a hole on the road. Such additional fasteners are usually matched to the color of the cap itself. These fasteners often leave abrasions or complete damage to the paintwork. After this, use a screwdriver to press the plastic latches and remove the cap from the wheel.
The next stage of preparation is purchasing the necessary materials and tools. The following items may be included in this list.
- sandpaper or sander with different abrasive sizes.
- rags and napkins.
- antisilicone.
- primer for plastic.
- dye. This can be acrylic enamel or an option such as liquid rubber.
- varnish (if necessary).
As you can see, the set for carrying out the work is not at all large, and the cost of consumables is budgetary.
Now we begin to remove the old paint layer from the hubcaps. Remove old paint using sandpaper and a sander. So, a thinner layer of material is usually applied to the edges of these parts, and by going through sandpaper, you can easily remove it. There is usually more paint in the central part of the structure, and here you can either spend more time and sand it by hand, or take a sander and speed up the process. But when using the machine, make sure that the plastic is heated so that it does not float, otherwise you will ruin the appearance of the product.
After cleaning, the surface should be washed and wiped dry with a cloth. Next, using anti-silicone as a degreaser, we treat the surface of the caps.
This is a mandatory step when painting wheel covers, as it ensures high adhesion of the finishing layer of material and the surface of the part itself. An important point is that the soil must be exactly on the plastic in order to get a good result. They are usually applied using spray cans; you will need 1 or 2 of them. You can also buy such a primer for a spray gun, if you have one in your garage. Spray the material in 2 – 3 layers.
The first one is used for touch-up, and the second one already provides a good base for the finishing coat. In addition, the first layer of soil fills minor irregularities and defects that are present on the polished surface of the car hubcap. If the damage is larger, then it must be eliminated at the grinding stage. Next comes the drying period, which lasts 4 – 5 hours. Then the surface is matted using sandpaper grade P600 - P800, using the wet method.
Dry the part and degrease it again with anti-silicone.
Apply paint
When choosing a paint color for the hubcaps, consider the color of the primer. If it is a light gray shade or white, then the primer should be light; for dark colors, look for a dark primer. This will provide a more saturated color of the part. Car enthusiasts occasionally use metallized, chrome-plated and other types of paints, but the most popular for painting car hubcaps is acrylic enamel, which you can purchase at almost any auto store.
The paint, as in the case of a primer, is applied either with a spray gun or an aerosol can. Usually 2–3 layers of material are sprayed. The first layer is thin, it is the base layer. The second layer is applied at a greater thickness, evenly covering the surface of the caps. A third layer of paint is sprayed if necessary to cover unpainted areas. The drying period between each layer is 15 - 20 minutes.
If desired, you can apply varnish, also from a can, in 2 layers. But if acrylic paint is used, then varnish is not needed.
Coloring
After the preparatory stage, do-it-yourself painting of car hubcaps begins. The coating is applied in two layers: the first is base, the second is thicker, it must be sprayed evenly. If necessary, you can apply a third layer if there are unpainted areas left after the first two.
If you use a spray can for coloring, you must carefully read the instructions. For the coating to lay down evenly, it must be at room temperature. Before starting work, you need to mix the paint well; to do this, shake the can for 2-3 minutes. It must be held strictly vertically.
Spray painting of hubcaps
The final layer can be applied with varnish. After drying, it must be polished, which will create additional gloss. The varnish may not be applied, but it will provide additional protection for the coating.
High-quality painting will hide small chips and scratches. Restoring their appearance is possible with your own hands. Repair will cost much less than a new set.
Source
Painting car hubcaps
The use of hubcaps solves many problems that are hated by car enthusiasts. For example, this is a good protection for “stampings”, it has a decorative overtone and makes it easier to paint the “main pieces of iron”. Painting hubcaps is much easier than “stampings” or alloy wheels, but they still have a number of features.
Preparatory work
The preparatory work includes not only the dismantling of the caps, but also the selection of the necessary tools and materials.
What you will need to paint car hubcaps:
- paint (the choice can be either classic colors or neon, chrome paint or even liquid rubber);
- primer for plastic (required for plastic, otherwise the result will be sad);
- iron brushes (or metal brushes);
- a grinding machine and grinding wheels (sandpaper can be used as a substitute, but the operating time will increase by at least 3 hours);
- white spirit or degreaser;
- varnish
Let's start with the actual preparation. First you need to remove the caps. To do this, use a screwdriver to pry up the latches, remove the plastic ties (they are used as a safety net so that the cap does not fall off at high speeds and when the wheel hits potholes and bumps) and pulls the cap itself away. Then it is better to replace the ties and match them closer to the color scheme.
Then we proceed to remove the old paint. The paint often doesn't adhere well to the edges, so it's enough to go over this area with sandpaper. In the center of the cap the paint is applied in a thicker layer, so it can only be removed with a metal brush (iron brush). The ideal option would be to use a grinding machine, which will save a lot of time and effort. It is imperative to monitor the heating of the plastic so as not to deform the cap.
After removing all the paintwork from the surface of the cap, you need to thoroughly clean it, rinse and dry. Then you need to go over it with a degreaser, trying not to touch it anywhere with your bare fingers.
Priming caps before painting
After drying and degreasing, we move on to the priming stage. As mentioned above, the soil must be on plastic. It can be found on sale both under a spray gun and in a cylinder. It’s easier to use ready-made cylinders (1-2 cylinders are enough), which will reduce the preparation and cleaning time after painting.
The primer is applied in 2 layers (the first is for painting, the second is for better adhesion). The soil will slightly level the surface and hide some cracks. For larger scratches, this trick will not work - they need to be smoothed out in advance using sandpaper with a fine abrasive.
The primer essentially dries for about 4-5 hours, after which it needs to be matted with P600-800 sandpaper using the wet method. Next, let it dry and finally degrease the surface with white spirit or auto silicone.
Applying paint to hubcaps
Various paints are used to paint the caps (acrylic, metallized, chrome, rubber, etc.). We will take as a basis the most common option - painting with acrylic paint.
If you choose a light-colored paint, be sure to buy a white primer, and if you decide to paint it a dark color, the primer should be dark.
The paint is applied using a spray gun or a can. If you decide to paint to match the car, you can find out the paint number by the VIN code. But few people are happy with this option. Most often they are painted in contrast or a more pronounced color.
A convenient painting option is to use spray cans. But when purchasing, be sure to check not only the paint number, but also the batch number, otherwise you may end up with paint of different shades.
The paint is applied in 2-3 layers. The first layer is a preparatory layer, applied lightly by spraying, the second layer is the main layer and is applied in a thicker layer. The third layer is the final one, leveling the color over the entire surface. Be sure to let each layer dry for about 15 minutes.
Preparatory work
The most popular car caps are made in gray. It gets boring quickly, and the slightest damage to it is very noticeable. To correct the situation, you need to properly paint the plastic caps on your car. To do this you need:
Painting car hubcaps
Do-it-yourself painting of car hubcaps begins with dismantling. To do this, you need to pick up the latches and then cut the plastic ties that are used for reliability. It is better to replace them with new ones, matching them to a new color.
To remove old paint you will need the following tools:
The latter option will help remove old paint faster and better, but when working you need to make sure that the plastic does not overheat. You can sand the edges; the coating there is thin and does not stick tightly, unlike the center. At this stage, the restoration of the car hubcaps is carried out, since the soil can mask minor damage.
Then the part must be washed to remove small debris. When it is completely dry, you need to go over the surface with a degreasing liquid, solvent or anti-silicone. The product should not be too aggressive.
To beautifully paint the hubcaps on your car, the next step is to apply primer. Then the paint will lay down in an even layer and will adhere better. To work with plastic, you need to choose special products for this material.
Paint selection
The choice of paint for car hubcaps depends on the preferences of the owner. Sometimes chrome or metallized types of paints, as well as liquid rubber, are chosen, but acrylic enamel remains the most popular. It can be bought at any auto store, and an additional advantage is that it does not require the application of varnish.
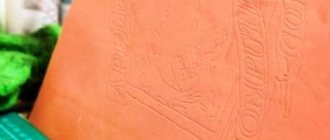
Bright paint for hubcaps
If painting car hubcaps is done at home, then it is better to choose a dye in a can. It is easy to apply without additional tools, and the quality of the paint remains high. If you have a spray gun, you can buy a liquid version of the dye.
Some owners prefer to paint the hubcaps to match the car; in this case, the color number must be identified by the VIN code. But most car enthusiasts make them contrasting.
Padding
The primer for the caps must match the color of the paint. Light for grey, white, cream or bright, dark for black and other rich colors.
The primer is sold in aerosol cans or in liquid form for spraying with a spray gun. Not everyone has this tool, so the first option is more popular. To paint the hubcaps on your car, you will need one or two cans. Apply the primer in two layers with mandatory intermediate drying. Then the surface must be matted using wet sandpaper and degreased again.
Applying paint
The most common enamels are used, such as acrylic. Difficulties may arise during color selection. If the color of the caps differs from the main one, then it is better that it differs significantly, because small deviations in tone look more like a painter’s (colorist) mistake than a special idea. Sometimes small deviations in tone can look advantageous if the color of the wheels is formed by darkening the main color of the car or echoes some other part, for example, a bumper, roof rails, etc. You can calculate the original color of the car using the VIN code.
First of all, the enamel is applied to hard-to-reach places (painting the back side, by the way, is optional). After the paint from the first pass has dried, the main area is painted. It is advisable to choose the placement of the caps in such a way that leaks are formed with a minimum probability. In total you need 2-3 layers. Drying between levels takes 10-15 minutes, although sometimes there are precise instructions for this on the can itself or the container in which the paint is sold. There you should also look for instructions on dilution with solvents and their effect on drying time.
After painting is completed, everything is varnished. Varnish is an optional element, protecting not the plastic itself, but the paint underneath it. In some cases it makes sense to apply several layers of varnish under polishing. Not all irregularities can be corrected by polishing, but a little polishing will almost certainly be needed and will only benefit the car.
Source
Priming plastic
Special primer for car plastic is sold both in cans and for spray gun use.
One or two cylinders should be enough, since the main task of such a primer is to ensure reliable adhesion during painting. You don’t need many layers for this, but a second layer may be required for leveling, since all unevenness from this level is transferred to the next one, i.e. for paint. You can do without primer, but in this case you need to be absolutely sure of the compatibility of the plastic and the chosen paint. Only very minor defects can be corrected with a primer. This material cannot fill large scratches, so you need to smooth them out in advance with fine sandpaper. Drying lasts 3-5 hours, after which the primer needs to be matted and also degreased. At this stage, you can use any degreaser except solvents. The surface is matted to P600 or higher, preferably using water.
Best answers
Lyokha63:
Kotovasya:
fasten onto disposable plastic clamps
Mikhail Khokhanov:
sealant (not glue, but sealant) it has minor adhesive properties, but as a sealant it’s simply superb
Alexei:
plastic clamps - get them from computer specialists or electricians
Alexey Stolyarov:
yeah))) ) you can))) ) nail it))))
Panya):
Plastic electric clamps
Evgeniya:
Plastic clamps are an option, of course, but it’s safer - buy alloy wheels!
Anatoly:
in stores that sell electrical goods there are clamps called nylon ties
Just use these zip ties to secure it in several places before you lose it..
Doppelganger:
Which car, it’s best to use clamps, or even more reliably put a bracket with a pin in the middle on 2 wheel bolts or nuts, drill a hole in the cap, push it through the pin on the bracket, fix it with a rubber washer and a nut
Zhenya:
Specials for sale the cables pass through the stamping from top to bottom. even if someone wants to remove the caps without knowing about the special ones. the cables, it will simply break the caps.
Tatyana Mukhankina:
Plastic clamps! in the 21st century... collective farm... Ha ha! ,Do not make me laugh! She's so funny to me!