In order for a child to have good health, he needs daily walks, even when it is snowing outside and the cold wind is blowing. There are a great variety of insulated envelopes, footmuffs, etc. for kids. But the mother is also outside with the child and her hands, which are constantly on the handle of the stroller, are especially not protected from the weather. Especially for such cases, a warm fur muff is suitable, which will protect your hands from bad weather and keep them warm. In this article we will talk about how to sew a muff for a stroller quickly and easily with your own hands.
We sew a beautiful and warm muff for a stroller with our own hands
1) Needle, scissors, ruler, sewing machine;
2) Raincoat fabric – ? m.;
3) Faux or natural fur, can you make fleece – ? m.;e
4) Internal insulation – ? m. It is especially important to fill the muff with insulation if faux fur is used - its knitted base perfectly allows cold air to pass through and your hands will freeze. You can use batting or padding polyester. In the first case, the insulation is sewn between a layer of bolognese and fur fabric, but in the second case, the insulation is stuffed inside through the allowance in the seam. The thickness of the insulation can also vary depending on what kind of lining is used: if it is natural fur, you can make it very small; if it is fleece or faux fur, then you need to better insulate the muff;
5) Buttons for clothes (you can’t install them manually - you’ll have to visit the nearest hardware department and do it there) or sets of buttons with punches. Their advantage is that they can be installed at home with a hammer, but they are not so easy to find in the store. It is better to purchase any buttons with a long stem - the width of the coupling will be rather large;
6) Various devices for decoration (can be decorated with rhinestones, beads, fur scraps, etc.)
How to make patterns for a coupling?
In this case, you do not need to draw everything separately on paper and cut it out. You can immediately mark the desired lines on the fabric.
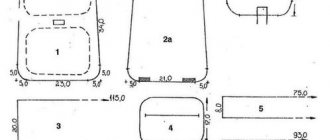
The first thing you need to do is decide on the size. The optimal rectangle is 47x52 cm. It must be drawn on the wrong side of the bolognese fabric.
After the rectangle has been marked, a median line is drawn along the sides of the rectangle (from a side of 47 cm). On this median line, 12x4 cm notches are marked.
This will be the pattern, which is then transferred to the fur fabric.
We sew and fill the sleeve.
Now it’s time to cut out the pattern from bolognese fabric. You need to cut carefully, rounding the corners.
Then, by attaching the pattern to the fur fabric, you can make a fur blank. You need to cut strictly along the base of the fur so as not to damage the fibers. The edges of the fur blank should be smooth, not torn.
From the remaining scraps of fur you can cut out circles and make pompoms (the diameter depends on how much fabric is left and what size pompons are needed).
By placing fur and bolognese fabric next to each other, the product is swept away. Leaving a small allowance (about 15 cm), the coupling is sewn on a sewing machine. Through the resulting hole you can turn the product inside out. Now it can be filled with padding polyester or other insulation.
If fur and padding polyester fibers suddenly stick to the raincoat fabric, this can be easily removed with a damp cloth.
The allowance must be carefully sewn by hand. On the wrong side, the location of the buttons is marked, and the middle line is sewn. You can also stitch decorative patterns, for example, like this:
Now all that remains is to take the coupling to the accessories department and attach the buttons and decorate as desired.
Pompoms for the muff.
You can make pompoms from leftover fabric - take a circle and sew stitches measuring 5 mm. along its edge. Place a piece of filling inside and pull off the pompom. Attach a lace or satin ribbon to it and sew it to the muff.
You can decorate the muff with rhinestones, various beads, and make personalized embroidery.
Pocket on the coupling.
For convenience, you can make a pocket on the muff, in which you can put a phone, wallet or some other small item. To do this, you need to cut out two identical pieces of pocket and valve from raincoat fabric.
First, the flap is basted and stitched, and then the pocket itself. While the parts are not sewn to the coupling, it is necessary to sew Velcro on them with the hard side facing the pocket. And soft to the valve.
The finished pocket can be stitched to the coupling. If desired, it can be divided into two or three sections, if length allows. This can be done simply by sewing a pre-designated line on the pocket.
The valve is attached last and the pocket on the coupling is ready.
Warming accessory
The prototype of the first muffs were elongated sleeves with fur cuffs. They were worn by both women and men, and were sewn from a variety of materials and intricately decorated. An undeservedly forgotten wardrobe detail at the beginning of the last century became a big fashion item as a purely female accessory. In cold Russia, muffs were made mainly from fur.
Gradually, the fashion for these things has passed, but sometimes they can be seen at modern clothing shows or in children's wardrobes. But, as it turns out, modern parents find it very convenient to use muffs for walking with a stroller.
You need to walk with your child in any weather, even in frost and wind, because the baby needs fresh air. And during this period, both children and parents need to be thoroughly insulated. Of course, on a cold day, the baby is always carefully wrapped and covered, but dads and moms sometimes have to freeze. The hands holding the stroller especially suffer in the cold and the piercing wind.
To make the coupling we need:
raincoat fabric 55x55 cm, padding polyester, faux fur, buttons, threads in the color of the raincoat fabric, scissors, tailor's pins.
1. Transfer the pattern to the wrong side of the raincoat fabric and cut out the part. Folding it in half, trace it on the fur, cut out 2 halves of the part (with an allowance of 1 cm along the inner cut).
2. Fold the fur halves with the right sides inward and sew along the middle cut, leaving an opening for turning 10-12 cm wide.
3. Place a piece of raincoat fabric on the padding polyester with the right side up and pin it with tailor’s pins (photo 1).
4. We lay a zigzag stitch along the entire perimeter of the raincoat fabric. This securely fixes the insulation and simplifies further work on the coupling. Carefully cut off the excess padding polyester at the edges (photo 2) Place a straight machine stitch in the middle of the resulting workpiece (photo 3)
5. We fold the parts made of fur and raincoat fabric with padding polyester with the right sides inward and pin them together (photo 4). We grind them along the perimeter of the coupling. If necessary, cut off the corners of the allowances and turn the product inside out through the hole in the fur part (with the raincoat facing out). We straighten the corners with scissors.
6. Hand sew up the turning hole. We install buttons in the product (photo 5). With their help, we fix the coupling by bending it around the handle of the stroller. It's time for a walk!
We carefully insulate
This master class will tell you a simple way to create a clutch for a stroller, for both hands.
Prepare for work:
- raincoat fabric;
- artificial fur;
- threads, scissors, sewing machine;
- Velcro;
- chalk for cutting.
When using fur as an inner layer, you can do without padding polyester. If you plan to replace it with fleece or knitwear, take care of insulation.
If you want decorative elements, such as embroidery, on your muff, do it before sewing the pieces together. One side of the muff is wrapped around the handle of the stroller and secured with Velcro (and its length is equal to the width of the handle), and the other is a wide canvas divided into two halves with Velcro. This part is for the hands.
Read this: Gabardine dress for girls: two outfit options
The product is based on the following diagram:
- it is necessary to cut out 2 parts of each type - 2 outer layers and 2 insulation. Add a 2 cm seam allowance along the edges;
- Sew Velcro according to the diagram on the front sides of the parts. If you do this with a finished coupling, the stitching will be visible on the opposite side;
- Fold the parts right sides together so that each side has 1 set of Velcro elements;
- Sew all the parts in a circle, at a distance of 1.5 cm from the edge, leaving a small area unstitched. Through it, you will subsequently turn the product right side out;
- turning it inside out, sew it with a hidden seam;
- secure the finished parts together with Velcro to determine where they will be on the stroller handle;
- Having measured a distance from the Velcro equal to the diameter of the handle plus 2-3 cm, connect the elements together with a machine stitch.
Read this: Brazilian Carnival Costumes: Design Ideas for Adults and Children
You should get this result:
The coupling is ready!
Test Drive
We attach one edge of the coupling with Velcro to the handle of the stroller. Then we bend one part of the coupling over the handle and connect it to the other using Velcro or buttons. And finally, a few comments that arose after the first use of the product.
- Buttons are still more reliable, since Velcro constantly strives to come loose. The advantage of Velcro is that in an emergency (if you take into account our slippery paths and my “luck”) you can easily free your hand.
- I was used to driving the stroller with my arms spread wide, and therefore the clutch seemed a bit narrow to me. Although I adopted the sewing principle and dimensions from the “factory” product. It might be worth trying to cut the pieces in the shape of a trapezoid, which will expand from the handle to the openings for the hands. In any case, I advise you to focus on the “terrain” when sewing.
- When sewing, do not leave too much distance from the “sticky” edge for the handle. It is necessary that the coupling fits tightly to it, and it is comfortable for your hands to hold on. For the same reason, you should not sew a muff from more than two layers if one layer is quite dense (such as faux fur).
Despite all the comments, “walking” in the muff is really comfortable and warm. At a temperature of minus 20, your hands do not freeze at all, but for greater insulation you can wear gloves.
Pattern for a stroller: find it on the Internet
Every mother wants her child's stroller to be different from others. That's why parents spend so much time choosing a children's vehicle before purchasing. Individuality, brightness and comfort are what their attention is primarily paid to.
Today in stores you can find unusual multifunctional strollers with truly original designs. But the appearance of the products, as a rule, is made in the same tone; most often it is a single-color design without bright prints or inclusions.
The least expensive option to stand out from others is to sew a set into a stroller.
The most resourceful mothers are able to solve this issue. Pattern skills, fabrics and sewing supplies come to the rescue. And it’s worth saying that the tradition of sewing our own original products was passed down to us from our parents and grandparents.
After all, at their age they created, for example, a pattern for an envelope for a stroller with their own hands, and then passed it on to their friends, and they, in turn, passed it on to other friends. Then the main problem was the question: where to find the pattern? After all, often not everyone was willing to share the work of their work, or the necessary acquaintances might not have been there.
Here we had to resort to a variety of tricks: search in purchased magazines, visit libraries, ask people, go to studios and even buy for money.
Nowadays, finding a pattern “How to sew a stroller with your own hands” has become much easier, because there is a worldwide Internet.
Here, many people are quite willing to share the necessary drawings, provide detailed descriptions of the process and post video instructions.
Especially for our readers, we studied the question of how information is presented on the Internet on the topic “Ways to alter a baby stroller.” And we will share our opinion with you.

