Ice cream is a favorite cold dessert for many. If your child loves this sweetness, you can make a homemade dessert together with him. Develop creative thinking, because you can endlessly experiment, and motor skills.
You can decorate your room with a toy in the form of food or hang it on your bag. A child can do a lot with a craft in the form of this dessert.
If you quickly get tired of the toy, you can decorate the walls of the room, the ceiling or the bed or other furniture with it.
Master class “Ice cream made from paper”
Paper ice cream can be made either simple or complex, depending on the age of the children for whom the master class is designed. An option for younger children is a cone with colored balls. The pattern for this ice cream craft consists of two parts - a “waffle” corner and a filler.
Materials and tools:
- paper - yellow or light brown, white or pink;
- glue or glue stick;
- marking pencil and scissors.
You can invite children to draw a grid in advance on a sheet of paper for the cone, imitating the texture of a waffle. This way the applique will look more elegant, and the paper ice cream craft will look more realistic. In this case, you will also need a ruler and felt-tip pens.
Technique:
- Trace the templates (corner and 6-8 circles) on paper.
- Cut out the elements, glue the horn.
- Fold the circles in half and glue them together.
- Assemble the craft.
Ice cream balls can be assembled without glue. To do this, you need to make cuts along the central part to the middle of the circle, and then insert the elements crosswise. To prevent the shape of the ball from folding inside the cup, you will have to make slits along the edges of the cone and teeth inward.
Ice cream in Japan
Residents of the “Land of the Rising Sun” are accustomed to sophisticated aesthetics in everything from traditional crafts, which include origami, to national cuisine. Japanese ice cream is fundamentally different from its European counterparts, topped with lush whipped cream and streams of melted chocolate, and topped with a thick topping. Externally, the dessert looks extremely simple, but has a refined taste and contains ingredients that are healthy.
Lavender Delight
Each region has its own unique varieties, inextricably linked with local history and culture. For example, on the island of Hokkaido, gourmets will definitely be offered aromatic ice cream made from lavender, which is considered a symbol of the region. The first specimens of this plant were imported in the middle of the last century from southern France for perfume companies. Japanese entrepreneurs failed to make a business selling essential oils - imported raw materials were much cheaper, but lavender still contributed to the economic prosperity of Hokkaido. Every year, tourists from all over the world come to see its luxurious purple fields, located in a mountainous area near the city of Furano. The season for lavender viewing is in July. You can not only contemplate the healing plant, but also taste it. This is why there is lavender ice cream, which gives no less to the planting than the surrounding landscape.
Golden ice
The city of Kanazawa, famous for its temples and castles, serves up a truly out-of-this-world treat - ice cream covered in 24-karat gold leaf. Since ancient times, the region has produced sheet precious metals, which were used to decorate sacred statues, interiors, furniture and wooden utensils. The Japanese firmly believe that by adding gold to cosmetics and food, they prolong their life and improve their health.
Gold foil ice cream is one of Kanazawa's signature dishes. Surprisingly, it is quite inexpensive compared to analogues that can be tasted in elite restaurants in the West. For a serving of vanilla ice cream, not notable for anything other than elegantly arranged golden leaves, you will have to pay only $8. The dessert has a familiar taste, which does not prevent tourists from enjoying it with special trepidation.
Mochi
Rice flour is used to make not only world-famous mochi cakes, but also equally popular ice cream. It is believed to have been invented by Japanese-American entrepreneur Frances Hashimoto in the 1990s. The dessert is a natural cream ice cream wrapped in a thin glutinous rice dough. The top of the delicacy is sprinkled with powdered sugar.
The unique combination of flavors quickly made the new product the object of desire among gourmets in Japan and America. In the homeland of the delicacy, it is often made with a special fermented rice ice cream, which is considered very healthy. Outside of Japan, Mikawaya offers more traditional flavors: green tea, strawberry, vanilla, chocolate and plum wine.
Templates
In kindergarten, children themselves cannot yet calculate and mark out the shape of a craft. The teacher should take care of the templates. Their shape depends on the selected product option. Ice cream craft can be:
- a glass - for self-production you will need walls and a bottom;
- horn - you need a shape with a rounded edge or a rectangle for the option with a corner;
- popsicle - you need dimensions for the stick and a layout to create a briquette.
The option with a plate and spoon should not be offered; not all children in the kindergarten group will be able to visualize this design option. It is less associated with ice cream.
Templates and layouts are not required if the ice cream craft is made from scrap materials - plastic cups, balls, balloons, cotton pads or napkins.
Why should we make craft ice cream?
It would seem, indeed, why? Where can we use such an art product? Psychologists give the answer to these questions: children often use such products in object-role associations, for example, as interior parts in dollhouses. A bouquet of elegant ice cream cones will be a great addition to the style of our home.
Applications
Ice cream in the form of an applique can not only be demonstrated at an impromptu exhibition after class, but also placed on the wall. The interior decoration will be a good present for grandparents who lovingly treasure their grandson’s first creations.
As a basis for the application, you can take a sheet of cardboard or a ready-made photo frame. Older children can make a passe-partout or an impromptu frame from the same popsicle sticks themselves. Materials from which DIY ice cream can be made:
- scraps of fabric and leather;
- colored paper and cardboard;
- cereals, pasta;
- bottle caps and buttons;
- nuts and cotton pads.
The material can be used in its pure form and tinted. Gouache, which contains bright, opaque white, is suitable for tinting.
Technique for making the Button Ice Cream applique:
- Cut a triangle out of a waffle towel, tint it with brown paint, and dry it.
- Using the base, outline the shapes of the ice cream balls and divide the buttons by color.
- Glue the “horn” and buttons onto the PVA, laying out the balls in a “pyramid”.
- The background can be decorated with multi-colored beads or beads. It’s easy to make a frame out of them or buttons of a different color.
To work with bulk materials, you need to use PVA construction adhesive. It is as safe as stationery, but much thicker in consistency.
Use ready-made templates to create applications from various materials:
“Delicious” bookmark
A corner that helps you mark the pages you’ve read can also be made in the shape of an ice cream. This origami bookmark will appeal not only to children, but also to adults. Every time they open their favorite book, they will smile when they look at the cute “humanized” treat.
Step-by-step instruction:
We fold the corner according to the standard pattern, from a square with a side of 15 or 10 cm. We choose paper of the same shade as the traditional waffle cone.
- Fold the sheet diagonally. We position the workpiece at a right angle upwards.
- Bend the top of the nearest layer down until it intersects with the base of the triangle.
- We fold the right and left corners towards the middle.
- We return to the original position.
- Now we raise the same corners up.
- And we bend them inside the resulting “pocket”.
- The “corner” is ready.
- Turn it over 180°C.
Cut out the ice cream “cap” from pink designer paper.
Glue to the top of the bookmark. Using a marker, draw the bottom triangle into regular squares, imitating a waffle cone. On the ice cream itself we draw a cute face. Sprinkle with glass beads and rhinestones.
Now you can use the bookmark for its intended purpose.
Corrugated paper ice cream
Corrugated paper does not hold its shape, so it is used as a finish for finished parts or in the form of crumpled balls. You can cover it with cardboard or a plastic cup, ping pong balls and small balloons. Without a ready-made shape, the crepe paper simply needs to be scrunched or folded several times to form a tight stack. Crafting ice cream from corrugated paper is easy even when large. It will make a spectacular garland or Christmas tree decoration.
Materials and tools:
- thick paper for cups;
- corrugated paper of different colors;
- empty eggshell;
- PVA glue, scissors.
In order for the eggshell to become dense, after blowing out the contents, you need to hold it for 10-12 hours in salt water (2 tablespoons of salt per glass).
Performance:
- Using the templates, trace and cut out the details of the cup. Glue the form together.
- Wrap the eggshells in corrugated paper for 2-3 layers.
- Secure the paper with glue. Place the balls in the cup so that the glue is not visible.
- Cut out drops of topping and stick to the edges of the cup.
The cup itself can also be wrapped in corrugated paper. Older children can imitate the texture of a waffle by weaving paper ribbons like basket weaving or by winding them in a spiral. The cardboard must first be soaked with glue.
Classic "Cone"
Based on the “Kite” shape, you can create another ice cream model, perhaps the most popular and effective. It is widely used in greeting decor.
To make an origami ice cream “Cone” out of paper, you will need a one-sided square measuring 15x15 cm.
Step-by-step instruction:
- Make a diagonal fold.
- We attach the sides to it.
- We bend the internal corners outward as much as possible, as shown in the diagram.
- We place the valves of the upper layer behind the side edges of the “Cone”.
- We turn the model over.
- We bend the sides at the top, aligning them along the center line.
- We make two zigzag folds along the dotted line. To do this, bend the upper triangle forward and, stepping back a little, return it to its original position. We repeat the action again at a distance of several centimeters.
- Turn the workpiece over.
Now you can decorate the origami ice cream to your liking.
For holiday garlands or Christmas tree decorations, models made of patterned paper “kami” are suitable; they are very elegant and atmospheric.
Origami
Children aged 7-9 years can handle the ice cream diagram using the origami technique. You can decorate the finished craft with funny faces drawn after assembly. This will make the craft seem even more interesting. To make it, you will need a classic paper square made from a low-density A4 sheet. Smaller or stiffer paper may be difficult for your child to fold.
Scheme
There are several options for folding origami Ice Cream. The level of difficulty varies. The simplest options involve connecting two parts - a corner envelope and conditional balls. More complex models are one-piece crafts made from one sheet.
Popsicle stick craft ideas
The sticks left over after a tasty treat are most often made of natural wood and have a pre-treated surface. Such materials can be glued and painted, assembled like a construction set, constructing composite products of various types and purposes:
- useful crafts made from sticks. This category includes flower pots, bird feeders, cups for hot dishes, containers for bread or sweets, sweets and pastries;
- decorative decorations. To create a stylish and original decor from sticks, it is better to carefully select ideas, creating home decorations, frames and compositions, art installations;
- toys for children of different ages. In addition to toy furniture and dolls for the toy theater, you can create doll houses and educational materials, with their help they teach counting and colors, supplementing the learning process with game elements.
Before using sticks in the creative process, it is recommended to wash them thoroughly and dry them well, and you can further decorate them. In creativity, you can use materials of different shapes and sizes, having previously sorted them and come up with a concept for use in a particular craft.
From cotton pads
Cotton pads are ready-made forms for simulating ice cream balls. If desired, they can be tinted by immersing them in water with a weak paint solution. For applications, the discs are left flat. but if desired, they can be fluffed up. Unmolded cotton wool can also become part of a children's craft - just roll it into tight balls.
Materials and tools:
- Cardboard for the background and cup, strips of colored paper.
- Cotton pads.
- Glue, scissors.
Additionally, you can use stencils for cherries or strawberries - decorative decorations on ice cream. Finely chopped bright paper can also be used as a topping.
Technique:
- Using the templates, we trace and cut out the parts.
- Glue large elements onto the base.
- We decorate the waffle and decorate the glass with stripes.
- Glue the topping on top of the cotton pads.
Cotton pads can be tinted not only with paint, but also with hairspray with glitter. When using the spray by children, you must follow safety precautions.
Required materials and tools
- Colored paper or cardboard;
- Rope and knitting needles;
- Plasticine;
- Felt paper;
- Cotton wool;
- washcloth;
- Pompoms;
- Corrugated paper;
- Marker, felt-tip pen, colored pencil;
- Gouache, watercolor, paint;
- Marker for fabric, acrylic for fabric.
From fabric
Fabric ice cream can be made using the appliqué or soft toy technique. In the second case, based on crafts, you can teach children decorative stitches or processing the free edge. Depending on the desired result, you can use felt, suede or pieces of leather, as well as waffle fabric or light chintz.
Materials for making felt popsicles:
- 2 rectangles of light material.
- 2 pieces dark brown.
- Popsicle stick, beads, rhinestones.
- Cotton wool or flap for stuffing.
- Felt pens, thread and needle.
Children should be given a template for a decorative edge in the form of dripping drops of chocolate in advance. This will make the drops look more natural. First-graders can make rectangles with given dimensions themselves. To make them look realistic, they need to have rounded corners.
Technique:
- We cut out the blanks according to the template.
- With a pencil we outline the location of the parts (chocolate, sticks).
- Let's draw a face. For blush, blur the marker dot with cologne.
- We sew the details with drops behind the figured edge.
- We fasten the parts with stitches in a circle from the entry point of the stick.
- Before the last stitches, fill the form with stuffing and distribute it to the corners.
- We close the seams. Insert the stick.
- We use rhinestones, beads and chopped felt as decorative toppings.
Ice cream cone from scratch!
I want to share with you a master class on making these waffle cones with ice cream.
On the Internet you can find a variety of MKs on this topic; I tried to make mine as detailed as possible, starting with making the mold for the waffle. Because Not everyone can boast of having a silicone mold (and I, too, never got one), so let’s make it ourselves. There are also several ways to do this, some use a colander, some use a print from an object that matches the texture, and some make the texture themselves. We will take the latter route.
So, to make an ice cream cone you will need:
Plastic for waffles of a suitable shade, plastic of the main color for ice cream (it’s not in the photo), plastic we don’t need for making molds (usually all sorts of scraps are used for this, I took a plain piece to make it look better in the photo), talc (baby powder, flour), a ruler (a plastic card, for example, would also work well instead), a toothbrush, a blade, a brush, a pastel for tinting, a gel for plastic, acrylic paint for tinting the cream (not pictured), a round cutter.
WE MAKE MOLD.
Roll out the plastic (unnecessary scraps, or a solid color, it’s at your discretion)
Using a blunt object (in this case, a ruler), we press out identical lines, first horizontal:
Then - vertical:
We get mold.
To make the distances between the cells a little wider, you can gently stretch it a little in different directions:
We bake at the usual temperature for the plastic you are using.
We take it out and cool it.
We sand with sandpaper, leveling the surface of the cells.
In this case, my mold turned out to be a bit large, and I wasn’t very happy with it, so I made a second mold, smaller. The drawing was already pressed diagonally:
We prepare the plastic for the waffle. Roll out to the required thickness (thinner is better).
Lubricate with talcum powder.
Making an imprint. To do this, take our mold and place it on the plastic with the textured side down.
We press along the entire perimeter as it should. Talc will prevent the plastic from sticking to the surface of the mold.
Carefully separate the mold from the plastic.
We get relief. I still used the second, smaller mold.
Cut out a circle of the diameter we need. I took a rather large one (I have gigantomania 
And then the most interesting part. How to roll a neat cone without damaging the texture?
To do this, take a piece of paper.
And roll it into a cone, like this:
The edge can be fixed with glue.
We take our cut out wafer and put it on the cone to wrap it around it, first the edge (we do it without pressing, but the plastic sticks to it well):
Wrap the cone around the cone.
Then, without fear of damaging the horn, you can process it.
Grind the pastel for tinting:
Apply with a brush over the entire surface of the horn, not forgetting to process the edges.
Finally, go over the surface with a toothbrush (this will give the texture a complete natural “waffle” look):
When you are completely satisfied with the appearance of the waffle, just like that, on a paper cone, send the cone into the oven to bake.
We take it out and cool it. Carefully remove the cone from it (it comes off very easily)
We get a wonderful horn:
We make ice cream.
For it we need plastic of the desired shade (I just have white) and a decorating cream (in this case, gel mixed with acrylic paint)
Roll out a medium-length sausage from plastic and flatten it on both sides:
We twist it into a spiral:
Make the tip sharp:
We roll the resulting spiral in a circle as follows:
Here's what happens:
Combine ice cream with cone. To do this, lubricate the inner edge of the cone with gel (for better adhesion to the ice cream)
And put in the ice cream
Pushing a little inside
The horn is almost ready. All that remains is to decorate it with cream. To do this, it is convenient to use a stand so that your hands are free
Top with cream:
And we send it to the oven. I bake my horns in a pile of salt. They do not fall and are not damaged when baking. The main thing is to make a good slide
There are a lot of options for decorating ice cream, you just need to use your imagination!
After baking, cool the horn and varnish it at your discretion. I prefer to highlight the cream with gloss. A waffle must remain a waffle. Therefore, if the varnish is matte.
Here's what horns you can get:
I hope I could be useful!
Good luck in your work, O. Pruss
From a sponge
A dish sponge is a ready-made mold for making popsicles. All you have to do is make a cut and insert the stick. If this shape seems too simple, you can make a multi-layered complex structure by cutting circles of different diameters from multi-colored sponges and gluing them together into a pyramid. You can decorate the craft with crumbly glitter and beads. The topping can easily be imitated with colored rice or semolina. To do this, the cereals need to be soaked in watercolor or gouache and dried.
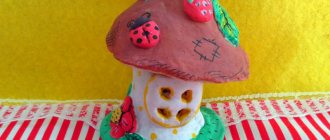
Made from plasticine
Modeling from plasticine is included in the compulsory curriculum in kindergarten. Using the Ice Cream master class as an example, you can learn with your children a whole range of techniques for working with the material:
- to imitate a waffle, make an impression of a towel or a relief toy;
- for balls - roll the material in your palms and on the table;
- to add texture, apply the design with stacks or toothpicks;
- To make it look like pouring horns, twist and lay the strands.
When working with soft plasticine, you can use pastry bags to create spectacular shapes.
The same steps are suitable for making souvenir Watermelon ice cream from polymer clay:
- The base is a triangle made of red plasticine.
- We make narrow flat strips from white and green.
- We lay it out along the edge and press first the white one, then the green one.
- We cut off the excess.
- We make seed droplets from black plasticine and place them on the surface.
- Stick in a popsicle stick.
Leader of the plasticine market
The first plasticine of the Play-Doh brand was released in 1956. Since then, she has sold more than two billion jars of this wonderful modeling material. Its advantage over other types of plasticine is that it is absolutely safe, very soft and flexible, does not stick to your hands and has a wide range of bright colors. And the recipe for Play Do plasticine is kept in strict confidence. It is only known that its composition includes wheat, water and salt, i.e., in essence, it is not plasticine at all, but modeling dough.
Related article: Pig from a plastic bottle: step-by-step instructions with video
Even if during classes the baby swallows a small piece of this mass, nothing bad will happen, because all the components have a natural composition, even food dyes are used to create it. But you won’t want to try it again, this plasticine tastes bitter and salty. It is packaged in a cellophane shell, which is placed in a beautiful plastic cup. The lids of the cups have a stamp that can be used to leave beautiful imprints on plasticine. She didn’t stop at producing just modeling dough; she also produces a variety of accessories for modeling: all kinds of stacks, molds, rolling pins, stamps and even entire sets.
Interesting ideas
The most unexpected materials can become materials for making crafts. When offering them to children, you need to take into account safety and accessibility. Simple tinted polyurethane foam imitates ice cream well, but adults must process it in advance. This is the only way children will be protected from harmful fumes. Safer original materials:
- popcorn (suitable for both appliques and voluminous crafts);
- pompoms made of threads and decorative ribbons;
- tulle and mesh washcloth;
- balloons and plastic unbreakable light bulbs;
- cardboard egg racks dissolved in water.
The cut out corners from the grates can also become miniature cups for cones. Elementary school children can be trusted to independently search for material. This will contribute not only to the development of fine motor skills and perseverance, but also creative thinking.
Useful activity
Plasticine is a modeling mass made from various substances and having different properties. It was originally made from clay and vegetable oils mixed with wax. Now plasticine is produced from polyvinyl chloride and high molecular weight polyethylene. And there are a lot of other relatives of this material.
For example, ball clay consists of many small foam balls that are held in place by special glue.
Why is modeling so useful? They develop perseverance and increase attention, develop imagination and logical thinking. Due to the fact that fine motor skills of the hands are actively trained during the modeling process, the speech center of the brain is stimulated. And both you and the children will be pleased to look at the result of the work.