There are many dishes that are very quick to prepare, but this does not affect their taste in any way. I recently wrote about gingerbread cake, and today I want to remind you about the wonderful delicacy of my childhood. This is a “Potato” cookie cake, it seemed the most memorable and accessible at that time. And it’s ready in just 15 minutes, if not less.
Of course, people still love to enjoy this dessert, but a lot of recipes have appeared. There are those who reproduce the GOST recipe. Some people like desserts that are not very sweet and therefore do not add milk. And those who watch their figure prefer to remove butter from its composition. In general, today there will be a lot of variations of this quick and very tasty cake.
But we will make it not from biscuit, but from cookies. You can use any that crumbles well. Shortbread cookies, such as Yubilene, are also suitable here. You can also take different crackers, such as “Maria” or fish. It is also prepared from oatmeal cookies. To make it not too sweet, add simple crackers or do not add sugar at all.
By the way, the cake can be chocolate if you add cocoa, as well as simple. Decide for yourself whether to add cocoa or not. I love both “white” and “black” delicacies.
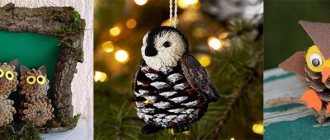
Master class “Vegetable caps for autumn”
Valentina Bodrova
Master class “Vegetable caps for Autumn”
Lately I've been tired of the usual flat printed hats vegetables for skits and round dances. I thought for a very long time about how to make them more interesting and brighter. In the end, this is what happened.
Material: colored corrugated paper, Whatman paper, ruler, pencil, scissors, stapler (or glue gun)
.
Step-by-step photos are presented using beets as an example.
1. To begin with, I took whatman paper and cut off a 7cm strip. and stapled the edges together. The result is a frame.
2. Then I measured burgundy corrugated paper along the length of the frame and folded it in half, so it’s stronger.
3. Using scissors, I made cuts on the paper at equal distances, approximately 4 cm long.
of the hat in a circle using a stapler (I stapled it inward so that they would not catch on the children’s hair)
.
5. I assembled the top, folded the corners and stapled it together to form a cone.
6. I cut out the tops from green corrugated paper, folded in half.
7. I turned the resulting cone of the cap inside and attached the tops from the inside so that the beets turned out round.
I made carrots and onions using the same principle. Only on the bow, so that the feathers stand, I fold them several times and attach each one separately. And I drew “eyes” on the carrots with marker.
I made the potatoes a little differently. I cut out a square from brown corrugated paper, covered the frame of the cap on top so that the paper remained on top, and secured it on four sides. Then I collected the remaining paper evenly in a circle. I stapled it on top in several places from the inside to create “eyes.”
Lesson summary on the topic: “Dandelions for Little Red Riding Hood.” Full name of the teacher - Olga Sergeevna Ivantsova Preschool organization - MBDOU kindergarten No. 81 in the city of Orel Position - Educational teacher.
Summary of the lesson “Dandelions for Little Red Riding Hood” Full name of the teacher – Ivantsova Olga Sergeevna Preschool organization – MBDOU kindergarten No. 81 in the city of Orel Position – Teacher Educational.
A master class on making a daisy hat and for the matinee on March 8th we staged the “Daisies” dance. To make it more interesting we decided to make these funny daisy hats. Children. Master class “Basket of vegetables” using plasticineography Master class “Basket of vegetables” using non-traditional drawing techniques (plasticineography) with children of the second junior group Goals:. Master class “Hats and masks for musical games” Hello again. Dear colleagues! This time I bring to your attention attributes that are very necessary for us, music directors. Master class on making a cockerel hat I have always loved doing handicrafts. With the onset of 2022 (Year of the Fire Rooster), I decided to please the children and make it for the New Year. Master class on animal caps made of colored cardboard. Children love to act out different scenes (dramatizations of fairy tales, cartoons). The necessary costumes are not always available in kindergarten or at home.
Scenario “Osenin” for children of older groups with mental retardation ANO DO “Childhood Planet “Lada” Kindergarten No. 198 “Cherry” ENTERTAINMENT SCENARIO THEME “In Autumn. Autumn, we invite you to visit us!” Groups.
Knitted hats-toys for theatrical games To develop the individual creative inclinations of each child, staging theatrical performances and staging familiar fairy tales help.
Source
House on the Internet
The next series of children's matinees with fancy dress is being prepared in kindergartens.
In kindergarten, parents are given the task of preparing a mask for the matinee.
You can make masks together with your child from cardboard or paper.
Below are pictures that allow you to make masks of vegetables and fruits with your own hands: peas, broccoli, potatoes, corn, carrots, onions, tomatoes, cucumbers, apples.
The pictures need to be saved to a computer, inserted into an editor (for example, MS Word), stretched onto an A4 sheet, printed, together with the children and, if possible, laminated (if not, pasted on cardboard), cut along the contour and threaded with twine or elastic band according to the size of the child's .
See also: children's masks - vegetable headbands: cucumber, tomato, onion, potato, cabbage, onion, carrot, radish, radish, pumpkin, turnip, garlic.
Together with the children, we make a children’s carnival mask of the carrot vegetable with our own hands. Carrot mask We make a children's carnival mask of the cucumber vegetable with our own hands together with the children. Fun cucumber mask. Black and white template. We make a children's carnival mask of the cucumber vegetable with our own hands together with the children. Fun cucumber mask
How to make a hedgehog from potatoes
The “Hedgehog” craft from potatoes is very easy to make. You need to choose a vegetable of a suitable shape, mark on its surface the places where improvised needles will be stuck, and prepare the material for making the animal’s face.
Hedgehog with toothpick needles
Instead of needles, you can use toothpicks, pine needles, and plastic skewers. Pieces of plasticine, black peppercorns, and a nose - the cap of an acorn - will do a great job as eyes. You can decorate a forest dweller with flowers, rowan berries, and dried mushrooms.
Potato hedgehog family
First option
The easiest way to make a hedgehog from potatoes is to boil the vegetable directly in the peel or jacket. Although you can safely use it raw. When the potatoes have cooled, take toothpicks and simply stick them in, imitating needles. If you are lucky and find a potato with an oblong cone on one side, then this is where you can make the spout. A piece of olive is suitable for this. Eyes can be made from drops of mayonnaise or hand cream. The pupils can also be made from pieces of olives or black peppercorns (you can use special eyes, like those on toys, they are sold in craft stores).
The mouth can be made from fragments of a tomato, carrot, etc. Instead of paws, olives cut into 2 or 4 pieces are suitable. You can put a mushroom, cherry tomato or small apple on top of the needles.
Potato hedgehogs
I myself did not expect that this dish would be so tasty. I wonder if there is a similar recipe on Christina’s blog?
I came up with it myself based on a recipe for ordinary potato pancakes. But she prepared it in her own way.
For potato hedgehogs you will need:
Chicken breast (300 g), potatoes (4 pcs), carrots (3 pcs), herbs, spices, 1 small onion, cheese (50 g), 1 small apple.
Cut the breast into small pieces and fry in oil.
Add to it a little onion (onion or green), and also - the highlight of the recipe - a lot of dill (can be supplemented with parsley, cilantro, celery, wild garlic, raw or frozen) and several finely chopped apple pieces. Mix everything, lightly fry, salt, add spices and a little grated cheese. This is the filling.
Edible craft
How to make a hedgehog from potatoes so that it is beautiful and not only edible, but also tasty? This time it will have to be baked. To do this, you need to take 6 potatoes, wash them thoroughly, leave them in their skins and cut them in half. Remove part of the skin, this will be the muzzle. Rub half with salt and grease with oil. Insert peppercorns instead of eyes and nose. How to make a potato hedgehog even more delicious? Rub it with garlic. Place the family in the oven and bake at 180 degrees until golden brown. This will take from 20 to 40 minutes depending on When the hedgehogs are ready, place them on a plate in the form of a clearing. To do this, the bottom should be covered with dill, and for taste, a drop of mayonnaise and garlic sauce should be added under each potato. Arrange the hedgehogs and decorate the clearing with cherry tomatoes and thick cucumber strips located along the edges of the dish.
Source
Potato men
Easy potato crafts are little people. Sometimes you don’t even need to use additional details - the shape of the vegetable already resembles some kind of fairy-tale hero or funny face, it just needs to be decorated.
Potatoes that practically do not need to be changed
If you can’t find such a unique potato, you can take a regular oval one. It will be the torso. Using a toothpick, attach the head (a small round potato), make legs and arms from toothpicks.
It’s great if the face of an unusual person has a mustache, eyebrows, and eyes. Hair and a hat wouldn't hurt either.
Funny potato family
Children will love crafts made from potatoes in the form of Smeshariki - popular cartoon characters. To complete them you will need:
You can ask your child to make hats, scarves, and boots for Smeshariki.
DIY cartoon characters
Potato brownie
Ready product
After a written explanation of how to make a pirate hat out of paper, compare your craft with the finished hat. As you can see, you can slightly modify the shape by making the narrow edges taller. The top of the hat has a few centimeters of flat surface.
Draw the pirate emblem on a white sheet of paper, and then outline it with a black marker so that it looks three-dimensional. If you don’t have artistic abilities, it doesn’t matter, you can print such a popular drawing on a printer by taking an image of a skull and crossbones on the Internet.
Stages of working on a potato costume for a girl
Having unfolded a piece of prepared fabric, you need to mark the middle in it. From it you should measure ten centimeters to the right and left. These values are approximate, so it is more convenient to work with the child’s individual measurements. After this, you can use scissors to cut out the neck for the potato suit.
The next step is to prepare the parts for the appliqué. They will become the “face” of the outfit. You can cut them out of felt (any other suitable fabric will do). The finished parts need to be attached with pins in the place where they are planned to be sewn on in the future. Using a sewing machine, the applique is attached to the front side of the potato suit (photo below). Usually it turns out to be large in size and located in the center of the outfit.
Funny faces
Need to make a toy, but you don’t have the time or energy left? “Mugs” is what you need.
- Take several even small tubers.
- Draw eyes on them. If there is no paint in the house, use a white concealer. Wait for it to dry and fill in the pupils with a black dot.
- Draw in hair and mouths with a marker.
- You can add plasticine bows, beads, glasses, headphones, masks made from pieces of fabric.
The whole point of the craft is in the different facial expressions. Muzzles can be sad, happy, scared, surprised.
You can make smiley faces: heart eyes, sticking out tongues... You can sculpt anything from plasticine. Another option for the craft: faces of different professions: in a chef’s hat, in a construction helmet, in glasses and with a teacher’s pointer, in an army cap.
Potato birds
Potatoes are optimal for making children's crafts in the shape of a bird. So, from one tuber you can make a body, from the second - a head. Cut legs and beak from carrots. The wings of a homemade bird can be made from feathers or pieces of pepper or plasticine collected in the park.
This is the advantage of children's autumn crafts - all the details in them can be replaced with whatever is at hand, and the result will not lose at all.
Another popular option is tuber cockerel. The connection of the body to the head is carried out in the usual way - with the help of a wooden toothpick. In this case, it is important to leave part of the stick visible - it will be instead of a neck. If you cut off the sides of a potato, you get some kind of paws. You can cut notches on them and then connect them to the body. The tail, beak and comb should be prepared from thin carrot slices.
Using potatoes, it is easy to make a bird's nest in which a small chick sits. You need to cut the vegetable in half using a jagged motion to create halves that resemble a broken egg. Then scrape out the inner pulp from them and place the chick in the vacant space.
The bird can also be made from potatoes. It is also possible to use ready-made chicks - they are often sold in handicraft stores.
Masks – Fly and mosquito
Let's start with the frame. First, cut out an even strip 3 centimeters wide. Narrower ones will not be strong, wider ones look bulky. Length - 85 cm (this is if the masks are intended for adults or teenagers). Ideally, masks should be made exactly according to the measurements of the specific performer of the role. But in life, a good isolon mask serves faithfully for years, and the actors change. Therefore, let's take average sizes.
Using glue we glue the frame in this order. We make a cut at the back of the head, which will make it possible to slightly change the size.
Parts for mosquito mask
Details of the clattering fly mask
Cut out the fly's face according to the pattern. The color is gray or pink (depending on whether you prefer the resemblance to insects or like more humanized characters). I myself adhered to the stylized appearance of insects. Since Chukovsky wrote about insects, we will play with their features. The eyes are made of green foil, it would be better if it is a green holographic self-adhesive film. If you really want to, you can decorate your eyes with long eyelashes and glue the lips with a bow under your long nose. The six legs can be made simply black, or you can wear gloves and shoes. To make it more elegant, the frame of the cap can also be decorated with green or blue foil. We will make the wings from transparent plastic film. I took a transparent cover for a school textbook - they are sold in office supply stores (I don’t recommend using hard plastic, for example, from soda cans - the edges are sharp, and we don’t want anyone to cut themselves in the commotion of the show). We will lay out the veins on the wings with narrow strips of colored self-adhesive film. You can draw with a permanent marker, but... it won’t look very elegant. That’s all – enough for a convincing image of a fly. If your soul really wants a beauty and a coquette, there is an option to wear a tiny hat with a veil, but I didn’t do it myself - in my opinion it was too much.
Sketches
The facial expressions of the mask are of great importance. Even the most ordinary characters convey a palette of moods. They can be sad and cheerful, kind and angry, surprised and indifferent. This is achieved by drawing the eyebrows (raised, lowered, like a house), a smile on the face, and the position of wrinkles, if we are talking about a mask of an old man or woman. Emotions are conveyed not only by the faces of people and animals, but also by inanimate images: templates for masks of flowers (bells, roses, daisies), vegetables and fruits (apples, tomatoes, plums).
Robot
Indian
Carrots
Aliens
Download and print templates for making children's three-dimensional paper head masks with your own hands.
Magic transformations are one of a child’s favorite activities. From early childhood, girls try on their mother’s outfits and jewelry, imagining themselves as princesses or fairy tale characters. The boys are also not far behind, imagining themselves in the image of their favorite Superheroes or a brave pirate. Imitating your favorite heroes is not only entertainment, it helps a child to realize himself.
Accessories to complete the look
A wire sprig with flowers, reminiscent of flowering potato tops, will help the little actress fully get used to the role. It can be made from thick wire and green and white yarn.
Face painting will also be useful. Leaves or flowering twigs are painted on the face. A leaf drawn on the cheek with a Colorado potato beetle or ladybug sitting on it looks great. They can be painted using special water-based paints that do not cause irritation to children’s skin.
Subscribe to our Social networks
Mom's potato hedgehogs
Despite the apparent “familiarity” of the dish, take a closer look.
These are not potato pancakes with meat, not sorcerers or whatever else they might be called. The difference in my recipe is that you don’t need to add anything to the potatoes except a pinch of salt.
So - studio photos
Grate the potatoes on a coarse grater. So that it doesn’t darken, I don’t sprinkle it with anything (so that the taste of the dish doesn’t change), but I just do everything in portions - about three large potato tubers for one pan of hedgehogs. I do everything in a colander with a tray so that the dripping juice and starch do not interfere with the cooking process, but you can get by with a simple deep container. Which is what I did before in the absence of anything else. Salt the potatoes. A little. Literally a pinch will be enough. We form a potato pancake on the palm of our hand, put a certain amount of minced meat in the center (you can use any minced meat - I used pork, beef, salt, pepper and raw onion on a grater) Place potatoes on top of the meat and form a bun. Like snowballs in winter. The juice drains, the potatoes become compacted and it turns out...... ...like this bun. Place in a frying pan with hot vegetable oil. The fire should be quite small so that while you are forming other hedgehogs, those in the frying pan do not have time to burn. When you put all the hedgehogs in the frying pan, cover the lid and increase the heat to “a little more than medium.” When the hedgehogs are fried on one side, carefully turn them over to the other side and, lowering the heat a little, cover with a lid until the other side is fried. Cross-section of a hedgehog.
Did you like the article? Subscribe to the channel to stay up to date with the most interesting materials
Hat decoration
You already know how to make a pirate hat out of paper, now let’s look at decorating it. Most often, when designing such an attribute, black is used. The finished origami hat can either be covered with black colored paper or painted with gouache with a brush. The pirate emblem is attached with appliqué or painted with white paint after the background has dried.
A hat with a fold at the bottom looks interesting. To do this, when working on origami, complete the folds in diagram No. 7. To prevent the sheet from unfolding, the edges of the paper sticking out to the sides are smeared with PVA glue. The ends of the rectangular parts from the bottom of the hat are connected in the same way. The semicircular cutout of paper in the center of the strip, highlighted with a white border, looks original.
Rösti “Potato Hedgehogs” recipe with photos, how to cook on Webspoon.ru
Crispy Rösti “Potato Hedgehogs”
Rösti, Rösti, Rösti, Rösti - all these are names for the same dish (well, or a group of very similar dishes) made from potatoes. Rösti was invented in Switzerland, but then this recipe spread throughout the nearest (and not the closest) surroundings, acquiring not only many pronunciation options, but also different methods of preparation. In the same country, in two neighboring villages, rösti can be prepared in completely different ways. What is there! Two neighbors can each be proud of their family recipe for rösti (or rösti, depending on where the family comes from).
I will not claim that my rösti are the rösti. Actually, they are not at all similar (outwardly) to the classic ones (those flat ones). But my son loves these (and to explain what exactly he wants, he calls them “potato hedgehogs”). So let me introduce you to this amazing hybrid of flora and fauna (perfect for children's birthday parties).
Source
The best recipe for cooking according to GOST USSR at home
So, here is a historical recipe. It was this that was prepared in restaurants, cafes and delis in the country that was called the USSR. It is this taste that we remember from childhood and try to reproduce in moments of nostalgia.
But I warn you right away that this cake contains a small dose of alcohol to improve the taste. And therefore, decide for yourself whether you will treat your children to it.
Let's take:
- 550 g shortbread cookies,
- 250 g butter,
- 100 g condensed milk,
- 130 g granulated sugar,
- 4 tbsp. l. cocoa (30 g),
- cognac or rum - 4 tbsp. l. (40 g).
1. As always, we will grind the cookies into crumbs. You do this at will in any way possible. For example, in a blender or coffee grinder.
In this recipe we will do everything manually using a rolling pin. Now I'll tell you how.
We take two bags, insert one into the other for strength. Pour the cookies inside and carefully roll over them with a rolling pin. You can use a kitchen hammer and hit all the cookies.
Pour the crumbs into a deep bowl.
2. Grind the sugar into powdered sugar. Pour it into a separate bowl. Add vanilla. Place the melted butter there.
3. Take a mixer and beat this mass until the butter and powder are completely combined. This will take about 3 minutes.
4. Then add condensed milk, whisking it constantly. We've got cream.
5. Pour cocoa into the cookies. Stir until smooth. Then add the buttercream and add cognac or rum.
For children, you can replace alcohol with grape juice.
Mix until the dough becomes plastic.
6. Separately, grind another 80 g of cookies for sprinkling.
7. Roll into balls and roll in nuts and crumbs.
Freeze the entire dessert in the freezer for about an hour.