At the dawn of his darts, even before his first target made of Chinese pressed cardboard, the author of the text already understood that just a target on the wall was categorically wrong. The wall must be somehow protected from local snipers.
Just going to the store and buying it is not an option at all; we don’t live in England. It became clear that we had to somehow paint our own protection on the wall. And the author of the text was already beginning to think about the size of the protection that would fulfill its task, but a collapse occurred in the form of the purchase of the first target made of Chinese pressed cardboard.
Didactic game for preschool children “Hit and name”
Evgenia Ereeva
Didactic game for preschool children “Hit and call”
Didactic game Darts “
Hit and call ” .
Dear colleagues, I bring to your attention an original game. The game is intended for preschool children .
Goal: to teach throwing at a vertical target, to develop coordination of movements, eye and throwing accuracy, accuracy.
Objectives: To teach children to distinguish and correctly name geometric shapes and primary colors.
Develop fine motor skills of fingers, spatial perception, memory children
Develop physical qualities in children , introduce them to a healthy lifestyle.
Description of the game's production.
Fibreboard sheet size 50*50, Raincoat fabric 60*150, colored felt, padding polyester (or thin paralon)
binding, instant glue, tennis balls, white and colored Velcro.
1. Using a jigsaw, cut a circle with a diameter of 50 cm from a sheet of fiberboard.
2. Cut out two circles with a diameter of 50 cm from raincoat fabric.
3. Cut out geometric shapes from felt.
4. Place geometric shapes on one circle and mark their location with chalk.
5. Sew the hard side of the Velcro to the raincoat fabric.
6. Glue the soft side of the Velcro onto the glue.
7. We assemble the finished parts: fiberboard, put synthetic padding on it, a circle with sewn Velcro on top and a circle on the bottom, sew it together.
8. We process the edges with binding.
9. Glue colored Velcro onto the tennis balls.
Options for game situations:
1. Get there and name the color and shape.
2. Find and name the figure and its location.
3. Get into the circle (square, triangle)
.
4. Find the same figure.
"Game of Moods" Didactic game for preschool children Title: “Mood Game” Age: children 4-7 years old Purpose: development of communication skills and the emotional-volitional sphere of children Age: children. Didactic game for preschool children 4–7 years old “Mood” This game contains 16 cards with images of the emotions of joy, surprise, anger, sadness and one pyramid with pockets. Game "Mood". Didactic game for children of primary preschool age The presented games contribute to the development of sensory abilities in children, enrichment and activation of vocabulary, memory development, etc.
Didactic game “Catch and name” Topic: Didactic game “Catch and name”. Goal: Consolidate the names and order of the seasons, months and days of the week. Tasks: Secure.
Didactic game “Name the differences” Didactic game “Name the differences” for children of senior preschool age. Designed for children in the compensatory group. Didactic game “Vegetables” for children of primary preschool age “Fold the picture” Purpose: to introduce children to the variety of vegetables; learn to select parts into a whole picture; develop a holistic perception. Didactic game “Funny Bunnies” for preschool children Goals of the didactic game: 1. development of horizons; 2. development of coherent speech; 3. development of mathematical concepts. Didactic tasks. Didactic game “Magic Cube” for preschool children This game can be used both in a younger group to study individual topics, and in the future to generalize and systematize what has been learned. Didactic game “Recognize and name the emotion” Didactic game “Recognize and name the emotion” The relevance of the development of the game lies in the fact that the emotional level is insufficiently formed. Didactic game on local history for children of senior preschool age “One, two, three, name this fish” Brief description of the material (relevance): When preparing for the plot-role-playing game “Fishing on the Don”, we were faced with the fact that the children were bad.
Source
Making darts
- Toothpicks or a small twig.
- A needle or sharp pin.
- Insulating tape.
- Knife.
- A thread.
- Glue.
- Paper.
- Ruler.
- Pen or pencil.
How to make a wooden shank?
To make a dart, take 4 toothpicks, which are tightly wound with electrical tape so that you get a square bunch. Instead of toothpicks, you can take a thin tree branch (preferably elm). A fragment about 8-10 cm long is cut from the branch. Next, the bark is removed from the workpiece and electrical tape is wound on one edge of the wooden fragment, as well as in the middle. At the end where there is no electrical tape, two perpendicular cuts are made. The plumage will subsequently be attached to these grooves.
A small sharp pin or needle is inserted into the tip of the product. The tip of the future dart is tightly wrapped with thread until the tip is firmly fixed in place. You can add a little glue for strength.
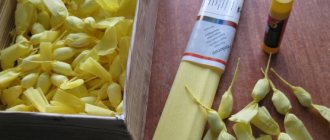
Attaching the paper tail
To make the plumage, take a sheet of paper . It depicts a small square (side is approximately 5 cm) .
The dotted lines inside the square indicate fold lines (only two lines, located either crosswise or perpendicular to each other). The square is bent in such a way as to form a “star”.
If the body of the dart was made of toothpicks, then the feathers are attached between the toothpicks . Due to the fact that they are pressed tightly against each other, securing the plumage will not be difficult. If it is a twig, then the plumage is inserted into pre-made cuts - grooves.
How to make darts with your own hands?
At the dawn of his darts, even before his first target made of Chinese pressed cardboard, the author of the text already understood that just a target on the wall was categorically wrong. The wall must be somehow protected from local snipers.
Just going to the store and buying it is not an option at all; we don’t live in England. It became clear that we had to somehow paint our own protection on the wall. And the author of the text was already beginning to think about the size of the protection that would fulfill its task, but a collapse occurred in the form of the purchase of the first target made of Chinese pressed cardboard.
Step-by-step instruction
In the first step, we cut off a fragment 8-10 centimeters long from the prepared branch, after which we remove the bark.
You don't have to do the latter, but there is a chance that the dart will become deformed as it dries. An additional problem may be peeling of the bark, which will lead to disruption of the aerodynamic properties of the product and a deterioration in the degree of accuracy when throwing. The next step is to wrap the insulating tape on one edge of the wooden fragment, as well as in the middle. Next, it is necessary, starting from the end where there is no insulation, to make two perpendicular cuts up to 3 centimeters deep into the branch. The wings of the product will subsequently be inserted into them. We proceed to making the “plumage” from a piece of plastic bottle prepared in advance. You need to cut out a couple of elements, giving them the shape as in the picture below. In the next step, bend the wings in the middle, achieving an angle of 90 degrees. Gently tapping, immerse the knitting needle or nail into the wood. This is done on the side where the insulating tape is wound. Next step: insert the plumage elements. The following photo demonstrates how to do this. Now we wrap the tail edge of the dart with electrical tape. The wound tape will tightly tighten the cut end, and the tendrils on the plastic will not allow the “feathers” to jump out. The last thing is sharpening the tip using an existing abrasive in the form of sandpaper, a block, a file, a grinder or a machine. In this way, you can make as many darts as you like without spending a penny. Darts is a sports game in which competitors alternately throw three darts at a target.
, trying to get the maximum number of points.
Appeared more than 200 years ago.
This is one of the most accessible sports
, where no criteria are presented for the player’s physical condition.
Dart target. Dart target dimensions
Playing darts is a fun activity and a great way to spend time with friends and colleagues. High-quality darts cost a lot of money, and cheap ones do not always meet our expectations.
This is why the question on how to make a darst occupies high positions in search engines. Playing darts is useful both for concentrating attention and for relieving aggression and negative emotions. Agree, why isn’t this a reason to make it yourself and spend your time profitably?
Dart target
The classic set for the game, as you know, consists of darts and a target itself. And you can do all this yourself, spending a little time and saving money. Let's stop directly at the target.
Did you know that the history of the dart target dates back to ancient times, when soldiers in their free time fought among themselves in javelin throwing and archery? It was made from a tree trunk, so the appearance of sectors is associated precisely with the presence of segments and rings on the trunk, and it was convenient to carry out calculations using them.
In cold weather, games were moved indoors, and of course, shooting with a bow or throwing large spears was inconvenient, since the probability of hitting the target was too high, and the target itself turned out to be too easy to shoot. Therefore, over time the target was modified, and in 1920 a target was created, the standard of which is used in the modern world.
It is called the “London” or “Sentry” target. The changes also affected darts. Their length has become shorter, aerodynamic performance has been higher, and standardized shooting rules have also appeared.
Dart dart
The classic target is divided into sectors of four colors: black, red, white and green. Each section has its own number of points. On an industrial scale, the target is made from specially compressed fibers that are not damaged by the tip of the darts. This type of target is used for both darts and archery.
Darts dart board
At home, you can make it from wooden planks, 2-3 pieces are enough. We glue them together so that we get a square with dimensions of 40cm x40cm. On the reverse side you need to attach several slats. The front side must be cleaned so that it is smooth.
We have the preparation. Then it all depends on your imagination, as well as the materials that you have at hand. You can draw the sectors yourself, highlighting each one with wire and painting it in color.
You can also print out the finished target and stick it on the base, so you can update it as it wears out. But keep in mind that such a target should not be used for archery, knife throwing, etc. For archery, you can make a target out of cardboard.
Playing dart with
Another option that you can use to make a goal with your own hands is ordinary cardboard. You will need a round piece of paper, cardboard, foam and a glue gun. This method is perfect for those who want to involve young children in the process.
Pallet dart cabinet
Mini-cabinet for playing Darts, made from improvised materials. The main source material for its creation was ordinary pallets.
Materials and tools used to create a Darts wall cabinet:
-wooden pallets -screws -several hinges -stain and varnish -wood glue -hammer -nail puller -saw -80 grit sandpaper -sander -brushes -drill -and more
Description of making a mini wall cabinet for playing Darts.
Step one: Dismantling the pallets.
As already mentioned, the main material for creating the cabinet was pallets, or rather the boards from which they were made. But to get these boards, the pallets need to be disassembled. Therefore, armed with a hammer and a nail puller, the author got to work.
The photo below clearly shows the problem the author encountered. Since the nails were bent too far into the boards, it was difficult to get them out, and when removing some of them the boards were slightly damaged.
Step Two: Preparing the Boards
Step three: Elaboration of the cabinet design and marking.
The next step was to work on the design of the future cabinet. To begin with, the boards were laid out in one row and a Darts board was placed on top of them. Next, according to the target, the size of the future cabinet was marked and tried on. Thus, the cabinet body was assembled around the target. To make the product look more pleasant, the boards were subject to additional processing.
Step Four: Assembling the Cabinet.
Then the author proceeded directly to the assembly. To do this, the boards that should create the back wall of the cabinet were glued and clamped with clamps.
After the main part of the Darts wall cabinet was completed, I began creating the side doors. To do this, the boards were glued together in the same way as the back wall of the cabinet.
Step six: final assembly of the product.
After preparing all the details, the author began the final assembly of the cabinet. The side doors were hinged and a Darts board was installed inside. Also, a pair of planks were attached to the sides of the doors, which will serve as holders for darts.
Then the entire structure was covered with several layers of varnish.
Tables were also made to record the results of the game. They were made of birch veneer, on which two layers of paint were applied. A bronze marker was used to mark the table.
The result was this:
Source