Most commercial knife sharpeners can scratch or damage your knife. Professionals recommend using sharpening stones in sets. However, the price of these stones starts from 2000 rubles and higher for large sizes. These stones also have a problem: after repeated use, they wear down into a “bowl” shape. This, in turn, requires the purchase of additional stone to flatten the surface. As you might imagine, purchasing these varieties of stones becomes extremely expensive.
The knife sharpening device I made with my own hands is capable of sharpening a knife sharp enough to shave hair, consists of easily accessible parts and simple drawings, does not lose its properties over time and does not wear off. Also, this sharpener can be quickly repaired in case of problems and becomes no worse than new.
How to make your own sandpaper
Sandpaper
- A coated abrasive used primarily to smooth surfaces and remove tiny particles from them. Sandpaper can be made from a variety of materials, such as aluminum oxide, silica and chromium oxide. Sandpaper was first called glass paper, and in the past people used shark skin as a form of sandpaper as well.
Nowadays you can also make your own sandpaper, but you need to pay a lot of attention when you do this project. It may take you a lot of time because you cannot figure it out right away, so this job requires some patience as well. Be very careful when you attach things together with glue and try not to run off more than necessary.
Step 1 - Wrapping and Marking the Paper
Wrap the sander belt with the paper and make sure to leave some space, about half an inch. Use a pencil to place the markings on the paper. Now turn the paper over and place the line marking in the corner of it. Measure the angle with the combination square first. Many belt sanders use an angle of approximately 32.5 degrees. You can use this angle as a guideline.
Rules for sanding wood
How to properly sand wood with a grinder or other tools? This question interests many.
Sanding planed logs from the outside
To polish a log house made of planed logs, you should use angle grinders. It is recommended to use devices of the mid-price category.
A special grinder will be an effective device.
Sanding rounded logs
Such a log house already has a flat surface. Therefore, using a grinder with a lack of experience will lead to the appearance of furrows and holes. In such a situation, eccentric machines are more suitable. They are less productive, but if the pressure is too strong, the disc becomes blocked.
Sanding the log in grooves and corners
Regardless of the logs used, the grooves must be sanded with a grinder. It is recommended to use a smaller attachment than the disc. If they coincide, the tool may jam.
Important! The corners of the log house are considered the most problematic areas. They are best processed with chisels.
Log end processing
For these areas, it is worth using a grinder, which has an abrasive wheel with 40 grains. Adjusting the speed allows you to choose the optimal speed mode. In this case, cleaning with fine grains is not required.
What can replace sandpaper?
For many jobs, sandpaper has to be rolled onto a block. To grind small parts, it is easier to use a matchbox instead of a block. It is always at hand and it is very easy to attach the skin to it. A piece of the required size is placed on top of the open box, the edges are folded inward and the box is pushed back.
A travel soap dish can be turned into a sanding tool. Replacing worn out sandpaper with new one is a matter of a few seconds.
When sanding small parts with sandpaper, it is easy to damage the skin on the tip of your fingers. This can be avoided by placing the sandpaper on a block, bending the edges and holding it in a vice.
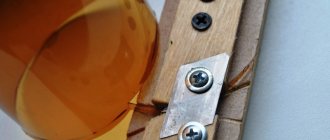
When sanding wooden and metal objects with a large surface, it is convenient to use a device made of two wooden blocks connected by a strip of leather. The sandpaper is secured with the sharp ends of nails driven into the top block.
Another way to secure the skin to a block. Insert one end of the sandpaper into the oblique cut, secure the other with a pushpin.
The easiest way to cut sandpaper (any base) is to use a nail. Its tip is drawn several times along the underside of the sheet, and then the desired piece is torn off. The edge is smooth and not stretched.
It is very convenient to sand large surfaces, such as floors, with a kitchen grater nailed to a wooden block. This device is more durable than simple sandpaper.
What do you need to know when sanding walls and ceilings after puttying?
The debate over whether it is necessary to sand the walls continues. Which decision is correct? Why do you need to sand the walls?
Why sand the walls?
Not all walls need to be sanded. For example, walls prepared for thick wallpaper, tiles, and panels do not need to be sanded. Of course, there is no prohibition here, but there is no point either. If the wall is covered with thin wallpaper or painted, small irregularities will appear. Other wallpapers hide imperfections, such as liquid ones.
There are masters who plaster well, the surface becomes smooth, without flaws, especially after applying putty. Even they have scratches and small transitions that are visible, for example, after painting.
Necessary tools, materials
Sanding after puttying is done with abrasive materials:
- sandpaper;
- abrasive stones;
- diamond mesh.
Grinding is done manually with a block or grater. Sandpaper and mesh are attached to the sole. The work can be automated with a grinding machine. Particularly difficult areas are in the corners, a device will help.
- plastic corner;
- stationery knife;
- Double-sided tape;
- sandpaper of different grits.
The corner can be taken from the leftovers after installing a plastic window, or bought in a store. You can use flexible thin plastic about 5 cm wide. The corner is cut in half, resulting in two plates. The plates are cut into pieces of 20 cm. One surface of each piece is cleaned of dirt and degreased. Double-sided tape is glued along the entire length. Softness doesn't matter.
Sandpaper is cut to size. The protective layer of tape glued to the workpiece is removed and sandpaper is glued on. The result was a flexible tape with sandpaper. However, it is inconvenient to work with tape; one edge of the segment is cut in the form of an angle. A cut corner is good for sanding plaster in hard-to-reach places. As it is erased, the paper is cut off and continued to be used fresh.
It is convenient to use two sandpapers of different grain sizes on one plate: for rough grouting, fine. Fine-grained erases faster; the length should be twice as long as coarse-grained.
The better to skin
There are not many materials for sanding walls; available ones are used. Sanding the walls is carried out in at least two stages:
- rough, rough grout;
- final sanding.
At the first stage, you can use any material, use it manually or automatically. If defects appear during grouting, they are eliminated with additional putty. When finishing grouting, it is better to use a hand trowel.
If a sandpaper is installed on the grinder, plaster accumulates in the central part of the circle, where the fastening nut is. As it accumulates, it compacts and acts as a polishing material. There are shiny spots on the surface that will stand out when painted.
The effect does not occur when using a diamond mesh; another danger arises. The mesh is fragile and hard particles often break off. When particles get between the mesh and the wall, they leave deep grooves that are impossible to erase. Needs to be puttied again. The mesh is not used for manual troweling during final sanding.
It is better to use cloth-based sandpaper. More expensive than paper, but will last much longer.
How to sand walls without dust
Basically, they sand dry plaster; during work, small particles fill the air. During manual processing, dust generation is inevitable. Some types of putty can be sanded by wetting, however, due to dirt, it is impossible to evaluate the surface. The wall will have to be wiped down constantly.
If the surface is wet, the quality of sanding will suffer and the sandpaper will wear off quickly.
You can get rid of the main dust. Many sanding machines provide a connection to a construction vacuum cleaner via a hose. There are holes on the grinding wheels through which dust is sucked into the unit.
Some manufacturers began to use the method for hand graters. On the body of the tools there is a pipe for connecting a hose from a vacuum cleaner, and on the sole there are holes. Graters only work with a mesh that leaves deep furrows.
Grater connected to vacuum cleaner
Grinding methods, pros, cons of materials
The main tools for sanding are:
- grinding machine;
- bar;
- grater
The machine increases the speed of work and processes large areas. The rotation speed of the abrasive is high, you need to be careful not to remove an excess layer of putty. Sometimes it is useful to use a finer abrasive - there is less chance of making indentations, and broken grains leave fewer scratches. The downside is the price of the device; experience is required.
The block is used during manual processing. Has clamps and latches for fastening abrasive material. Can be used in conjunction with sandpaper or mesh. Comfortable to hold. The likelihood of damaging the surface is much less than with a machine; larger grains are used. Disadvantage: no automation.
Sanding block
Some find it difficult to work with a block; they use a grater. The included handle simplifies operation. The disadvantage is that it is completely manual labor.
Grinding float
Cleaning the kitchen
If you have a cast iron pan at home that is starting to rust, this life hack can be very useful. Using a little sandpaper to sand away the rust can restore your cookware to its original appearance. This method will also help you easily remove some uneven surfaces on the pot or pan. It is recommended to work with gloves.
Advice from Novate.ru:
Sandpaper is excellent for removing rust and dirt from cast iron cookware. However, you should not use such an aggressive method to clean new dishes. It's better to start with less radical remedies: for example, using salt and vinegar. These two ingredients must be mixed until a slightly liquid paste is obtained, and then applied to the contaminated areas. Let it sit for a while, and then remove the plaque with the coarser part of the sponge or a non-metallic brush.
Metal brushes made of bronze, copper, brass and steel
Bronze or copper brushes are used to clean the sliding surface before applying waxes or powders. When using a fluoride remover, bronze brushes are also used.
Copper brushes
After applying the first base layer of paraffin, its remains are removed with a scraper, and then comes the turn of the copper bristles. With its help, paraffin residues are removed from the sliding surface. 5-6 passes are recommended in order to remove the substance as much as possible. It is important that some of the paraffin remains for the adhesion of subsequent ointments or powders, so soft metal (copper) is the optimal solution here.
Brass brushes
If a gliding ointment is used, brass bristles are used before applying it. 1-2 passes from toe to heel are recommended to create conditions for the ointment to adhere to the previous layer of paraffin. Brass is a harder metal than copper, so fewer passes are needed. Otherwise, there is a chance to destroy the paraffin layer.
Steel brushes
Steel brushes are intended for the professional, and are not necessary for the average hobbyist. They have a very fine steel fiber that removes paraffin from the smallest structure. Only used when applying hardeners in severe frost or powders in all temperature ranges.
Tidying up the bathroom
No matter what we do, over time the seams between the tiles tend to become so dirty that no means can remove them. If this problem has appeared in your life, you should try a radical cleaning remedy. To do this, take sandpaper, fold the piece in half, and then use the edge to lightly sand the seams. Care should be taken not to scratch the tile.
Updating the cutting board
Over time, a wooden cutting board tends to become covered with knife grooves, darken and acquire an unpleasant odor. In the formed cuts, food debris can accumulate, which becomes fertile ground for the development of microbes. To refresh your cutting board and give it a good clean that regular detergent and sponge won't provide, you can lightly sand the cutting board with fine sandpaper to make it look like new. To make the board completely perfect, a non-toxic type of mineral oil can be used to coat the wood so that it does not absorb odors.
Plant protection from pests
If you place flower pots in your garden or country house on top of a piece of sandpaper, they will be reliably protected from various pests, especially slugs. These moisture-loving lovers of living vegetation will not want to touch the paper, since it has a rough texture that makes them uncomfortable. Thanks to this simple life hack, slugs will not be able to get into the pot and damage your favorite flowers.
Profiled and laminated timber: differences in the process
Sanding allows you to improve the appearance of walls and prepare them for high-quality painting, waxing or varnishing. For profiled and glued material, the process is different:
- Profiled timber . Usually processed in two steps. The first time is sanded with a coarse abrasive (a wheel with a grit size of No. 40), even at the construction stage. The second treatment (final polishing) of the walls is carried out after completion of the shrinkage process.
- Glued laminated timber . This building material is carefully processed at the production stage, does not shrink strongly and therefore does not require preliminary deep grinding like its profiled counterpart. To process walls made of laminated veneer lumber, use nozzles with a wheel starting from No. 80. Sanding should be carried out with caution - excessive force can damage the outer lamella.