Today, collecting dolls made by hand, to order, as well as those purchased from limited editions or simply popular ones has become widespread. Of course, no one wants to store such a collection in a desk drawer. Beauty should please the eye, be visible, and not gather dust on the mezzanine. Therefore, real collectors have a need to make a doll stand with their own hands. So that not only the collection surprises with its originality, but also the holder matches the favorite one hundred percent.
What parts does the stand consist of?
Many dolls cannot stand upright without support because they have a small support area or an inadequate center of gravity. Special removable stands give stability to such products. Both store-bought and home-made models consist of a disk-shaped or square base and a vertical stand fixed on it. The upper part of this rack can be in the form of a ring or a small rectangle. Their diameter should be slightly larger than the width of the product’s hips. The height of the stand should be close to half the height of the pupa.
Those who want to learn how to make a stand for dolls should remember the aesthetic design of the support. The composition should look coherent so that the appearance of the doll does not deteriorate. Tasteful details will enhance the expressiveness of the outfit and its decor. You need to carefully consider the diameter of the stand so that it does not fall when tilted. For large toys, the base should be massive.
Making hangers
You don’t have to make hangers for doll clothes, but use ready-made ones, for example, from sock packaging.
The hook can be removed from the packaging
If desired, they can be wrapped in thin foam rubber and covered with fabric.
Decorating hangers
If there are not enough of them or the right size, you will have to take their production into your own hands.
Hangers made of paper clips or wire
The easiest way is to make hangers from paper clips. They come in different sizes, metal, colored, with plastic braiding - there are plenty to choose from. The manufacturing process is simple, you can do it with just your hands, but it is more convenient to use pliers.
It is enough to bend the paper clip slightly on both sides, and then lift the long part and bend it with a hook. For rigidity, the tip of the short part can be wrapped around the neck of the hook.
Clothes clip hanger
Video - How to make hangers for dolls
If dolls need hangers larger than those made from paper clips, use wire. It is quite difficult to make neat and even products out of it; a simple device made from a piece of plywood or a plank and several small nails will help with this.
| Image | Description |
| Step 1 | On the board, draw the outline of a hanger of a suitable size and drive several nails into it, without recessing the caps. |
Step 2 | Cut a piece of wire and wrap it sequentially around the nails, forming hangers. |
Step 3 | Remove the workpiece from the template, cut off the excess wire and make several turns with its tip around the neck of the hook. |
Methods for attaching dolls to a frame
How are toys attached to these stands? The holder can be made with the following three attachment methods:
- In the form of a pointed stick onto which the doll’s body is inserted. Intended for toys that serve as interior decoration and are rarely removed from the frame.
- Fastening using secret pockets that are sewn to the doll's clothes. The stand stick is inserted into these pockets.
- Fastening by “hanging” the toy in the area of the armpits or waist. This is the most popular, versatile and easy-to-use type of stand. It is the modeling of such supports that will be discussed in our article.
It is worth noting that stores sell such devices made of plastic, metal, wood, and plexiglass. What can you use to make this support yourself?
Pattern of a life-size doll
Tilda was released thanks to the artist and decorator from Norway Toni Finnanger. Its standard height, according to the author’s idea, is approximately 40-50 cm, but there have long been no clear rules on this matter. The famous toy can be slightly larger than the palm of your hand or the size of a child.
The size of clothing and jewelry must correspond to the doll’s figure and the author’s design.
Tilda's pattern can be printed on a printer or immediately drawn on paper with a pencil by attaching a white sheet to the monitor. It will not affect the appearance of the future Tilda in any way whether you sew the pattern pieces by hand or on a sewing machine. A carefully executed hand stitch sometimes looks better than a machine stitch.
DIY cardboard doll stand
We offer you a simple and quick way to make doll supports. For such a case, stock up on the following materials:
- a 2 mm piece of cardboard, which can be purchased at an art store;
- a bottle of PVA glue;
- tube of Moment glue;
- a piece of sandpaper;
- set of acrylic paints;
- a jar of acrylic varnish.
We offer you a master class on cardboard paper doll stands. It is performed in the following order:
- The cardboard is cut into several parts (6-10), depending on how thick the support is wanted to be made.
- Identical circles are cut out from these squares.
- The round parts are glued together using Moment glue. You get a kind of disk.
- This semi-finished product is placed under a press for an hour.
- All uneven edges are processed with sandpaper. You get a perfectly round washer.
- This washer is covered and pasted over with ordinary office crumpled paper or a napkin.
- The workpiece is dried in the oven.
- Use your imagination and paint the support with acrylic paints and varnish it.
- Holes are made in such a soft stand and the doll is installed in them.
Very simple and convenient!
Required materials and tools
Regardless of the materials used, a do-it-yourself doll stand must meet the following criteria:
- stability, allowing you not to fall on your side under the weight of the doll;
- simplicity that does not distract attention from the doll;
- ease of use;
- accuracy.
Of course, no one wants to store such a collection in a desk drawer.
Beauty should please the eye, be visible, and not gather dust on the mezzanine. Stands that meet these requirements can be made from:
- wood;
- wires;
- cardboard;
- newspaper tubes;
- gypsum;
- computer disks;
- seaming caps.
Wooden support
Wooden accessories for dolls have their advantages. Wood emits a special aura and warmth that can complement the toy. The wooden support has an expensive and presentable appearance. They can be decorated using decoupage. This stand can be made to individual measurements. If the preparation is done manually, the result will be an environmentally friendly product.
To make a wooden stand, take a flat block of the required size. The top and sides of the workpiece are carefully processed to level and polish the wood. They step back a little from the edge of the block and drill a hole through. A wooden stand will be inserted into it. After this, the workpiece is painted and varnished several times.
The stand is made from a wooden plank. A narrow ring made of wire or elastic plastic is screwed to it. To place this ring in the rack, a small groove is cut into it. Secure the ring with small nails. All that remains is to assemble all the details into one whole. To do this, lubricate the lower end of the stand with glue and insert it into the hole in the base.
Step-by-step instructions for making a stand
From disk
For such a stand, on which the doll will sit, like on a bicycle, in addition to old disks, you will need:
- two plastic bottle caps;
- a piece of tin that can be cut from a can;
- aluminum tube, for example, from an old antenna;
- drill;
- Super glue.
To work, prepare two caps from plastic bottles, a damaged computer disk, an aluminum tube from an old antenna, a piece of tin from a coffee can, and super glue.
The working process is as follows:
- Cut off the bottom of one of the lids. This can be done with a hot knife. Cut a small piece from the wall of the resulting ring.
- Fold the tin rectangle two or three times in width so that it can wrap around the cork ring and close under it into a single strip. This manipulation will give the workpiece rigidity.
- Insert the ends of the resulting strip into the aluminum tube.
- Drill a hole in the bottom of the second cover and insert the workpiece there. The diameter of the drill must match the tube.
- Glue the cover to the disk to give the structure stability.
We decorate the leg half-time and put the doll in it, like in a bicycle seat.
From cardboard
Cardboard or newspaper tubes are suitable for such a stand. To work you will need:
- white paper or napkin;
- cardboard 2 mm thick;
- glue Moment;
- PVA glue;
- acrylic paints;
- sandpaper;
- acrylic lacquer.
The cardboard stand is made according to the following scheme:
- Cut 6-10 pieces of cardboard, depending on the desired size and thickness of the stand.
- Cut equal circles from the pieces, glue them with Moment and place under a press for an hour.
- Sand rough edges using sandpaper.
- Cover the workpiece with crumpled paper and dry it in the oven.
- Make a hole for the holder.
To ensure the strength of the base, it must be coated on all sides with glue and allowed to dry.
Note! If desired, the stand can be painted and then varnished several times.
The base of newspaper tubes is made as follows:
- Prepare the tubes. To do this, you need to cut a newspaper page into four strips, after which each of them is screwed onto a knitting needle from a corner. If the knitting needle is hidden under the newspaper, then it should be moved away and continued winding. After finishing the strip, glue the tip with PVA glue.
- Screw the first tube onto the stand. Once the first stick is finished, the stand can be removed.
Note! It is necessary to wind so many tubes so that the diameter of the base is sufficient for a stable stand.
- Make several similar disks of gradually decreasing diameter.
- Assemble the entire stand onto the stand, gluing the new disk to the previous one. The finished pyramid can be decorated.
Assemble the stand onto the stand. To do this, it is good to glue each new disk to the previous one.
Metal
The main materials of such a stand are thick wire, plaster and metal tube. The creation process is as follows:
- Bend the wire, the length of which is 3 times the height of the stand, in half and form a ring on one side that will be attached to the stand, and on the other - a holder corresponding to the size of the doll.
- Pass the ends of the wire through the metal tube.
- Dilute the gypsum in the proportion indicated on the package and pour it into a plastic mold.
- Insert the stand into the mold with plaster and leave to dry at room temperature. Remove from the mold after a few hours and leave to dry.
- Decorate the stand. It can be painted with acrylic paints, covered with corrugated paper or fabric.
Little dolls are the most favorite toys among girls.
They are not only beautiful, but also easy to play with. Note! The glue does not stick to wet plaster. In addition, if the base does not dry out enough, it can easily become damaged.
Saddle type
For such a holder you will need:
- wooden stand;
- wooden stick;
- silk thread;
- wire;
- PVA glue;
- knitwear or fleece;
- acrylic paint.
Insert one end of the wire into one hole, and the other from the opposite side into the other.
Tighten the joint with silk thread. The work order is as follows:
- Drill a hole in the middle of the workpiece, corresponding in thickness to the stick so that it holds securely.
- Drill blind holes in the stick from opposite sides, making an indent of 0.5 cm and 1 cm from the edge.
- Make a wire blank in the form of a saddle. One end of it must be inserted into one of the holes, and the other into the second.
- Tighten the joint with silk thread. Straighten the saddle and try it on the doll.
- Cut out a piece of fabric that matches the size of the saddle. Sew the part onto the structure.
- Decorate the stand and open it with varnish.
If desired, the stand can be decorated and varnished.
Heart stand
This base stand is suitable for small compact dolls whose height does not exceed 15-22 cm. The dolls are held on the stand thanks to a spring attached to the base. The base can be made of wood according to the following scheme:
- Cut a flat piece of wood to the required size.
- Carefully sand all surfaces of the workpiece using sandpaper. It is necessary to level and properly sand the wood.
- Drill a couple of through holes, stepping back slightly from the edge of the block.
- Paint the workpiece and varnish it several times.
- Insert a small tight spring into the holes and secure with small nails.
A wooden stand, of course, is more durable and practical.
Gypsum is an excellent base material.
Small items can be mounted on plaster stands. They are quite heavy and do not tip over. To perform this work you will need the following raw materials:
- gypsum powder;
- thick copper wire;
- metal tube of the required diameter.
First, a stand is made from wire. The length of the wire should be three times the height of the stand. The dart is bent in half and a ring is formed for the stand. The ends of the wire are passed through a metal tube.
Next we begin making the base. To cast the gypsum support, formwork (a special mold) is prepared. Liquid plaster is poured into the mold and the lower part of the wire stand is immersed in it.
After the workpiece has hardened, the formwork is removed and possible irregularities are rubbed with plaster. Such a product can be covered with any dense fabric, for example, a piece of velvet.
How to decide on sizes
The dolls, their houses and furnishings are smaller copies of us and our homes. And the most reliable way to make doll furniture with your own hands and not make a mistake is to measure real objects, reduce them several times, and then work with the obtained values.
Furniture for dolls - copies of our furniture
How much to reduce the actual dimensions depends on how small or large the doll is, because they range from 7 cm to 60 cm or even higher. Accordingly, they need furniture of different sizes. To determine the number by which the actual dimensions should be divided, divide the average human height in centimeters (170 cm) by the height of the doll. Let's get some number. This is how you will need to divide the dimensions of real furniture.
For example, the height of the doll is 15 cm. We calculate: 170 cm / 15 cm = 11.3. It is by this number that we divide all the parameters of “human” furniture. It is also worth saying that 14-15 cm is the most popular size among the doll population. Therefore, most of the finished furniture is made in a ratio of 1:12. We can also use the existing dimensions, at least so that we can navigate the scale of the required parts and the amount of materials.
Approximate dimensions of furniture for doll children
So, the most common doll sizes are:
- male doll 150 mm;
- female doll - 140 mm;
- child doll - 75-100 mm;
- toy baby - 65-75 mm.
If you need furniture for dolls of similar sizes, its parameters will be as follows:
- Bed: double – 160*130 mm;
- single - 160*75 mm; The size of the setting depends on the height of the inhabitants
If the toys you have are slightly larger/smaller, you don’t have to adjust the sizes. If the difference is large, you will have to increase or decrease (or you can calculate it yourself).
Old computer disks are good helpers
In a very original way, you can use old CDs to model stands. To work, take one old disk, a balloon stick, a piece of soft wire, a ball of twine, Moment glue and PVA.
First, a wire ring is made on the shelf. Then this stand is inserted into the hole of the disk. Then glue is applied to the disk in a circle and wrapped with twine all the way to the ring. They get something similar to a lamp stand. Such an original little thing will delight little housewives.
Paper coasters
This type of coaster is made from cardboard (2 mm thick) or newspaper tubes. Let's look at how to make a base from these materials.
For a cardboard stand you will need:
- cardboard;
- office paper or napkin;
- PVA glue;
- glue Moment;
- sandpaper;
- acrylic paints;
- acrylic lacquer.
Depending on the desired thickness and size of the stand, cut 6-10 pieces of cardboard. Cut out identical circles from the pieces.
Glue the circles together with Moment glue and place under a press for an hour. Use sandpaper to smooth out any uneven areas on the sides.
Cover the workpiece with crumpled office paper and dry it in the oven. If desired, paint and varnish. Make a hole for the holder.
Base made of newspaper tubes. Prepare newspaper tubes. To do this, cut a newspaper page into 4 strips. Start winding the newspaper strip onto the knitting needle from the corner. If the knitting needle is covered with newspaper, move it aside and continue winding. When the newspaper runs out, glue the tip with PVA glue.
Take the first tube and screw it onto the future stand. When the first stick is finished, the stand can be removed. Wind up enough tubes so that the diameter of the base is sufficient for a stable stand.
Related article: Plush fabric is not only for toys and furniture
Make several such disks, but each one is slightly smaller than the previous one.
Assemble the stand onto the stand. To do this, it is good to glue each new disk to the previous one.
Decorate the resulting pyramid as desired.
Tripods with corsets
Doll beauties with labile, soft bodies can be placed on a stand by placing them in rubber band corsets. It is better to make these rubber belts narrower than the waist. First, a base and a stand are made from scrap materials. It can be a wooden base and a metal tube. The loop for the stand is made of wire. Some people manage to saw off the top of the paper towel holder.
How is the doll secured? First, a rubber corset is put on her, and then she is placed on a metal loop. This corset stand is very convenient.
Toy cutlery
If your child asks to buy him a toy dishware, you shouldn’t rush headlong to the nearest children’s store and buy expensive accessories. They can be made very easily and simply with your own hands from scrap materials. To make dishes we will need:
- chocolate box with liner;
- scissors;
- decorative elements.
Making toy dishes takes little time and is done like this:
- We take a box of chocolates and take out the shiny and thick liner.
- We cut out plates and bowls from round candy boxes.
- To obtain cutlery, we will use the denser edges of the liner. We cut out forks, knives and spoons from them.
- We decorate the finished dishes with a variety of decorative elements.
The simplest support option
There are several options for the simplest frame models. The first is a wire stand. The base is made in the form of a ring and a stand with a hook is attached to it.
The next option is just a base with a stick. The doll is attached to it using a pocket on the back.
For dolls in dresses, a simple option with a holder is suitable. Under clothing, such a product is not visible at all. The frame of the stand is made of wire. Plastic tubes or cambrics are put on the ends. The base can be a wooden cube. Everything is simple - brilliant!
Do it yourself
You don’t have to buy a stand; you can make it yourself. This method even has its advantages. For example, the product can be immediately made in accordance with the size and design of your doll.
Handmade coasters come from a variety of materials: wood, plastic, electrical wires, wire, cardboard, rubber, etc. Sometimes they even use products from the plumbing department - plastic dowels and tubes - for their production.
The most common method of homemade production is as follows: a pair of holes are drilled in a wooden plank, a thick wire is passed through them, and it is connected. And then the doll is attached to it.
You can make a stand out of cardboard. To do this, several cardboard circles of the same diameter are glued together. Then they are wrapped in colored paper or draped with fabric. And a thick wire holder is carefully screwed onto the resulting platform. It should be noted that this design is only suitable for very miniature and light dolls.
Interesting post? Tell your friends about it:
Stands for Monster High dolls
Monster High dolls have gained great popularity. While children simply have fun with them, adults use them as collection exhibits. To make the cute dolls look nice on the furniture, you should build a simple support for them. How to make a stand for Monster High dolls? All of the above methods of making products are definitely suitable for these cuties.
Before execution, it is important not only to look at samples and master classes, but also to use your imagination. Using available tools, you can make a stand in the form of a seat. In this case, the doll simply sits on it like a bike saddle.
For “Monster” dolls, it wouldn’t hurt to make an option from a plastic bottle cap. Perform this product according to the following instructions:
- Using a hot knife, cut out the bottom of the lid.
- Another small piece is cut out on the wall of the resulting ring.
- An old computer disk is used for the base.
- The ring from the lid is glued to this disk.
- The doll is inserted with its feet into the ring.
For cute monsters, special multi-colored plastic stands with specific symbols are sold. But, with care and patience, you can create the perfect complete composition for the doll yourself. You may need some lace, fabrics, paints, ribbons, decoupage napkins, felt scraps and other decorative elements. Try it, dare, make your little ones happy!
LiveInternetLiveInternet
Stand from Ulitinka Stand for a doll. Master class 7:05 | Author: Ulitinka When the question of making a stand for a doll first arose for me (I’ll generally keep quiet about purchasing it in our Tver wilderness), I scoured the entire Internet in search of ideas. I must say that I didn’t find anything useful for myself. Everything that was offered was somehow “unfeminine”, and I can’t count on my husband to rush to the rescue. Dolls are my game, so I can handle it myself. Therefore, the stand I came up with is very simple. The main problem may arise in the presence or absence of wire. But if it’s not the same as mine, then I think that any other one is sold in stores. Do-it-yourself stand for a doll You will need: A piece of wire. Strong enough, but at the same time flexible. I have aluminum. Alabaster or plaster. Sold at any hardware store Empty plastic bottle. 2 liter is better Scissors Pliers Bowl for mixing alabaster (the bowl won’t suffer much, so you can take any one. I took it from the dogs :))))))) Water Any stick for stirring plaster. I have an old brush. For decoration, I took pebbles. First I washed and dried them. But this is optional. A little trick: I love using foam pads as a palette. They are brought from the store regularly and it’s a shame to throw them away. But as a palette they are ideal. I used them and threw them away. Here I will have a dirty brush and pebbles in it.
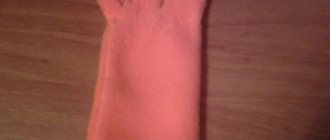
Let's cut our bottle. First, cut it higher, because the scissors tend to bend the bottle too much. And then you will bring it to the height that is required. There is a notch on the very bottom of the bottle, so we very carefully cut off the excess along it.
Now let's take the wire. We roughly estimate the required length. Life has shown that it is better if the doll is held with a stand above its middle (it’s bent. I hope it’s still clear?) This time I’ll try to make it (fortunately, my clothes allow it) so that it sticks directly under the armpits.
At this level, I unravel the wire and bend three ends. I don’t need the rest and I bite them off with pliers.
One of the three will fasten the entire structure from above. We hold it with pliers and with our fingers we lay the tip in a spiral. This is what happened
We bend the remaining ends so that they cover our doll. If the ends are too long, then we cut them off mercilessly. Now he looks at the length from below. I made a mark by placing a brush where the doll’s legs ended. Make a mark with a pencil or felt-tip pen. This is the place where our wire will be immersed in the solution. Now we bend the wire turning it into such a hedgehog. Please note that I intentionally bend it in different planes. Thus, it will be both a support for the stand and reinforcement for the alabaster. But keep in mind that the height should not exceed the height of our bottle base. While we are unbending, turn on the glue gun.
We seal the ends of our holder with heated glue. Otherwise, they will definitely cling to the fabric of the doll itself and the clothes. In general, with the advent of my glue gun, life became much easier. A little trick: If someone else is being crushed by a toad, then I’m sharing a way to deal with it. Don’t buy a gun in handicraft stores. For some reason, there, for us handicraftsmen, they sell them much more expensive than for builders in construction stores. Mine was bought for 200 rubles and at the same time I got it in a special plastic suitcase and with a set of glue sticks in the amount of 5 pieces! Well, you must agree, it was very successful)))))))) We check how ready our hedgehog is to fit into our jar. If necessary (it will arise, no doubt !) shorten the excess with pliers. Well, now comes the fun part! We measure out the required amount of water. To do this, pour it directly into our “base” and then pour it into the prepared bowl.
We begin to pour alabaster into the bowl. In general, working with plaster (and alabaster) has its own rules. Be sure to pour it into the water, and not vice versa! Having poured it, let it calmly combine with water. Just make sure that it is completely submerged and do not try to immediately start mixing. This time I had a hard time because I had to take pictures with one hand, so I broke the technology, but you will have two hands. So pour it in, shake the bowl slightly and wait until the alabaster is completely hidden and stops blowing bubbles (or almost stops) and then stir thoroughly.
You see, I started stirring earlier and had to do it much longer to get the bubbles to come to the surface.
The process is over.
Carefully pour the solution into the base (now without quotation marks, because it really becomes so) First make sure that there is no water left in the base. This is not scary, but unpleasant. The water displaced by the solution will rise to the top and you will have to mix it again directly in the container, and it is not comfortable.
This is how it happened. Exactly as much water was poured in, exactly the same amount of solution was obtained. Everything should be economical and thrifty :))))))))
We insert our stand. This time (unlike Glashina) I decided to move the stand to the side. So that there would be less of it in front, and more in front, in front of the doll’s legs. But this is again optional.. See for yourself what you want to achieve and proceed from that. After the hedgehog dives, the alabaster should level itself. But if suddenly (oh, horror! :)))) this does not happen, then help him. Make sure that your stand is absolutely vertical. And hold it until the alabaster starts to stick. This is very fast. I was completely indifferent to how much the alabaster had straightened out, because I decided to make paving stones (or I don’t know what). Holding the stand with one hand, with the other I quickly threw in the pebbles and buried them in the solution. I repeat, the solution sets quickly, so move if you want to repeat my feat :)))))
We leave our design to dry. A little trick: Alabaster is considered dry once it becomes cold. So while your stand is warm from the process, don't disturb it.
Here you go. My stand has cooled down and is completely ready. The delivery is tucked under the doll’s clothes. I lightly press the “holder” on the body so that the doll is securely fixed. Now it’s convenient for her to arrange any photo shoots, and just put her somewhere on the table, and not just plant her or hang her. The plastic in which we poured the solution will not scratch or stain the furniture, which is also very convenient. Py.Sy. There is no doubt that the plastic can be painted and the entire structure can be decoupaged. Or cover it with cloth. In general, there are a lot of options. If you have some other wire, then you can twist it yourself to achieve the required strength. Or not twist it, but simply twist it with thin wire in several places. Or even electrical tape. I still have in my head a very interesting option for making a stand and even a more universal one, but so far I don’t have a suitable tube for this. As soon as it appears, I’ll immediately share the idea.
Taken from https://kuklolend.blogspot.com/2010/05/blog-post_25.html
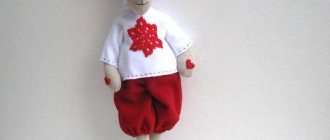
Tilda Santa doll
If you are preparing for the New Year, then Santa Claus doll tilde with your own hands, a master class which you can always find, will be the best decoration or souvenir. Tilda Santa Claus is sewn according to a pattern, having previously prepared fabrics for the body, clothes, and yarn for making a beard. You will also need padding - it can be holofiber or synthetic fluff. You will need blush and paint to make the eyes. Usually they choose white and red material for the doll. But you can always experiment and choose any colors for Santa. For company, you can sew a deer for your character. This toy will decorate any New Year tree.
The best free Tild patterns
Below are selected photos of sewing and patterns of life-size Tilts, so that needlewomen can download them for free and print them at any time. Choose any Tilda doll pattern and create a masterpiece with your own hands!