Making a tank from triangular origami modules
Very soon we will celebrate the holiday of real men - Defender of the Fatherland Day.
If you hurry, you can make a tank from triangular modules as a gift for your beloved father, grandfather or husband. To assemble the tank we will need:
- sheets of green paper;
- stationery knife (or scissors).
Instructions for the manufacture and assembly of the product.
In total, 1688 green modules need to be made for the craft.
Let's start assembling the product from the tower. To do this, you need to connect the modules in triplets (15 in total), and then close them in a circle.
The total number of modules in a row is 30.
Carefully turn the resulting workpiece inside out. We lightly press on the corners that were on top and lower them down and inward. We will lift the corners that were at the bottom up.
Rows 3-8 - 30 modules each.
There are also 30 modules in the 9th row, but they need to be inserted with the short side out.
The tank turret is ready.
We begin assembling the caterpillar with triplets (25 in total), which we close in a circle. There are a total of 50 modules in a row.
Rows 1-5 - 50 modules.
In the sixth row, we reduce the number of modules by 4. We reduce them opposite each other in the places where the track bends. There are a total of 46 modules in row 6.
Row 7 - 46 modules, short side out.
The second caterpillar is made according to the same scheme.
You need to insert 3 wheels inside the caterpillar. The total number of wheels for two tracks is 6.
There are 10 modules in each row. In total you need to collect 7 rows.
Connecting part for tracks.
The part is made quite simply according to the following scheme: we alternate 5 and 4 modules in a row.
In total you need to collect 34 rows.
The ends of the workpiece need to be slightly bent.
We insert the part between the two tracks.
Before attaching the tank turret to the tracks, you need to make a cannon. It is made in the same way as a connecting part, only you need to alternate 2 and 1 module in a row.
We attach the cannon to the turret and attach the entire structure to the tracks.
Frame Design Selection
Frames are either solid or articulated. Solid frames are simple and lighter, however, they require an axle with steering wheels. Articulated frames consist of two half-frames, joined in the middle by a pivot joint.
This frame design allows for high maneuverability, simplified axle designs, and the use of simple all-wheel drive.
The frame for a homemade mini-tractor is made from channels, angles and pipes of various sizes, taking into account the engine power and the nature of the work. It must be strong and reliable, which can be achieved by choosing the correct profile size and using gussets.
Before starting to manufacture the frame, you need to decide on the layout of the components, the place of their attachment to the frame and the wheel track, select ready-made drawings of the mini-tractor or make them yourself.
Module assembly technique
Step-by-step instructions for modular origami for beginners contain a method for making a triangular-shaped module and diagrams of volumetric figures using the origami technique.
Folding three-dimensional figures from identical paper parts is called modular origami. This activity is very labor-intensive, but at the same time exciting. By practicing modular origami techniques, children develop not only fine motor skills, but also mental and creative abilities.
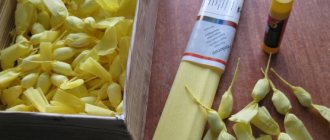
First, they learn how to fold a module . Take sheets of A4 paper and fold them in half until you get 16 rectangles. Cut the sheets along the resulting lines into 16 parts.
- The module is folded according to a simple scheme from 1/16 of the sheet:
- A small rectangle is folded in half horizontally, then in half vertically.
- Unfold the rectangle and turn it to the other side with the convex fold line facing you.
- The left and right sides of the rectangle from the fold line are folded down and connected to each other in the center.
- Turn the figure over and bend the protruding lower edges of the triangles upward.
- The protruding corners of the triangles are folded inward.
- The large triangle is folded in half and placed.
To make crafts, diagrams are used that contain information about how many modules need to be made and what color they should be.
Mounting methods
The module has 2 corners at the edges and 2 pockets on the fold line. These parts of the triangle are involved in attaching the modules to each other. Triangles are placed in two ways - on long or short sides . Bonding options:
- Take three elements. Two elements are placed next to each other with their long sides and 2 corners are inserted into the pockets of the third element standing on the short sides.
- Two elements stand on the long sides, insert 2 corners of one triangle into the pockets of the second.
- Two triangles stand on the short sides, one triangle is inserted with its corners into the pockets of the other triangle.
Step-by-step photo lesson:
To create a tractor, take blue paper and cut out a rectangle.
We fasten the sides with a stapler to form a tube.
On the front side below, draw two vertical lines on the sides.
Modular swan
The masters offer beginners step-by-step instructions on how to make a modular origami swan out of paper. You can make a small white swan, a large swan and a “Swan Princess”.
Small figure diagram
To make a baby swan , you need 22 dark yellow triangles, 120 white triangles and 1 red triangle. The first circle and all subsequent circles of the little swan figurine are made up of 15 blanks.
The swan's body is made up of 3 rows of elements, then the product is connected and raised with the corners of the triangles upward, the 4th, 5th, 6th, 7th rows of blanks are inserted from top to bottom. Having completed the 7th row, they begin to fold the wings. The wing is assembled anywhere from a blank of 6 elements.
The wing begins to be made from 1 dark yellow element, 4 white elements, again 1 dark yellow color. Subsequently, each row of the wing is reduced by one white element, while the dark yellow modules remain at the end of each row. The work is completed when only 1 dark yellow module remains. The second wing is made in the same way. The neck is folded, putting 15 white pieces into a triangle and at the end 1 red one - a beak. The finished strip is inserted between the red modules. Usually a whole family of small swans is put together.
Great white swan
The big white swan is made up of 355 white modules and 1 red one. When working on a craft, make sure that the direction of the modules matches.
The swan's body begins to be built according to the scheme:
- First, place 2 triangles next to each other, their corners are inserted into the pockets of 3 elements. Place the next triangle on one side and connect it with another triangle. You get 4 triangles in the first row, 3 in the second row. In this way, all the triangles in the row are connected. At the base of the body there are 30 elements, in the second row there are 29 elements. The first row is taken as 2 rows.
- The third row is made immediately together with the first for the strength of the craft. Elements of the 1st row are connected by elements of the 3rd row, for which 28 triangles are used.
- A circle is modeled from the strip.
- The craft is pressed in the center and turned inside out, the corners are raised. Subsequent rows up to the eighth row are assembled in a checkerboard pattern, connecting triangles from top to bottom in a checkerboard pattern, each row containing 30 triangles.
- From the seventh ring they begin to build the base for the wings. 10 triangles for the wing are inserted anywhere on the body. In row 8, reduce the number of elements by one. Work on the wing is completed when 1 element remains.
- Count 2 modules from the beginning of the first wing and prepare the base for the second wing. The principle of working with it is similar.
- Then they make the tail. The place for the tail is the side containing the most free space. For the tail, connect the elements in descending order. The first row of the tail consists of 5 triangles, then 4, 3, 2, 1.
- The base for the neck is made of 2 modules, which are located on the opposite side of the tail. Fifteen pieces of blanks are connected to each other, at the end 1 red blank is attached for the beak.
- The neck is placed between the tails.
To make the “Swan Princess”, you must follow the step-by-step instructions and assembly diagram.
To design three-dimensional figures, you need to have hard work and perseverance. Handmade crafts are the most valuable and expensive! She is the best gift for family and friends!
Advantages and disadvantages
What are the pros and cons of such a product? Firstly, you can operate a mini-tractor even in very limited space - it will fit perfectly into a small garage in the backyard. However, despite the fact that the size of a homemade tractor is relatively small, this will not in any way affect the functionality and volume of work performed.
In addition, it will help cope with plowing heavy rocky soil, since in this case digging with a shovel will give almost no results.
How to make a homemade tractor
In addition, you can independently make your own unique drawing of a tractor that will meet all your needs.
Modular origami from triangles
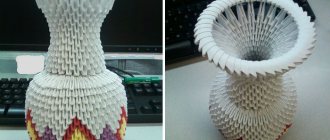
There are several types of paper origami modules, but triangles are the most popular. Only they allow you to create a wide variety of models based on the same “construction” unit. The imagination of origamists is not limited by anything - miniature triangles can be used to fold flowers, animals, vases and architectural objects ranging in size from a human palm to two meters or more.
Tractor made of cardboard without using glue
Tractor made of cardboard without using glue
Tractor made of cardboard without using glue
Tractor made of cardboard without using glue
Tools and materials that will be needed to create a tractor:
Tractor made of cardboard without using glue
What is a triangular module
The element is based on a rectangle, measuring from 1/4 to 1/36 of a landscape sheet (A4 format). Ready-made modules are connected using protruding “corners” and deep “pockets”, according to the principle of a plug connector. The tight fit of the parts ensures the strength of the structure, but for greater reliability it is better to additionally “seat” them with glue.
Before making triangles for modular origami, you need to cut rectangular blanks of a certain size. It is permissible to use several “calibers” at the same time: a larger one for the main volumes and a smaller one for elegant decoration. You can divide the sheet into modules based on the basic shape of the “Door”. For the 1/16 running element itself you will need:
- Fold the sheet in half lengthwise.
- To uncover.
- Fold each half towards the center line.
- Open the workpiece and repeat the same steps in the transverse direction. As a result, the sheet will be divided into 16 parts, measuring 7.4x5.3 cm.
Getting 1/32 is a little more difficult. The A4 sheet is first divided transversely along the central axis, and then each half is folded four times. This results in twice as many stripes as in the previous case. For the longitudinal direction, the actions are the same as when marking the 1/16 module. As a result, rectangles are formed, measuring 5.3x3.7 cm. It is best to cut the blanks with a stationery knife, placing a board, fiberboard or a special breadboard mat under the sheet.
You can get 1/32 rectangles in another way:
Triangle module
Folding a triangular piece from a rectangular blank will not be difficult. The only “but” is that you will need a lot of such elements, on average, about 1000 pieces for one figure with a height of 25–30 cm. Experienced craftsmen advise, whenever possible, to replenish stocks of parts while doing other things. For example, while watching your favorite TV series or walking with your child. After some practice, you can fold triangles without even looking.
Step-by-step instruction:
- Place the original rectangle with the long side facing you.
- Fold in half from top to bottom (this is important, since the free edge should “look” at us). We bend the workpiece in half across to mark its middle. Let's reveal.
- We lower the right and left edges down, aligning them in the center. Turn it over.
- We bend the outer corners of the workpiece.
- Fold the bottom up to the base line of the triangle.
- Fold the figure in half “valley”.
As a result, we get classic triangles for modular origami:
There are several types of connections for modular elements. They depend:
- from the choice of the side with which one part is connected to another;
- on the relative position of the “corner” and “pocket”.
The ABCs of modular business:
- The triangular module has two short sides located opposite the 60° angles and one long side opposite the straight one. In the figure they are designated, respectively, KSN and DSN.
- Connection on short sides (SSN).
- The same, but on long ones (DSN).
- “Snake”, when modular elements are connected one to another.
- The classic connection “two long sides and one short.”
- “Everyone is short.”
Developments of simple tractor models for children's creativity
Children who are not yet able to assemble a tractor out of paper using complex patterns with a large number of parts can make a toy with their own hands from a ready-made development.
The process of creating a craft consists of several simple steps:
- print out the picture you like;
- carefully cut out all the details along the contours;
- press all the folds along the ruler to obtain neat angles;
- coat the valves with glue and assemble a model of the tractor, checking the image of the finished model.
Blue paper tractor
In order for a cheerful educational cartoon character, a blue tractor, to “settle” in the house, the layout must be printed on a color printer on thick paper and assembled according to the step-by-step plan given above.
A simple tractor layout with a step-by-step assembly master class
It’s not difficult to make a model of a tractor with a trailer and rotating wheels if you carefully look at the photo and consistently carry out all stages of the work.
Master class on creating crafts
The process of assembling a toy consists of simple steps that even a junior schoolchild can complete independently:
- The patterns are printed and carefully cut out along the contours.
- To get a colored tractor model, you can color the templates with felt-tip pens or markers before starting assembly.
- Wheel blanks are glued to cardboard using an adhesive stick.
- After the glue has dried, the wheels are cut out, making sure that the cardboard base is not visible. To create a toy, you will additionally need 4 toothpicks and small beads.
- Mark the folds on the paper body of the car and make holes for the wheel axles in the marked places.
- The front flaps are sealed.
- Punch holes in the center of the cardboard wheels.
- Using toothpicks as axles, attach the large and middle pairs of wheels to the body.
- Cut out the trailer layout and cut the valves according to the drawing.
- Use nail scissors or a stationery knife to make holes for the axles.
- Bend the cart, first drawing along the dotted lines with the back of the scissors to obtain neat creases.
- Glue the valves to create a box shape.
- Insert toothpicks into the holes and put small wheels on them.
- The ends of all axes are secured with beads.
- The tractor and cart are connected, the paper transport is ready for agricultural work.
Development using cubecraft technique
A stylized cube tractor for little ones is an original toy that develops imagination and creative thinking.
Origami tractor with a simple diagram
A simple tractor model that even children or novice origamists can handle. To create a craft, you need 1 square sheet of 20 x 20 cm and 5 sheets of 10 x 10 cm. To make the toy more similar to a real car, you can take paper of different colors or even foil.
Video master class on creating an origami tractor.
How to Make a Bulldozer. Origami Step by Step Instructions
Watch this video on YouTube
Applications for children
Little car enthusiasts can start their journey as an engineer and creator of agricultural machinery with a simple application. A tractor made of colored paper, created with your own hands, will be a reason for pride for a child and, perhaps, the first step in paper modeling. And children who are not yet able to apply applique can simply color a picture that they like.
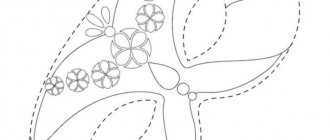
Cutting templates
To create an applique, the templates are printed, cut into pieces, applied to colored paper of the selected color on the front side, traced with a simple pencil and cut out along the contour. Then all that remains is to assemble the desired picture from the colored pieces.
Paper art does not lose its popularity because it allows you to create real masterpieces of modeling from such a simple and affordable material. And family evenings spent assembling toys using ready-made designs will become one of the warmest and most pleasant childhood memories for children.
Three models using modular origami technique
Novice craftsmen are not always familiar with the subtleties of “paper art”. The main thing when assembling origami from triangle modules, as in other types of needlework: embroidery, weaving or knitting, is not to rush and strictly follow the pattern at each stage. Then the work will immediately turn out neat and durable, without requiring any rework. There are other significant points:
- The modules must be folded very accurately, otherwise the product will be skewed and sloppy. The smaller the size of the assembly elements, the thinner the paper chosen for them.
- If the pockets are difficult to open, you can use a toothpick.
- It is better to start getting acquainted with modular origami with easy models, gradually moving on to more complex ones.
- Gluing the elements of the product will help preserve it for a long time and protect it from destruction when dropped.
- Finished work should be coated with transparent wood varnish. This is good protection against dust and fading, as well as the ability to do wet cleaning.
A good model for those who are just starting to get acquainted with the technique of folding origami from small triangles. It will require only 106 blue modules and 24 pink ones.
"Owl" scheme:
Assembly is carried out on the long sides. The 1st row consists of 16 blue elements. Starting from the 2nd, we add pink details for the owl’s “front” (12+4).
The total number of elements in each row is the same. But the color ratio is different.
3rd row: 10 blue and 5 pink pieces.
4th row: 8 blue and 6 pink.
Next, the modules are distributed in reverse order. For the penultimate row we take 16 blue parts, for the last – 15.
Having collected the owl, we make its characteristic “ears”. They consist of 3 parts that are attached to the last row, according to the same principle as the rest. Then we glue on the bird's eyes and nose from a pink modular element.
An “Owl” of bright fairy-tale color will decorate your home for Halloween or another themed holiday. It will also look spectacular in a nursery.
Chinese mini dragon
Following the principle of gradual complication of models, after the super-simple owl, you can just move on to the symbol of the water element, popular in the east. The dragon in China has long been associated with the cult of fertility; not a single rain-making ritual was complete without its images. In addition, this mythical character denoted belonging to the highest strata of society. Only the aristocracy was allowed to decorate clothes with his images, but such “freedom” was not available to commoners.
Historical reference
Modular origami most often means figures made from small triangles. However, there are also kusudama balls and polyhedra from the so-called “Sonobe modules.” Both varieties are native to Japan. Kusudama is a paper ball made of several sections sewn or glued together, known since the Middle Ages. It was filled with aromatic herbs that released healing essential oils, and hung in the house to protect against infectious diseases, as well as create a calming atmosphere.
Polyhedra from modules in the form of a parallelogram curved in a special way were developed in the 1960s by the Japanese origami artist Mitsunobu Sonobe and named after him. The master most likely borrowed the idea from his predecessor Hayato Ohoko, who in 1734 first described and presented the diagram of a three-dimensional cube made of several identical elements.
Origami from triangular modules is an invention of Chinese masters. Its origins are precisely unknown, but the Western world had to become acquainted with this unique technique under very sad circumstances. In 1993, 286 illegal immigrants from China arrived in the United States aboard the cargo ship Golden Venture. The “New Homeland” greeted them unkindly. When the ship ran aground near New York's Rockaway Beach, passengers tried to swim to the “promised land”, and 10 of them drowned. The remaining illegal immigrants were arrested by the Immigration and Naturalization Service (INS) and scattered in prisons across America.
While waiting for a response to their request for asylum, Chinese prisoners whiled away their time doing national handicrafts, including origami, which is called “zhezhi” in Pinyin. In the process of work, illegal immigrants invented triangular modules, creating large-scale figures from them: vases, swans, pineapples and ships. Instead of regular paper, they used covers of old magazines and newspapers. Later, when the technology became widespread, Chinese banknotes were often used for modular elements.
Inmates gave modular origami sculptures to those who supported them or sold them to raise funds for legal services. Some of them are presented at the traveling exhibition “Freedom Flight”, organized by the American Immigration Center.
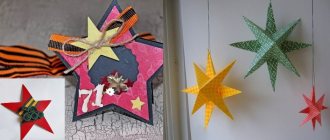
What can you decorate with?
In this direction, everything depends only on your imagination, creativity and capabilities. Don’t be afraid to come up with something unusual and interesting, consult with your child and ask what he would like to add with his own hands. The most common options are:
- Painting in different colors using watercolors or aerosol cans.
- Attaching various sparkles, rhinestones, beads or artificial stones using glue.
- Decoration with crumpled foil in the form of flowers.
- Adding fur balls.
- You can use multi-colored threads to wrap the microphone handle.
- Sign the microphone in an unusual way.
Subscribe to our Social networks
What other origami triangles are there?
Triangular modules are the first thing that comes to mind when it comes to origami techniques. But there are other elements with the same name, which it is advisable to get acquainted with so as not to get confused in concepts.
"Double Triangle"
Chinese origami modules are sometimes confused with the popular basic figure, which has nothing to do with them. The “Double Triangle” or “Water Bomb” is used in classic Japanese papermaking as the basis for many famous models. Among them are “Fish”, “Frog”, “Rabbit” and so on.
The basic origami triangle is folded according to the following scheme:
Step-by-step assembly of a three-dimensional model of the MTZ-80 Belarus tractor with step-by-step photos
MTZ-80 Belarus is a brand of universal row-crop wheeled tractors produced by the Minsk Tractor Plant from 1974 to the present. Creating MTZ from paper is a painstaking and time-consuming process, but the result - an exact copy of the legendary agricultural machinery on a scale of 1:43 is worth the effort.
Printable templates
Patterns are printed on paper with a density of 140-160 g/cm, cut out and assembled as the diagram suggests. Immediately after cutting out the elements, they are numbered on the wrong side so as not to be confused.
It is better to cut out parts as needed and immediately glue the elements together so as not to lose or crush the workpieces.
Assembly diagrams
Assemble the model according to the diagram, observing the numbering of parts and the order of actions. The folds are pre-pressed along the ruler. To get an accurate result, wait for each of them to dry before connecting the finished elements.