To ensure that the power supply in your homes is always of high quality, uninterrupted and reliable, it is very important to correctly connect the wires during installation work. There are a lot of methods, we will consider each in detail separately with its advantages and disadvantages, with step-by-step instructions for performing switching. We will also pay attention to the eternal question of electricians - how to connect wires whose cores are made of different metals (for example, copper and aluminum).
Existing methods of connecting conductors
Basic methods of connecting conductors in a house or apartment
Connecting wires can be done in several ways:
- welding is the most reliable method, ensuring high reliability of the connection, but requiring skills and the presence of a welding machine;
- terminal blocks - a simple and fairly reliable connection;
- soldering - works well if the currents do not exceed the norm and the connection does not heat up to temperatures above the norm (65°C);
- crimping with sleeves - requires knowledge of technology, special pliers, but the connection is reliable;
- use of spring clamps - wago, PPE - are quickly installed and, subject to operating conditions, ensure good contact;
- bolted connection - easy to perform, usually used in difficult cases - when it is necessary to switch from aluminum to copper and vice versa.
The specific type of connection is selected based on many factors. It is necessary to take into account the material of the conductor, its cross-section, the number of cores, the type of insulation, the number of conductors that will be connected, as well as operating conditions. Based on these factors, we will consider each type of connection.
Video description
The video shows the design of the WAGO 222 series self-clamping connector:
It should be noted that the lever model is reusable. In principle, it has no other differences from disposable terminal blocks. The manufacturer today offers models that can operate at currents up to 32 A.
Let's add to the advantages of self-clamping and spring designs the fact that during operation the terminals heat up, and accordingly their pressure plate expands. And this increases the downforce of the element.
Spring type connector Source a.allegroimg.com
Welding – high reliability in any conditions
When connecting wires by welding, the conductors are twisted and their ends are welded. As a result, a metal ball is formed, which provides a stable and very reliable connection in any conditions. Moreover, it is reliable not only in terms of electrical characteristics, but also mechanically - the metal of the connected wires after melting forms a monolith and it is impossible to isolate a separate conductor.
Welding - it is important to heat the metal, but not melt the insulation
The disadvantage of this type of wire connection is that the connection is 100% permanent. If you need to change something, you need to cut off the fused piece and do it all over again. Therefore, for such connections, a certain supply of wires is left in case of possible alterations.
Other disadvantages include the need for a welding machine, appropriate electrodes, flux and operating skills. In addition, welding takes a lot of time, it is necessary to protect surrounding objects, and it is also inconvenient to work with a welder at height. Therefore, electricians practice this type of connection in exceptional cases. If you are doing it “for yourself” and know how to handle a welding machine well, you can practice on scraps. The main trick is to not melt the insulation, but to weld the metal.
After cooling, the welding site is isolated. You can use electrical tape, you can use heat shrink tubing.
Removing insulation
Before connecting the wires in any of the eight known ways, the electrician will have to carry out preparatory work, namely, clean the core from the protective film. For the job you only need a mechanic's knife. Anyone can do this operation, but you need to be careful not to damage the wiring core. Therefore, you need to listen to the recommendations of experienced electricians and follow all their advice:
- The cable is placed on a table or flat board;
- Press firmly onto the board with your finger;
- The knife is pressed into the insulation at an angle;
- When removing the insulating ball, the wire should move, but not the knife;
- Having made a circular cut, the sheath is easily stretched and removed from the cable.
Electricians use strippers to strip insulation from cables.
Source yandex.ru Modern electricians use a stripper to remove the protective layer. This tool can be mechanical, semi-automatic or automatic. Its advantage is that the vein remains unharmed after the operation.
Connecting wires by crimping
To crimp wires, a special aluminum or copper sleeve is required - it is selected based on the size of the twist (bundle diameter), and the material is the same as for the conductors. The bare wires, stripped to a shine, are twisted, a tube-sleeve is put on them, which is clamped with special pliers.
An example of crimping conductors with a sleeve
Both sleeves and pliers are different, there are several types. Each of them has its own rules of use (the number of wires that can be packed in a sleeve), which you need to be well versed in. It is necessary to pack the wires according to certain rules, measure the size of the resulting bundle, and adjust it to the requirements. In general, a rather dreary task. Therefore, this type of wire connection is mainly used by professional electricians, and more and more often they are switching to spring clamps.
About the distribution box
In an apartment or house, wires from the electrical panel are routed to different rooms. There are usually several connection points: switch, sockets, and so on. In order for all the wires to be collected in one place, distribution boxes were created. They carry wiring from sockets, switches and are connected in a hollow housing.
So that during repairs you do not have to look for where the wires are hidden in the walls, electrical wiring is laid on the basis of special rules prescribed in the PUE (Electrical Installation Rules).
The main recommendation is that all connections are made in the junction box.
Distribution boxes are classified according to the type of fastening. So, there are boxes for external installation and internal installation. For the second option, you need to prepare a hole in the wall into which the box will be inserted. As a result, the box lid is located flush with the wall. Often the cover is hidden with wallpaper or plastic during repairs. As a last resort, an outer box is used, which is attached directly to the wall.
There are round or rectangular junction boxes. In any case, there will be at least 4 exits. Each outlet has a fitting or thread to which a corrugated tube is attached. This is done to quickly replace the wire. The old wire is pulled out and new wiring is laid. It is not recommended to lay the cable in a groove on the wall. If the electrical wiring burns out, you will have to dig into the wall and disturb the finish in order to carry out repair work.
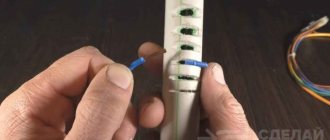
Terminal blocks
One of the simplest and most reliable wire connections is through terminal blocks. There are several types, but almost all of them use a screw connection. There are sockets of different sizes - for different sizes of conductors, with different numbers of pairs - from 2 to 20 or more.
The terminal block itself is a plastic case in which a metal socket or plate is sealed. A bare conductor is inserted into this socket or between the plates and clamped with a screw. After the screw is tightened, you need to give the conductor a good tug to make sure it is tightly clamped. Due to the fact that the connection points remain uninsulated, the terminal blocks are used in rooms with normal humidity.
The disadvantage of such a connection: due to the ductility of metals - especially aluminum - the contact weakens over time, which can lead to an increase in the degree of heating and accelerated oxidation, which again leads to a decrease in contact. In general, the connection of wires in screw terminal boxes must be tightened periodically.
Connecting wires in terminal blocks
Advantages - speed, simplicity, low cost, does not require any skills, except the ability to use a screwdriver. Another important advantage is that you can easily connect wires of different diameters, single-core and stranded, copper and aluminum. There is no direct contact, so there are no risks.
Application example
Clamps are considered low-voltage components and operate in the voltage range from 60 to 660 V. Installation inside electrical panels, when laying open electrical wiring and connecting low-power devices, is acceptable.
The installation process is as simple as possible. After selecting the desired model in accordance with the cross-section of the conductors to be fastened, remove the clamping plates from the equipment. To do this, remove the fastener holding the two parts of the case together. The fastening design can be different: using a locking ring, a threaded element with self-tapping screws or a washer holding the halves of the “shell” together.
After removing the clamping plates, depending on their size, the length of the section where the insulation on the switched cable will be removed is calculated. You can leave the corresponding marks with a marker or pen. Using a sharpened knife, cut the insulation as carefully as possible without touching the wires, and then remove it from the wire.
It is best to wipe the clamping surfaces and stripped wires with a cotton swab and any degreaser. Install the conductors into the recesses of the die. Adding a conductive lubricant is a great idea. Connect and fasten the parts by tightening the screws tightly. Hide the clamping plates inside the housing, holding both halves securely together. To ensure a stable connection, place Grover washers under the screws on the die.
Soldering
First, about soldering technology. The connected conductors are stripped of insulation, cleared of the oxide film to bare metal, twisted, and then tinned. To do this, the conductors are heated with a soldering iron and applied to rosin. It should cover the joint completely. Tinned wires are twisted first with your fingers, then pressed using pliers. Instead of tinning, you can use soldering flux. They wet the wires well, but after twisting.
Then, in fact, the soldering process begins: the joint is heated with a soldering iron or narrow torch. When rosin or flux begins to boil, take some of the solder onto the soldering iron tip and bring it into the soldering zone, pressing the tip against the conductors. The solder flows to fill the gaps between the wires, making a good connection. When using a torch, solder is simply added little by little into the torch.
Next, after the soldering area has cooled, according to the technology, it is necessary to wash off the remaining flux (they accelerate oxidation), dry the joint, cover it with a special protective varnish, and then insulate it with electrical tape and/or heat-shrinkable tubes.
Now about the advantages and disadvantages of this method of connecting wires. In low-current systems, soldering is one of the most reliable methods of connecting wires. But, when installing electrical wiring in a house or apartment, it is criticized mercilessly. The thing is that solder has a low melting point. When large currents periodically pass through the connection (this happens if the circuit breakers are incorrectly selected or faulty), the solder gradually melts and evaporates. Over and over again, the contact becomes worse and the connection heats up more and more. If this process is not detected, the matter may well end in a fire.
The second negative point is the low mechanical strength of soldering. It's the tin again - it's soft. If there are a lot of wires in a soldered joint, and if they are also rigid, when you try to pack them, the conductors often fall out of the solder joint - the elastic force is too great, which pulls them out. That is why it is not recommended to use soldering connections when wiring electricity: it is inconvenient, time-consuming and risky.
Application example
Consider a multi-storey building consisting of seven floors. As you know, it is customary to place switchboards at the entrance on each floor. Starting from the bottom floor to the top, a four- or five-core cable is installed (in new houses with modern wiring, where there is a separate grounding conductor). It passes through all the panels on the floors. Each panel supplies the apartments with power. In this situation, the use of a nut-type connector is simply absolutely necessary in order to ensure the connection of the electrical wires on each floor with a common main cable without breaking it on each individual floor.
If in this situation you break the “backbone” on all floors, connecting it to terminal blocks. this will significantly reduce the level of reliability of power supply to consumers. That is, if there is no contact on one of the phases for consumers on the lower floors, consumers on all upper floors, which, in turn, are connected to this phase, then risk being left without voltage.
Spring clamps for connecting wires
One of the most controversial ways to connect wires is using spring clamps. There are several types, but the two most common are wago terminal blocks and PPE caps. Externally and in terms of installation method, they are very different, but both designs are based on a spring, which creates strong contact with the wire.
There is controversy about this spring. Opponents of using wago say that the spring will weaken over time, the contact will become worse, the connection will begin to heat up more and more, which, again, leads to an even more rapid decrease in the degree of elasticity of the spring. After some time, the temperature may rise so much that the body (plastic) will melt, but what can happen next is known.
Spring clamps for electrical wiring - popular connections for wires
In defense of using spring clamps to connect wires, if they are used according to manufacturers' recommendations, problems are very, very rare. Although there are many fakes of both wago and PPE, as well as a sufficient number of photographs of them in melted form. But, at the same time, many people use them, and, under normal operating conditions, they work for years without complaints.
wago wire clamps
They appeared on our market several years ago and made a lot of noise: with their help, the connection is very quick and easy, and at the same time has high reliability. The manufacturer has specific recommendations for using this product:
- wago should only be used for single-core or stranded conductors with a cross-section from 0.5 mm2 to 4 mm2;
- to fix and connect stranded and small-diameter wires, use the CAGE CLAMP - from 0.08 mm2 to 35 mm2;
What's inside wago wire clamps
Inside these devices there is a metal plate, which ensures the proper degree of contact. The shape and its parameters of the plates were specially developed and tested. The tests were carried out on a vibration stand for many hours, then heated and cooled. After which the electrical parameters of the connection were checked. All tests were passed “excellent” and branded products always perform “five”.
In general, the range of Wago products is very wide, but for installing electrical wiring or connecting home appliances and lighting fixtures, two types of wire clamps are used: series 222 (detachable) with the ability to reconnect or change the connection, and series 773 and 273 - which are called permanent.
Detachable
Spring clamps for electrical wiring Wago 222 series have a certain number of contact pads - from two to five - and the same number of locking flags. Before starting the connection, the flags are raised up, the conductors stripped of insulation are inserted into them (all the way), after which the flag is lowered. At this point the connection is considered complete.
Wago wire connectors - connection methods
If necessary, you can reconnect the connection - lift the locking flag and remove the conductor. Convenient, fast and reliable.
Wago 222 series range
The 222 Vago series can be used to connect two or three, even five conductors made of copper or aluminum (you can connect different metals in one terminal). Wires can be single-core or multi-core, but with rigid wires. The maximum cross-section is 2.5 mm2. Soft stranded wires can be connected with a cross-section from 0.08 mm2 to 4 mm2.
One-piece
There is another type of clamps that does not provide the ability to redo the connection of wires - series 773 and 273. When using these terminals, the work is generally done in seconds: the stripped wire is inserted into the appropriate socket. The spring present there clamps it, ensuring contact with the plate. All.
wago contact terminals
These spring loaded wire clamps can be used to connect solid aluminum or copper wires with cross-sectional area from 0.75 mm2 to 2.5 mm2, stranded wires with rigid wires from 1.5 mm2 to 2.5 mm2. Soft stranded conductors cannot be connected using such connectors.
Types of mounting terminals for wago wiring
To improve contact, the wires must be cleaned of oxide film before connecting. To prevent oxidation from continuing, wago manufacturers also produce contact paste. The inside of the clamp is filled with it and it itself corrodes the oxide film, and then protects the wires from oxidation in the future. In this case, only heavily oxidized, dark conductors need preliminary stripping, and the clamp body is filled with paste.
By the way, manufacturers say that, if desired, the wire can be pulled out of the clamp. To do this, grab the wire with one hand, hold the terminal box with the other and rotate them back and forth with a small range, in opposite directions, stretching them in different directions.
Clamps for lamps (construction and installation terminals for lamps)
For quick and convenient connection of lamps or sconces, wago has special 224 series terminals. With their help, you can connect aluminum or copper wires of different sections and types (single-core or stranded with rigid wires). The rated voltage of this connection is 400 V, rated current:
- for copper conductors - 24 A
- 16 A for aluminum.
Methods for connecting wires in chandeliers and sconces using wago clamps
Cross-section of connected conductors from the mounting side:
- copper 1.0 ÷ 2.5 mm2 – single-core;
- aluminum 2.5 mm2 – single-core.
Cross-section of connected conductors on the side of the chandelier/sconce: copper 0.5 ÷ 2.5 mm2 – single-core, stranded, tinned, crimped.
When connecting aluminum wires, it is necessary to use contact paste, and copper wires must be stripped by hand to bare metal.
This product has two disadvantages. The first is that the price of original terminals is high. Secondly, there are a lot of fakes at a lower price, but their quality is much lower and they burn and melt. Therefore, despite the high cost, it is better to buy original products.
PPE caps
PPE caps (which stands for “connector insulating clips”) are very easy to use devices. This is a plastic case, inside of which there is a spring that has a conical shape. The conductors, stripped of insulation, are inserted into the cap, and the cap is turned clockwise several times. You will feel that it has stopped scrolling, which means the connection is ready.
How to make a wire connection using PPE
These conductor connectors are produced by many manufacturers; they are available in different sizes, for different diameters and the number of connected conductors. In order for the wire connection to be reliable, the size must be selected correctly, and for this you need to understand the markings.
After the letters PPE there are several numbers. Depending on the manufacturer, the number of numbers varies, but they mean the same things. For example, there is this type of marking: SIZ-1 1.5-3.5 or SIZ-2 4.5-12. In this case, the number immediately following the letters indicates the type of case. “1” is set if the body is a regular cone, on the surface of which grooves can be applied for better grip. If there is a SIZ-2, then there are small protrusions on the body that are convenient to grasp with your fingers and twist.
All other numbers reflect the total cross-section of all conductors that can be connected using this particular PPE cap.
An example of marking of PPE caps and its explanation
For example, PPE-1 2.0-4.0. This means that the body of the connecting cap is ordinary, cone-shaped. With its help, you can connect two conductors with a cross section of at least 0.5 mm2 (in total they give 1 mm, which meets the minimum requirements - see the table). This cap contains a maximum of conductors whose total cross-section should not exceed 4 mm2.
Connecting wires using PPE caps
In the second version of marking, after the abbreviation PPE there is only a number from 1 to 5. In this case, you just need to remember which of them is useful for which cross-section of wires. The data is in another table.
PPE caps and their parameters
By the way, only copper wires can be connected with PPE caps - aluminum wires, as a rule, are thicker than the maximum allowable for these connectors.
PPE
Let's start with the connection type PPE. It stands for:
- C connecting
- And insulating
- Clip _
It looks like a simple cap. Comes in different colors.
Moreover, each color means that it belongs to specific sections of the cores.
The cores are inserted into this cap and twisted together.
How to do it correctly, first twist the wires and then put on a cap or twist them directly with the PPE itself, is discussed in detail in the article “PPE cap for twisting wires.”
As a result, thanks to PPE, you get a good old twist, only immediately protected and insulated.
On top of that, it has a spring-loaded contact that prevents it from coming loose.
In addition, this process can be slightly automated by using an attachment for PPE for a screwdriver. This is also discussed in the above article.
Bolted connection
This connection is assembled from a bolt of any diameter, a suitable nut and one, or better yet, three washers. It is assembled quickly and easily, serves quite a long time and reliably.
Bolted wire connection
First, the conductors are stripped of insulation and, if necessary, the top oxidized layer is removed. Next, a loop is formed from the stripped part, the internal diameter of which is equal to the diameter of the bolt. To make it easier, you can wrap the wire around the bolt and tighten it (middle option in the right picture). Afterwards it all comes together in this order:
- A washer is placed on the bolt.
- One of the conductors.
- Second puck.
- Another conductor.
- Third puck.
- Screw.
The connection is tightened first with your hands, then with the help of keys (you can take pliers). That's all, the connection is ready. It is used mainly if it is necessary to make a connection between wires made of copper and aluminum; it can also be used when connecting conductors of different diameters.
Procedure for carrying out work in land and water
It is not so rare that there is a need to lay electrical wiring underground or underwater. Let us briefly dwell on the features of performing electrical installation work under these conditions.
Wires can be laid in water, for example, when installing a submersible pump. In this case, soldering of the wire ends is necessary. Next, the connection is treated with insulating material (hot glue), and heat shrink is put on top. If the technology is followed, the joint will be very reliable and safe. However, if you are careless, it will end in a short circuit.
Wiring in the ground is protected in the same way as described above, however, to obtain a secure connection, a more advanced technique can be used. The ends of the cable should be pressed with a terminal block, and the sealed junction box should be filled with silicone. It is recommended to place the underground pipeline in a durable box or pipe to prevent acts of pestilence by rodents. Damaged cable ends are best joined using couplings.
How to connect aluminum and copper conductors
By the way, let us remind you why you cannot directly connect copper and aluminum wires. There are two reasons:
- This connection gets very hot, which in itself is very bad.
- Over time, the contact weakens. This happens because aluminum has a lower electrical conductivity than copper, and as a result, when the same currents pass through, it heats up more. When heated, it expands more, squeezing out the copper conductor - the connection becomes worse and gets hotter.
To avoid such troubles, copper and aluminum conductors are connected using:
- terminal blocks;
- wago;
- bolted connection;
- branch clamps (make connections of wires on the street).
Other types of connectors cannot be used.
Connecting a switch with two keys
Connecting a switch with two keys in a distribution box is more complex than with a single-key switch.
The scheme is characterized by the fact that a cable with three cores must be laid to the device for 2 groups of lamps (if there is no grounding). One conductor is connected to the common contact, and the other two are connected to the output to the keys. You need to remember which conductor (by color) was connected to the common contact. The phase that comes in is connected to the common wire of the switch. The neutral wires from the input, as well as from the two light bulbs, are twisted - three conductors together. There remains a phase wire from the lamps and two from the switch. They are connected in pairs - one conductor from the switch to the phase of one light bulb, and the second output to the remaining lamp.
Instructions for restoring or extending the cable
In order to restore the integrity of a broken or cut electrical cable, you must strictly follow the instructions below:
- In all panel houses, the electrical wiring is laid inside the pipes, so additional gating is not required. The damaged cable should be pulled out of the channel and replaced with a new one from the socket to the junction box.
- Sometimes, in order to reliably place an insulated cable connection, you should break a section of the wall along the cable 15 centimeters in both directions. In this case, the depth of the split should be taken with reserve. This procedure must be performed carefully. Otherwise, the cable may be damaged again.
- The cable needs to be cut and its ends cleaned. This must be done at different distances so that the places where the bare connections of zero and phase are not located opposite each other.
- We take wires of the same metal and the same cross-section as in the damaged area. We put cambrics or heat-shrinkable tubes on them. The wires should be connected to each other by welding, sleeves followed by soldering or self-clamping terminal blocks.
- It is necessary to stretch the heat-shrink tube over the exposed areas of the connections and heat it.
- If heat-shrinkable tubing is not used, the wires should be individually rewound with high-quality electrical tape. Although the electrical insulating properties of self-clamping terminal blocks are quite high, it still doesn’t hurt to wrap them with additional electrical tape. This rule applies to places where solution can get inside the clamps.
- The section of the wall where the electrical connections are located must be covered with plaster solution and leveled.
When connecting electrical cables, preference should be given to soldering. This method is simple, reliable and inexpensive. High-quality insulation will be ensured by the use of heat-shrinkable tubes.
Purpose, advantages and disadvantages of connectors
The main purpose of branch compression is to organize a branch on the main electrical cable without making a break on the main route. The nut connector can be installed where the trunk is installed with new equipment wiring, and there is no need to cut the cable. This is one of the best options when switching conductors of different cross-sections made of aluminum and copper. It is advisable to make the contact plate brass, since this material does not enter into an electrochemical reaction with either copper or aluminum.
Among the shortcomings, it is immediately worth noting the need to expose the connected wires. This does not need to be done when using piercing type branch clamps. Another nuance is the weak degree of protection against dust and moisture (no higher than IP20).