Many people, including me, are interested in building a mini PC using a mini itx board, similar to the MAC mini. Preferably with passive cooling and minimal case dimensions.
It seems to me that the last criterion for a house is the main one. The more compact the system unit, the better. In this article we will create a silent and compact mini-computer in one of many configuration options.
Xbox, move over: we're building a mini PC that can do it all
For a long time, miniature but powerful PCs were the preserve of Intel: energy efficiency and performance left enthusiasts no choice. Now the balance of power has changed with the cold and fast Ryzen. And even with powerful built-in graphics. Let's see how it feels in a compact case.
Assembly in the ITX format imposes a number of restrictions: there is little space, components must be selected wisely, and cooling must be organized efficiently. Add a meager range of components (there is little demand for such assemblies), a high price and difficulty in finding spare parts “without trying them on” - and you will understand why they ask for so much money for factory compact assemblies. Shall we resolve all the problems ourselves?
Selection of components
Since we took the AMD platform as a basis, we need a suitable processor. If you don’t plan to play demanding games or spend 30-40 thousand rubles on assembly, your choice is the Ryzen 5 2400G. It has 4 cores, 8 threads, built-in Vega 11 - all this costs a modest 65-watt thermal package. Go ahead? Overclocking this little thing won't do anything, so there's no point in overpaying for the premium segment of motherboards - any will do, including those on the first generation of chipsets. The main thing is to have the right size.
The critical point for such an assembly will be the speed of the RAM.
The Zen/Zen+ architecture runs on a synchronous Infinity Fabric 1.0 bus, tied to the operating frequency of the memory controller. In addition, the Vega 11 video core does not have its own memory and relies on regular RAM reserves. A good choice would be 2 modules of 8 gigabytes with speeds of 2800+ MHz, and an excellent choice with 3200 MHz. There is no point in installing RAM with higher frequencies - you will have to put up with longer timings, which will lead to increased delays (and this will already begin to affect graphics performance).
Storage - according to needs. Of course, you should take an NVMe SSD (at least 240 GB) for the system, and files and games can be stored the old fashioned way - on the HDD. So, we’ve sorted out the primary iron.
Demo stand configuration
The second stage is the case, cooling and power supply.
The power supply must match the case: some kids support full ATX formats, others only support short STX. Therefore, you need to find a case that is quite compact, but well thought out. For example, Fractal Design Node 202. Then, study the specifications on the manufacturer’s website and buy a cooler that fits in height. Reputable companies immediately issue a list of compatible models of popular brands.
Next, you should consider whether you will eventually upgrade the system and install discrete graphics. Based on your needs, choose a power supply that matches the format and power. The FD Node 202 can accommodate a cooler up to 6.5 centimeters high—in our case, the Noctua NH-L9a fits. But we need a more powerful STX-format power supply - we’ll agree that later we’ll install a large and powerful video card. At the same time, we’ll understand whether the Ryzen 5 2400G has enough prowess to provide calculations to the game engine at the same time as assigning rendering tasks to the video accelerator.
Assembly
Packing the necessary hardware into a cramped housing and maintaining good ventilation is not an easy task. First of all, we study how the cooler is attached to the motherboard: some are mounted on the native mount for the AM4 platform, while others, like our Noctua, require an original backplate, which comes complete with a radiator and fan. Depending on this, we decide whether to first put the motherboard in the case, and then the processor with cooling, or put everything together and then pack it in a metal box. It is better to lay power cables and interface wires sequentially during assembly - this way you will not end up with a situation where something does not reach, does not fit, or is simply forgotten.
The more free space, the better the cooling. Therefore, we hide everything in cable ducts and tie it with zip ties
For testing, let's assemble a configuration without a discrete video card and check what the internal video core is capable of. Let's leave the power tails, secure the drives and close the lid. Time to install Windows, drivers and run benchmarks.
Tips for Followers
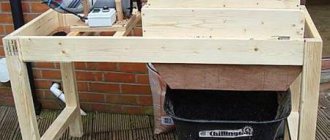
- The drill stand made it possible to drill all the holes evenly and accurately. If you do it by hand, you need it. I bought it specifically for this case for $30.
- A good ($3.5) 3mm tap is a must have. A special tap for aluminum produced a more “relaxed” thread. I liked the carving more than the usual one for machine cutting.
- The 6-32 (inch) tap is rare and optional. In aluminum, you can easily screw a self-tapping screw from a good case kit into a 3mm hole.
- Avoid using fasteners from cheap housings - there is a high probability of breaking the screw in the hole.
- Bent parts in the body are still needed; without them, it turns out to be Lego from scraps. In my version, these are 3 parts: a power supply mount and 2 corner rings for the rear panel.
- A finished back panel increases the cost of the case and imposes restrictions on the size (although it is beautiful and there is no hassle with bending a corner).
- Not all cutting boards are level. Mine may have started to leak after drilling. There is a curvature of up to 1mm in the middle. When purchasing, check.