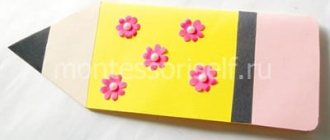
Plasticine flowers look so beautiful! If you use the brightest colors that match the shade of live copies, you can get unusual three-dimensional panels. Such panels become postcards if you attach them to cardboard and make a dedicatory inscription.
This lesson shows you how to decorate the front surface of a greeting card with a beautiful bouquet of pansies, and you can sign the back part yourself, writing prose or poetry. This masterpiece is best done with children; they are the ones who love to create beautiful crafts from plasticine and paper for mothers and grandmothers.
General principles and rules
Despite the fact that flowers are made from corrugated paper differently, the principles of operation are the same. Here are some general rules that will help you make paper flowers with your own hands that are very similar to real ones.
- Cut out several petals of the same size at once. To do this, fold the paper in several layers.
- Petals are usually made in different sizes. Roses, for example, have at least four different ones, while daisies have 2-3. In general, you can follow the rule - the more petals a flower has, the more different sizes there are. Lovely flowers made of corrugated paper can decorate your interior or become a gift
- Don't try to make the petals and leaves perfectly even or exactly the same. In nature they are different and unique. The same should happen for you.
- When twisting the petals onto the stem, press the wrapped part well with your fingers, twisting the paper around the stem. The more tightly you press, the more tightly the petals will fit one to the other. By adjusting this force, flowers of different sizes and appearances can be obtained from absolutely identical petals.
- Coat each petal wound onto the stem with glue.
That, in fact, are all the rules. And one more thing: the stem is cooked first. It uses wire or sticks of different thicknesses, which are wrapped in a long thin strip of green corrugated paper. The tape can be coated with glue and then screwed onto the base. You can twist it dry and secure the edge with a drop of glue. One more point: if you are going to assemble a composition from flowers, leave the lower 1/3 of the stem without decoration - it will be easier to compose a bouquet.
Spring theme in children's crafts
Spring is most likely the most positive time of the year, when nature blooms and glows from the warm rays of the sun, birds return, trees and the first flowers bloom.
A child, unlike an adult, reacts especially impressionably to such changes, so in the spring you want to do something new and original.
To implement ideas for children's creativity, you can use a lot of available materials: glue, paints, colored paper, empty plastic bottles, unnecessary boxes, various cereals, threads, ribbons, pine cones, foliage, etc.
The work can be in completely different directions, depending on the material for its manufacture:
poppies
Poppies from corrugated paper are very easy to make. It is important to find the right shade of scarlet. You will also need a small piece of black for the core. But, if you don’t have it, you can use any dark one and then paint it black.
We make a poppy from corrugated paper like this:
- Fold a small square from paper napkins of any color. We wrap it in black corrugated paper. If you don’t have black, take any dark one, then we’ll paint it.
Making the core - We cut out two or three petals of different sizes from scarlet paper: small, medium and large.
- We collect the petals all together (do not put them in a neat pile) and crush them into a ball.
- We disassemble the ball into petals. Preparatory work
- We take the core and wrap the first small petal around it from left to right.
- The second small petal partially overlaps the first, followed by the middle one, also overlapping it. We collect flowers from corrugated paper with our own hands
- The second middle and two large petals form the second row. They are located so that their central part overlaps the junction of the previous row. We give shape and design the stem
- Having collected everything together, we insert the wire into the base, wrap the base with thread, and glue it. Wrap in green paper. Here's a flower made from corrugated paper
Poppy is one of the easiest flowers to make yourself from crepe paper. At the same time, he looks very good. You can use them in a campaign with other flowers, or make a bouquet of poppies only.
Even such a simple flower can be made in different ways. First of all, you can change the middle. In the master class described above, the core of the flower is very simple. It can be made more like natural. We use the same technology to make the middle, but from white paper. And from black (can be painted) we cut out a strip about 1 cm wide and 4-5 cm long. On one side we cut it into thin strips (a couple of millimeters wide). We twist the resulting “noodles”, obtaining thin stamens. We wrap the stamens around the core, and then proceed according to the same algorithm.
Interior composition
A small photo selection will tell you in detail how to make a composition of pansies in a pot or basket. They will be a wonderful decoration for a winter window and will cheer you up every morning.
To make this craft you will need:
- Green floral wire;
- Cotton yarn;
- Hook of matching number;
- Scissors;
- Basket or flower pot;
- Styrofoam.
Related article: DIY bead pendant: rose master class with photos and videos
Small petals are made according to this pattern.
And the big ones - according to this one.
Knit the parts of the viola, connect them and embroider the core with yellow threads. Make the desired number of flowers.
Tie the greens (sepals and leaves) according to these patterns.
Fasten the workpieces to the wire.
Cut out the foam base and tie it around.
Stick the flowers in the desired order, cut the wire. Cover the bottom with a knitted square.
All that remains is to place the flowers in the basket, and you can enjoy their bright appearance.
How to make crocuses from paper and candy
An unusual gift can be made using candy as the center of flowers. It turns out to be an original sweet gift. Such a core can be made in flowers with a large, hollow bud inside - a tulip or crocus, for example. Moreover, making crocuses from corrugated paper is very simple. Everything will take 5-10 minutes. Not more.
A bouquet of corrugated paper with sweets is a nice surprise
- Cut out a square of paper with a side of 15 cm.
- We divide it into three parts, making a cut to a depth of 7.5 cm. We get three petals. First step: cut out the blanks
- Each petal, measuring 5 cm from the top, is scrolled around its axis and the upper part is bent down.
- Use your fingers to give them a concave shape. Second step: forming the petals
- We take the formed petals and wrap them around the stem so that each petal takes its place - approximately 1/3 of the total diameter. To do this, the bottom edge will have to be pressed down well. Step 3: attach the petals to the stem
- We make leaves from green paper. Cut out a rectangle with sides 5*8 cm.
- We divide it into three parts, making cuts to a depth of 8 cm.
- Stepping back 3 cm from the edge, twist the strip of paper around its axis, bend the upper part down, straighten it and give it a rounded shape. Step 4: making leaves
- We wrap the leaves around the bud. They should fall at the junction of the petals. Step 5: final design of the crocus
- We take a narrow strip of green paper, twist it around the wire, and form a stem.
That's all, the crocus made from corrugated paper and sweets is ready. Having made 7-9 pieces of these colors, you can put them in the basket. For more variety, you can make some small flowers.
Making the top petal of the pansy
To make plain upper petals, take bright beads (for example, blue) and, crossing thin wire in rows of beads, follow the pattern:
- 1st row – 8 beads;
- 2nd row – 10;
- 3rd, 4th rows – 12;
- 5th row – 11;
- 6th row – 9;
- 7th row – 7;
- 8th row – 5;
- 9th row – 3.
The bright upper petal is ready. For one flower you also need two of them. It is better to use a darker shade of beads to create a contrast with the lower ones. These flowers will be bright on their own, and you can use them separately. For a bouquet, it is better not to get carried away with too contrasting combinations, otherwise the composition will be too bright.
Chrysanthemum
Using the technology described above, you can make chrysanthemums. The difference is that there will be many petals and they will be narrow. But the principle is the same: twist the upper part of the petal, lower it down. Only in the case of chrysanthemums it is necessary to give the entire petal a curved shape.
We make this chrysanthemum from corrugated paper
These paper chrysanthemums also use candy as the center. These corrugated paper flowers are best made from a material that is not too bright. The tones are more delicate and soft. For foliage, muted greens are also chosen. For greater believability, take paper of two similar shades and make petals in two shades.
So, we make our own chrysanthemum from corrugated paper:
- We tie a candy to a long bamboo skewer (the wire bends). To do this, you need to take a piece of foil and wrap the candy. You can secure it with thread or ribbon. Petals may be the same
- Cut out a rectangle from paper. Width 10 centimeters, length - about 20 cm (more is possible, the flower will be denser).
- Cut into strips about 1 cm wide. You should get 18-20 petals.
- We twist each petal, stepping back from the edge about 3 cm. We give the petals a curved shape.
Almost done - We twist the strip around the stem. We make sure that the petals of the second row fall at the junction of the petals of the first row. Similarly we place the third row and all subsequent ones.
- We squeeze the base with our fingers, twisting it around the stem, and secure it with thread.
Finishing touches - decorating the stem - We take a long thin strip of green corrugated paper, wrap it around the base of the color and the “stem”,
This version of chrysanthemum looks good. But for greater plausibility, you can make petals of different sizes. At least three gradations are needed: small, medium and large. They will differ more in length than in width. Such a flower will look more magnificent and will look richer in a bouquet. Try it.
Interesting videos on the topic
Original bouquet for the teacher:
Chocolate bouquet in 15 minutes:
6 ideas for fruit bouquets:
Candy bouquets for beginners:
DIY bouquet for a teacher:
Please your beloved and respected teachers on their professional holiday with beautiful, useful and pleasant bouquets. These can be not only flowers, but also compositions of fruits, sweets, tea or coffee, etc. Presents that students and their parents made with their own hands are especially valuable. Choose any option and bring it to life to please the dear teachers who do so much for their students.
Asters - simple and original
If you need to make simple but effective flowers from crepe paper, try making asters. They are made from corrugation in bright and pastel shades. They look best in a bouquet, and the colors can be different.
- Cut a strip of paper 8-12 cm wide and three to four times longer.
- Fold the paper several times. Simple flowers made of corrugated paper - asters
- Cut into thin strips - a few millimeters wide (2-4 mm, as it turns out).
- We bend the petals with our fingers. The bend radius may be different, but the direction is approximately the same. During operation, you don’t have to unroll the tape and work with several petals at once. This makes it more believable. And, during assembly, it will take less time to arrange the petals.
This is what a bouquet can look like - We twist the formed petals around a wire/bamboo stick. We try to wrap those petals that are closer to the center inwards more tightly, and bend those that are further away with a smaller radius.
- We crush the base of the flower (the uncut part), twisting it around the stem, and secure it with a thread.
- Using a narrow green stripe, we decorate the base of the flower and the stem.
Corrugated paper asters can also be made from petals of different sizes - shorter ones closer to the center of the flower (there should be fewer of them), and longer ones on the periphery (there should be more of them). You can bend them in one direction, or you can bend them in the opposite direction. Whatever you prefer.
Recipes for creativity
And then I went to serve. And she worked for 17 years as a cook at a floating plant. There were two of us cooks and eight assistants. I knew how to cook well, I fed 500 people! We made dumplings, manti, and pies by hand. She baked cakes for sailors to order and came up with different colored decorations. And I colored the cream with the juice of beets, carrots and lingonberries - there were no food dyes back then, everything was made natural. I still do this now. And I still really love decorating cakes with roses - I’m partial to this flower.
At the age of 45, I was “retired” - we had a reduction in staff, and my experience just allowed it. And, in order not to sit at home, I went to work in the paramilitary security. You're sitting in this booth, bored - what to do? And I can’t sit in one place at all! I bought myself a special machine - a jigsaw. And she began to cut out wooden patterns and window frames. Then I started ordering jigsaws and hand knives for wood carving via the Internet. At first I cut it from birch and willow - one person advised which was easier. She made small totems - amulets. Then she broke the wooden boxes and began to cut out patterns from the boards.
A year ago I met Alexandra, a nail design master. She made paintings using airbrushing. I became interested, and she taught me.
Corrugated paper roses: step-by-step manufacturing algorithm (2 methods)
The good thing about corrugated paper flowers is that they can be made in different ways. The material is very plastic and easily changes shape because there are several ways. Some people want to achieve more “naturalness”, while for others speed is important.
1 way (natural look)
For corrugated paper roses, it is better to choose paper of two or three very close shades. This will make the flower look more natural. For example, for the flower in the photo, white and crepe paper was used. The number of petals of different shades is arbitrary, as is their placement in the bud.
This is what you should get: very beautiful flowers made of corrugated paper
The manufacturing procedure is as follows:
- Cut out 8 small, 10 medium and large petals, and 8 more super-large petals. The quantity of pure white and crepe is halved.
- From green paper we cut out a long ribbon to wrap around the stem, several (4) leaves - long and narrow, which in real roses are located at the bottom of the flower.
- Use your fingers to give the petals a rounded shape. We straighten it from one edge, even turning the edge back a little. On the other hand, on the contrary, we twist it. DIY flowers from corrugated paper: making a rose
- We wind the tape on the wire. If flowers will be used in the arrangement, leave about 1/3 without ribbon - this will make it easier to insert them.
- We take the smallest petal and twist its lower edge around the wire. It should wrap the stem completely. The petal will be almost curled. Apply glue to the bottom part and glue the next small petal. Approximately half press one to the other tightly. From the second row, the force can be slightly weakened - the bud gradually opens.
Final Steps - Next, using the same technique, add all the other petals in order: medium, large and very large. When we glue large petals, each of them covers only half of the “stem” with the petals twisted onto it.
- Glue the leaves last.
As a result, we get a beautiful rose made of corrugated paper. In this design it looks like a real flower. There is an easier and faster way (pictured below).
Method 2 (simple and fast)
We cut out a strip of paper 7-8 cm wide. You can make it uneven - narrower on one side, wider on the other. We fold it, starting from the narrow edge, like an accordion. The width of the “accordion” is 3.5 -4.5 cm. Cut out petals from the resulting stack at 2/3 of the height.
We wind the petals onto the wire (you don’t have to wrap it with green tape yet) starting from the narrow edge. As we roll, we give them shape with our fingers - stretch them on one side, press them at the stem. Having installed all the petals, we secure them with a thread (simply winding a certain number of turns). We adjust the petals, forming a bud.
You can quickly make a rose from corrugated paper
From green paper, folded like an accordion, we cut out long and narrow petals. Please note that their ends will need to be twisted, so they should not be so narrow (approximately 1 cm). We wrap the cut out petals at the bottom, under the petals, twist the leaves with our fingers, and then shape the stem.
Crocheted brooch “Pansies”
A delicate brooch depicting spring flowers will be a wonderful decoration for a demi-season coat.
What we need for work:
- remnants of yarn in lilac, yellow, purple and green colors;
- hook with the corresponding number;
- purple felt;
- needle;
- clasp.
Traditionally, we start knitting from the middle with yellow thread. We dial 2 v. p. and in the second of them we perform 6 sc.
Change the color of the thread to lilac and cast on 6 in. p. In the next loop of the base we make a connection. column, and then again 6 in. p. and conn. stitch into the next base loop. In this way we perform 5 arches to the end of the row.
Let's move on to the strapping. Inside one of the arches we make a sc, a half double crochet, and then 8 dc. Next, in the same arch we knit a half double crochet and sc.
Knit the next 2 arches in the same way as the first. You should get 3 small petals
Change the thread color to purple and start knitting 2 large petals. In the new arch we perform sc, half double crochet, dc, and then 8 dc2n, and then dc, half double crochet, sc.
We tie the remaining arch similarly to the previous one
Change the color of the thread to lilac and tie the last 2 petals.
Let's move on to making the leaves.
Using green thread we cast on 12 vp. and knit sc. In the very last v.p. make 3 sc and knit on the second side
Now we knit loops behind the back wall, without tying 2-3 loops to the top and make 1 ch. We unfold the work and continue to knit the loops behind the back wall in the opposite direction. We perform the other side in the same way
In this way we knit a few more rows without knitting 2-3 loops of the previous row. The leaves should look like this
Cut out a circle from felt and sew a flower with leaves onto it. We attach a clasp to the reverse side. The brooch is ready.
Corrugated paper peonies (with patterns)
For peonies, you need yellow corrugated paper for the core, green for the foliage, pink, cream, crimson for the flower itself. A wire or thin stick is suitable for the stem. You will also need PVA glue.
These are the beautiful flowers you can make from corrugated paper
A peony made from corrugated paper is a rather difficult flower to make. It has many different petal shapes. You can't do this without a pattern. But there are many varieties of peonies, so there are several patterns. Let's give two options. The first one can be printed, cut out and used as a template - it is given in a full-size image. The second option can be drawn with your own hands according to the cells.
Pattern of life-size peony petals Pattern of peony petals, which you can draw yourself on a checkered sheet
Step-by-step manufacturing process with photos:
- From yellow paper, cut out a strip 4-5 cm wide and 10-12 cm long. Fold it several times, cut into thin “noodles,” leaving about 1 cm of uncut edge.
- Roll the resulting tape into a tight roll, using the entire edge for this. Lubricate it with glue and twist it. The result is a shaggy yellow core around which the petals will be attached. We fix this center on a stick/wire, which will be the stem.
Let's start making a peony from corrugated paper - Cut out petals from paper. The minimum quantity is 20 pieces (all types), but the more, the fluffier the flower will be. On the second pattern the number of petals is indicated on each; on the first one some explanation is needed. There are numbers there too. This is the required number of petals.
- Stretch each petal in the middle without touching the edges, giving them a convex shape. Don't try to make them the same. This is not required. During the process, you can still stretch or tighten it a little.
- We start folding the petals from the smallest ones. We place them around the existing center. We place the first small petals only slightly overlapping their edges. Coat the base with glue. Making leaves that grow from the bottom of the flower cup
- Next we take the middle petals. We lay them with a slight overlap of one on top of the other.
- Then we lay the large ones and lastly the very large leaves. We coat each layer with a small amount of glue at the base.
- You will also need leaves. We cut them out of green paper. On one side we compress them, forming a petiole, on the other we straighten them in the middle, giving them a curved shape (similar to a boat). Peony leaf pattern
- We attach the leaves under the bud and bend them down.
- You can also make leaves like a peony, but this will require a thin wire and several cut out shaped leaves. Veins cannot be made on corrugated paper, but they can be marked with paint.
What might happen - We glue each leaf to a wire, wrap a thin strip around the petiole, then attach it to the stem. The assembly process is a creative exercise
- Take a long narrow strip of green corrugated paper (about 1 cm wide, 20-30 cm long - depending on the length of the stem). We wrap the base of the flower, then smoothly move to the stem. Finally, secure the edge of the paper with a drop of glue.
The corrugated paper peony is ready. Usually they are used to make a bouquet. When you make the next ones, don't try to make them exactly the same. All flowers in nature are unique. Yours should be different too.
You can make this bouquet of paper peonies with your own hands.
You can play with the size and number of petals, mixing petals of different shades that are similar in color. You can try using paint to make the petals at the base darker. In general, there are a lot of options.
Knitted violets
Flowers have always been considered a home decoration. They create an atmosphere of freshness and comfort. We invite you to create such a cute decorative element - crocheted violets that look like real ones. You can knit them for yourself or as a gift.
Materials:
yarn “Iris” (100% cotton), 10 g pink, 10 g green, 5 g light brown, a little yellow; thin wire; hook No. 0.9.
Vase:
Using light brown yarn, cast on a chain of 5 sts. p. and close in a circle using the connection. Art. 1st r.: 1 c. lifting point, 11 tbsp. s/n into the resulting ring. Row finish connection. Art.
2nd r.: 3 c. lifting point, 1 tbsp. s/n in the 1st century. lifting item, * 2 tbsp. s/n in the next st. s/n of the previous row from hook *, repeat from * to * 10 times, 12 times in total. Row finish connection. Art.
3rd-4th r.: 3rd century. p. lifting, 2 tbsp. s/n in the next st. s/n of the previous row from the hook, * 1 tbsp. s/n in the next st. s/n of the previous row from the hook, 2 tbsp. s/n in the next st. s/n of the previous row from hook *, repeat from * to * to the end of the row. Each row ends with a connection. Art.
5th—16th century: 3rd century. p. lifting, according to the 1st art. s/n in art. s/n of the previous row. Finish each row with a connection. Art.
Flower (12 pcs.):
Using pink yarn, cast on a chain of 6 sts. n. and close the connection in a circle. Art. 1st r.: 6th century. P . (1 v. p. rise + 5 v. p.), 3 unfinished st. with 2/n, tied together, in the resulting ring, 5 in. p., * 1 tbsp. s/n in the ring, 5 in. p., 3 unfinished art. with 2/n, tied together, in the resulting ring, 5 in. p. *, repeat from * to * 4 times, 6 times in total. Row finish connection. Art. Cut the thread. Middle (12 pcs.): Using yellow yarn, cast on a chain of 3 sts. n. and close the connection in a circle. Art. 1st r.: 1 c. lifting point, 10 tbsp. b/n into the resulting ring. Finish the row using conn. Art. Cut the thread, leaving a free end of the thread of approx. 20 cm.
Stalk (12 pcs.):
cut the wire to a length of approx. 12 cm. Attach the middle to the wire and wrap tightly with yellow yarn. Coat the stem with PVA glue.
Leaf (6 pcs.):
Using green yarn, cast on a chain of 12 sts. p. (11 v. p. base + 1 v. p. rise). 1st row: 1 tbsp. b/n in the 3rd century. p. chains from a hook, 9 tbsp. w/n in the next 9 centuries. n. base of the chain, 2 v. p., 8 tbsp. b/n in the next 8 centuries. n. base of the chain on the reverse side. 2nd row: 1 c. lifting point, 7 tbsp. b/n in the next 7 tbsp. b/n the previous row from the hook, 2 tbsp. b/n in the arch from 2 in. p. of the previous row from the hook, 2 in. p., 2 tbsp. b/n in the same arch, 8 tbsp. b/n in the next 8 tbsp. b/n of the previous row from the hook.
Next, continue working in straight and reverse rows according to the leaf pattern up to the 6th row inclusive.
Assembly and finishing:
All parts are heavily starched. Attach the center to the flower using a needle and thread. Attach leaves to 6 finished flowers.
Place the vase on a plastic base, wrap the edge and heavily starch it. Leave until dry.
Corrugated paper flowers: photo ideas, patterns
Using the techniques described above, you can make any flower. The main problem is the shape, number and size of the petals. The most important thing is the form. It is characteristic of each petal. Dimensions are arbitrary. Not only do flowers in nature come in different sizes, but recently it has become fashionable to decorate the interior with giant life-size flowers. The decoration is original, but specific. It is necessary to enlarge the basic patterns many times; it is difficult to work with large scales. It is better to first practice on flowers of normal sizes, and then move on to larger ones.
Cornflower is easy and quick to make, and it looks great
A little about patterns. You can not only find them. If this happens in the summer, take the desired flower and disassemble it into petals. From the whole bunch, choose the most characteristic ones, attach them to a sheet of paper, and circle them. Then the shape needs to be adjusted, taking into account the fact that these are, after all, paper flowers. The pattern will finally take shape after several trials and errors. We will post several patterns and master classes in photos in this section.
Cornflowers
The simpler the flower, the more ways to make it. Cornflowers can be made from corrugated paper using different techniques. Examples are in the photo.
From afar you can't tell the difference
We cut out such petals to get flowers from corrugated paper as in the photo above Another technique
If you want to make it very similar to the real one (A - pattern for a blossoming flower, B - for a bud)
Iris
Making paper iris requires some imagination. A very unusual flower. The photo shows several techniques that allow you to achieve different effects. Some flowers simply resemble the original, others are very similar to it.
They are very beautiful both in person and on paper.
Pattern of iris petals Having cut them out, we give them a curved shape
You can use candies as a core With such a core they are more believable How to attach them to the stem Difficult, but very beautiful
All sorts of different things
There is no limit to perfection: the core of a poppy can be made from Lily threads... Beautiful, but several techniques are used
Variant of aster made of corrugated paper with a large core
Step-by-step photos of making paper carnations
Pansies - pattern for making from corrugated paper
You can consider the shape of the petals for different colors. For “advanced” ones. It turns out to be a very beautiful flower
The process of making this flower is in the photo above.
Cute daisies - an option for beginners
Crochet pansy flower
0:07, August 28, 2022 28 2 1569
Hello! Today there is a very cute and beloved flower for you! Crocheting pansy flowers is not at all difficult! For work, you can use yarn of a variety of colors. It all depends on your desire and imagination!
crochet pansy flower pattern
Using the pattern, you can crochet pansy flowers and use them to decorate clothes!
- A crochet pansy flower, crocheted according to the pattern, can be used to create jewelry, bags, beautiful gift wrapping and delicate magical accessories!
- I wish you good luck, endless inspiration and joyful creativity!
- Your guide in the magical world of handicrafts, Evgenia Kopakova.
What types of tapes are suitable for the job?
When faced with the need to choose a material for embroidery, you can really get confused. Today, the range of specialized stores is so wide that once you enter one of them, it is impossible to leave without purchasing something.
In fact, you can choose almost any material to make pansies from ribbons (the master class offered below illustrates working with satin ribbons). Here preference is given to those materials that suit the craftswoman in color, texture and width. You can buy tape from:
Each of these materials contains synthetic fibers, which is very good for the future product. Artificial materials do not fade, do not stretch, do not deform, that is, the work done will be preserved for a long time.
Beautiful flower "pansy"
This product can serve as decoration for anything - clothes, accessories, toys, etc. It is done very quickly and simply, which is ideal for beginners.
What we need for work:
- wool yarn in yellow, purple and lilac colors;
- hook with the corresponding number.
We start knitting from the central part. We take a purple thread, make a chain of 6 air loops, close it into a ring and knit the first petal as the diagram shows. In the second row we change the color of the thread to purple, and in the third – to purple.
For the 2nd petal, we insert a purple thread into the central ring, and in the third row we change it to purple. We knit according to the pattern. Tie the third petal in the same way as the second.
The fourth petal is made according to the pattern in lilac color.
Let's move on to knitting the fifth petal. We hold the product with the wrong side facing us and insert a purple thread into the arch of air loops. Next, we knit similarly to the 4th petal.
To complete the work, iron each petal, and then collect them into a flower so that the 1st and 2nd rows of the 4th and 5th petals slightly overlap each other.
Master class of ranunculus from foamiran
Another type of flower that I like and which has many varieties is ranunculus. There are quite a lot of options for its implementation, I will share the one that seemed quite easy to me, but at the same time very interesting.
I wanted to experiment with the colors of the flower, so I will mix several oil pastel colors together to get an unusual color. This moment is optional, but if you are interested, you can also try to repeat it, or just skip this step.
For the experiment you will need: One part blue; 3 parts red and 3 parts black, but after this experience I realized that it was better to take two parts black. I just initially wanted to get a slightly different color, but in principle this option also turned out to be very interesting and unusual. You can see how to get the right palette on this website Trycolors.com, I liked the site, although the recommended tone did not match. Perhaps it also depends on the materials that are mixed. To heat, you will need a piece of foil or baking paper. Iron on medium heat.
When the pastel melts, mix the colors with each other.
When you remove the foil from the iron, the pastel hardens again.
I used this petal template, only I cut the centers between the petals deeper. It took me 6 cinquefoils to make 1 flower.
I tried to tint the petals with liquid pastel when it was heated and with hard pastel when it had already frozen. The effect was a little different. Melted pastel tints with a thicker and darker layer, and solid pastel, on the contrary, with a lighter and lighter layer.
To make the pastel liquid again, it needs to be heated again; you can use a sponge for tinting.
In order for the petals to acquire a more convex shape, you need to put a dry napkin on the sponge, then put the cinquefoil itself, and another napkin on top. Using a hot iron, you need to iron out each petal individually.
Such petals are obtained after all the processes.
We make a hole in the middle of the cinquefoils with an awl and prepare a lump of foil.
I insert the wire into the foil and glue it with hot glue. I glue a piece of green foamiran onto the resulting bud from the very top. Then we glue the quinquefoils one by one, distributing them one after another.
By the way, I glue the lighter petals first, gradually moving to the darker ones.
You should try to arrange the petals in a checkerboard pattern.
You will also need a sepal from green foma.
Using a lighter, slightly curl the ends of the sepals.
For the stem, I took an empty gel pen refill and taped it.
We put the rod on the wire, you can glue it with glue.
The miniature ranunculus is ready.
If desired, the number of cinquefoils can be increased and then the flower will turn out more magnificent.
general information
Pansies came to us from Europe, and spread throughout the globe from Asia to the Western part of our continent. Viola belongs to the violet family. These plants have a rod shape, and their stem reaches a height of up to 35 cm. Viola buds are usually single.
In the wild, flowers grow like weeds and do not add any aesthetics or beauty to the place where they grow.
Surprisingly, some species of these plants are able to bloom even in cold climates.