Note: To securely hold heavy weights, tie the rope to the hook with a double locking knot.
How to make a strong grappling hook
You can make a lightweight and durable grappling hook with your own hands.
The unique “cat” has a 15-meter paracord rope and can be disassembled, which is convenient for compact storage. There is also a magnet installed at the end of the hook, which can be used to magnetize keys and other metal objects.
Materials for production:
• Bolt and nut with a diameter of 1.9 cm; • Neodymium magnet; • Steel rod (diameter – 0.8 cm).
Sewer pipe toy (Interactive)
Plastic pipes and their connections are an excellent material for creating toys for cats. Handy craftsmen create entire play complexes for their pets. But, even without special skills in the field of plumbing installation, you can please your pet with an educational toy you created with your own hands.
To make this toy we will need:
We wrap the smaller edge of the knee with electrical tape and carefully use a drill to make 2-3 round holes in each. Each drilled hole must be carefully processed so that the cat does not injure its paw, i.e. we need to carefully go over it with fine sandpaper or, by cutting the flexible wire, cover the holes with it. Now we put the ping-pong balls inside and assemble the sewer elbows into a ring. This toy will not let your cat get bored while you are visiting or at work. For clarity, watch this video of step-by-step production:
Source
Manufacturing instructions
Step 1: Undercut the armature body
Step 2 It is necessary to leave a small section of the threaded connection where the nut will be screwed, and grind the rest. This will be the body of the future “cat”.
The end of the bolt is also machined.
Step 3 To complete the end of the bolt, you need to drill a hole in the center of the head. A magnet will be installed here.
Step 4 Use a ruler to determine the center of the edges of the nut.
In the center of the nut, at equal distances from each other, you need to drill three guide holes. Hooks will be installed there later.
After the base for the hook is ready, you need to make a carabiner to which it will be attached.
To make a carbine you will need steel wire with a diameter of half a centimeter.
Step 5 The wire must be wrapped around a rod of the above diameter of 0.8 cm. The resulting spiral is reduced to one loop.
The result is a carbine that is installed in a hole made in the base.
Step 6 To keep the carabiner firmly, a hole is made in the base and a pin is installed.
The looped wire should sit firmly at the base of the anchor. All irregularities are sanded.
Step 7
A new stage of homemade work is making anchor claws. To do this, three rods of equal length are cut from the rod.
The length of the claws should approximately correspond to the length of the base of the “cat”.
A cone is machined at the end of each rod. The resulting short segments resemble a pencil in shape.
Step 8 To determine the final shape of the anchor claws, you need to use a wire.
Before installing the wire into the nut, you need to bend the claws using a pipe and a vice. Each section is placed in a vice and bent.
Next, the claws are installed and welded into the holes intended for them in the nut.
Weld seams are cleaned.
Step 9 The final step is to coat the grappling hook with powder paint, which is sprayed onto the hook. These manipulations are best done outdoors.
After the object is painted, the “cat” needs to be heated in the oven.
The magnet is glued to the bolt using superglue.
The rope is tied to the finished craft. The grappling hook is ready for use!
Did you like the article? Subscribe to the channel to stay up to date with the most interesting materials
Source
Adding rope
Our slug won't be able to fly through the air without a rope, so it's time to give him something that will be a visual representation of the rope and has the ability to "wrap around" corners.
A line renderer is ideal for this because it allows us to convey the number of points and their positions in world space.
The idea here is that we always store the first vertex of the rope (0) at the player's position, and all other vertices are positioned dynamically when the rope needs to wrap around something, including the current hinge position, which is the next point along the rope from the player.
Select Player and add a LineRenderer component to it. Set Width to 0.075. Expand the Materials list and select the RopeMaterial material, located in the project's Materials folder, as Element 0. Finally, set the Line Renderer's Texture Mode to Distribute Per Segment.
Drag the Line Renderer component into the Rope Renderer field of the Rope System component.
Click on the Rope Layer Mask drop-down list and select Default, Rope and Pivot as the layers that raycast can interact with. This ensures that when the raycast is "fired" it will only collide with these layers and not other objects such as the player.
If you run the game now, you may notice strange behavior. When we aim at the stone above the slug's head and shoot with a hook, we get a small jump upward, after which our friend begins to behave quite chaotically. We have not yet set the distance for the distance joint, and the line rendering vertices have not been configured. So we don't see the rope, and since the distance joint is directly above the slug's position, the current distance joint value pushes it down onto the rocks below it.
But don't worry, we will solve this problem now.
In the RopeSystem.cs script, add a new operator at the beginning of the class:
using System.Linq; This allows us to use LINQ queries, which in our case simply allows us to conveniently find the first or last element of the ropePositions list.
Note: Language-Integrated Query (LINQ) is the name of a set of technologies that build query capabilities directly into the C# language. You can read more about it here.
Add a new private bool variable called distanceSet under the other variables: private bool distanceSet;
We will use this variable as a flag so that the script can know that the rope distance (for the point between the player and the current anchor point where the grappling hook is attached) is set correctly. Now let's add a new method that we will use to set the positions of the rope vertices for rendering the line and set the distance joint in the stored list of rope positions (ropePositions):
private void UpdateRopePositions() { // 1 if (!ropeAttached) { return;
} // 2 ropeRenderer.positionCount = ropePositions.Count + 1; // 3 for (var i = ropeRenderer.positionCount - 1; i >= 0; i-) { if (i != ropeRenderer.positionCount - 1) // if not the Last point of line renderer { ropeRenderer.SetPosition(i , ropePositions ); // 4 if (i == ropePositions.Count - 1 || ropePositions.Count == 1) { var ropePosition = ropePositions[ropePositions.Count - 1]; if (ropePositions.Count == 1) { ropeHingeAnchorRb.transform.position = ropePosition; if (!distanceSet) { ropeJoint.distance = Vector2.Distance(transform.position, ropePosition); distanceSet = true; } } else { ropeHingeAnchorRb.transform.position = ropePosition; if (!distanceSet) { ropeJoint.distance = Vector2.Distance(transform.position, ropePosition); distanceSet = true; } } } // 5 else if (i - 1 == ropePositions.IndexOf(ropePositions.Last())) { var ropePosition = ropePositions.Last(); ropeHingeAnchorRb.transform.position = ropePosition; if (!distanceSet) { ropeJoint.distance = Vector2.Distance(transform.position, ropePosition); distanceSet = true; } } } else { // 6 ropeRenderer.SetPosition(i, transform.position); } } } Let's explain the code shown above:
- Exit the method if the rope is not attached.
- We assign the value of the rope line rendering points the value of the number of positions stored in ropePositions, plus 1 more (for the player’s position).
- We loop through the ropePositions list in the reverse direction and for each position (except the last one), assign the position of the line rendering vertex the value of the Vector2 position, stored at the loop index in the ropePositions list.
- We assign the rope anchor point to the second-from-end rope position where the current hinge/anchor point should be, or if we only have one rope position, then make it the anchor point. This way we set the ropeJoint distance to be equal to the distance between the player and the current position of the rope that we are traversing in the loop.
- The if construct handles the case when the current position of the rope in the loop is second from the end; that is, the point at which the rope connects to the object, i.e. current hinge/reference point.
- This else block handles assigning the position of the last vertex of the rope to the value of the player's current position.
Don't forget to add a call to UpdateRopePositions() at the end of Update(): UpdateRopePositions(); Save your changes to the script and run the game again. Use the spacebar to make a small jump, aiming and firing your grappling hook at the rock above your character. Now you can enjoy the fruits of your labors - the slug is calmly swinging over the stones.
Now you can go to the scene window, select the Player, use the move tool (W key by default) to move it and watch as the two vertices of the rope line render follow the position of the hook and the position of the player to render the rope. After we release the player, DistanceJoint2D recalculates the distance correctly and the slug will continue to swing on the connected joint.
What types of roof ladders are there? ↑
The main varieties are classified according to their intended purpose:
Wall-mounted ↑
They must satisfy certain conditions.
Note: To securely hold heavy weights, tie the rope to the hook with a double locking knot.
Step 1: What you will need
Step 2: Making the spindle
Cut a piece of steel rod 230 mm long.
Bend a loop at one end. The loop circumference should be about 100 mm. First, using a vice, make a U-shaped squiggle, then, using the same vice, squeeze the squiggle into a loop (see pictures). Bend the loop 45 degrees so that it is symmetrical relative to the main rod.
Weld the end of the loop to the shaft.
Step 3: Making Hooks
Using a sharpener, sharpen one end of each piece, but not too sharp.
Bend the parts at an angle of 50 degrees, departing 40 mm from the blunt end.
Step 4: Weld the hooks
Place the spindle and two hooks on either side of its bottom on a flat surface. Weld the hooks to the spindle. Then turn the structure over and weld the connections on the other side.
Using a magnet or clamps, secure the third hook to the spindle, perpendicular to the two previously welded. Weld it on both sides.
Turn the grappling hook over. Use a magnet to secure the fourth hook, perpendicular to the first two. This hook should lie in the same plane as the third.
Clean the welds from slag, and the metal itself from dirt and rust. If desired, you can paint the hook with spray paint.
Description
Large folding assault grappling hook "Cat" with four hooks.
Can be used as:
This is a universal tool, useful both on the farm and on the go.
Characteristics:
The design consists of 3 independent elements: Stainless steel plates that do not take up much space.
It assembles quickly, keep in mind that the hole for the rope should be secured as much as possible with a knot! Only by removing the knot can you disassemble the cat.
Dimensions: total width 23.5cm, height: 20cm, steel thickness: 0.3cm, weight: 615g.
Crochet technology
The technology for connecting foundation reinforcement rods is quite simple and is not determined by the type of hook: the knitting wire, one way or another, is tightened in a loop, thereby connecting the metal rods.
The reinforcement is knitted after the preparatory work has been completed and the vertical rods have been installed. To install the reinforcement, use a working drawing of a monolithic structure.
In practice, there are two main knitting technologies:
Most often, they knit using the first method, since it is the simplest: you can learn it in a few minutes, and making a mistake while working is quite difficult. On the other hand, butt stitching is, in theory, good for corner pieces.
Important! In your work, you should use only burnt wire with a round profile and a diameter of 1 mm, as it is flexible and elastic: it fits well to the rods and does not break when knitting.
The principle of knitting reinforcement with one loop in the first stages does not depend on the type of hook. The only differences in how different tools work will be in the way the rod rotates: with a brush, by inertia or automatically.
To connect the frame rods you need:
Diagram of types of wire knots for manual knitting.
The reliability of the bundle is checked not by the tension of the wire (if you tighten it, the wire can easily break), but by the mobility of the rods.
Notes
- The grappling hook flies 20 blocks long.
- The grappling hook (like all other hooks) does no damage.
- The grappling hook (like all other hooks), when caught on a block, returns the charge of all flying accessories (like rocket boots) without touching the ground (if you hook and instantly unhook, the charge will still return).
- If you unhook from a hook or similar tool while being pulled (by pressing the spacebar), the momentum will be retained; helps you move quickly. If you don't reach the block that the grappling hook is hitting, the momentum won't carry over.
- Also, if you hook onto a closed door and then open it, you will fly forward at maximum speed. If you have Hermes boots or hurricane boots, they will be put to use in no time.
- If you fall from a great height and manage to shoot your hook down, catching on the ground, you will land without damage.
- Once you grab onto a block, the recoil from the blows is turned off. It's like you're using a cobalt shield or something similar.
Grappling Hook • Candy Hook • Slime Hook Ivy Whip • Dual Hook • Skeletron Arm Web Weaver • Gem Hook • Creepy Hook Bat Hook • Fish Hook • Christmas Hook Glow Hook • Sinew Hook • Worm Hook Barbed Hook • Anti- Gravity Hook • Moon Hook Static Hook
Wooden swing for a summer house
Model selection
Drawings of how to make a swing from wood will allow you to choose the appropriate option.
Most owners of suburban areas and summer cottages come on vacation with the whole family. Considering the hobbies of modern youth, it will not be easy to interest them in such a trip, and in the absence of basic entertainment, this idea becomes completely unrealistic.
Another thing is a trip to a dacha, equipped with love and intelligence, where there are not only basic amenities, but also means of organizing leisure time.
For adult leisure, the site will be equipped with a barbecue area, fishing equipment, various gazebos and benches in the shade of trees. Children enjoy active recreation, and a good swing is ideal here.
A good vacation must be properly organized.
It is important to consider various design and model options in advance in order to choose the most suitable option. There are a variety of designs for DIY wooden swings, and your task is to make an informed choice.
The first question that needs to be answered is the question of the purpose of the projectile. Will it be purely children's entertainment, will they be stationary or portable, single or family, etc.
The most unexpected solutions are possible.
We will briefly list the most common design options:
It is the stationary model that fully corresponds to the ideas of comfort and safety.
To understand how to make a swing on a tree, you don’t need a lot of intelligence, but to make a high-quality and reliable stationary model you will have to work a little harder.
Do-it-yourself wooden swing: installation features. Making the seat and frame
A homemade wooden swing is, one might say, a country classic. The shell will become a favorite vacation spot not only for children, but also for adults, because we all come from childhood. We want to tell you how to make a swing out of wood for the whole family at your summer cottage.
Drawings of wooden swings allow you to create a wide variety of models.
Grappling hook
| Grappling hook | |
| Information | |
| Used: | All classes |
| Slot: | Subject of action |
| Released: | Update December 22, 2014 (Smissmas 2014) |
| Availability: | Standard |
| Renaming: | Yes |
| Available qualities | |
| Characteristics | |
| Level 1 Grappling Hook Obtained 100% faster | |
Press and hold the action key to shoot the rope.
The hook can be manually selected by pressing slot6 and then fired with the main fire button.
Can be used in Super Mann games or on special servers.
is a standard Action slot item for all classes. The item can be used to move from one place to another in the Super Mann game mode.
If the Grappling Hook is equipped, then by holding down the action key, the player will fire a grappling hook with a rope in the direction where his aim was aimed. The hook will remain attached to the surface until the player releases the key. If the hook hits a wall, ceiling or other surface, the player will be pulled to the same place along a straight path, and upon reaching the specified place, the hook will remain there with the player until the action key is released. This allows players to quickly move around the map and hover on walls and ceilings for as long as they need. The Spy can use the Grappling Hook while invisible or cloaked.
If an obstacle appears on the path of a player moving towards his hook, he will try to get around it and continue moving. Pressing the jump key will release the grappling hook and launch the player upward, giving the player additional vertical momentum. Please note that the grappling hook cannot be fired into the sky.
Content
Demonstration
Previous changes
Added a new backpack icon for the Grappling Hook.
Notes
- If you shoot a hook at a closed door, when it opens, the player will be thrown out at maximum speed.
- The hook allows you to penetrate holes that are usually too small to fit through.
- If the grappling hook is fired vertically downward while flying, the player will not take fall damage.
- If you shoot a hook in front of you on the ground and press the jump key before reaching the hook, you can do without jumping.
- Unlike boomerangs, the grappling hook can be fired again before it completely curls up.
Ore • Ingot • Anvil • Pickaxe • Ax • Hammer • Reinforced Fishing Rod • Dagger • Sword • Bow • Armor
How to use a grappling hook
Roof ladder: from drawings to installation
Any diligent homeowner periodically checks the technical condition of his home. This is the only opportunity to timely detect defects and damage, even if they are minor. Even they may one day turn into a big problem, the solution of which will require large-scale work and quite large investments.
When it comes to roof maintenance or repair, it is difficult to imagine that you can do without the use of special devices that are convenient to move around and maintain balance. For example, in order to move freely on the roof, a ladder for the ridge of the roof with a hook is used. They are hooked to the skate and perform work, standing or sitting as necessary, without additional fastening.
It is not at all difficult to prepare drawings taking into account the required dimensions and dimensions of the future product yourself. In principle, there is nothing complicated here; it is important to calculate everything correctly and then accurately mount the device.
Steel wool and vinegar
If you place cotton wool in vinegar, it will dissolve and create a solution that is ideal for aging wood. The only negative is that this will take quite a lot of time, approximately about 5 days. Before work, sand the wood so that the solution better saturates the surface. Brew black tea - it contains tannic acid, which reacts with vinegar and turns it darker. The tea will not add any color, it will simply give the wood a glossier finish.
DIY forum: shooting hook – DIY forum
shooting hook or something like that
#1 Black_Hunter
#2 TROY
#3 Black_Hunter
#4 Stirlitz
You go to the store and buy a harpoon, a rope and a grapple. You change the harpoon rope to a longer one and put a grapple instead of an arrow. The only thing is this crap will not attract you!!
#5 Black_Hunter
We take an old and unnecessary umbrella, remove the fabric, tear off the knitting needles. We fix the spring inside the outer tube, attach a knitting needle to the same tube with wire and sharpen it. We close the “umbrella”. We use it.
#6 Fiery_Wanderer
#7 Imahara
(03/27/2011, 20:14) ——————————————— Here: Mythbusters made a winch (a small electric motor), with which they climbed to the roof of a 2-story building (8m. ) in 20 seconds with the grappling hook already abandoned. The miniature hero lift was made in 2 days, but it did not have a reverse gear. those. going down. To go down it was necessary to cut the cable.
Processing of wrapping points
The swinging slug game is currently no more useful than a water-repellent towel, so we definitely need to expand on it.
The good news is that the newly added method for handling rope positions can be used in the future.
For now we are only using two rope positions. One is connected to the player's position, and the second is connected to the current position of the grappling hook's anchor point when firing it. The only problem is that we don't keep track of all the potential rope positions yet, and that needs some work.
To recognize the positions on the rocks that the rope should wrap around, adding a new vertex position to the line render, we need a system to determine if the collider's vertex point is between the straight line between the slug's current position and the rope's current hinge/anchor point.
Looks like it's the job for good old raycast again!
First we need to create a method that can find the closest point in the collider based on the raycast hit point and the faces of the collider.
Let's add a new method to the RopeSystem.cs script:
// 1 private Vector2 GetClosestColliderPointFromRaycastHit(RaycastHit2D hit, PolygonCollider2D polyCollider) { // 2 var distanceDictionary = polyCollider.points.ToDictionary( position => Vector2.Distance(hit.point, polyCollider.transform.TransformPoint(position)), position => polyCollider.transform.TransformPoint(position)); // 3 var orderedDictionary = distanceDictionary.OrderBy(e => e.Key); return orderedDictionary.Any() ? orderedDictionary.First().Value : Vector2.zero; } If you're not familiar with LINQ queries, this code may seem like some kind of complicated C# magic.
If this is the case, then have no fear. LINQ does a lot of the work for us:
- This method takes two parameters - a RaycastHit2D object and a PolygonCollider2D. All the rocks in the level have PolygonCollider2D colliders, so if we always use PolygonCollider2D shapes it will work great.
- This is where the magic of LINQ queries begins! Here we transform the collection of polygon collider points into a Vector2 dictionary of positions (the value of each element of the dictionary is the position itself), and the key of each element is assigned the value of the distance from this point to the position of the player (a float value). Sometimes something else happens here: the resulting position is converted to world space (by default, the positions of the collider's vertices are stored in local space, i.e. local to the object to which the collider belongs, and we need positions in world space).
- The dictionary is organized by keys. In other words, according to the closest distance to the player's current position. The closest distance is returned, meaning any point returned by this method is a collider point between the player and the current rope hinge point!
Let's go back to the RopeSystem.cs script and add a new private field variable at the top: private Dictionary wrapPointsLookup = new Dictionary();
We'll use this to track positions where the rope might wrap around. At the end of the Update() method, find the else construct that contains crosshairSprite.enabled = false; and add the following:
// 1 if (ropePositions.Count > 0) { // 2 var lastRopePoint = ropePositions.Last(); var playerToCurrentNextHit = Physics2D.Raycast(playerPosition, (lastRopePoint - playerPosition).normalized, Vector2.Distance(playerPosition, lastRopePoint) - 0.1f, ropeLayerMask); // 3 if (playerToCurrentNextHit) { var colliderWithVertices = playerToCurrentNextHit.collider as PolygonCollider2D; if (colliderWithVertices != NULL) { var closestPointToHit = GetClosestColliderPointFromRaycastHit(playerToCurrentNextHit, colliderWithVertices); // 4 if (wrapPointsLookup.ContainsKey(closestPointToHit)) { ResetRope(); return; } // 5 ropePositions.Add(closestPointToHit); wrapPointsLookup.Add(closestPointToHit, 0); distanceSet = false; } } } Let's explain this piece of code:
- If the ropePositions list contains some positions, then...
- We shoot from the player's position in the direction of the player looking at the last position of the rope from the list - the reference point where the grappling hook is attached to the stone - with a raycast distance equal to the distance between the player and the position of the rope reference point.
- If the raycast collides with something, then that object's collider is safely cast to type PolygonCollider2D. As long as it is a true PolygonCollider2D, the closest vertex position of that collider is returned using the method we wrote earlier as Vector2.
- wrapPointsLookup is checked to ensure that the same position is not checked again. If it checks, we drop the rope and cut it, dropping the player.
- The list of ropePositions is then updated to include the position around which the rope should wrap. The wrapPointsLookup dictionary is also updated. Finally, the distanceSet flag is reset so that the UpdateRopePositions() method can redefine the rope distances based on the new rope length and segments.
In ResetRope() we will add the following line so that the wrapPointsLookup dictionary is cleared every time the player removes the rope: wrapPointsLookup.Clear(); Save and launch the game. Shoot the grappling hook at the rock above the slug and use the Move tool in the Scene window to move the slug behind some rock ledges.
This is how we taught the rope to wrap around objects!
DIY forum: shooting hook – DIY forum
shooting hook or something like that
#1 Black_Hunter
#2 TROY
#3 Black_Hunter
#4 Stirlitz
You go to the store and buy a harpoon, a rope and a grapple. You change the harpoon rope to a longer one and put a grapple instead of an arrow. The only thing is this crap will not attract you!!
#5 Black_Hunter
We take an old and unnecessary umbrella, remove the fabric, tear off the knitting needles. We fix the spring inside the outer tube, attach a knitting needle to the same tube with wire and sharpen it. We close the “umbrella”. We use it.
#6 Fiery_Wanderer
CAT - A thing in itself...or 101 ways to use... / Survival equipment / Don't get lost
- Author: onyxpol
- Published: January 26, 2014, 10:27 pm
- strannik,
- gennadiy,
- Sammat,
- tiunin,
- vtorogodnik,
- max2008a,
- MONGOL,
- botsman
- Tushcan,
- Land-user,
- Sunman,
- akvatran,
- ger9,
- razar,
- VOLk61,
- Gorec,
- tourist,
- asketes,
- ktibq,
- Andruha,
- DIS
- VARIAG,
- Mitya,
- denikoboroda,
- kvin,
- Sergsib
Good day, comrades!
This is a small addition... more precisely, a branch from the article “Russian Frost - 3” test...
Namely, we are talking about such a not-simple-simple object as a CAT... or KAGINAWA... Since time immemorial, it has been used by almost all nations for one purpose or another... but the main one is not close... Boarding, climbing to a height, removing tripwires or other dirty tricks , pulling the wounded out of the shelling zone, getting something, pulling it up... there are a lot of ways to use this mega-device...
But today, I used it purely for peaceful but good intentions... to warm and feed...
So:
Method 100 - warm...
With the help of a super-duper tool we extract... food for the fire... perhaps many people know in theory how to do this, and someone has done it this way... We take a typical representative of the family... and deftly throw it onto DRY spruce branches... because everyone knows, that the big spruce has dry branches high... sometimes very... AP and now... AP and already closer to the body... And the fire AM-AM...
Not enough for him... but now he was full... he began to lick the dessert in the form of fir trunks fallen by the weather... and then method 101 was required...
Feed...
One suspension was traditionally made from a branch... but suddenly a second one was needed... wah-wah... what to do... but here it is... Mikhalych...
This seems to be a simple, but at the same time useful thing... weight 345 g.
PS She can also pull out nets, clean ponds and rivers...
Don't disappear, comrades...
Types of roof ladders
Note! An installation ladder for working on the roof is required for any type of roof; even, at first glance, durable polymer materials on hip roofs sag under local mechanical stress, and protective stone chips fall off on bitumen shingles. All this leads to deformation of the protective layer and disruption of waterproofing.
The most common types of roofing ladders are:
Such mounting devices, made of steel, aluminum or wood, are designed for installation on hip roof types. The simplicity of the design allows you to independently (without involving a specialist) assemble the staircase from individual parts. A do-it-yourself staircase to the roof is an interesting and, most importantly, useful construction project, which in the future will definitely justify the money, time and labor spent.
Important! During the installation of a wall ladder, it is necessary to comply with all safety requirements. The distance from the top step to the eaves should not exceed 10 cm, and the gap between the stairs and the wall should be at least 20 cm. In the place where the stairs meet the roof, reinforced handrails must be installed to facilitate the process of climbing onto the roof.
The installation ladder on a gable roof type is fastened using reinforced brackets, which are passed through the roof for more reliable fixation. Rubber gaskets must be placed at the joints; they can also be replaced with any other sealant. The sections are connected in series and attached to the roof, the final element is securely fixed to the ridge. Not only the aesthetics of the house, but also the life of the person who climbs onto the roof depends on the quality work carried out on the installation of a roofing ladder.
Adding the ability to swing
The slug hangs on the rope quite statically.
To fix this we can add a swinging ability. To do this, we need to get a position perpendicular to the forward (sideways) swing position, regardless of the angle at which he is looking.
Open PlayerMovement.cs and add the following two public variables to the top of the script:
public Vector2 ropeHook; public float swingForce = 4f; The variable ropeHook will be set to whatever position the rope hook is currently in, and swingForce is the value we use to add the swinging motion.
Replace the FixedUpdate() method with a new one:
void FixedUpdate() { if (horizontalInput < 0f || horizontalInput > 0f) { animator.SetFloat("Speed", Mathf.Abs(horizontalInput)); playerSprite.flipX = horizontalInput < 0f; if (isSwinging) { animator.SetBool("IsSwinging", true); // 1 - get the normalized direction vector from the player to the hook point var playerToHookDirection = (ropeHook - (Vector2)transform.position).normalized; // 2 - Invert the direction to get a perpendicular direction Vector2 perpendicularDirection; if (horizontalInput < 0) { perpendicularDirection = new Vector2(-playerToHookDirection.y, playerToHookDirection.x); var leftPerpPos = (Vector2)transform.position - perpendicularDirection * -2f; Debug.DrawLine(transform.position, leftPerpPos, Color.green, 0f); } else { perpendicularDirection = new Vector2(playerToHookDirection.y, -playerToHookDirection.x); var rightPerpPos = (Vector2)transform.position + perpendicularDirection * 2f; Debug.DrawLine(transform.position, rightPerpPos, Color.green, 0f); } var force = perpendicularDirection * swingForce; rBody.AddForce(force, ForceMode2D.Force); } else { animator.SetBool("IsSwinging", false); if (groundCheck) { var groundForce = speed * 2f; rBody.AddForce(new Vector2((horizontalInput * groundForce - rBody.velocity.x) * groundForce, 0)); rBody.velocity = new Vector2(rBody.velocity.x, rBody.velocity.y); } } } else { animator.SetBool("IsSwinging", false); animator.SetFloat("Speed", 0f); } if (!isSwinging) { if (!groundCheck) return; isJumping = jumpInput > 0f; if (isJumping) { rBody.velocity = new Vector2(rBody.velocity.x, jumpSpeed); } } } The main changes here are that we first check the isSwinging flag so that actions are only performed when the slug is hanging on the rope, and we also add a perpendicular to the slug's corner pointing to its current anchor point at the top of the rope, but perpendicular to the direction of its rocking.
- We get the normalized direction vector from the player to the point where the hook is attached.
- Depending on whether the slug is swinging left or right, the perpendicular direction is calculated using playerToHookDirection. A debug draw call has also been added so that you can see it in the editor if you wish.
Open RopeSystem.cs and at the top of the else block inside the if(!ropeAttached) Update() method add the following: playerMovement.isSwinging = true;
playerMovement.ropeHook = ropePositions.Last(); In the if block of the same if(!ropeAttached) construct, add the following: playerMovement.isSwinging = false; This tells the PlayerMovement script that the player is swinging, and also determines the last (excluding the player's position) position of the rope - in other words, the anchor point of the rope. This is necessary to calculate the perpendicular angle that we just added to the PlayerMovement script. This is what it looks like if you turn on gizmos while the game is running and press A or D to swing left/right:
Important accents that must be taken into account when installing stairs
Having figured out how to make a roofing ladder with your own hands, you need to dwell on the features of its installation and operation:
In addition, you need to remember the most important rule (unwritten) of the builder: “If one of the fasteners is deformed or worse, fails and there is no way to replace it, or the place for fastening is too flimsy, then the ladder must be moved to another more reliable place " At one of the “responsible” moments, this can save a life.
Very boring? Rubber gun from office supplies
How to make a rubber gun from office supplies if the office is very boring
Recommended for viewing by middle-aged schoolchildren and younger office managers. A video of the gun in action is at the very bottom of the page.
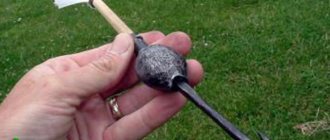
Have you noticed how secret agents and spies get cool gadgets to carry out their secret missions? Now you too can make your own mini rubber grappling hook using everyday office stationery! Apparently someone has revealed the secret mission of Her Majesty's Secret Service.
This grappling hook was made based on the new book Mini Weapons of Mass Destruction 2. This book features over 30 weapons and gadgets that can be easily built in the office or home, most of which I already have on hand! I decided to build my own version of such an insidious weapon and present you with its description. Enough talking, let's take a mini detour!
Tools + materials
Tools: • adhesive tape • needle nose pliers • hot glue • drill, awl, knife
Required Tools
Basically, the installation ladder is made of wooden beams; therefore, anyone who decides to independently make a device for roof repair cannot do without the following building materials and tools:
Note! The length of the board is selected in accordance with the dimensions of the roof, therefore in each case the dimensions of the product are selected individually - there are no uniform standards in this regard. In addition, the ladder for roofing work will last longer if, instead of the usual nails, you use hardened self-tapping screws, which do not oxidize or wear out under the influence of natural phenomena.
Source