Men dressed in military uniforms always attracted the attention of everyone around them. Particularly noteworthy was the uniform of past centuries, in which gallant military personnel shone at balls.
All boys love to play with tin soldiers, painted in various forms of the royal army - in the toy sets you will find hussars, dragoons, lancers, caponiers, and infantrymen. But the style of clothing they wear is approximately the same - the difference consists mainly only in the insignia of the military branches and belonging to one or another regiment.
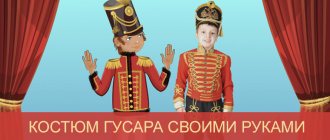
Making a hussar costume
We will not use complex special names for hussar uniforms, but will replace everything with simpler and more understandable ones. So, our kit will consist of:
Before you start making a hussar costume with your own hands, check your existing wardrobe. You need black trousers and a matching jumper or sweatshirt. If there is a small pattern on the sweatshirt, it’s okay; the shirtfront will hide it.
As for the color scheme, there are many options. The fact is that different hussar regiments had different uniform colors. Although traditionally the hussar's clothes are made in red or blue.
Having decided on the basis of the costume, prepare the necessary materials.
Let's start with the jacket. We cut out the overlay for the front part, cuffs and stand-up collar for the hussar’s suit; make the patterns according to the clothes. Lay the blouse on the table and carefully draw the necessary elements. For the rack, make 2 parts: internal and external. Its lower part should be equal to the size of the neck. Connect the parts, iron and sew to the armhole. The cuffs are also double-layered.
After that, start decorating. Using a ribbon, sew the entire uniform open and sew on the buttons.
Paint cardboard epaulets or cover them with fabric. Use a glue gun to apply the gold fringe. Secure them to your jacket.
For the cape, cut out a rectangle of a suitable size, decorate it and add a golden cord like a sling.
Baste stripes from decorative tape onto your pants.
Variety of shakos
Hussars' hats vary in color and height. They can be white, black or in harmony with the color of the uniform. If the dolman is red, then the shako can also be made red.
They may not be too high in height - up to 20 cm.
But the decoration is radically different. Aiguillettes can be located along the visor from one edge to the other, from one upper corner of the cap to the opposite middle, or to the opposite upper corner. A badge or coat of arms symbol is attached in the center. You can look for a voluminous sticker in a gold or silver color in a sewing accessories store so that it resembles the metal emblem of a hussar regiment. To decorate a hussar's hat for the New Year, you can attach a pom-pom or a fluffy feather to the top center of the bottom of the child.
You can also sew a gold stripe on the top and bottom of the crown, and a stripe matching the color of the camisole on the black background of the shako.
We complement the suit with accessories
Headdress
We'll make our hero's hat out of cardboard. Prepare the necessary elements as shown in the diagram. Glue all the parts together and sew two buttons on the right and left, bottom and top. Attach a cord with tassels to the top two, and golden braid to the bottom ones. You can add a small elastic band under the chin so that the headdress stays in place and does not fall off.
Saber
We will also make the weapon from thick cardboard. We cut out the serrated blade and wrap it with silver tape. Then we cut out the handle, also glue it over it and put it on the blade. The sheath is simply a tube compressed to a flat state. It should be slightly wider than the blade. The sheath and hilt can be beautifully painted.
As for makeup, everything is extremely simple - just remember the famous movie hussars.
There simply weren’t any brave, beardless cavalrymen!
Choose what you like best: small mustaches or lush mustaches, and draw for your little hero.
After this, the work of creating a masquerade image can be considered complete.
As you can see, the task turned out to be not so difficult. We hope our tips will help you make a hussar costume with your own hands and please your little defender.
Source
What will you need to buy?
To sew a hussar's suit and hat with your own hands, you will need to purchase the materials that will be needed in the work, so that later there will be no problems along the way and you will not have to run to the market again or go to the nearest store.
- Material for sewing pants. These should be dark and dense fabrics. Although you can also sew white leggings.
- Material for sewing dolman and mentik. Here you need to select brighter fabric colors - red, bright blue, emerald, burgundy, etc. The color scheme may vary.
- Accessories: “zipper” for trousers and a vest or jacket, gold buttons for a jacket and uniform, for a hussar’s hat, aiguillettes (you can buy gold or silver rope, choose tassels), threads, needles, you can also choose yarn to match the color of the suit in order to to make a pompom of the same color for a shako, a fringed ribbon for epaulettes.
- Cardboard for patterning a headdress.
- Scissors.
- PVA glue.
- Badge or sticker on the central part of the shako.
We will need:
10 buttons (golden, with monograms)
gold edging with fringe – 70 cm
golden elastic band “wave” – 150 cm
red fabric - 30 cm (the width can be 130 or 160, even 120 can be achieved, although with difficulty)
hat elastic (to prevent the top hat from falling off your head)
Buying all this will cost you 100 rubles, or even less.
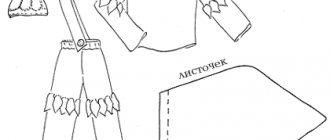
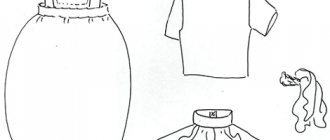
Next, look at the drawing: these are the parts we will cut out of cardboard and cover with fabric. The drawing takes up exactly an A4 sheet, so it’s not difficult to copy it from the screen. Or print it.
* Shoulder straps – 2 parts from whatman paper, 4 parts from fabric
* Cylinder – a strip of whatman paper 15 cm wide, the length depends on the volume of the child’s head. In our case, 50 cm. Plus a circle on top of the cylinder (you don’t have to do it). 1 piece each from whatman paper, 2 pieces each from fabric. Although it is better to make the rectangle for the cylinder one-piece rather than made of two pieces. In this case, 1 piece 32 cm wide is needed for the cylinder walls.
* You can sew a belt and cuffs from leftover fabric. Both are just rectangles of fabric.
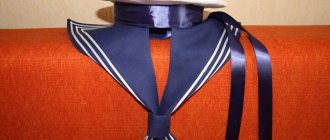
Peak cap and sailor's collar
We continue to sew a naval military suit for a boy, starting with a cap.
- Attach the headband to the headdress by attaching two satin ribbons in advance.
- Then you sew it on the machine.
- Glue the anchor applique to the front.
Another option for constructing a sailor's headdress is represented by cardboard and fabric. The band consists of cardboard. A cloth is attached to it from the inside so that it covers its inside and head. A strip of fabric is glued to the outside. The result was a kind of cook's hat.
For a striped collar, you need measurements of the half-circumference of the neck, the width of the shoulder and the length of the product itself. On the pattern, mark the beginning of the horizontal measurement, consisting of the neck and shoulder data. To do this, make two more calculations.
- Divide the half-girth of the neck by 3, add 0.5 and divide everything by 3. This parameter will determine the height of the neck bend.
- Divide the neck circumference by 3 and add 0.5. Mark this parameter along with the shoulder length on the pattern.
Progress
1. Cut out all the details from whatman paper. We measure the circumference of the cylinder, fasten it into a “pipe” (with a stapler, tape, glue, sew...).
3. Cut out, leaving seam allowances. You can stitch the edges with a zigzag for strength.
5. Decorate the bib. Sew on 8 buttons as shown in the diagram. Sew a “wave” 0.5-1 cm from the edge around the perimeter. We cut the remains into 4 parts, from which we make “eights” around the buttons.
6. Decorate the cylinder. First, we sew the “lid” to the “pipe” on our hands, hiding the allowances inside the cylinder. Then we trim the top edge of the cylinder with the fringe down. We make holes on the sides and stretch the elastic through them.
7. Decorate the shoulder straps. We sew 1 button per shoulder strap, trim the outer edge with the remains of the fringe so that it “hangs” from the shoulder strap.
8. If there is any fabric left, we sew a belt (you can insert 1 wide elastic band or 2-3 thin linen ones into it, stitching the belt in 2-3 rows) and cuffs.
9. Assembling the costume. We sew shoulder straps and a bib onto a shirt or T-shirt with long sleeves (what is the correct name - a jumper? A sweatshirt? A blazer?), cuffs onto the edges of the sleeves, smooth out the cuff turns and also sew them on. So that they don't bloom. Down - straight black trousers. The soldier is ready for battle!
Source
Military T-shirt and tank top
Use needles to cut off the shoulder and side sections. You bend it, sew it, if the fabric is not loose and you have an overlocker, sew it with a zigzag. Next, fasten the sleeves with needles and also stitch them. Now cut off a strip (4-5 cm wide) for the neck.
It is better to choose a special fabric (ribana) that stretches. Then you need to subtract a third from the size of the back and front neckline, you will get the required length of the ribana (for example, the neck is 25 cm, then the ribana is 17 cm). You sew the strip into a ring, attach it to the neckline, and sew it on a machine.
If a military suit for a boy is represented by a T-shirt, shorts and a cap, then we decorate the T-shirt with a St. George ribbon, shoulder straps, badges or a special appliqué. Thermal application is especially convenient (apply to clothing, cover with gauze, iron with a hot iron).
If there is a tunic on top, then you can sew a vest. It is suitable for a soldier, sailor, paratrooper. Also transfer the pattern from a tank top that has wide straps to striped fabric. Sew the shoulder and side sections, process the armpit and neckline.
We sew a hussar costume for a boy ourselves
There is not much time left before the New Year and almost everyone is already ready for New Year's matinees, but if you do not yet have a beautiful costume, I suggest you sew a soldier costume , it is also suitable for a nutcracker or a hussar . The outfit consists of a hat of trousers and jackets of two colors.
For tailoring, you need to take the following measurements: Jacket length Sleeve length Sleeve circumference at the wrist Shoulder length Neck circumference Chest circumference Waist circumference Hip circumference Pants length Leg width at the bottom Collar height Head circumference And determine the desired height of the hat How to take measurements correctly, see this article
When all the measurements have been taken, you need to determine how much fabric and accessories you will need . The amount of fabric, if it is a simple cut, as in our case, is measured along the length of the product. For example, if my jacket length is 37 cm, then taking into account allowances, with a fabric width of 150 cm, we need to take 50 cm of fabric. For teenage sizes, product length plus sleeve length.
Considering that the pants were ready and sewing took 2 and a half days . We sew trousers . 1) We build a pattern - the basis for the trousers 2) We cut out and sew the parts (the work progress can be seen here) 3) We baste and sew on the gold braid (I have bias tape)
2) Model the collar . From point B1 up along line BA, set aside the height of the collar (mine is 2 cm) and from point D along line DS1, set aside the height of the collar. Connect the resulting dots. Create a smooth cut for the collar.
Patterns are ready
We sew the parts using detailed sewing instructions
I advise you to duplicate the collar with adhesive fabric, then it will be more stable.
Sew the collar to the front side, and sew the inside side 3-4 cm short of the edge of the front, so that you can then carefully sew a zipper into it.
Sew on the zipper. 1) Sweep the shelves the way they should look when fastened
2) Attach the lock to the wrong side and pin it with needles.
Decorating the jacket
Shoulder straps 1) Make an shoulder strap template from paper 2) Duplicate black fabric with adhesive fabric 3) Sew gold bias tape to the fabric from which you will cut the upper part of the shoulder straps 4) Position the template so that the gold stripe runs down the middle of the template 5) Cut out the parts and sew 6) Sew the shoulder strap and sew (in my case, glue) the button
Please note that shoulder pads are sewn to the shoulders.
We decorate both jackets with buttons. I glued all the buttons with a glue gun, as I wanted them to fit tightly to the fabric.
A cap
For the hat, we have already determined the girth of the head, let's assume 52 cm and height 17-18 cm. Take regular A4 cardboard, measure the required height and length, most likely you will have to join 2 sheets.
We build a circle with a length of 52 cm. Using the formula C = 2n*R, where C = 52 is not difficult to calculate, the radius R = 52:2n = 52:6.28 = 8.3 We take a compass and build a circle with a radius of 8.3 cm. This will be the bottom of the hat. Attach the resulting circle to a new sheet of cardboard and draw the desired visor. Make fabric patterns: bottom, side part and visor. Sew the paper bottom to the paper base.
Sew fabric parts
We put the resulting cover on a paper base. Using pins, secure the top and, while pulling the fabric taut, fold the sides to the inside of the hat.
Sew the hem and peak and cover the seam with gold bias tape using a hot glue gun.
The hat is decorated with a gold cord (a braid made of 4 parts) and two tassels made from the same cord and a button.
Also on the sides are sewn “fasteners” decorated with buttons.
The costume is ready to try on and enjoy the upcoming New Year! And I chose such a beautiful hallway for myself not so long ago, and now I often photograph it with the finished works.
Source
Pattern
The hussar's hat pattern consists of three separate elements: the crown, the bottom and the visor. To draw such a template, you need to measure the circumference of your head. This will be the length of the crown. Having determined by eye what height will be enough for your child’s shako, draw a rectangle. Don't forget to leave a couple of centimeters for the hem so that the cardboard shako can be glued or stapled.
Having rolled the crown in a circle, we outline the circumference of the bottom. You need to draw a lot of triangles around it to firmly glue the bottom to the crown. The visor is also drawn along the same circle; triangles are also drawn on its upper part, onto which thick PVA glue is subsequently applied. However, before fastening the parts together, you need to use these templates to transfer the pattern onto the fabric from which the shako for the gallant hussar’s costume will be sewn.
The material is first joined along the height of the rectangle, then the bottom is sewn. The visor pattern is transferred to fabric folded in half. Next, the material is sheathed around it on both sides. Only then is the trimmed visor sewn to the shako.
DIY tin soldier costume
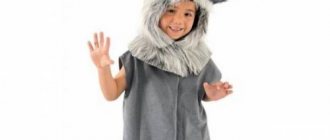
Carnival costume "Titmouse".
I went to a kindergarten matinee two years ago, I’ve already forgotten many of the nuances, but I got the main idea from
. I made the wing patterns at random; the wings are attached to the wrists using Velcro, the edges are decorated with feathers. I cut the chest to the size of my son’s T-shirt, sewed it from fleece, sewn a zipper on the chest, and a tail at the bottom of the back. The shorts were cut from pajama pants. I had to tinker a little with the hat, but I also found an old winter hat with ear flaps and copied the pattern for the upper part from there, then I practiced on chintz fabric, tried it on, where I needed to add, where I needed to subtract, then I sewed a carnival hat from the main fabric. I cut out the eyes and beak from an old leather bag and sewed them onto the hat. The carnival was a success.
Yakut shirt for a boy. I was just learning to sew, so I had to buy a ready-made pattern at the Ilin Ener store, but there were some nuances here, the pattern was for a boy 140 cm tall. There are no detailed instructions, only a brief sewing diagram. I had to redo it a little, widen it a little at the shoulders and shorten it according to height; I also thought out the collar myself. First I practiced on chintz, and only then sewed it from the main fabric.
Carnival costume "Tin Soldier" . This year the kindergarten was challenged with a themed costume; we had to create a tin soldier. This time I didn’t even go shopping, because I know that I won’t find the right size. My son is tall. I started scouring the Internet, looked through a lot of options, including hussar costumes, and found a great idea here, completely inexpensive. I changed the concept a little due to the source materials, because at home I found chintz and satin, and grandfather’s buttons and something else, but there was no felt at all, so I got a little creative and sewed everything my own way.
I found a great idea on how to make a shako here. But I wanted something more fundamental, and I thought that a shako could fit on one’s head, so I modified the idea to suit myself and used an ordinary ready-made baseball cap to make the shako. It turned out strong and reliable and does not fit on your head. For one thing I remembered sixth grade geometry
