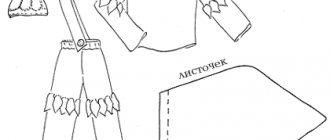
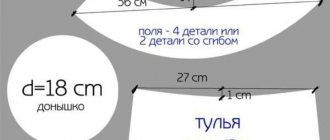
consists of the elements: 1. Trousers 2. Jacket 3. Hat with a “beak” 4. Slippers
Description of work
We sew a blouse and pants (with elastic) according to any pattern, the sleeves and legs are straight. Use white satin braid, 4 cm wide, to make four rows of ruffles along the bottom of the panties and sleeves, so that the ruffles slightly overlap each other.
The hat is eight-piece, gathered at the bottom with an elastic band to fit the volume of the head, and a “pumpkin” made of yellow satin braid is sewn on top.
We sew the “beak” and “legs” according to a random pattern from red foam rubber, and hem the bottom with red fabric. To prevent the slippers from falling off, we sew a loop for the leg from the inside to the heel using ordinary elastic.
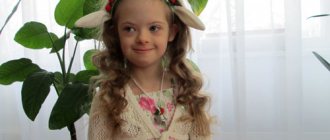
The cheerful goose is ready!
| The sketch and description of this costume are based on the original idea of Natalia Pavlova >>> |
From the archive of photo competitions:
Idea and description: Natalya Pavlova, Isabella’s mother, sketch: Lyudmila Orlova, drawing of Goose: Svetlana Makhotina, coordination and layout: Tatyana Evtyukova
The material was prepared specifically for the children's portal "Sun" and published on December 10, 2007.
For personal use only! Republication in other publications is prohibited!
Source
Features of a goose costume for a boy
A carnival costume always looks bright, interesting and festive. For a child, this is a special image into which he is reincarnated. A goose costume for a boy must have a red beak. This could be a mask or a regular red cap. It all depends on what the outfit will be made of and its details.
In addition, such a bird should have red legs. Don't forget about the wings. After all, what is a bird without wings? The child's outfit should be white or gray to match the color of the goose's feathers.
Remember!
Ready-made costumes in theme stores will cost many times more than those made by yourself.
Sketches
The facial expressions of the mask are of great importance. Even the most ordinary characters convey a palette of moods. They can be sad and cheerful, kind and angry, surprised and indifferent. This is achieved by drawing the eyebrows (raised, lowered, like a house), a smile on the face, and the position of wrinkles, if we are talking about a mask of an old man or woman. Emotions are conveyed not only by the faces of people and animals, but also by inanimate images: templates for masks of flowers (bells, roses, daisies), vegetables and fruits (apples, tomatoes, plums).
Grandfather
Robot
Indian
Carrots
Aliens
Carnival children's masks made of paper are closely associated in our minds with matinees in kindergarten, New Year trees, holidays when you can become anyone: a bunny, a wolf, a bear, etc. Moreover, to designate an image, it is not necessary to completely cover the face with a carefully drawn muzzle of the animal: conventional designations that you can make with your own hands are enough.
For example, paper chicken masks can depict a beak and muzzle. DIY paper carnival masks for children today are not a problem at all. They can be used for everyday role-playing games, and for performances during holidays in kindergarten, and even for finger games, to arrange a home theater.
What you need to create and decorate a goose costume
To create a beautiful themed goose costume you will need:
- White or gray fabric (you can take a T-shirt or sweater).
- Baseball cap with a long visor.
- Knitted fabric in white or gray shade.
- Dense material of a red or orange hue.
- Threads.
- White elastic band.
- Large buttons 2 pcs. (you can take eyes from an old toy or self-adhesive images that are sold in a theme store).
- Socks, socks or tights in a red shade.
Remember!
The set of necessary tools and materials will depend on the chosen version of the costume.
Foam craft
Foam masks are made according to the cap principle. To work you will need:
- Foam rubber 1-2 cm thick.
- Scissors.
- Glue "Moment".
- Paints.
Such products can be in the shape of a cone, ball or cylinder. To make a squirrel mask, you need to make a round hat, then glue the ears to it. Make the nose in the form of a cone. The finished sculpture must be painted. Eyes can be cut out of paper.
Foam rubber makes wonderful attributes. These can be not only animals, but also vegetables or fruits. For example, you can make a mask of onions, potatoes, cherries, apples and others. It’s easy to make a bee mask for a child’s head from this material.
These attributes are suitable not only for children, but also for adults for all kinds of entertainment, holidays and games.
Attention, TODAY only!
Download and print templates for making children's three-dimensional paper head masks with your own hands.
Magic transformations are one of a child’s favorite activities. From early childhood, girls try on their mother’s outfits and jewelry, imagining themselves as princesses or fairy tale characters. The boys are also not far behind, imagining themselves in the image of their favorite Superheroes or a brave pirate. Imitating your favorite heroes is not only entertainment, it helps a child to realize himself.
You can buy ready-made carnival masks of animals, birds, superheroes for children in the online store (in, in, in) or make your own from paper using the templates presented below.
Animal masks for the game "Cat and Mouse"
Source: mermagblog.com
Template for printing the Mouse mask, pdf file.
Printable template for the “Cat” mask, pdf file.
Head mask “Owl” made of colored paper
Source: paperchase.co.uk
Printable Owl mask template:
PART 1
PART 2
Print the “PART 1” template on colored cardstock or thick paper, set the print settings to “photo” and “grayscale”. Cut out the mask along the contour and eye holes. Punch holes on both sides to thread the ribbon through. Make folds on the beak along the dotted lines and glue in place.
Print the feathers on sheets of different colored paper. Set the print options to "photo" and "grayscale". Cut out large feathers, fold them in half and glue them onto the mask. Cut out small feathers and start gluing to the base from the bottom row.
Superhero masks for boys and girls
Source: mini.reyve.fr
Printable Superhero mask templates, pdf file
Paper bunny mask
Source: playfullearning.net
Printable children's mask "Bunny" template, pdf file. In order to make a mask you will need: a printing template, scissors, a marker or felt-tip pen, cardboard and two pieces of rope or tape.
Print the mask template onto thick paper and fold it in half vertically. Cut along the contour, make holes for the eyes. Open the mask, color your nose with paints or a pencil. Children can decorate the mask as they wish. Make two longitudinal folds in the nose area at the same distance from the middle. Make holes in the side wings and thread the strings.
How to make a gosling costume for a boy with your own hands
There are several ways to make a gosling costume at home. The most relevant and proven ones include:
- To make the chick's beak, take a cap with a red visor. We glue or sew button eyes onto the top of the cap. Now the matter remains small. We put on a white turtleneck or T-shirt and red tights, leggings, knee socks (your choice). We put a white cape on top with elastic bands, it will serve as the chick’s wings. The costume for a theatrical event for a boy is ready.
- If there is no red cap at home. Then we take an ordinary white or gray hat and sew a homemade beak to it. We make it from thick fabric or red paper. For the bottom we wear black dress pants and a white shirt or turtleneck. We complement the look with a white cape made of satin fabric.
To create a costume, it is not necessary to buy special themed items. Every boy's wardrobe has a classic white shirt, turtleneck or T-shirt that goes well with a suit. Tights, leggings, and knee socks are suitable for the bottom. If this is not the case, then you can wear red shoes with socks of the same shade.
If you want to sew a set yourself, then you will need to make a pattern for a T-shirt, sweater, shorts or pants. A white jumpsuit would be a great option. Don't be afraid if you don't have a machine or overlocker in your house. All details can be sewn by hand.
Sewing a jumpsuit is very simple. All you have to do is take the pattern, transfer it to the fabric and sew the two parts together. Don’t be afraid to experiment because your child’s outfit should be unique and interesting. For the outfit, choose white, black or gray.
For a warm version of the overalls, a velor option is suitable. This suit will be very warm and comfortable for the child. It does not restrict movement and helps the body breathe. We make the following pattern according to the child’s size:
Animal faces
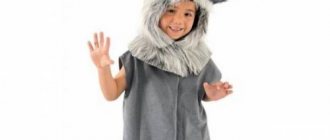
Costumes and masks of forest and domestic animals are a common option for holding a matinee. Some children prefer to dress up as cats, dogs, hares and other recognizable animals (bull, goat, wolf). Others want models of less common animals - raccoon, moose, platypus or koala.
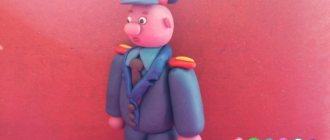
A universal option is the “mask of the Year”. It symbolizes the animal according to the eastern calendar. For 2022, the faces of a pig, piglet, and wild boar are relevant. They can be made not only from paper, but also sewn from fabric. Patterns and sewing patterns make it easy to complete the task.
Foxes
Hare
Bear
Wolf
Leo
Tiger
Raccoon
Crocodile
frogs
Fish
Hedgehog
Zebras
Deer
Leopard
Elephant
Monkey
Snakes
Squirrels
Rhinoceros
Turtles
Giraffe
Rats
Hamster
Polar bear
Panthers
Sharks
Lizards
How to make a goose costume for a children's party with your own hands?
What sketches, ideas and step-by-step master classes are there for sewing fancy dress costumes?
The Goose costume can be sewn and made. If we do, then it is enough to use the things that we already have. For example, a white turtleneck, white denim or cotton summer shorts. For a girl, you can take yellow tights and sandals to match). You can simply make a mask for this outfit or buy it. The costume is ready)! If we sew a set, then we can also sew a top, T-shirt, shorts, and pants. I really like the white jumpsuit. It is easy to sew using a ready-made pattern taken from the Internet or a magazine. There are a lot of patterns. For example, you can take a pattern with long sleeves and short ones. We make a jumpsuit from white velor. This option is good because the child will be comfortable and very warm. Let's focus on this pattern: We make several parts - cut them out and sew them on a machine. You can also use an overlocker. Sleeves and a hood can be omitted. At your discretion. ☀ ☀ Fold the bottom of the trousers and stitch them. You can also insert an elastic band to gather up the pant leg a little. It will be very beautiful. We bend and process the sleeves and neckline. You can make a small cut along the back and sew in a zipper. This will make the overalls easy to put on and take off. ☀ Now a cap or a mask? I think that every mother will decide for herself. It seems to me that you can make a goose mask out of paper, it will be very beautiful. There are many options on the Internet. This one is funny)).
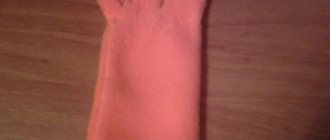
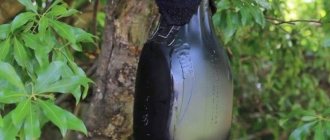
To make a goose costume you will need to sew a shirt using any simple pattern, insert an elastic band into the sleeves so that they are puffy. The pants also need to be sewn according to a simple pattern, the length is just below the knees. Insert an elastic band into each pant leg. Next you need to work on the wings and the head of the goose. For a more detailed description, I will attach a screenshot from the site (unfortunately there are no photos here). And here is another photo without a description, but according to the author, the head and beak are made of plastic bottles and paper.
Pictures of pets
Masks are often used for photo shoots. Parents can take funny photos of their child themselves. The look will be created by cat ears with a tail, paper glasses, and a funny hairstyle.
Mouse, goat or chicken masks are suitable for the theater or circus when children are taken to New Year's performances. Older children or parents of preschoolers can make three-dimensional masks according to the drawings. They are put on the head and cover the back of the child's head. Incisions are made for the eyes and nose. Children will like the head of a horse, boar, or donkey as models.
Dogs
Cats and Kota
Horse
Cows
Pigs
Mice
A rabbit
Goat
Barana
Donkey
Rooster
Chickens
Chickens
Ducks
Goose
DIY hussar costume
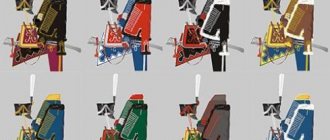
New Year's parties sometimes make parents rack their brains. Not every masquerade outfit can be made in one evening. The hussar image is just such a case. Quite complex uniforms, decorated with rich decor, additional equipment, weapons of different types - there is a lot to get confused about.
But you shouldn’t give up and deprive your child of the opportunity to feel like a gallant cavalryman.
Content:
- What date is Halloween in Russia 2021
- History of the holiday for children Symbols of Halloween How to make a pumpkin for Halloween
- Versatile Halloween Costumes
- Invitations and gifts
Making a hussar costume
We will not use complex special names for hussar uniforms, but will replace everything with simpler and more understandable ones. So, our kit will consist of:
- A short jacket, complemented by a shirtfront with decor, cuffs and epaulettes
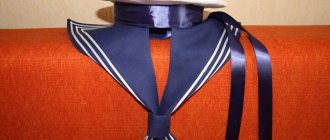
- Capes with a turn-down collar
- Trouser with stripes
- Headdress
- Sabers
Before you start making a hussar costume with your own hands, check your existing wardrobe. You need black trousers and a matching jumper or sweatshirt. If there is a small pattern on the sweatshirt, it’s okay; the shirtfront will hide it.
As for the color scheme, there are many options. The fact is that different hussar regiments had different uniform colors. Although traditionally the hussar's clothes are made in red or blue.
Having decided on the basis of the costume, prepare the necessary materials.
You will need:
- For the bib and cuffs, black cut, approximately 30 cm
- For a cape, fabric of the same color as the jumper, 70 cm is enough
- For embroidery and finishing, gold braid, approximately 5-6 m
- Golden cord and fringe 30 cm each
- 10 metal buttons
- Cardboard and silver tape
- Scissors, glue, thread, needles, glue gun
Let's start with the jacket. We cut out the overlay for the front part, cuffs and stand-up collar for the hussar’s suit; make the patterns according to the clothes. Lay the blouse on the table and carefully draw the necessary elements. For the rack, make 2 parts: internal and external. Its lower part should be equal to the size of the neck. Connect the parts, iron and sew to the armhole. The cuffs are also double-layered.
After that, start decorating. Using a ribbon, sew the entire uniform open and sew on the buttons.
Paint cardboard epaulets or cover them with fabric. Use a glue gun to apply the gold fringe. Secure them to your jacket.
For the cape, cut out a rectangle of a suitable size, decorate it and add a golden cord like a sling.
Baste stripes from decorative tape onto your pants.
Masks – Fly and mosquito
Let's start with the frame. First, cut out an even strip 3 centimeters wide. Narrower ones will not be strong, wider ones look bulky. Length - 85 cm (this is if the masks are intended for adults or teenagers). Ideally, masks should be made exactly according to the measurements of the specific performer of the role. But in life, a good isolon mask serves faithfully for years, and the actors change. Therefore, let's take average sizes.
Using glue we glue the frame in this order. We make a cut at the back of the head, which will make it possible to slightly change the size.
Parts for mosquito mask
Details of the clattering fly mask
Cut out the fly's face according to the pattern. The color is gray or pink (depending on whether you prefer the resemblance to insects or like more humanized characters). I myself adhered to the stylized appearance of insects. Since Chukovsky wrote about insects, we will play with their features. The eyes are made of green foil, it would be better if it is a green holographic self-adhesive film. If you really want to, you can decorate your eyes with long eyelashes and glue the lips with a bow under your long nose. The six legs can be made simply black, or you can wear gloves and shoes. To make it more elegant, the frame of the cap can also be decorated with green or blue foil. We will make the wings from transparent plastic film. I took a transparent cover for a school textbook - they are sold in office supply stores (I don’t recommend using hard plastic, for example, from soda cans - the edges are sharp, and we don’t want anyone to cut themselves in the commotion of the show). We will lay out the veins on the wings with narrow strips of colored self-adhesive film. You can draw with a permanent marker, but... it won’t look very elegant. That’s all – enough for a convincing image of a fly. If your soul really wants a beauty and a coquette, there is an option to wear a tiny hat with a veil, but I didn’t do it myself - in my opinion it was too much.
mosquito mask
Clutter fly mask
We complement the suit with accessories
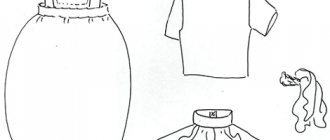
Headdress
We'll make our hero's hat out of cardboard. Prepare the necessary elements as shown in the diagram. Glue all the parts together and sew two buttons on the right and left, bottom and top. Attach a cord with tassels to the top two, and golden braid to the bottom ones. You can add a small elastic band under the chin so that the headdress stays in place and does not fall off.
We will also make the weapon from thick cardboard. We cut out the serrated blade and wrap it with silver tape. Then we cut out the handle, also glue it over it and put it on the blade. The sheath is simply a tube compressed to a flat state. It should be slightly wider than the blade. The sheath and hilt can be beautifully painted.
Felt products
Such accessories look very nice, they are light and hold their shape well. You will need the following materials:
Print a pattern drawn by hand or in a graphic editor. You can make it easier if you enlarge or reduce the image of the pattern on your computer to the desired size and print out a squirrel mask for your head.
The product will fit better on the face if darts are made in its upper part. The mask can be secured to the head using a headband or hair clips.
You can experiment first by cutting out a pattern from paper. Then glue it together and try it on. This way, it will become clear whether the attribute size is appropriate or not. If necessary, adjust the pattern, cut and glue again. Continue these steps until the mask fits perfectly.
Then the pattern can be transferred to felt using a pencil, marker or chalk. Felt parts are cut out very carefully and evenly so that the edges are not shaggy. Small holes are cut using a sharp breadboard knife.
The details of the craft can be sewn or glued. First, it is better to glue flat elements, for example, eyes, ears. Then you can begin to form volumetric parts.
For the nose, make a slit on the craft in the form of a triangle. Coat the edges of the slot well with glue and insert a squirrel nose, folded in half, into it. Then glue on the black tip of the nose.
The mask is ready. If there is excess glue left on it, it must be removed.
Instructions
- Using any simple pattern, sew a shirt with long, loose sleeves from the main fabric. Instead of cuffs, insert elastic into the drawstring to keep the sleeves nicely gathered.
- Decorate the neckline with a frill of satin ribbon and sew on the ties.
- From the main fabric, sew pants that are just below the knees. At the bottom, gather them with an elastic band. The pants should be full and slouchy. If you have enough sewing skills, the bottom of the legs can be decorated with a frill made of satin ribbon in two or three rows.
- Don't get carried away by the complexity of the pattern. Both the pants and the shirt are just the basis for the suit, keep them very simple.
- Remove the pattern for the wings from your child. Stand the baby upright with straight arms extended to the sides. Measure the distance from one wrist to the other through the seventh cervical vertebra. This is the width of the wingspan.
- Measure the distance from the seventh cervical vertebra to the tailbone or just below. This is the size of the wings themselves.
- Fold the main fabric in half. Measure half the wingspan along the top cut from the fold. Along the fold line, set aside the value of the second measurement. You have two points at the ends of perpendicular lines. Connect these points with a smooth semicircular line.
- Spread your wings. Using scissors, cut out elongated teeth with rounded tips along the cutting line, imitating feathers. If the fabric does not fray too much and you do not plan to use the suit more than once, the cut does not need to be processed. Otherwise, the jagged line will have to be sewn with a zigzag stitch on a machine or overcast by hand.
- You can color the wings with fabric paints or regular markers. For example, draw the feathers more clearly. But keep in mind that a regular marker cannot withstand washing.
- Sew the wings to the shoulder line of the shirt and along the sleeves from one cuff to the other.
- Cover the baseball cap with thin knitwear of a suitable color. An old T-shirt or tank top works very well for this.
- Cover the visor with red or yellow fabric. This will be the beak. Just above the beak, sew two ovals from the same fabric to indicate the eyes of the goose. Attach buttons to the ovals.
- Choose shoes that are appropriate for the location where the performance will take place. Dress your child in matching tights or socks, pants, a top with wings, and a baseball cap. Without a doubt, your goose will be the most fun.
Why are wings needed?
Using such a simple device, you can fly or slowly soar from great heights. Therefore, they can be considered to some extent as an analogue or replacement for other things in the game: the feather potion or the horseshoe. It's worth noting that you won't take damage when you land either.
This accessory was first added to the game in update version 1.1. Soon, in version 1.2 of the game they were redesigned, and from version 1.2.3 they completely ceased to appear on the character. Today, in the game there are many different wings that a character can use. They all differ from each other in some characteristics. A character can activate several of these accessories, but only one will be imagined. Also, when used simultaneously, their characteristics will not add up - that is, only one type of wings will always be used. They all look different, but the difference doesn’t end there. The main difference is the flight altitude, as well as its duration. In addition, there are several ways that improve these characteristics. Such items are: spectral boots, rockets. If you use an ice rod, you can find floating islands faster and easier, and also get out of various holes with ease. Below, we will give some examples of exactly how various upgrades can change the height to which a character rises:
- If you use simple wings - maximum height is 286 feet.
- With boots (missile or spectral) added - 323 feet.
- Using a cloud in a bottle - 331 feet (you must also use boots)
- If you decided to use a cloud in a balloon instead of a bottle, the maximum height will increase to 458 feet (if you took the “bright red” balloon, the height will be slightly less - 441 feet).
- The maximum height you can reach using Frost Boots, Ribon Wings and a bunch of balls is 478 feet.
Bird patterns
Having selected ready-made sketches, they are saved or copied for subsequent printing, and the masks are cut out. They are usually used as a headband without covering the baby's face. To make a full-fledged mask, you need to make an effort. The specificity lies in the anatomy of the bird's head. You need to prepare a template for the head and beak separately. The bird's beak is glued along the marked lines. Its size and shape depend on the bird - for an owl it will be small and hooked, for a crow it will be long and sharp.
Sparrow
Galchonka
Crow
Cuckoos
parrot
Herons
Pavlina
Thick paper
Beer cardboard is considered a good option; it is white. Although, the color component is not so important, because it will close anyway.
The main thing here is that the material is durable. From it we make the wings of a bird, an angel, a butterfly.
The details must be symmetrical. For a child, the form can be uniform. You can prepare paper feathers with which to paste over the blanks.
Tulle wings
To create such wings you will need tulle, two wire hangers and thread.
Progress
- Cut off hooks on hangers.
- Give the frame the shape of a wing.
- Cut out the shape of the wings from fabric and cover the frame.
- Secure the result with threads along the edge of the frame.
- Connect both parts to each other. This can be done using adhesive tape.
- Cut strips of fabric 10-15cm long and the same width.
- Sew strips, forming folds from them.