What is iris folding? Iris folding is a fairly current hobby. Used in active areas.
The iris folding technique is often used to decorate postcards, photo albums, notebooks, as well as to make unusual canvas to decorate the interior.
Iris Folding: what is it?
The Iris Folding technique is a special method of folding colored paper. Translated into Russian, the name translates as “rainbow folding”. To begin with, blanks are made from colored paper, and then they are folded in a special way in a spiral. As a result, interesting three-dimensional paintings appear.
You can “draw” anything using this technique. The result of folding depends on the desire and imagination of the author of the work. You can make a star or a huge painting of a modern city. It all depends on the availability of time and desire.
Ideas
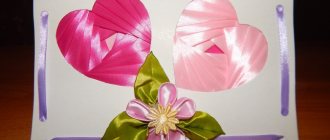
The most popular in this type of creativity are postcards. They are made for any holiday. Most often, hearts and flowers are used in cards.
If they are not suitable for a particular case, other elements and details are chosen.
- For a card, for example, a Valentine's card, take a sheet of colored cardboard and fold it in half. Draw a heart on the left side and cut it out.
- Then they continue to work using the proven technology, described in detail in paragraph 5. The original handmade gift is ready.
- New Year's cards look stylish. They make a Christmas tree, Santa Claus, and Christmas balls. It is better to take shiny, bright paper, it will look festive.
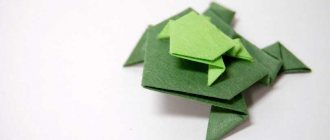
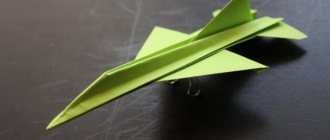
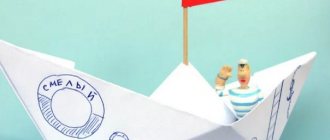
Children's crafts, especially at the beginning of learning, are usually simple. Depending on the age and gender of the child, these are cars, planes, various animals, dolls, flowers.
Needlewomen who have fully mastered the technique of iris folding can make real paintings with various subjects, combining different paper craft techniques. Such paintings look stylish in the interior.
History of technology and modern times
Rainbow folding appeared in Holland in the middle of the last century. Since cameras with apertures were used at that time, the Dutch felt that their work resembled it. They were also associated with the iris of the eye. This is where this unusual name came from.
Although more than seventy years have passed, the technology has not lost its relevance. It is widely used in the modern world, it is becoming one of the fashionable areas of decorative and applied art.
If previously only colored paper and cardboard were used to make products, now the range of materials has become much wider. Now scrap and origami paper are used, and various fabrics are used.
Iris fabric folding
The use of fabric ribbons resembles patchwork sewing. The technology for crafts using fabric is the same as using paper. There are only a few nuances. Having folded the ribbons in half, they must be ironed.
It is better to choose a fabric that is dense and has an interesting texture. Crafts made from velvet, satin and brocade look impressive. If you are working with light fabric, put paper or thin cardboard inside the strips to maintain the shape.
Why is rainbow folding so popular?
It’s easy to find lessons and master classes on Iris Folding on the Internet. The technique is popular because it’s easy to master and accessible even to older preschoolers. In addition, the materials for making products are inexpensive, and the result of the work can please both children and adults.
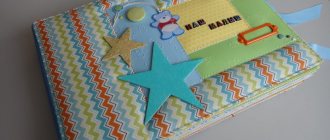
Young mothers and teachers enjoy working with Iris Folding. The technique is used not only for making cards and paintings, but is also used as a decorative element. It is used for scrapbooking when making diaries, it is easy to mix with other techniques,
What tools are needed?
Everyone has the tools necessary for making paintings in their home. If not, then buy:
- ruler;
- simple pencil;
- scissors;
- stationery knife.
Cover the table at which you will work with a thick base to protect it from cuts while working. After that, get down to business: select a template or make it yourself.
Rules and techniques
If you are a beginner, then it is better for you to start with standard patterns: triangle, square, circle. On their basis, a wide variety of paintings are created by folding. To do this, a thematic design is applied to the cardboard, and then folded paper parts are applied and glued onto it.
The main elements used in the technique are triangles and rectangles. To create a three-dimensional drawing, prepare (fold) the required number of parts, which are then adjusted to the template.
Animalistics
Iris folding (simplified images are suitable for children) in the form of animal images can have complex fillings. But any creative person can do them if they print out a ready-made diagram.
Often ready-made templates are numbered and the letters indicate different colors. Taking the time to glue the strips according to the numbers and letters can create an impressive piece of work. For children's creativity, schematic images of animals, birds and insects and standard templates are used.
Examples of bright works for children:
- Snail. The snail's body is made in the form of an applique on cardboard, the shell is made in the rainbow folding style using a square template. The work uses bright color combinations. The front side is decorated with stickers in the form of flowers, butterflies and the sun.
- Fish. The outline of the fish is completely transferred to cardboard and cut out. The work is carried out according to a square template. For applique, contrasting colors are used, alternating them in a circle (1st row - red, 2nd row - golden).
- Elephant. For older children, you can print out a ready-made diagram, which is more complicated than usual. The work will take more time, but the result is worth it. For creativity, blue paper is used. The center can be decorated with a beautiful design in Indian style.
Template creation schemes
Creating simple templates is possible even for children starting to work in Iris Folding. On a notebook sheet in a box, using a ruler, draw a square with a side of 140 mm. After this, place points at a distance of 15 mm from each corner. Connect them. You will get a square within a square.
Then repeat the steps, also measuring the same distance from each corner of the inner square. And so on up to eight to ten times, until a small square is formed in the very middle.
If the template is simple, start posting the picture right away. When you have a complex template in front of you, number the sequence of sticking on the parts. If it is very difficult, also mark out the color scheme.
Making paintings using the Iris Folding technique: master class
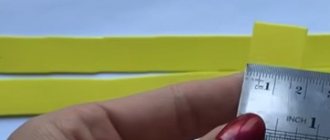
To get a beautiful postcard or picture that will work for you and your friends, you need to carefully glue strips of paper onto the stencil. For the simplest products, three colors are enough; for more complex products, the color scheme should be more varied. Remember that the paper is cut along the long edge, having first drawn a cutting line. The width of the part should be two and a half times the mark on the template. Allow two centimeters on each side. During operation, the strips fold and overlap each other. This is the secret of a three-dimensional image. Now let's look at the technique step by step.
Detailed job description
Select a figure for the picture, apply it to a cardboard base, and cut it out.
Making a diagram
Combine the face with the base and the diagram.
Fix with paper clips or secure the template on the desktop with tape, put cardboard with a picture on top and secure with tape.
Cut blanks of the desired shades (it is better to use several shades). The width of the blanks should be 2.5 times the width of the step on the stencil. The length is 2-3 centimeters longer than the outline of the picture.
Fold the blanks in half along the entire length
Begin gluing in the direction from the edge to the middle. The first row is glued to the base.
- The remaining parts are glued to both the base and adjacent parts.
- This must be done very carefully so as not to stain the product.
- Glue is applied in small quantities only in places where the parts come into contact.
- You can use paper tape instead of glue. The strips are folded towards the middle.
- If the strips are very long, it is better to trim them so that the finished product is not too thick.
The remaining uncovered part in the center is sealed with paper.
Turn the craft over and remove the stencil
The wrong side of the cardboard base is sealed with paper; if you make it slightly larger than the size of the cardboard, you will get a frame on the front side.
If desired, decorate with decorative elements. For decoration, you can use details made in other styles of paper craft.