From paper
The simplest option is to create an aircraft out of paper. An ordinary piece of paper from a school notebook is enough for him. If there is a desire to develop a more complex model, then use colored paper, cardboard, or matchboxes.
Your son will definitely like this paper airplane craft; it will make him feel like a young designer or pilot.
Well
From such improvised material it is quite possible to build a toy well for dolls. The child will be interested in making it and playing with it. To do this, you need to take 20-30 sticks, a plastic cup, glue, a knife or scissors.
The procedure for creating a well step by step:
- Cover the glass with chopsticks.
- Using three sticks, construct the base of the well roof in the form of crosses. Secure the blanks to the glass.
- Connect the sidewall with parallel parts on the sides and in the middle. Seal the slopes on top with the rest of the material.
The unusual and colorful well is ready.
From cardboard
After purchasing household appliances, the packaging remains. Don't throw it away right away. It will be an excellent material for making a cardboard airplane. The size of the product depends on the size of the box. The child can help cut out the necessary parts and participate in the process of connecting them.
A parallelepiped is made from cardboard. Such a narrow box will become the basis of the aircraft. You will need to cut out the portholes and doors with a utility knife.
A narrow strip is also made from cardboard. It needs to be divided into four parts. The two middle elements connect
Cuts are made in the back of the plane where the tail is inserted. The cardboard wings are attached to the base with tape; you should also make a propeller.
Colorful souvenir houses (decoupage)
To work you need to prepare:
- wooden sticks;
- paper napkins with a themed pattern;
- glue;
- paints (acrylics are best);
- priming;
- decorative elements.
Detailed description of the work progress:
- We place 9 sticks close to each other, laying them out like a ladder.
- We fasten the sticks together with two parts, gluing a loop on top at the same time.
- Turning the work over, we fix the roof of the house on top.
- The base is ready. We leave it to dry under pressure (you can put a stack of books on top).
- After complete drying, apply a primer on top. If there are gaps between the parts, you should prime again.
- While the primer dries, prepare a napkin. Separate one layer of the napkin and place it on cellophane (you can use cling film or a file). Using a spray bottle, moisten the napkin with water.
- We apply the primed side of the wooden blank to the wet napkin and turn it over. Gently smooth out to avoid the formation of bubbles and wrinkles.
- Remove the cellophane film from above and remove the excess napkin from the sides.
- When the work dries, the areas not covered with a napkin should be painted with paint of the appropriate color.
- We cover the dried house with transparent varnish and draw patterns with golden sparkles.
It turned out to be a great souvenir that can be used to decorate a wall or a Christmas tree!
We wish you inspiration and creative success!
Made of plastic
Bottles are an affordable material that is always available in the house. You will need three more covers, one for the nose of the car and two for the chassis. Crafting an airplane from a bottle will delight a boy. This original product can be presented to grandfather or father for any occasion.
A plastic vessel is covered with newspaper using PVA glue. Cut out wings, tail and propeller from cardboard. All of them are covered with paper. They need to be dried well.
A plastic tube from a ball is suitable for the chassis. The lids are attached to it with a glue gun. Then the wings and tail are connected to the base. Afterwards the craft needs to be decorated and varnished.
The light in the darkness)
I set out to make a light for a doll's house.
Without thinking twice, I simply glued a flat lantern to the roof of the 1st floor.
I struggled with the second one, but I attached the LEDs in series and, even though it turned out a little dim, I was satisfied.
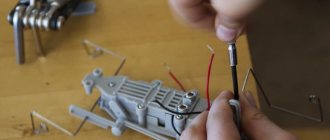
Then it seemed to me not enough. And I decided that school should have been useful in “adult” life. I made a table lamp from an LED, copper wire, watch batteries, plastic tubes and insulation from broken headphones (replacing some wires with others). Fasteners for droppers allow you to bend and rotate the lamp like a regular table lamp. Initially, it was attached to a clothespin and electrical tape, but then I got around to it and remade it onto a heavy steel base and placed it on a table on the 2nd floor.
The second photo shows my pride, taken in the euphoria of a working lamp - a ball for clairvoyance. A pillow, a ball on a pillow. And it glows! In fact, this is not a pillow - a steel frame covered with fabric, with a switch at the bottom. The fabric is glued in such a way as to create folds and leave room for the LED peeking out of the frame. The fabric itself is dense and does not allow light to pass through. All that remains is to put a glass ball on top (from a burnt chandelier). Voila!
Then my mother was indignant that I was only making dolls, and I made a night light with the remaining LED. but that will come later somehow.
While I was fiddling with the light bulbs, NG crept up and there was not enough light again. But here I didn’t bother anymore, and, having switched on the old non-working garland, I enjoyed the doll Christmas tree. The hack didn’t last long, but it was enough for a couple of photos, I won’t look again at what’s wrong, I’ll put diodes on the bottles.
And the fireplace, of course, the fireplace! What's New Year's Eve without a fireplace?! True, I thought that by the time I get to the construction site, I’ll buy marble chips and fireproof mortar while I’m done. the room will begin to remind you of poor repairs, and spring will come. Therefore, a bowl for incense of a suitable shape became a “temporary” fireplace. I cut a sheep skin from old boots and laid it in front of the fireplace and got very atmospheric photos. Periodically I replaced the “fireplace” with a regular ceramic lid from a broken cup, creating the effect of a fire or an open hearth.
Now all I have to do is solder (I’ve never soldered anything, I just twisted the wires together in the absence of a soldering iron) a chandelier for small candles (unburnt holiday ones were left), and figure out how to make torches so that there is enough light from them - LEDs are not for a potionery will do.
Airplane made from clothespins
Little ones will love the simple model they can make with adults. A wooden clothespin, an ice cream stick, and glue are prepared for it. For the wings and tail section you will need cardboard.
The propeller must be inserted into a cotton swab and attached. Then the wings are attached to the structure. An ice cream stick is used for this. It can be replaced with a part cut out of cardboard.
Preparing material for work
Popsicle sticks are considered a safe raw material for creativity. But since young children, who have a habit of putting toys in their mouths, will be in contact with them, the disinfection procedure is worth it. To do this, boil the sticks in water for half an hour. As a result of boiling, a double effect is achieved:
- the surface is cleaned of germs;
- sticks acquire the property of flexibility.
The property of flexibility and resistance to deformation can be imparted by immersing the “supports” in warm water for 12 hours. But the boiling procedure quickly gives the chopsticks the necessary qualities. The working material must dry completely and begin the creative process.
From popsicle sticks
For the model you will need cardboard. You should prepare three wide and three small ice cream sticks. You also need glue for the craft. Five elements are connected together, then two wide sticks are attached to the base.
The propeller is cut out of cardboard. A black bead is glued to it. All that remains is to decorate the aircraft, and it can be used in games. Children will help decorate the model by drawing portholes, doors, and making inscriptions.
Bracelet
You can create an original decoration from wooden parts. To do this you will need 1-2 wooden sticks, satin ribbons, rhinestones, glue and a pan of water.
The procedure for creating a bracelet:
- Soak the sticks in water. To do this, they need to be left overnight. You can also just simmer for 40 minutes.
- The soft parts need to be twisted and placed inside the glass. When the tree dries, it will take a semicircular shape.
- Connect the two halves together with glue. The bracelet needs to be decorated with ribbons. To do this, tapes can be wrapped around the base and secured with glue. After this, all that remains is to decorate with rhinestones.
Made of wood
A plywood craft can be created independently by a 12-year-old teenager. If the child is still small, then adult help is required to assemble the model. The wooden airplane craft is made using a jigsaw. You will also need sandpaper.
You need to print the template on paper, and then attach it to the material and circle it. Jigsaws cut out all the elements, then assemble the apparatus. All that remains is to decorate it by drawing patterns.
How to make a Delta type glider
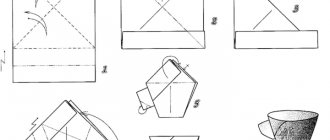
Take a rectangular sheet of paper. Fold in half vertically, then unfold back.
Bend the upper corners of the square diagonally towards the center. They should reach approximately two-thirds of the leaf height.
Fold the corners diagonally again. This time you should get a trapezoid, the lower part of which (the rectangle) will occupy only about one-fifth of the height. Bend the top corner of the trapezoid. It should reach the junction of the right and left parts of the curved corners.
Fold the future glider in half vertically so that all previously folded corners are on the outside. Unfold the outer side until you have wings.
The airplane can be decorated by drawing portholes or symbols on its “sides” that are found on real gliders.
Made from plasticine
For this craft you will need green or blue material. Knead the plasticine well and roll it into an element resembling a carrot. This will be the base of the liner. Make a small ball from the blue material and give it an oval shape. It is mounted at the front of the aircraft.
The remaining green or blue plasticine is used for the wings of the aircraft and the tail. Craft airplanes for children are made in different sizes and colors. Kids are happy to take part in this process.
Bird feeder
The child will be happy to build a bird feeder. This easy and effective craft made from colored sticks will also teach your child to take care of animals and birds.
Stages of work:
We start from the bottom: glue 10-12 sticks with 2 transverse ones.
We lay out the walls in a square shape in several rows. It is more beautiful if the edges of the sticks protrude through one another. We thread a thick rope and attach the feeder to the tree.
- You can complicate the feeder by painting the sticks in different colors. Make the poles at different levels. In case of bad weather, you can make a roof using the same scheme, you will get a colorful, beautiful feeding house.
Hang the product from the roof onto a strong branch.
Interesting crafts made from sushi sticks or tree branches.
From candy
You can make a sweet gift for a man or boy. For this you will need a cardboard box. You also need to buy your sweet tooth’s favorite candies from the store. Such a surprise will only cause positive emotions.
You must first read the instructions on how to make a craft airplane out of sweets. A step-by-step master class will allow you to quickly get the job done. The model can be made on a stand or supplemented with other elements.
Toys
Why buy expensive games or dolls in stores. Homemade characters become beloved friends and gain character.
To get cute little animals, you should glue the wooden parts onto the workpiece. Then paint and attach additional elements (ears, eyes, mustache, tail, wings, feathers, etc.). Children's rooms are furnished with such heroes or animals.
You can build a miniature puppet theater. We draw an eye and a mouth at the tip, a fringe of cotton wool on top, a scarf made of rags, and the hero of your favorite fairy tale comes to life
The big advantage of such “actors” is their low cost, and therefore it doesn’t matter if your son or daughter takes them for a walk or to a children’s group. Lost - let's draw a new one!
It's easy to create an army of planes. Additionally, you will need clothespins. We glue the wings. Like a hang glider, we can color the tail to your taste.
War plane
All the boys love military equipment and enjoy watching aircraft. You can make a military aircraft craft yourself. To do this, choose any material that is available in the house and get to work. It is better to download ready-made templates to accurately reproduce the model.
You need to carefully work out all the details and carefully decorate the car. For military equipment, choose green or gray. Using a marker, they draw patterns on the product and make inscriptions.
Airplane made using origami technique
Origami is a fairly common technique. Its homeland is Japan. The traditional method of creating an airplane requires a sheet of A4 paper.
It is better that it has a fairly dense texture. In addition, you will need colored markers (for decoration). The sheet folding diagram can be found on the Internet.
Folding the figure is not difficult even for a small child, and with the help of adults, any toddler can do it.
Children's crafts in the shape of an airplane will become favorite toys for kids and original interior accessories for their parents.
They take about 10 minutes to create. So don’t be lazy, and if you have free time, start making airplanes with your children.
Airplane for young pilots
Kids will love to become airplane pilots. For a large model, you will need a cardboard box from household appliances. It’s better to use a video of making a craft airplane so as not to confuse anything.
A parallelepiped is made from cardboard; holes must be made in it for the tail. Cardboard elements will be inserted into it. You also need to attach the wings and propeller.
The structure must be large enough to accommodate a child. Children will enjoy playing with the plane, imagining themselves as pilots.
Handbags
An exclusive wooden handbag made of ice cream sticks will definitely not leave its owner unnoticed. With your imagination, you can build an accessory of any shape and size, and borrow the handles from an old bag. The main thing is not to get caught in the rain with such a handbag.
- Wooden clothespin.
- 2 shaped ice cream sticks.
- Several small straight ice cream sticks.
- Hot glue.
- Hot glue gun.
- Small magnet.
- Spray paint in 2 colors (you can also use acrylic), in our case the main color is.
- Brush.
- A sharp stationery or pocket knife.
- Toothpick or bamboo skewer.
Photo crafts airplane
https://www.youtube.com/watch?v=Xayeuqc50So
Stands for pens and pencils
1 option
For the base you need a jar, preferably a tall coffee jar, so that the sticks are slightly higher than the container.
Read here: Crafts for the dacha - useful, stylish and beautiful decorations for the dacha and vegetable garden (110 photos)
We put two rubber bands on the jar. Then we insert 1 stick under the elastic bands, glue them vertically, closing the jar. Leave until dry.
A well-dried piece can be painted with acrylic paints, an applique can be glued on, and decorated in any way. Let the child choose his own style of performance.
Option 2
Master class on making crafts from sticks:
We fold five sticks vertically and glue them to the transverse sticks on the inside at the top and bottom.
You can paint it with acrylic paints in a single color or make it in repeating stripes.
Decorate the outside with decorations. For example, 4 sticks glued on top of each other in the shape of a flower can be painted in a contrasting color. If you try, you can create a bee, etc.
The coasters are ready!
- Liquid wallpaper. What do they need?
- Nickel-cadmium batteries. What do you need to know about them?
- Bathroom tiles. What is it like?
