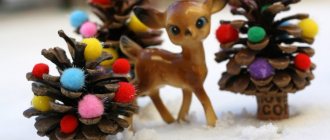
Hello, dear readers! Autumn has fully come into its own, it is very cold and inhospitable here this year, but we all know that nature doesn’t have bad weather, so it has to be so. My daughter went to kindergarten after the long summer holidays and my son also went with varying degrees of success. Today I have a current topic at the moment - we will create autumn crafts for kindergarten or school, because they are also great for school.
We love to make crafts, I’ve already written about this and never philander, but I’m always a little outraged that autumn crafts competitions are held not for children, but for parents
An announcement was written in the garden that directly states that the “Autumn Fantasy” competition is being announced, please your children with your creativity, that is, the competition is not for children, but for parents. Well, okay, I still understand that my daughter is 6 years old and can participate in creating an autumn composition, but I can’t wrap my head around the same task for my son, he’s 2.5 and what kind of crafts are there, he still knows how to crush and break, disassemble and scatter, but not create. That’s why we didn’t make a craft for our son’s group, but we made one for my daughter.
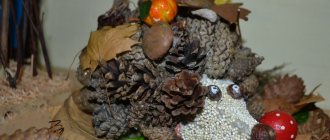
Last year we made a house from natural material, or rather a log hut or a Cossack kuren, as we were told it turned out very similar. The year before there was also a house, only it was smaller in size. We even took first place in the competition then. This year we had to come up with something different. I drew a picture right away, but it was mainly my husband who embodied it, since it involved sawing and drilling, and I’m not good at these things).
My daughter and I collected materials, it was very funny when passers-by looked at us in surprise, because we were carrying a whole bag with protruding branches, leaves and everything interesting that could be useful to us for an autumn craft.
And we decided to make such a composition and call it “Autumn in the Village”, weave a fence, make a well, plant apple trees, chop wood with an almost real ax). Of course, the house is missing here, but we have already made it, so this is a continuation of previous crafts.
How to make a well out of paper
If you want to decorate your interior with an unusual, exclusive item, then a well made of paper, or rather, made of paper tubes, is the optimal solution. Despite the simplicity of the materials from which it is made, it can become a real decoration of the room. It just takes a little time and a little effort. A beautiful craft that can be complemented with a sign with a wise saying or quote will surely attract the attention of guests. To make this craft we will need:
- Newspaper
- Cardboard
- Knitting needle
- Regular glue
- Super glue
- Wooden skewer
- Wire(hard)
- Pliers (pliers)
- Paper tape
- Acrylic paint in sand, brown and metallic colors
- Simple pencil
- Glue brush
- Scissors
- Ruler
- Colored paper
- Paper knife
- Thick cotton thread
Well base
On a thick sheet of cardboard of sufficient size, draw a drawing of the well shaft, as in the diagram in the photo above. The optimal size of the well will be with a side length of 10 centimeters in all dimensions. We leave a margin on each side for gluing. Cut out the template and glue it together. To strengthen the fixation of the gluing area, we additionally glue it with paper tape.
We should end up with a hollow cube like this without a top. This is the base of the shaft of our future well.
Roof layout
On a thick sheet of cardboard, similar to the one from which we made the base of the well shaft, we draw a drawing of the well roof. Then we cut, bend and glue to form the roof slopes. To enhance the bonding strength, we also additionally glue the gluing areas with paper tape.
This is how we make the roof.
Paper tubes for forming a log house and well slope
Paper tubes of different diameters are made from newspaper sheets using a knitting needle and a wooden skewer. Larger tubes, from which the well frame will be formed, are made using a wooden skewer. Roof tubes are made using a knitting needle. The number of tubes is determined by the size of the well. If necessary, additional quantities can be added. Newspaper tubes are made like this: newspaper sheets are cut into equal pieces of the required size and tightly wound onto a knitting needle or skewer. The protruding edge of the newspaper sheet is coated with glue and glued to the main, twisted sheet, forming a log-tube. After this, you need to let the glue dry, and you can start making the craft.
We form a shaft (log house) of a well
Before you start gluing the base of the well with tubes, you need to prepare them in the required quantity. Uneven, protruding ends are trimmed with scissors. For the log house we need log tubes of different lengths, in two versions. This is necessary in order to fill the projections, forming a beautiful masonry of “logs”. The depth of the protrusion should be equal to the diameter of the paper tube when gluing. We glue, alternating short tubes with long ones.
A fully pasted base looks like the photo above.
Making a roof
We cover the roof gable with newspaper tubes, starting from the center. Carefully cut off the excess length with a paper knife. Next, we cover the roof slopes with paper tubes. We glue paper tubes to the cut points, forming the “ridge” of the roof. For clarity, see the photo above and below this text.
We fasten the supports
The roof and frame blanks are ready. Our next step is to make supports for the roof and the rotating drum of the well. As supports you need to use paper tubes of the required length. We attach them to the opposite walls of the well symmetrically to each other. To ensure secure fastening, in addition to glue, we also use stationery tape. At the bottom of the well, you can put a piece of blue paper with stars glued to it. This is a decorative illusion of the sky being reflected in water.
We make formwork
When the supports are secured, we begin to form the formwork. To make it, you will need a piece of cardboard, its perimeter corresponding to the perimeter of our well. From it we cut out a frame with the required width of the edges, making holes in it for the supports, thread the supports into these holes, and glue the formwork to the top of the well.
Rotating drum
From rigid wire, using pliers, we form a rotating handle for the well gate and a fixing base for it. We form the gate (drum) itself from the same paper tubes. Of course, attaching paper tubes to a metal base is very problematic. Therefore, we will need a thick cotton thread for reliable fixation. We wrap it tightly around the wire and coat it with superglue. And to it, or rather, around it, we glue the required number of tubes, forming a rotating drum.
Bucket with chain
To make a bucket, we will need a circle of paper of small diameter and a piece of paper, when gluing the edges of which, the diameter of the resulting paper cylinder would correspond to the diameter of the circle. We glue the resulting parts together using paper tape and decorate with the same paper tubes. To form the bow of the bucket, we use a large paper clip, giving it the required shape using pliers. As a chain for a bucket, you can use either a silver thread or a piece of a thin chain from cheap jewelry. It will turn out even more natural.
Unfinished layout
We glue the finished roof to the supports using glue and tape. Our well is almost ready. All that remains is to paint.
To paint the product, acrylic paint of two colors is used: sand and brown. Sand color is the main color, and brown is used to tint and give a “wood effect”. First, the entire layout of the well is painted sand color. After the paint has dried, using an almost dry brush, the entire craft is rubbed with brown paint. Two strips of steel-colored paper are glued onto the bucket (you can use ready-made steel-colored paper for this, or you can paint regular white paper), imitating the rim. The product is assembled, the bottom can be decorated with a decor of cut and fluffed colored green paper depicting grass. You can create a custom stand from dried moss. Your choice. As an addition, a paper sign with a wise saying is glued to the pediment of the craft. Ready. A nice result in the photo at the beginning of the article.
Options for making a paper well /video/
We only needed old newspapers and a little of our efforts to create an exclusive craft that can be safely used to decorate a bookshelf, chest of drawers, or a decorative fireplace panel. Almost a masterpiece, isn't it?
www.xn——6kcctg4abn1dp4j.xn--p1ai
Why do many people like wooden crafts?
It should be noted that crafts made from popsicle sticks are a great way to develop good creative skills in your child; videos of such master classes can easily be found on the Internet.
Attention!
Souvenirs made from ice cream sticks can be given to friends or acquaintances; you can decorate your own home with such details, and every day they will remind you of a pleasant pastime and acquiring new skills and knowledge.
Many parents know that almost all children love to collect unnecessary things; they collect candy wrappers, stickers, popsicle sticks and other materials. But you don’t need to immediately scold your child; if you stretch your imagination a little, you can make very interesting and original objects from the above materials.
For example, crafts made from wooden ice cream sticks can be used to make various products. These can be vases, bracelets, photo frames, bread bins, pencil holders, flowerpots and much more. Some examples of simple master classes have already been mentioned above. Now you need to figure out how to make an original and stylish photo frame. So, for this you will need:
- 6-7 spatulas;
- any glue;
- paints (it is best to use acrylic);
- any beads, rhinestones or some pictures.
By the way, if we talk about decorating the product, you can use almost any material. The main thing is that it matches the color of the main interior of the room where this frame will be installed, and also pleases the master himself. After the spatulas are decorated, they need to be laid out on a flat surface. But first, we are posting only 2 of them. They should lie parallel to each other across the width of the frame itself. The result is the top of the product. Then we fasten them together using two more spatulas. If you want to attach the structure, then you can glue 2 more sticks on the back, which will be located perpendicular to those that were attached first. Well, don’t forget about the last spatula, it acts as a support.
Design options
Companies involved in the production of garden decorations sell various ready-made well structures. They are quite expensive, most of them are almost the same. If you order the production of a well according to an individual project from a landscape designer, the construction will be unique, ideally fitting into the interior of the garden, but prohibitively expensive. The best option is to choose or build the structure yourself.
The well can be:
- in the form of a small carved mansion house;
- with a “crane” and without a canopy;
- in the form of a “Chinese” house with a tiled roof;
- wicker high “nest”;
- with a small fountain;
- in the shape of a mill or steamboat.
In shape, this building can be round, cylindrical, square, rectangular, hexagonal, asymmetrical. It should be externally consistent with other buildings on the site - a house, garage, barn, bathhouse, chicken coop, and also be of a similar design, made of similar materials.
Well design and functions
- Before starting construction of a structure, it is necessary to draw up a project. You can do it yourself, download it from the Internet. It consists of several stages: General provisions. Includes engineering-geological data, technical indicators, and pursued goals. At this stage it is decided what function the structure will perform:
- If it acts only as decoration, then all that remains is to choose a suitable place for installation, decide on construction materials and cladding.
- For the well, which will be used for drainage, hydrogeological studies of the soil are carried out. If it is water-absorbing, filter models are installed; where moisture is poorly absorbed, storage models are installed.
- Wells that serve as a source of water (plumbing option) also require preliminary research related to determining the depth of the aquifer. 2. Graphic part. It consists of drawings of the main components, the appearance of the building, the roof plan, if any, recommendations for finishing, the technologies used, the location of lighting fixtures, electrical points (socket, light bulb). 3. Specification. It includes materials and equipment used for construction.
DIY wooden well
A wooden well can be made either in full size or in reduced sizes. To make it you will need the following tools:
- board 25*200 cm;
- timber 20*30 cm;
- screwdriver, self-tapping screws;
- wood saw, bullet;
- sandpaper;
- alkyd varnish, brush.
Manufacturing process
Any building materials are suitable for making a decorative well: you can use roofing or floor boards, timber or clapboard. To avoid rapid rotting of wood, it is coated with antifungal impregnation. Afterwards, stain is applied to highlight the structure of the wood. The last layer of varnish will protect the wood from moisture.
Before you start making a well, you need to create a drawing.
A drawing must be prepared in advance
Options for making “Well” crafts
“Well” is a craft that can be made from a huge number of different materials. Attractive designs come out of both paper and natural components of natural origin.
Making crafts from fruits and seeds
Most of those who studied in Soviet times remember that during labor lessons they made many different crafts under the guidance of the teacher, using natural materials. Crafts were made from cones, acorns, nut or eggshells, seeds, coffee beans and much more.
These natural materials, , help create worthy decorative accessories for use in homes and apartments. Most often, fruits and seeds are used to make miniature figurines or three-dimensional paintings. Attaching various fruits to a bouquet made of dry twigs perfectly replaces the New Year tree.
Any collected natural materials (pebbles, pine cones, wooden sticks and twigs, bark) must be dried before being used to create a masterpiece with your own hands, otherwise crafts made from wet materials do not last a long time - they can quickly deteriorate or break.
Add a comment Cancel reply
You must be logged in to post a comment.
Hello, dear readers! Autumn has fully come into its own, it is very cold and inhospitable here this year, but we all know that nature doesn’t have bad weather, so it has to be so. My daughter went to kindergarten after the long summer holidays and my son also went with varying degrees of success. Today I have a current topic at the moment - we will create autumn crafts for kindergarten or school, because they are also great for school.
We love to make crafts, I’ve already written about this and never philander, but I’m always a little outraged that autumn crafts competitions are held not for children, but for parents
An announcement was written in the garden that directly states that the “Autumn Fantasy” competition is being announced, please your children with your creativity, that is, the competition is not for children, but for parents. Well, okay, I still understand that my daughter is 6 years old and can participate in creating an autumn composition, but I can’t wrap my head around the same task for my son, he’s 2.5 and what kind of crafts are there, he still knows how to crush and break, disassemble and scatter, but not create. That’s why we didn’t make a craft for our son’s group, but we made one for my daughter.
Last year we made a house from natural material, or rather a log hut or a Cossack kuren, as we were told it turned out very similar. The year before there was also a house, only it was smaller in size. We even took first place in the competition then. This year we had to come up with something different. I drew a picture right away, but it was mainly my husband who embodied it, since it involved sawing and drilling, and I’m not good at these things).
My daughter and I collected materials, it was very funny when passers-by looked at us in surprise, because we were carrying a whole bag with protruding branches, leaves and everything interesting that could be useful to us for an autumn craft.
And we decided to make such a composition and call it “Autumn in the Village”, weave a fence, make a well, plant apple trees, chop wood with an almost real ax). Of course, the house is missing here, but we have already made it, so this is a continuation of previous crafts.
DIY standard wooden well
Since wooden wells of the standard type are the most common, a detailed master class on its manufacture should be presented. So, for self-assembly you should prepare the following materials and tools:
- Wooden boards - it is better to take ash, but other types of wood are also possible (the boards must be the same width and thickness).
- Jigsaw.
- Sander.
- Hand saw.
- Nails.
- Hammer.
The production of a decorative well occurs in the following sequence:
- It is necessary to cut two triangles from the boards to form a house above the structure. The dimensions are determined at the discretion of the owner of the site.
- Next, they begin to manufacture the main part - the container itself. To do this, they cut boards measuring 1 m in size. The width of the boards can be approximately 15 cm, so they are laid out in 6 pieces in height (more or less can be done). For the base you will have to prepare 24 blanks - boards 1 m long and 15 cm wide.
- Next, you need to connect all the boards, forming the base of a standard well. A hammer and nails are used for the work.
- Now prepare 2 boards 15 cm wide (can be increased or decreased) and 1.5 m long. These boards are nailed from the bottom of the base opposite each other.
- Then a board of the same width as the previous ones is nailed to the top - you need to connect 2 vertical boards.
- Triangles are nailed to the vertical boards on the outside.
- It is also important to connect the triangles together with narrower boards, nailing them to the sides - this is the plank and the base for the roof of the structure.
- Make sides for a decorative well - you can take boards 20 cm wide and cut recesses in them for vertical bases.
- The roof is formed in a standard way - for this you need to cut 4 boards for each slope 80 cm long. The boards are nailed to the planks.
- Finally, you should cut out a wheel with a shaft from wood. For the shaft, you can take an ordinary small log and reduce the diameter at the ends. A circle is cut out of the boards that were previously used to form the base well.
All parts are polished as they are manufactured; it is advisable to round the corners so as not to get injured on them while working on the site.
The finished well can be painted in any bright color. But if the wood has a natural shade, it is better to leave everything in its original form.
Hot stand
You will need: 50 ice cream sticks, wooden beads of 2 sizes (large and small), elastic band, drill.
Master Class
- Using a thin drill, make 3 holes (top, center and bottom) in each stick at the same level.
- Prepare a long piece of elastic and tie a knot at the end.
- Thread the stick onto the elastic through the top hole, then thread the large bead through. Continue weaving in this way, alternating a stick and a bead, and when you complete the semicircle, tie a knot and leave a tail of elastic for tying.
- Prepare a piece of elastic and secure a knot at the end.
- Thread a rubber band through the center hole of the stick and thread a small bead through it. Continue weaving in this way, alternating a stick and a bead, and when you complete the semicircle, tie a knot and leave a tail of elastic for tying.
- Prepare a piece of elastic and secure a knot at the end.
- Thread the elastic through the bottom holes of the sticks only, then tie a knot and leave a tail of the elastic.
- Weave the second semicircle in the same way, then tie the 2 pieces together.
The hot tray is ready!
You will need: 40 popsicle sticks, glue, large wooden stick, string.
Master Class
- Place 2 sticks horizontally opposite each other and glue 12 sticks to them vertically. This will be the bottom of the feeder.
- Turn the bottom over so that the 2 sticks act as stands.
- Assemble the walls of the feeder in this way: glue one stick to each side, placing them opposite each other. Some are on the sides below, others on top. Lay out 6 sticks on each side in this way.
- Glue a large stick in the center of the feeder as shown in the image.
- Attach twine for further hanging and add grain.
The feeder is ready! I recommend watching this video!
Decorative well made of tires with a flower bed. Master Class
You will need:
- 3 used car tires.
- 2 small diameter logs or 2 pieces of timber.
- 4 pieces of thin timber to construct a roof support.
- Roof material.
- Fasteners: nails, screws, metal corners, etc.
- Dye.
- Container for planting flowers.
If all the materials are prepared, this simple but interesting decorative well can be built in a couple of hours.
In each of the 3 tires we make slits with a sharp knife or a handsaw - support posts will be inserted into them to support the roof.
We lay the tires one on top of the other so that the slots line up.
We insert beams/beams into the slots. We drive them into the ground so they don't wobble. We measure their length - they must be the same, otherwise the roof over the well will turn out crooked.
But you can do it another way - install support pillars outside the tires.
We paint the tires brown (brick color). After the background has dried, paint an additional design. For example, stripes imitating brickwork.
Why do you need a well house?
Convenience and cleanliness of water
A well house is necessary because it performs several functions at once:
- Its design eliminates the possibility of leaves, insects, dust, debris, as well as chemicals used when spraying plants near it, getting into the water.
- Protects against penetration of sunlight, which negatively affects water.
- Prevents water from freezing in winter.
- Will not allow access to children and pets.
- It will serve as a decoration for the yard, which will emphasize the uniqueness and complete the composition of the site.
Design Features
Various forms of structures for wells are allowed. They can be in the form of a simple shield covering the top of the well shaft or look like a log house. The roof is usually gable, shed or umbrella-shaped. The angle of the roof can be flat or sharp. Doors are usually placed on one or both sides. They can be single-leaf, double-leaf, solid or sliding panels.
For the roof, a material is selected that is harmonious in color and texture with the buildings on the site. It can be painted or covered with soft tiles. Finishing with stone and other textured materials looks beautiful. In this case, a layer of cement mortar is applied to the well ring, and stones are placed on it. The same principle applies to tiling with mosaic tiles.
To create all these design details, it is not necessary to purchase them from a hardware store. The materials remaining after building the house will do just fine:
- Cement applied to a well ring can easily be turned into a relief pattern in the form of brickwork. While the solution has not hardened, you can draw lines imitating bricks. When it hardens, paint it in the appropriate color.
- Ceramic tile fragments can be split into fragments and laid out like puzzles, in the form of a composition around the base of the well.
- Enclose the base with round logs, giving it any geometric shape. The stands can be decorated with dry tree bark. Plant flowers nearby and decorate the roof slopes with curly carvings.
Required tools and materials
The minimum set of tools required when constructing a well is as follows:
- devices for digging a well channel (bayonet and shovel shovels, pickaxe);
- steel scrap for breaking large stones or layers of rock;
- containers for excavating soil and pumping out liquid mud;
- a winch with a rigid base for lifting and lowering loads into the trunk;
- electric submersible pump that allows you to pump out water;
- circular saw for cutting workpieces (use of a chainsaw is allowed);
- a set of tools for marking workpieces;
- construction level (hydraulic or laser);
- axe;
- hacksaws for wood.
Tools for creating a wooden well.
In addition to a set of blanks for the frame and the head, it is necessary to prepare a set of fasteners (depending on the method of connecting the parts) and gravel for arranging the filter. Since the work is carried out in water or mud, it is necessary to use rubber boots or a wetsuit. Additionally, you will need to purchase insulated clothing.
Where and how best to install
There are no special restrictions here. You can install a well structure in any part of your summer cottage. The main thing is that the surrounding area matches the design style. It can be installed in a place where it is necessary to disguise various landscape elements or utility lines.
Particular attention is paid to the surrounding area:
- Install jugs, pots, etc.
- Lay out beautiful stone paths.
- Set up a bench.
- Buy beautiful decorative figurines.
- A well near a pond, bridge, etc. will look beautiful.
- Flowering plants are planted nearby.
We create a well from acorns with our own hands: creation technology, decoration
A well - a DIY craft can be made from natural materials, for example, from acorns, branches, moss and bark. Such crafts look very beautiful and look like real miniature wells.
Natural materials for creating decorative wells
A beautiful miniature well, made by yourself, can decorate any home, and nothing complicated is required to make it. Most often, acorns and branches are used to create crafts. Acorns are usually used to create the basis for a well, since they are quite durable and look original. Chestnuts, beans, cones or stones are also used as a base.
It is very important that the structure is durable, so it is better to use only strong natural materials. For the roof, you can take thin branches, dry grass or leaves. The shelter should look natural, so this creative process requires only dry parts. The choice of material depends solely on imagination and the time of year when the craft is carried out.
Technology for creating a decorative well from acorns
You can make your own decorative miniature well if you use oak fruits as a base. This craft looks very beautiful and natural, it is easy to make and there is no need to spend money, everyone has everything they need at hand.
For this creative process you will need acorns, a glue gun with clear tips and small scissors. If you can’t buy a glue gun, you can replace it with brown plasticine. In addition, you will need to take a white sheet of paper, a piece of cardboard, a pencil, an awl with a thin and long needle, as well as a needle, thread and matches. For the roof you need to take 2 thin sticks and dry grass.
Creating a well from acorns is carried out in several stages. At the first stage, you need to draw a circle on a sheet of paper; the format of the future craft depends on its size. After this, you need to take the previously prepared acorns and lay them out evenly on the circle drawing. Then spread glue on this layer or apply plasticine and place the second row of acorns.
There should be 5-7 such rows (depending on the desired height). The “gaps” between the acorns can be additionally filled with silicone. In order for oak fruits to be better bonded to each other, they can be pre-sanded with sandpaper. After this, the acorns can be coated with clear varnish or stain.
The second stage of work is to install the support and roof. Since the structure is microscopic in size, thin branches 12 cm high are used as connecting elements. They must be glued inside the well and under the roofing.
The roof for the acorn well is made from dry grass . First, a double triangular layout is created from cardboard; it is better if the “triangle” has equal sides - approximately 10-12 cm each. After this, dry grass is thickly glued onto the model, and it should hang slightly from under the roof.
The roof can be made not only from grass, but also from natural material that is at hand. For example, for this they use thin dry twigs (they will resemble a log house) or they take tree bark and cover the roof with it. A roof made of moss looks very original; such a well will resemble the rural outback.
The technology is very simple - you just need to carefully cover the model with moss. To prevent this natural material from losing its shape, it can be opened with acrylic varnish. Once the well structure is ready, you can proceed to decorating it.
Decoration of the structure
You can make your acorn craft more realistic by adding a bucket and a drum. To create them you will need to cut out 2 small cardboard cylinders of different sizes. The bucket is made smaller and with a sealed bottom, and the drum is slightly larger (its size depends on the format of the structure) and with 2 sealed sides.
These parts are covered with birch bark or painted brown with gouache. A few threads are wound onto the drum, which will imitate a chain. Excess and uneven edges must be trimmed so that everything looks organic. For the drum you need to make a handle from 2 pieces of thin wire, carefully screwed to the sides of the part.
When the well is ready, you can install it on a piece of board or thick cardboard and arrange a whole yard there. For example, they make a bench from bark, bushes and trees from vines, paths from moss and Christmas trees from cones. The souvenir will have an even more interesting look if you complement it with crafts made from acorns. You can make little people who supposedly came to the well for water.
To do this, you need to take matches or toothpicks, liquid glue and a black marker. Using matches coated in glue, you need to pierce the acorns so that they resemble human legs and arms, and draw eyes, a nose and a smile under their caps.
Wells made from natural materials are a great opportunity not only to enjoy creativity, but also to plunge into the beauty of nature.
House for your favorite doll
Many parents are interested in the answer to the question of how to make crafts from ice cream sticks. There is nothing complicated in this process, you just need to prepare the necessary set of tools and materials, and then follow a clear pattern.
It should be noted that crafts made from ice cream sticks allow you to make any child’s creative dream come true. Let's say a child asks his parents to buy him a toy house for his dolls. Of course, you can go to the store and buy this toy, but it’s better to make it yourself, especially since there is nothing complicated in this process.
So, first, let's prepare the following set of materials:
- stationery scissors;
- silicate glue or PVA;
- popsicle sticks;
- any fabric, as well as padding polyester.
Of course, these popsicle stick crafts require a little more effort and attention. For example, before starting work, you should accurately calculate the number of sticks that will be used to implement the planned craft. To do this, you should draw your future house and accurately calculate the amount of material for each wall. Usually 14 sticks are enough for each wall and separately for the floor.
The next step is that the sticks should be laid out on a flat surface, and not all 14 should be laid out, but only 12. They are glued together with glue in the side area. Then we glue the remaining 2 more perpendicularly. It should be borne in mind that they should be located closer to the center, because their task is to support the main structure.
In general, according to the same scenario, 7 more blanks need to be made. Only now 2 of them are fastened with 3, not 2 sticks.
Then we move on to those blanks where 3 sticks were attached. These products are glued together in the shape of a triangle. This is very easy to do: first, 1 stick is glued to one of them, and in such a way that half of it protrudes beyond the workpiece itself.
This way, you can enjoy the almost finished house. Then it’s up to the production of textile products - pillows, carpet, you can make a staircase or other decor.
Necessary materials for crafts
You can create a miniature well using different materials - coins or matches, but the easiest way is to use paper or newspaper tubes. To create such a craft, you need to prepare a sheet of paper (size - 30x35 cm). In addition, you will need to take cardboard.
You don't have to buy a special kit; you can use a cereal box or any unwanted cardboard folder. In the process of work, you cannot do without a high-quality, sticky glue stick, as well as a wooden skewer. The diameter of this round stick is 0.7-0.8 mm, and its length is 35 cm.
To create a miniature well with your own hands, you will also need to take paper tape, pliers, stiff wire, and also beige, brown and “steel” acrylic paint. For such a creative process you will need a hard flat brush, a regular pencil, a ruler, scissors and a large needle.
Summary of the lesson on modeling “Well”
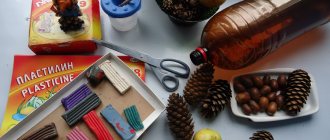
Materials: plasticine, board, stack, hand wipes.
Progress of the lesson: At the beginning of the lesson, read to the children the fairy tale by K. D. Ushinsky “The Fox and the Goat.” Conduct a conversation on the content of the fairy tale, characterize the characters. Clarify children's knowledge about the well, its purpose, and what it is made of. Note that the well is made of logs that are stacked on top of each other. Invite the children to build it from wooden posts.
Explain sculpting techniques to the children: roll out a lot of log sausages of approximately the same length and thickness: the well should be smooth, durable and strong. To compare the length of the logs, we lay out the already rolled sausages on a board in a row and determine their size. The excess can be cut off in a stack. After the sausages are rolled out, we begin to fold the logs: we put two logs in a row parallel to each other, on top of them two more logs across, etc.
Do some physical exercise before starting sculpting.
We sculpted for a very long time (imitate sculpting)
Your fingers are tired (shake your hands)
We'll take a little rest (shake hands)
Let's spread our hands together (spread our hands)
And let's start sculpting again! (sit down)
.
Invite children to start modeling, provide help if they have difficulty, and remind them to be careful with plasticine while working.
Review the works with the children, evaluate them and display the finished works in the creativity corner.
THANK YOU FOR YOUR ATTENTION!
Publications on the topic:
Summary of the lesson on modeling “Sun” Kids are naturally energetic and inquisitive, so it is very important to support and stimulate cognitive activity.
Summary of the lesson on sculpting “Birds” visual activity (sculpting) Topic: “Birds” Goal: creating a social situation of development in the process of creative activity Tasks:.
Summary of the lesson on modeling “Insects” Program content: Reveal in children the ability to plan their work, correctly create the image of an insect, convey their structure, size.
Summary of the lesson on modeling “Machine” TOPIC OF THE WEEK “TRANSPORT” PROGRAM TASKS: continue to teach children to sculpt objects consisting of several parts from plasticine: fasten.
Summary of the “Rainbow” sculpting lesson Program tasks: continue to teach children to roll out plasticine in the form of a “sausage”, use the colors of the spectrum, connect parts together.
Summary of the lesson on modeling “Chamomile” PROGRAM OBJECTIVES: to improve children’s skills in rolling out a round and oval shape (sausage, sticking it to a flat surface,...
Summary of a lesson on sculpting “Snowman” Summary of a lesson on sculpting Topic: “Snowman”. Educator: Plyusenko M.A. Purpose: - to teach children to name the main signs of the winter period, to sculpt.
Summary of the lesson on sculpting “Snowman” Topic: New Year (as part of an educational event) entertainment “New Year’s Carnival” Purpose: creating a social situation for the development of children in.
Master class “Making a “Well” craft from clothespins” Good day, friends, colleagues and random visitors to my page. Today I want to offer you a master class “Manufacturing.
How to make a decorative well from wood for the garden with your own hands
You can decorate a well in your country house with your own hands using ordinary carpentry tools. The process involves creating a base as well as forming a canopy like roof.
Making a well
Step-by-step instructions for creating a decorative well with your own hands include the following tools:
- carpenter's square;
- fine-tooth saw;
- chisel;
- file;
- cutter;
- fasteners (glue, screws).
A decorative well from scrap materials is created with your own hands as follows:
- Using a square, the positions of the cutouts are marked on the boards.
- In the marked places, two identical cuts are made with a fine-toothed saw.
- A chisel is used to remove gaps between cuts.
- The grooves are cleaned with a file, and rounded shapes are created using a cutter.
- The body is assembled by connecting the boards with appropriate grooves.
- Additional pads are attached to the top boards using screws or glue.
- Grooves are created in the parapet boards to secure the frame post.
After this, you can install racks made of durable boards. Sizes may vary depending on specific dimensions.
Advice! Transverse connecting elements placed in the spacer between the posts help to significantly strengthen the structure. All parts are connected with bolts in the corners of the walls.
What it is
A decorative well is a good option for your summer cottage. They blend perfectly with the surrounding environment, thanks to the main component - wooden structures. Recently, people have increasingly begun to create them in their country houses. The direct meaning of a well is the work of water supply
It is important not to forget that the purpose of a decorative well is an aesthetic location on the site
Types of decorative wells:
- Log house A design designed to complement the landscape design of a country house or garden. The option for creating such a well is quite simple. It can be used as a real well. The following materials are selected for its creation: branches, large stones. Auxiliary raw materials are cement and twine.
- Flower pot - that's what it was called for its decorative value. The material used in this case is wood. The originality of such a well goes well with similar pots. Due to its small size, the well is usually installed on window sills.
- A well is a house. This option is becoming increasingly popular. With its small size, it is great for hiding hatches. It can also perform its main function.
- Toy well. This type of product is similar to a real well made of concrete and a wooden roof. It contains all the elements that only imagination is capable of.
- Snow White. The main mystery of this species is its snow-white color. By the way, a variety of shades gives the landscape freshness and beauty.
- Extensive flower bed. Summer residents and gardeners with deep imagination will turn this well option into perfection. Made of several tiers decorated with flowers.
- A version of a light wood well is considered a classic of its kind.
- Decorative wells made of birch can be used for main purposes.
How to make a mill?
We will tell you another master class on crafts made from newspaper tubes in the form of a mill.
To do this you need:
- newspaper tubes;
- paint in brown and yellow shades;
- glue;
- cardboard;
- scissors.
Advice! Before you start weaving the windmill, you need to color all the tubes. You will end up using more paint than if you were painting a finished item. In this case, it is up to you to decide.
Work should begin when the tubes are slightly damp, so that each stick fits neatly and compactly. We coat them with glue at the places where they are connected to make the structure stronger. The newspaper tube should increase the structure. We pass it through 4 pcs. We lead with eight. Next, take 4 pieces of sticks and twist them around 2 rows. As a result, we return to the beginning. Then we braid 2 sticks each. So we do 2 rows. We begin to wrap around 1 stick at a time. We weave 3 rows in this way and be sure to tighten each stick so as not to leave any gaps. The diameter of our weaving should be about 22 cm. To fix the weaving, we need to thread 1 stick near the next one using a knitting needle. We thread 2 weaves in this way and cut off the excess. Having done this with all the sticks, carefully cut off the excess. The base is ready. For the next step we will need a tin can. Place the container a little to the side. We secure the jar so that it does not slip. We pass through the sticks near the jar through 2 weaves. We do this manipulation around the jar. We take the quantity by eye. Next, we thread several sticks near the main tube and fix it with glue on the wrong side. We let the bottom one follow the stick, and the top one will go towards it. We braid in a figure eight. As a result, the first row was braided. We continue in the same spirit. It is necessary to take into account that the higher we weave, the more we need to monitor the can and tighten it as we weave. So we weave about 10 cm. Let's do the finishing. At the end of the base we will add a yellow stick.
The master class on crafts made from newspaper tubes is coming to its final stage. We weave the row further with a yellow stick. Cut off all excess. For finishing, it is important to make a smooth transition of colors and finish it just as beautifully. Next we weave 4 rows with the main color and again return to the yellow shade. Let's look at the main sticks. If they run out, then it’s time to stop weaving. Additional yellow sticks are hidden in the same way as the main ones.
Making a vase from ice cream sticks
In addition to the bracelet, there are many other items that can easily be made from popsicle sticks. For example, a vase.
The manufacturing process itself is slightly different from the above-mentioned bracelet, but in general the procedure begins similar to that described above. First, soak the sticks in a container of water.
Attention!
If you need to complete a craft quickly, then you don’t have to wait a day for the material to soak in water, but simply pour boiling water over it.
The next stage is selecting a vase. It is best to choose transparent dishes. Then we begin to carefully lower the sticks into the vase itself, for this we use tweezers. Moreover, this must be done in such a way that they take the shape of the vessel.
Then use glue to attach the sticks to the vase. Then the real creative stage begins: you need to paint the resulting craft. Here you can already use various tools for decoupage, paints and other materials for appliqué.
Of course, DIY crafts made from ice cream sticks will be very useful for your baby. They contribute to the development of fine motor skills, and this task also develops perseverance and attentiveness in the child. The main thing is to interest the little one so that he wants to do something with his own hands and show the result of his labors to everyone around him.
What is the difference between plasticine and clay?
Clay is a natural, natural material that hardens when dried, and if fired, it will be resistant to high temperature and moisture.
Plasticine is an artificial invention. Even hard varieties do not harden completely, crafts made from it are not very durable, and they will melt under high temperatures.
Clay is a softer material, so it is given to young children for modeling; when hardened, it can be diluted with water, and it again acquires fusible properties. Plasticine depends on the temperature of a person’s hands; it must be kneaded for modeling. However, clay is more sticky, making it easier to wash your hands off plasticine.
Clay crafts can be painted with paints, and plasticine is initially multi-colored.
The creations that come out great from these materials are up to you to choose.
The basis of crafts is a ball
One of the first techniques in sculpting is rolling. Knead the plasticine, roll it in your palms in a circular motion, you get a smooth ball.
You can try to roll a ball on the board, using the palm of your hand to roll the plasticine in a circular motion, you get a ball, but less even than the first method.
If you need a very small ball for the details of a craft, you need to put a piece of plasticine on your palm and roll the desired part with the finger of your other hand.
From these basics you can make many crafts: a caterpillar, a tumbler, flowers, apples, nuts, beads.
What is it for?
Such buildings can be used to hide a container with rainwater, hide utility lines or disguise hatches. If desired, an artificial tower can be installed above the well. Thanks to this, a garden house at the dacha will not only serve as decoration, but also prevent contamination of the source, hide various imperfections in the landscape, etc.
Plus, such a structure is used in combination with a flower bed. For example, beautifully flowering plants and flowers are planted on the roof or in the middle of the tower. Often these are climbing species.