Reads: 14,163
Reading time: 10 min.
no comments
The new year is coming - a time of miracles and magic. Snow, slides, a festive table, weekends and belief in a fairy tale, another reason to rethink life and start it from scratch! And now it’s time to think about how to decorate an apartment or house in an original way for the holidays.
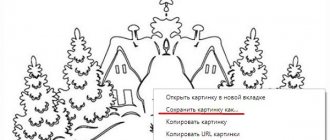
In today’s article, we’ll look at how to make crafts from foamiran with your own hands using a template. Additionally, in the publication you can find photographs of ready-made templates. There is nothing complicated in the crafts we offer. A little of your time, imagination and desire to create - and everything will be fine!
You can involve children in creating crafts from foamiran: they will definitely enjoy the time spent with you. And they will get even more pleasure by creating beautiful and simple decorations, cards from foamiran and more!
DIY foamiran crafts for beginners + diagrams
Why for beginners? Because you don’t need to be a pro, having special skills is the same: even a beginner can handle the New Year’s crafts we propose. Even your kids!
So, let's talk about several simple and understandable options for New Year's crafts made from foamiran.
Electrical part
To make the lamp not only beautiful, but also safe, remember these simple recommendations:
- It is worth using LED lamps. They do not heat up during operation and provide bright, uniform light.
- The socket matches the light bulb. It is better to buy an option with a mount to simplify the work.
- Copper stranded wires are used for wiring.
- The switch will increase ease of use; it is placed between the lamp and the socket.
- Contacts are carefully isolated.
Video block: Night light in the shape of a crescent, strewn with summer flowers.
Christmas wreath
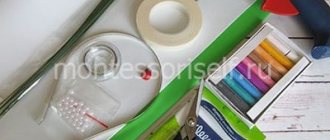
To make such a wreath, prepare in advance foamiran (preferably green), a simple glue stick or PVA, scissors and shiny decorative stones of various shapes. They can be found at any hardware store or at Fix Price. You will also need a ribbon for decoration.
What to do:
- First you need to cut out a circle. The outer edges can be made uneven and rounded in places. Follow the principle of symmetry to make it look beautiful!
- Pebbles need to be glued onto the workpiece. Multi-colored ones are perfect. We have already mentioned where to find them. They are inexpensive.
- All that remains is to make a bow and a loop from a ribbon or piece of fabric. A beautiful New Year's craft is ready!
If you don’t want to be limited by the instructions, show your imagination and decorate the circle the way you want.
After looking at the photos and diagrams of DIY foamiran crafts, even novice handicrafts will be able to cope with the work:
There are many options, but don’t limit yourself to template solutions – get creative!
What paint to paint and what colors to choose
It is recommended to use foamiran that has already been painted, since using white makes the work more complicated. Here you need to remember the following:
- Both dry pastel and watercolor or gouache are suitable for work. Paint should be applied in an even layer.
- Acrylic compounds can be used. They are more expensive, but much stronger.
- It is worth choosing light shades, dark ones can greatly worsen the lighting.
To protect against moisture, painted elements can be coated with acrylic varnish.
Read also: Why do you pay for heating in the summer?
Flower
This is not an ordinary flower, but a New Year's one. In addition to the main material, prepare red inflatable balloons - without them you will not be able to make a New Year's craft.
Step-by-step instructions for making a “Flower” craft from foamiran with your own hands:
- Cut out petals from foamiran. They should look like leaves with 8 points: one at the top and bottom, three at the edges. Between the points, cut small semicircular or semi-oval recesses towards the center of the canvas.
- Connect the three leaves together with glue so that there are equal angles between them. You can use a stapler if convenient. And to create a volumetric effect, layer smaller folded leaves on top of those that will lie flat.
- Now you need to inflate the balloons according to the number of crafts. There is no need to inflate too much, but in general, be guided by the size of the foamiran leaves: the larger the flower, the more inflate the ball. You can make one larger one for each craft, or several, but smaller ones.
- It is important to leave a larger putska: it will need to be secured in the center of the flower.
The craft is ready!
Crown
Princesses need a crown!
How to do it, watch the video:
Read also: asphalt color IN COLOR BALANCE
- Cut out a crown from foamiran. Length – 15 cm. Height of teeth – 8.5; lower level – 3.5 cm.
- Glue it together.
- We decorate with rhinestones and beads.
- From organza (1.5m by 5cm) we make an elegant “skirt”. We make folds and stitch. The last seam should be light, not fastened with knots, so that by pulling, you can pull the skirt to the desired size.
- Let's make a bow.
- We attach the base to the bottom of the crown.
- We assemble the design: attach a skirt to the headband, hairpin or headband, and a crown on top. There is a bow on the crown.
If you remove the organza “skirt”, such a crown will suit a prince too!
Christmas decorations
Another good craft option. The peculiarity is that in this case the foamiran will need to be cut out not just with scissors or a stationery knife: you will need a special hole punch. Better is one that will make bigger holes.
Algorithm of actions:
- We take a hole punch and use it to cut out flat figures (if the hole punch is shaped). Even if the one you use has a different pattern, it doesn't matter: feel free to cut.
- We warm up the iron. The minimum temperature or the most gentle mode is enough. Each of the workpieces will need to be carefully applied to the heated surface. This will give the cut pieces volume.
- Styrofoam will come in handy. You need to make something like a small ball out of it. You will need to attach the blanks to it using needles or pins.
The craft is ready! As a fastening, you can provide a thin wire with a formed “ear”. Its base just needs to be stuck into a foam ball.
Simple toys
Figures made from dense foamiran will look beautiful on the Christmas tree.
Process:
- Use a figured hole punch to cut out small flowers.
- Heat the iron, but it should not be too hot.
- Place the blanks on the iron to create volume.
- Pierce the prepared flowers with a French pin. Secure them onto a foam ball.
- Secure the loop by threading it onto a pin with a flower.
Christmas tree
There are several manufacturing options. There is a simpler one, which is suitable for beginners, and there is a little more complicated one. Let's start with the relatively complex one.
The algorithm of actions is as follows:
- Cut out squares from foamiran. It is advisable, which is quite understandable, to take green material.
- You need to make a lot of cuts on the squares, but not all the way: each strip should hold on to the uncut base.
- Using an iron heated to the minimum temperature, you will need to warm up the workpieces: the fringe will bend slightly - this is what we need.
- The cone, the base of the Christmas tree, can be made from a sheet of cardboard or paper by simply folding it so that the lower part is wide and the upper part ends with a point. The edges of the sheet can be secured with glue.
- All the blanks prepared from foamiran remain to be glued to the base from bottom to top, so that each top row is covered by the bottom row.
Beads, small stones, and ribbons can be used as decorative elements. Now let's look at a simpler option. Offer to make such a Christmas tree for your child - he will cope and will only enjoy the process.
The algorithm of actions is quite simple:
- Have your child make a cone out of green paper or cardboard. Foamiran will also do: it will be even better. The edges can be secured with glue.
- Now you need to use a hole punch or scissors to prepare decorations: stars, hearts, snowflakes - whatever. Tip: use different colors of foamiran.
- All that remains is to secure the blanks on the already finished cone.
Super snowflakes
You can make a snowflake for your Christmas tree from glitter foamiran. To make it, prepare:
- blue foamiran with glitter coating;
- silver cord 20-30 cm long;
- 6 silver bells;
- several snowflakes, the diameter of which is 25 mm;
- 2 cores with a cross section of 1.2 cm;
- 12 snowflakes, 1.5 cm in diameter;
- 24 white beads, with a cross section of 0.7 cm.
Process:
- Cut out strips of foamiran measuring 2x15 cm. Their number should be 18.
- Fold the strip in half and make a longitudinal cut, not reaching the end 2 cm. You will need 12 blanks.
- Place the workpiece with the wrong side facing you. Glue the top parts together to form a ring.
- Insert the lower sections into the ring, placing them crosswise. Fasten in the center, and then to the top strips. You will get the first petal. For a snowflake you will need 6 petals. They need to be connected by the lower sides on the sides.
- Glue the top ends. The workpiece will take on an oval shape.
- Cut three strips, measuring 2x15 cm, in half lengthwise. 6 large and small peaks will be formed. Attach a 1x15 cm strip to the wrong side of the large one.
- Insert the strip into the round hole, and then into the hole of the petal opposite. Glue to the top. Attach 2 other strips to the larger tops. Lubricate with glue at the place where they cross.
- Glue the strips to the small tops. First, work is carried out on the reverse side, and then on the front and back. Glue 3 stripes. Cut off excess foamiran.
- There is a silver cord attached to one of the tops of the New Year's toy made of glitter foamiran. Glue together several cool elements at the tops. This foamiran snowflake can be hung on a lamp. The lighting when turned on will create a magical effect.
"Video instruction"
New Year card
Another simple and interesting craft. It can be used as an original gift! Glue, foamiran and thick paper are all you need for this. And a little more free time and imagination for decorating!
The algorithm of actions is simple:
- You need to cut out a Christmas tree, which will consist of four parts. The first is the base with fringe (slots on the foamiran). It should be the biggest. All the higher elements are narrower.
- To achieve a voluminous effect, you can use an iron or twist the strips with your hands.
- We glue the blanks one by one (from bottom to top) onto the postcard. You can make a yellow foamiran star as a decoration.
Offer to make such a craft for your own child - he will succeed, he will be absolutely delighted!
Headband
What I liked about this model was the ethnic style, and the fact that even if you don’t have templates, you can still make flowers and a headband with them.
We will need:
- 2 sheets of glitter white foamiran;
- Scissors;
- Wire cutters;
- Wire;
- Yellow beads;
- Four leaf flower template;
- Foil;
- Glue;
- Glue gun;
- Threads;
- Floral tape;
- Iron.
Making:
- We cut out the blanks according to the template.
- Using an iron we give them shape.
- For a bud: 1 square, 5 circles.
- We also heat the petals for the bud on an iron.
- Make a ball out of foil. While we bend and twist the foil, weave in the thread.
- We cover the circle with a square and fix it with glue.
- On top, around the circle we decorate with petals.
- We put 2 flower blanks together. We pull the thread and needle through them several times. There should be “tails” on both sides.
- On the front side, the tails are stamens. Dip them in glue and beads.
- Using the tails on the wrong side, we will attach the flowers to the rim. To avoid pulling the thread and spoiling the pattern, apply a drop of glue from the underside at the base of the thread.
- For the wreath we will need 4 sizes of wire. Let's cut it off.
- Wrap it with tape.
- When we wrap it, we insert flowers.
- It remains to weave the layers together, folding them 4 times. Glue ribbon to the edges to tie the wreath.
You can make a different design. For example, attach flowers to a finished headband or make hairpins with this jasmine.
Cones
By taking a round hole punch and foamiran, you can make truly beautiful Christmas tree decorations in the form of decorative cones. And not only decorate your Christmas tree with them, but also give them to your family or friends! The advantage of such a craft, again, from the parents’ point of view, is that even a child can handle it!
You need to prepare foam bases in the shape of eggs; foam rubber will also do. The main thing is to carefully cut out and wipe off any excess with sandpaper. You also need glue and a large hole punch; standard ones are not suitable for filing documents - they are too small.
Instructions:
- We use a hole punch to make many circles.
- Gradually glue the resulting circles onto the frame prepared from foam plastic or foam rubber so that only part of each new circle is attached to the base - one should stick out to the side.
- The direction of pasting is from bottom to top. This is necessary in order to be able to layer the circles on top of each other and form something like a cone-shaped “scale.”
Tip: to make your craft look truly beautiful, try choosing gold or silver foamiran. To give the pine cones a New Year's look, sprinkle them with glitter, after lightly smearing individual circles with a simple glue stick.
0 Comments
Piggy
If you have a universal mold, let's now try to make a cute pig.
- We heat the mold. Place a sheet of foamiran on it and press down. We fill it with pieces of foamiran. On top is glue from a hot gun. We cover it all with another sheet of foamiran and press it down with our fingers.
- Using the same scheme, we form the second (back) part.
- We cut off the excess. From it we make additional parts: a nickel, ears.
- We connect 2 parts.
- Let's paint.
If you make only one, the front part, you can glue a magnet to the back. Such magnets can be made not only in the shape of a pig, but also of Santa Claus, etc.
Bouquet of roses
This “bouquet” in a hat box looks very elegant. I like that you can “play” with colors, create a pattern and invent some options yourself!
We will need:
Foamiran or isolon squares. For one rose you need 7 squares:
- 2 pcs. – 4X4;
- 5 pieces. – 5X5 (or 6X6).
Round lampshade on a stand.
How to craft.
- We give all petals (except the first one, whose dimensions are 4 by 4 cm) a rounded shape on top. Heat the petals over a hairdryer. Place the skewer in the middle of the petal. We bend the foamiran around the skewer on one side and the other.
- Roll the first petal into a tube.
- We form a bud around it. We glue each petal overlapping the previous one.
- A total of 7 roses are needed.
- The rose in the middle of the bud can be made different from the previous ones in color and size, for example. If the entire bouquet is pink, the central rose is white. It is larger and consists of 11 petals.
- We cut out parts from green foamiran - the bottom and walls of the box for the bouquet. And we cover the lampshade. Bottom – cut out a circle according to the diameter of the lampshade, plus a few centimeters for a loose fit. The height of the walls is a strip as long as the height of the ceiling. Lightly heat the parts with a hairdryer and glue the bottom to the wall.
- We place the lampshade inside the “box”. And seal the side seam. If necessary, we align the walls so that the dome of the lampshade looks out from the box.
- Glue the flowers onto the surface of the lampshade. We start with the flower, which will be in the middle.
- We glue a strip 3-4cm wide to the bottom of the box.
- We cut out leaves from green foamiran and use them to cover all open areas where the ceiling is visible. We place the leaves inside the bouquet.
Decorate the box with a satin bow.
Necessary materials
Isolon is sold in rolls.
To create a rose lamp you will need:
- 2 mm isolon - 12 sheets 20x20, 8 sheets 15x15, 5 sheets 20x5.
- Clutch. The diameter of the larger side should correspond to the dimensions of the cartridge, the narrow side - to the pipe.
- Cartridge with ring.
- Wire 3 meters.
- Switch.
- Light.
- Fork.
- Pipe for base 1.5 m high.
- Screwdriver.
- Scissors.
- Glue gun.
- Construction hairdryer.
All these materials can be purchased at a hardware store.
What is isolon
Wall lamp made of white isolon
Insulating material isolon is used in construction work. It is made in different thicknesses and can be white or foil. In handmade products, isolon with a thickness of 2 mm is usually used. The height of the created flower lamp can be like a table night light or a large floor lamp. Manufacturing methods are also different - you can attach the petals to the finished lampshade or attach it to a coupling.
In the store you can find the following options for isolon:
- Unstitched. The material does not undergo special processing, so its price is affordable.
- Stitched. It has improved properties due to processing, so it costs more.
You can buy isolon in rolls with a thickness of 0.2 mm. up to 1 cm.
